IPS MC Sensor Version Information Is Out of Date
Available Languages
Contents
Introduction
This document explains how to add groups and sensors to your IPS MC hierarchy and to perform other tasks, such as how to use the Progress Viewer (for status and confirmation of background tasks) and how to view device statistics.
Use the Management Center for IPS Sensors (IPS MC) in order to install the signature on the IDS. After you update the signature successfully, the updated signature information does not appear in the IPS MC, but is visible in the show version command output from the IDS.
Prerequisites
Requirements
There are no specific requirements for this document.
Components Used
This document is not restricted to specific software and hardware versions.
Conventions
Refer to Cisco Technical Tips Conventions for more information on document conventions.
Background Information
IPS MC runs on Windows 2000 and Solaris 8 (Sun 2.8) platforms as a web server. Use the web browser you have chosen as the web client in order to use the CiscoWorks interface to log into IPS MC. After you log in through CiscoWorks, you can view the IPS MC interface.
CiscoWorks Common Services must be installed before you install IPS MC.
Start CiscoWorks Common Services before you start IPS MC.
-
Microsoft® Internet Explorer 6.0 with Service Pack 1 on Windows operating systems
-
Netscape® Navigator 7.1 on Windows operating systems
IPS MC uses a hierarchy of groups and sensors. A group can contain sensors, other groups, or a combination of sensors and groups. When you start IPS MC, you always have at least one active defined group. This is the Global group. The IPS MC hierarchy can contain many levels of groups and sensors similar to a folder in Windows 2000 that contains many levels of folders and files.
The IPS MC hierarchy of groups and sensors enables you to configure more than one sensor at a time because a sensor can acquire settings from its parent group. A sensor must acquire settings from its parent group if a parent defines those settings as mandatory. A child cannot override the values for such settings.
Problem
After you use IPS MC to upgrade the signature, the version information, such as the signature release version, appears out of date in the IPS MC.
Solution
The workaround is to delete and reinstall the sensors. Complete the steps described in this document in order to delete and add the sensors.
From the Devices tab, you can control which sensors you want to manage with IPS MC. You can add and delete sensors and sensor groups. However, you cannot delete the Global group. If you have established settings elsewhere, you can apply them to sensors and groups that you set up from the Devices tab. See these sections for the step-by-step procedures on how to perform a specific task:
Delete Sensor Subgroups
You can delete any subgroup from any sensor group, which includes the Global group. The Global group is the only group you cannot delete.
Complete these steps in order to delete a sensor group:
-
Choose Devices > Sensor Group.
The Sensor Group window appears.
-
In the tree, choose the group that you want to delete.
Note: If you choose to delete a sensor group, IPS MC does not ask you to confirm your choice.
-
Click Delete.
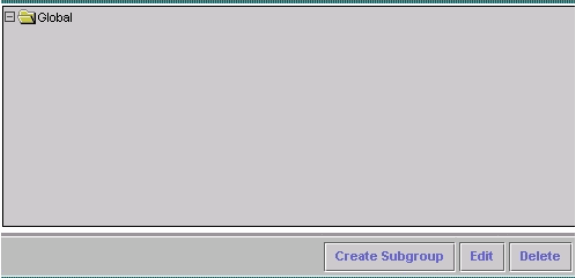
The Sensor Group window appears again and the group you just deleted does not appear under its parent group.

Delete Sensors from a Sensor Group
You can delete a sensor from any sensor group, which includes the Global group.
Complete these steps in order to delete a sensor from a sensor group:
-
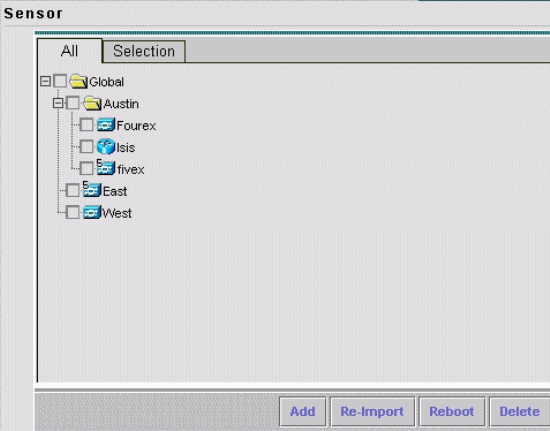
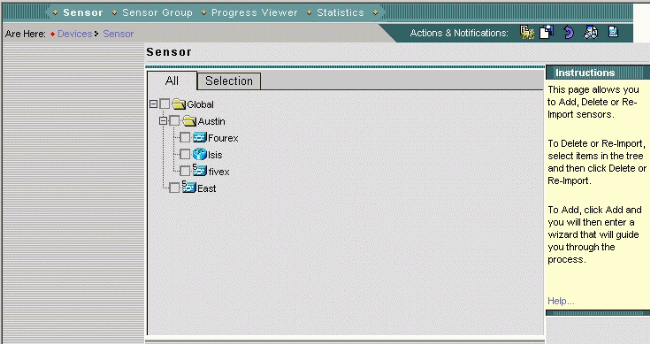
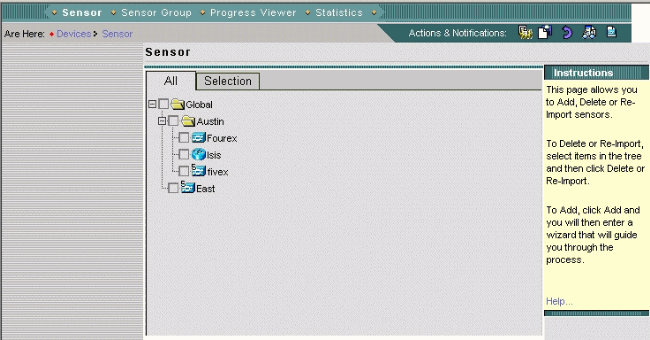
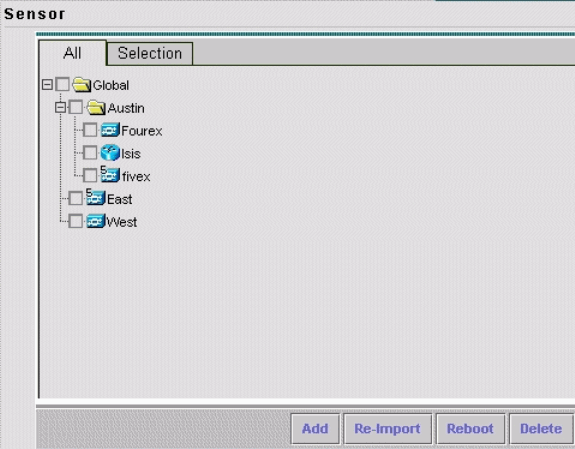
Choose Devices > Sensor.
The Sensor window appears.
-
In the tree, choose the sensor that you want to delete.
-
Click Delete.
A dialog box appears and asks you to confirm the deletion.
-
Click OK.
The Sensor window refreshes to show that the sensor is deleted.


Create Sensor Subgroups
You can add a subgroup to any sensor group, which includes the Global group.
Complete these steps in order to create a sensor subgroup:
-
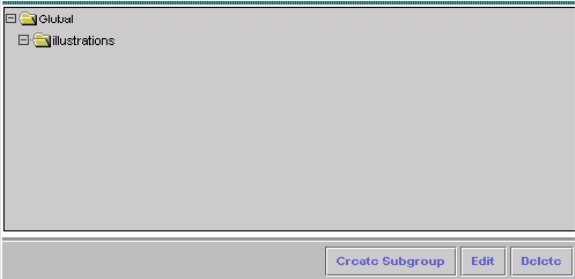
Choose Devices > Sensor Group.
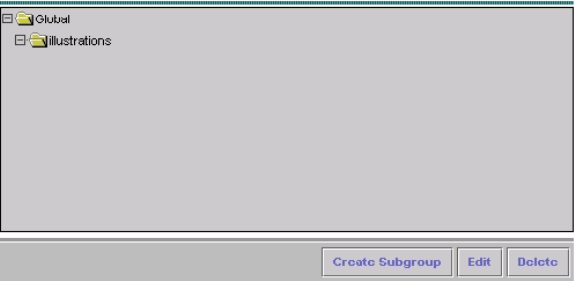
The Sensor Group window appears.
-
In the tree, choose the name of the sensor group that you want to add a subgroup to.
-
Click Create Subgroup.
-
In the Group Name field, enter the name of the subgroup you want to add.
-
Click Default (use parent values).
-
Click Copy settings from group and choose the name of the group from the associated list box.
-
-
Click OK.
The Sensor Group window appears and shows the sensor subgroup that you added.


Add Sensors to a Sensor Group
You can add a sensor to any sensor group, which includes the Global group. The Add Sensor Wizard guides you through the process. There are three ways to add sensors:
-
Create a default device
-
Import a configuration from an existing sensor
-
Import a list of sensors in .csv or .xml format
This document provides details for the procedure to manually add a sensor. There are two other methods presented in the Add Sensor Wizard:
-
Import a sensor that exists
-
Add multiple sensors from a list
Import a Sensor that Exists
Complete these steps in order to import a sensor that exists:
-
Choose Import configuration from device (see step 3 in the Manually Add a Sensor to a Sensor Group procedure).
-
Identify the sensor to be added.
-
Confirm the summary information that is displayed.
Add Multiple Sensors from a List
Complete these steps in order to add multiple sensors from a list:
-
Prepare a list of sensors in either .csv or .xml format in the manner shown by the sample files copied to the IPS MC installation directory during installation.
Note: The sample .csv format and .xml format files are located in: InstallDirectory\MDC\etc\ids\ and are named MultipleAddDevices-format.csv and MultipleAddDevices-format.xml, respectively.
-
Choose Add Multiple devices (see step 3 in the Manually Add a Sensor to a Sensor Group procedure).
-
Identify the format of the list (.csv or .xml).
-
Specify the list.
-
Confirm the summary information that is displayed.
Manually Add a Sensor to a Sensor Group
Complete these steps in order to manually add a sensor to a sensor group:
-
Choose Devices > Sensor.
The Sensor window appears.
-
Click Add.
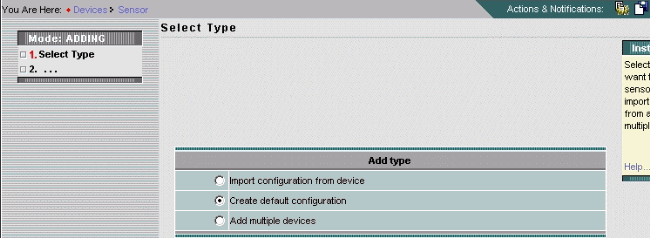
The Add Sensor Wizard opens and displays the Select Type window.
-
Choose Create default configuration.
Note: Summaries for the alternative method choices, Import configuration from device and Add Multiple devices are shown earlier in this section.
-
Click Next.
The Select Sensor Group window appears.

-
Choose the group to which you want to add a sensor.
-
Click Next.
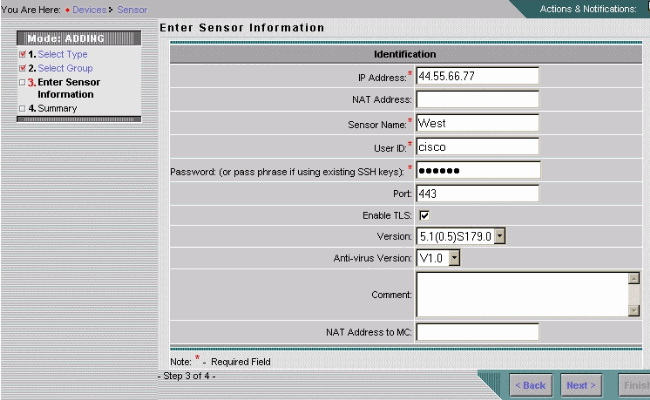
The Enter Sensor Information window appears.
Note: The Enter Sensor Information window varies and depends on sensor type. The window that appears reflects the sensor type last added.
-
Provide the information required by the Enter Sensor Information window.
Note: An asterisk (*) indicates the required fields.
-
Choose the version number for the sensor you are adding from the Version list box.
The Enter Sensor Information window displays the fields for the sensor type and version you choose.
-
Enter the IP address of the sensor.
-
Enter the NAT address of the sensor, if there is one.
-
Enter the sensor name.
-
Enter the User ID and Password for Secure Shell (SSH) communications between your host and the sensor.
Note: If you use SSH keys that exist, enter the pass phrase in the Password field.
-
In the Port field, review the default value and change it as required.
-
If you want TLS enabled, check the Enable TLS check box.
-
From the Version list box, choose the version number for the sensor you are adding.
-
From the Anti-virus Version list box, choose the anti-virus version number for the sensor you are adding, if necessary.
Note: The Anti-virus Version list box only appears when such versions are employed.
-
Enter a comment (optional).
-
Enter the Host ID, which is typically the last octet of the IP address of the sensor.
-
Enter the NAT address to MC, as required.
-
Click Next.
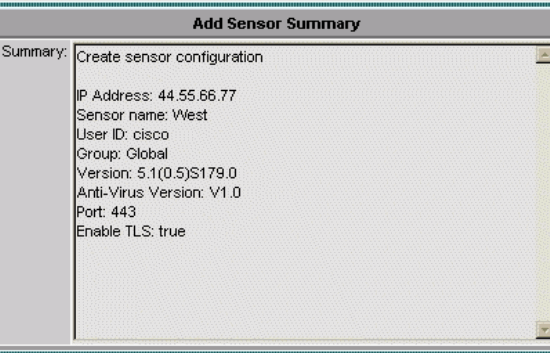
The Sensor Information window appears with the Add Sensor Summary table information.
-
-
Review the displayed Sensor Summary information.
Note: You can click Back if necessary in order to go back and change the information displayed.
-
Click Finish.
The Sensor window appears, updated with a record of the sensor you added.


Verify
Use the Progress Viewer
For each sensor, the Progress Viewer shows the status and percent completion for the deployment of configurations to sensors, signature updates, and signature update downloads from Cisco.com to the IPS MC server.
Complete these steps in order to use the Progress Viewer:
-
Choose Devices > Progress Viewer.
The View Progress Tasks window appears in the current browser window.
-
Click New Window at the bottom of the View Progress Tasks page in order to open the Progress Viewer in a new window.
Note: You can also click on the Progress Viewer icon in the Path bar in order to directly open the Progress Viewer in a new window.
-
Choose the background task in the Progress Viewer table and then click Show Messages in order to view messages for a background task.
The messages for the background task appear in a new browser window.
-
Choose the item(s) and then click Delete in order to delete messages from the Progress Viewer table.
-
Click Refresh in order to refresh the Progress Viewer table.
-
Check the Enable Refresh Rate check box and choose a time interval from the drop-down list in order to refresh the page automatically.
Viewing Device Statistics
You can view statistical information for the devices in your IPS MC installation. The statistical information is not updated in real time. Instead, it displays a snapshot of the device component at the time the information is requested.
Complete these steps in order to display statistics for a device:
-
Choose Devices > Statistics.
-
In the Object Selector, choose the device for which you want to view statistics.
The components of the device that you selected are listed under the Select Component to View heading.
-
Choose a device component from the Select Component to View list.
You can select statistics from these components:
-
Analysis Engine
-
Authentication
-
Denied Attackers
-
Event Server
-
Event Store
-
Host
-
Interface (5.x devices only)
-
Logger
-
Network AccessNotification Controller
-
SDEE Server
-
Transaction Server
-
Transaction Source
-
Version/License
-
Virtual Sensor
-
Web Server
-
-
Click View.
The report appears in a new browser window.
Related Information
Revision History
| Revision | Publish Date | Comments |
|---|---|---|
1.0 |
13-Dec-2006 |
Initial Release |
 Feedback
Contact Cisco
- Open a Support Case

- (Requires a Cisco Service Contract)