Fulfill Single and Multiple PAKs and Tokens
In addition to being able to register single PAKs, you now have the capability to register multiple PAKs within a single registration. Fulfilling a PAK is the same as registering a PAK. Your PAK can be found on a Cisco Claim Certificate or in the PAK email.
·
Example 1: 1075JEF78FE
·
Example 2: UNTY-2X-SJ-XXXXXX
Your Token will be emailed as a result of a secure rehost transaction for DCM products.
Summary -
PAKs and Tokens are fulfilled in the 3 same steps.
Step 1: Specify the source, which is one or more PAKs or Tokens.
Step 2: Specify the Feature quantities and the target device for the license.
Step 3: Review assigned information, specify email, end user and Submit.
Step 1: Specify the source, which is one or more PAKs
or Tokens.
NOTE: You need a valid PAK or token to begin. PAKs shown in the table are valid. New PAK entries will be validated when proceeding to step two for a single entry and when adding them to the table.
|
|
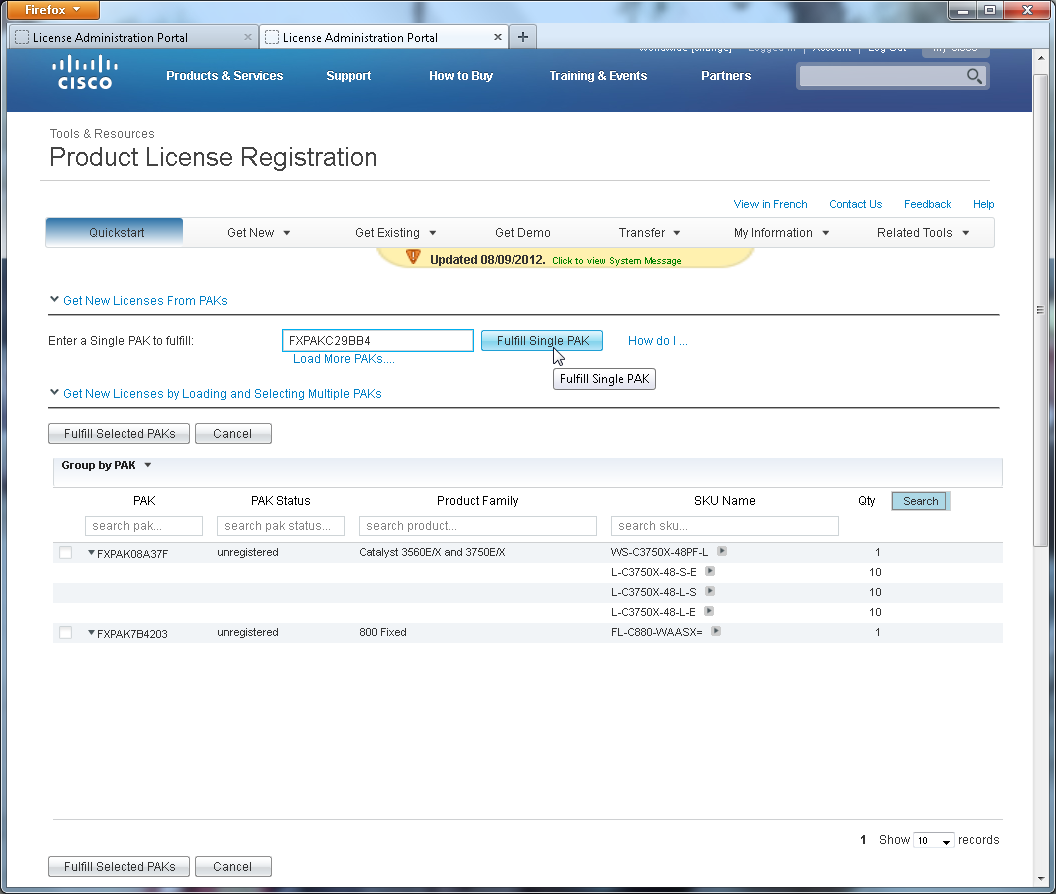
Single PAK or Token To fulfill a single PAK, enter the PAK name in the PAK field. Click the button on the right side of the single PAK entry field - "Fulfill
Single" This continues to Step 2 to configure quantity(s) and target(s). |
|
Note: this picture shows the "How Do I…" hint. |
Multiple PAKs
or Tokens Click "Load More PAKs". This button above the table opens a popup to enter the PAKs. Enter up to 10 PAKs at a time, one per line. Click "OK" and the PAKs will be validated and added to the table. Invalid PAKs will not be added. A red error message will display the invalid PAKs beneath the page title:
Repeat this as many times as needed. |
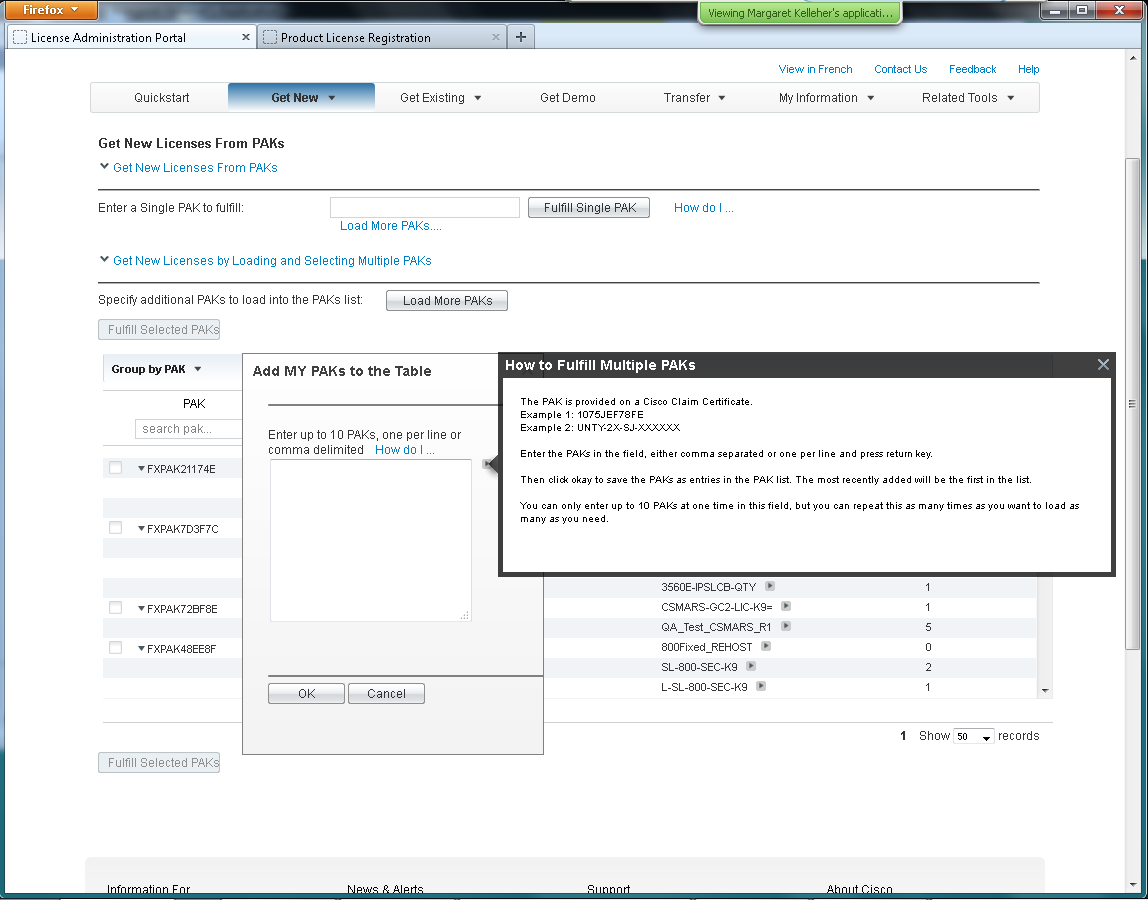

The new PAKs will be added to the list of PAKs in the PAK table located below the input fields, with the most recent added to the top of the list. Select PAKs by checking the appropriate check boxes.
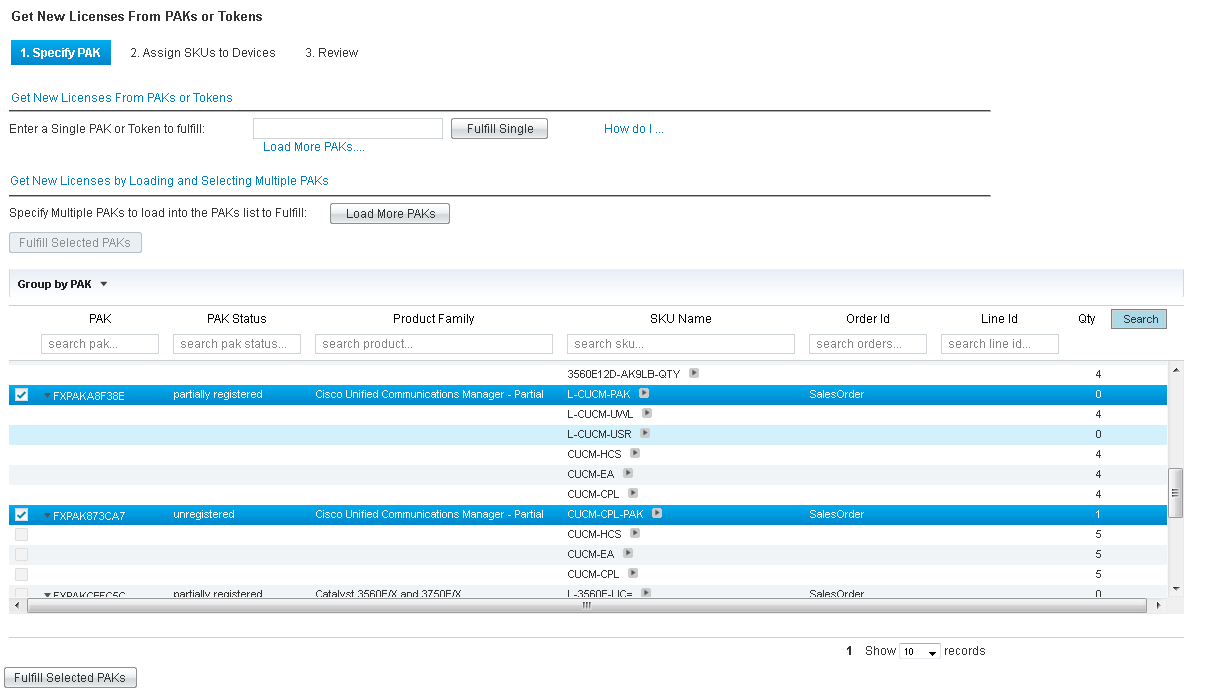
The PAKs table can contain as many PAK as you wish to enter, but only displays the amount selected in the dropdown selector beneath the table. The rest are accessed by paging through the table.
If the desired PAKs are not visible, you can browse (scrolling and paging) or search for the PAKs:
1. Scroll to see the full list. Select more to view using the drop down.
2. Select other pages and scroll to view these additional listings.
3. User the search fields at the top of each column to search for the contents it contains. This is a search, not a filter and will search the database for the entry. If no results are displayed, it doesn't exist or the search criteria are incorrect. Clear or modify the search entry and try again.
|
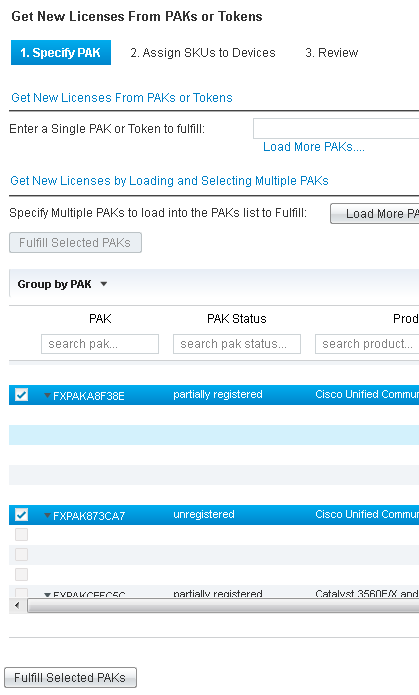
Click "Fulfill Selected PAKs" This button (top left or bottom left of the table) continues to Step 2 - configure quantity(s) and target(s). |
Step 2: Specify the Feature quantities and
the target device for the license.
[Step 2 Help content is accessed
from the help icon on the page when step 2 is displayed]
This step provides the information and fields required to specify the quantities of the features contained in the PAKs, and the devices to which the features should be assigned based on the PAK type: single fulfillment or partial fulfillment.
1. Single fulfillments PAKs required assigning all features in a PAK to a single device.
2. Partial fulfillment PAKs allow assigning features to different devices in a variety of combinations.
o Quantities of the same feature can be allocated across different devices.
o Different features can be allocated across different devices,
o A combination of these is also allowed.
Note: the quantity or the device can be specified first.
|
|
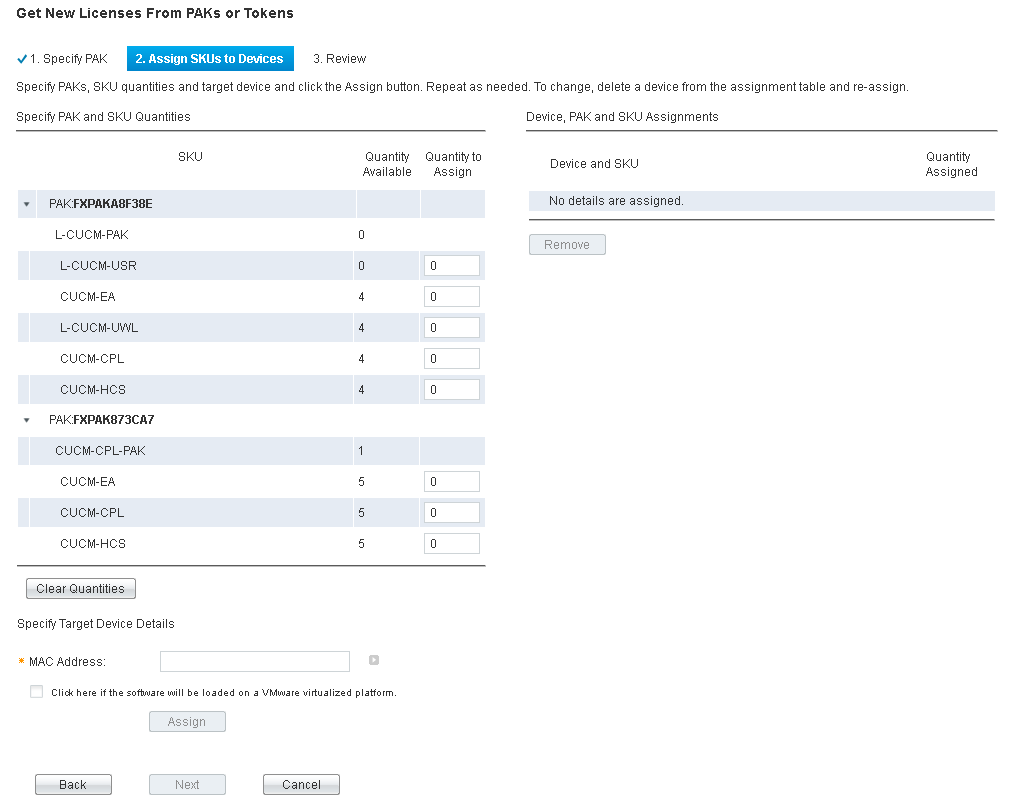
Single Fulfillment In this step, the Specify the quantity of each feature to assign to a device Enter the target device details below the table. These may differ for different products, but will be either a MAC address or a product ID and serial number. (MAC address shown here) Click "Next" at the bottom of the page. This button continues to Step 3 – Review and Submit. |
|
|
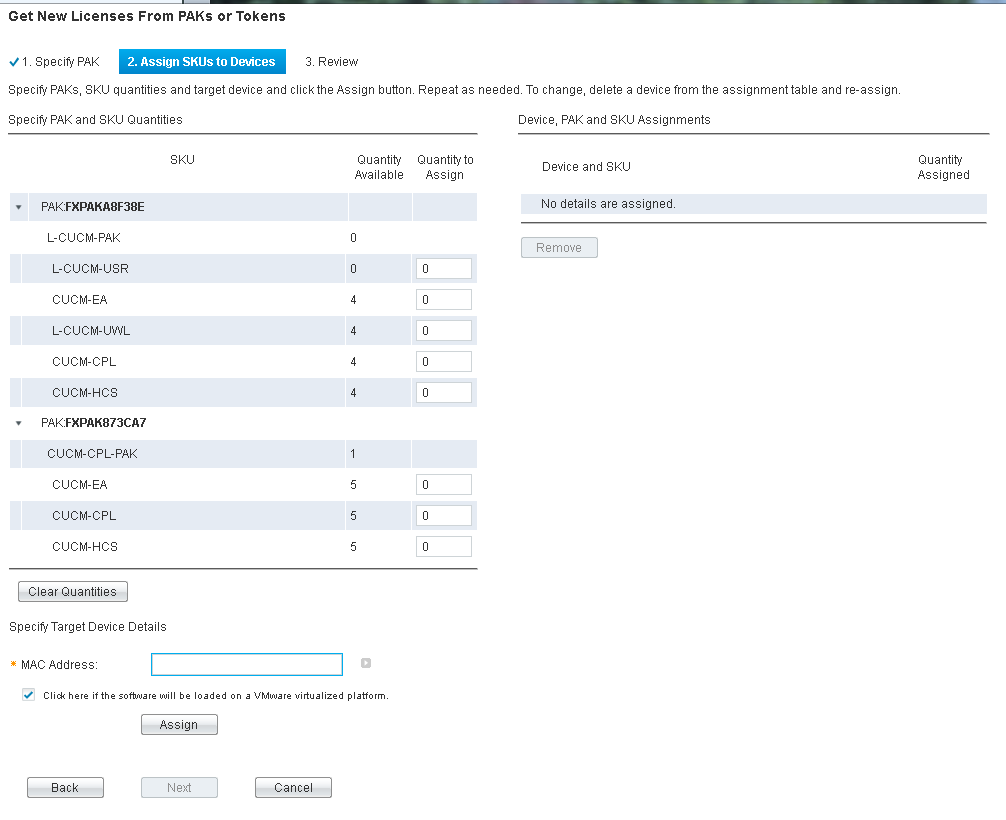
Partial Fulfillment In this step, specify the quantity of each feature to assign to a device. Enter the target device details below the table. These may differ for different products, but will be either a MAC address or a product ID and serial number. Click the "Assign" button. This button
validates the information specified in the page fields. |
|
|
Valid assignments will be displayed in the Device, PAK and SKU assignment table on the right. Errors for invalid assignments are displayed above the tabs. Repeat this process until all of the product SKUs have been assigned. To remove any device assignments and release the quantities - · Check the box by the assignment. · Click the "Remove" button below the assignment table. |
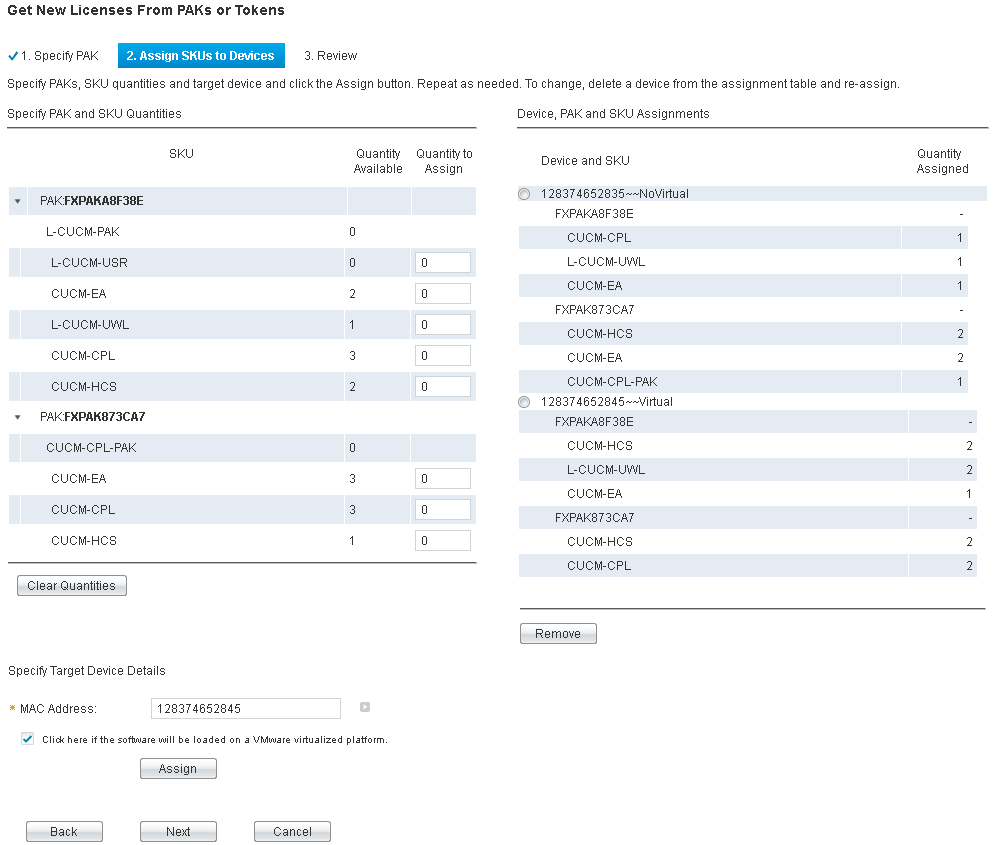
Note: Not all have to be assigned at this time. Anything left can be fulfilled at a later time in another transaction.
Click "Next" at the bottom of the page.
This button continues to Step 3 – Review and Submit.
NOTE: if you leave this page at any time, everything will be saved to this point as a "pending" transaction in the "My Transactions" table, accessible from "My Information > My transactions". This transaction can be continued by selecting the transaction and clicking the button beneath the table – "Continue Transaction".
Step 3: Review assigned information, specify email, end user and
Submit.
[Step 3 Help content is
accessed from the help icon on the page when step 3 is displayed]
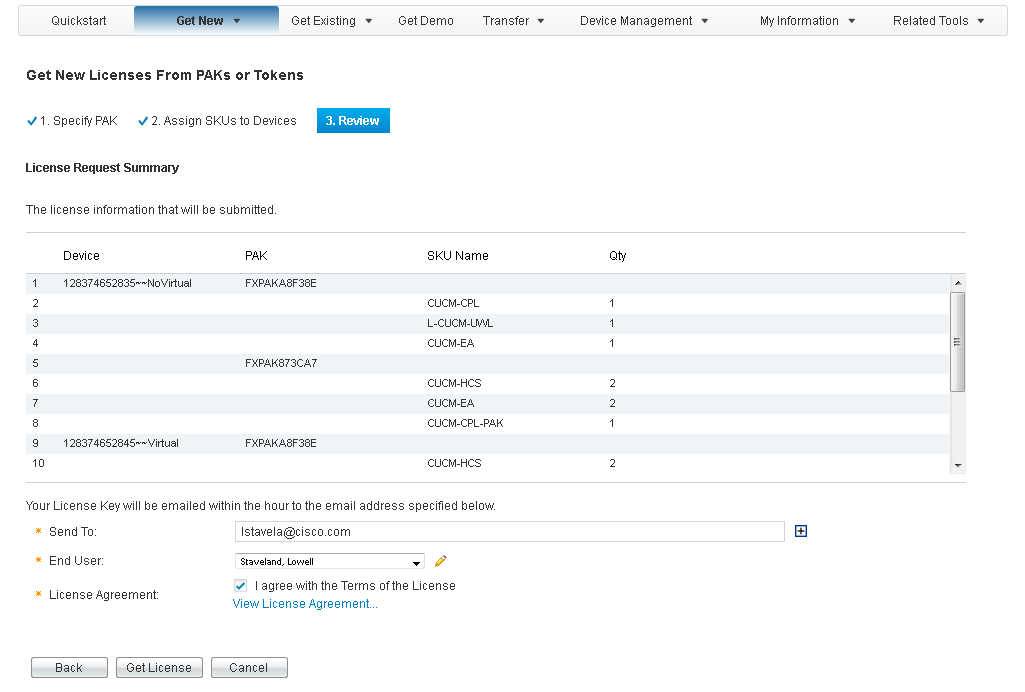
In this final step, all of the relevant information is displayed to review before submittal. The review table includes device, PAK(s) and SKUs with quantities. If anything needs to be changed, now is the time. Closely examine the details to determine if changes are needed.
|
|
Use the "Back" button to return to previous pages. Entered information will be displayed and available for editing. Use the "Assign" and / or " Next" buttons to continue forward after changes and return to this review step Check the license agreement check box. |
|
|
Change or edit the end-user details associated with this transaction. The end user is a person associated with this license. It could be the end-user, registered user or some other person. Note: The end user details are associated with this license, but the end user will not be assigned as a registered user of this license. The license is not automatically emailed to the end user. This is done using the email address field. |
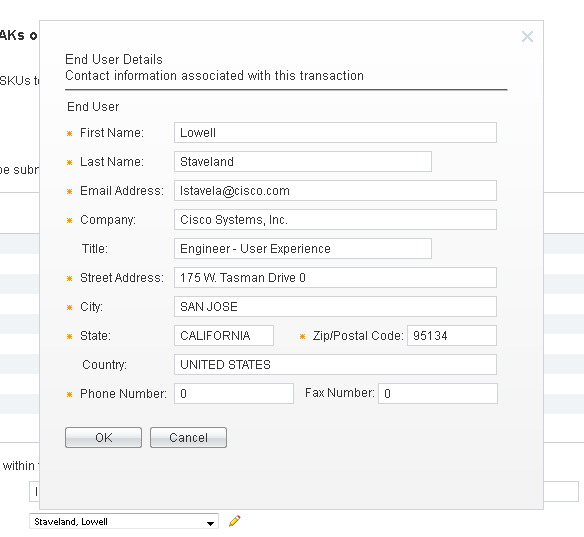
|
|
Change, add, or edit the email address to send the license. Directly edit or enter addresses in the email field. Select addresses by Clicking the "+" icon on the right of the email field. This opens the list of users setup in the page accessed from the top menu "My Information > My Profile". |
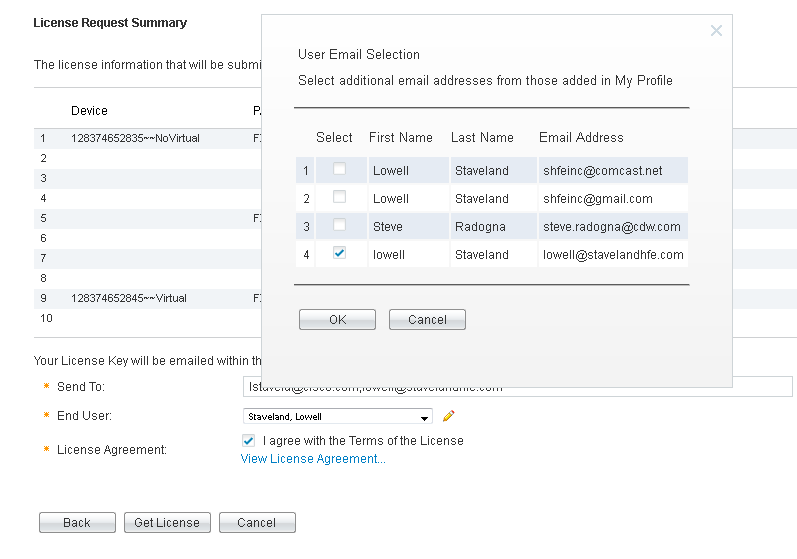
Click "Get License" (bottom of page).
|
|
This button submits the license request for processing. The license request status box displays a progress bar during validation. Additional and final checks and validations are performed on the information specified in the page fields. This lists the email addresses to whom the license(s) will be sent. |
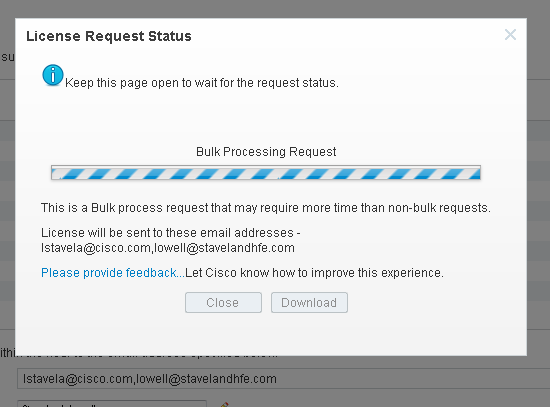
|
|
A green check indicates success. Click "Close" to close the dialog box. This closes the pop-up and resets the flow to step 1 to start a new transaction. The message lists the email addresses of those who received the license. Click the "Download" button to download the zipped license file to a local or networked location. The "Transaction ID" is a
unique identifier assigned to this license transaction. Use it to locate the
license in the transaction history table accessed from the top menu "My
Information > My Transactions". |
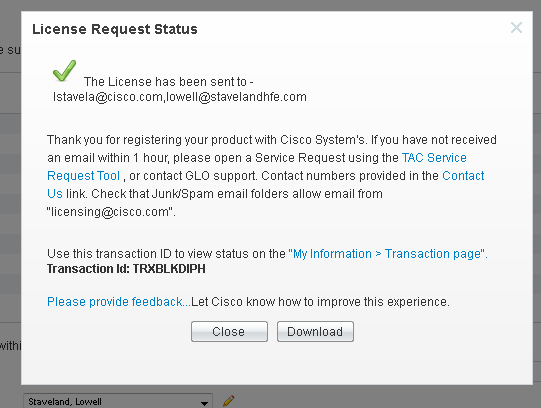
A red stop-sign is displayed with an error message if the request fails the submittal process. The message will indicate what to do if it is known. Options include retrying the transactions and/or opening a service request.
NOTE: All transactions are saved in the transaction history and include the transaction details and history for devices in the transactions. The history is accessible from the top menu bar "My Information > My transactions". The table contains some basic identifying information about a transaction. A link with each transaction "More…" opens a pop-up that provides the details.