-
Cisco MDS 9000 Family Fabric Manager Configuration Guide, Release 3.4(1a)
-
Index
-
New and Changed Information
-
Preface
- Getting Started
- Installation and Switch Management
- Switch Configuration
-
Fabric Configuration
-
Configuring and Managing VSANs
-
SAN Device Virtualization
-
Creating Dynamic VSANs
-
Configuring Inter-VSAN Routing
-
Configuring and Managing Zones
-
Distributing Device Alias Services
-
Configuring Fibre Channel Routing Services and Protocols
-
Dense Wavelength Division Multiplexing
-
Managing FLOGI, Name Server, FDMI, and RSCN Databases
-
Discovering SCSI Targets
-
Configuring FICON
-
Advanced Features and Concepts
-
-
Security
-
Configuring FIPS
-
Configuring Users and Common Roles
-
Configuring SNMP
-
Configuring RADIUS and TACACS+
-
Configuring IPv4 Access Control Lists
-
Configuring Certificate Authorities and Digital Certificates
-
Configuring IPsec Network Security
-
Configuring FC-SP and DHCHAP
-
Configuring Port Security
-
Configuring Fabric Binding
-
- IP Services
- Intelligent Storage Services
- Network and Switch Monitoring
- Traffic Management
- Troubleshooting
-
Launching Fabric Manager in Cisco SAN-OS Releases Prior to 3.2(1)
-
Cisco Fabric Manager Unsupported Feature List
-
Interface Nonoperational Reason Codes
-
Managing Cisco FabricWare
-
Configuration Limits for Cisco MDS SAN-OS Release 3.1(x) and 3.2(x)
-
 Feedback
Table Of Contents
Launching Fabric Manager in Cisco SAN-OS Releases Prior to 3.2(1)
Setting the Seed Switch in Cisco SAN-OS Releases 3.1(1) to 3.2(1)
Setting the Seed Switch in Releases Prior to Cisco SAN-OS Release 3.1(1)
Launching Fabric Manager in Cisco SAN-OS Releases Prior to 3.2(1)
This appendix provides instructions for launching Fabric Manager Client in Cisco SAN-OS releases prior to 3.2(1).
This Appendix contains the following sections:
•
Setting the Seed Switch in Cisco SAN-OS Releases 3.1(1) to 3.2(1)
•
Setting the Seed Switch in Cisco SAN-OS Releases 3.1(1) to 3.2(1)
Note
From Cisco SAN-OS Release 3.1(1) to Release 3.2(1), you must log in to Fabric Manager Server before you discover or open fabrics, and these fabrics can have different user credentials. You can specify different SNMP communities per switch on the Web Server.
Note
To log in to Fabric Manager Server and to open a fabric, follow these steps:
Step 1
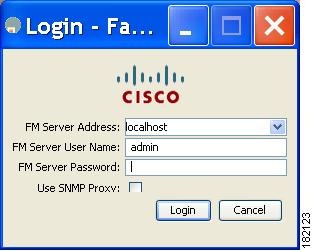
You see the Fabric Manager Server Login dialog box shown in Figure A-1.
Figure A-1 Fabric Manager Server Login Dialog Box
Step 2
If you forget your password, you can run one of the following scripts:
–
–
Both of these scripts are available as UNIX .sh files.
Step 3
Step 4
Step 5
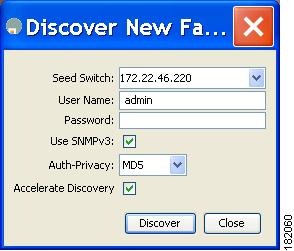
You see the Discover New Fabric dialog box shown in Figure A-2.
Figure A-2 Discover New Fabric Dialog Box
Step 6
Step 7
Step 8
Note
Step 9
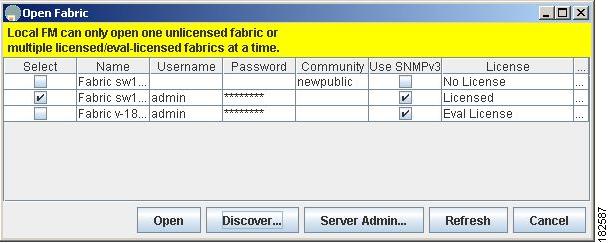
You see the Open Fabric dialog box shown in Figure A-3.
Figure A-3 Open Fabric Dialog Box
Step 10
Note
Note
Step 11
Setting the Seed Switch in Releases Prior to Cisco SAN-OS Release 3.1(1)
Note
When you run Fabric Manager, you must select a switch for Fabric Manager to use to discover the fabric. For releases earlier than Cisco SAN-OS Release 3.1(1), use the same user name and password on each of the multiple fabrics that you open, then log in directly to the MDS 9000 Family switch that you want Fabric Manager to use.
To set the seed switch if you are running a version of Cisco SAN-OS that is earlier than Cisco SAN-OS Release 3.1(1), follow these steps:
Step 1
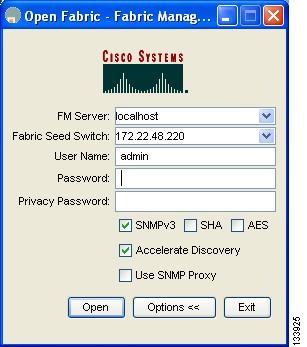
You see the Fabric Manager Login dialog box shown in Figure A-4.
Figure A-4 Open Fabric Dialog Box
Step 2
Step 3
Step 4
Step 5
Step 6
Note
Step 7