-
User Guide for Cisco Security MARS Local Controller, Release 5.3.x
-
Preface
-
STM Task Flow Overview
-
Reporting and Mitigation Devices Overview
-
Authenticating with External AAA Servers
-
Configuring Router and Switch Devices
-
Configuring Firewall Devices
-
Configuring VPN Devices
-
Configuring Network-based IDS and IPS Devices
-
Configuring Host-Based IDS and IPS Devices
-
Configuring Antivirus Devices
-
Configuring Vulnerability Assessment Devices
-
Configuring Generic, Solaris, Linux, and Windows Application Hosts
-
Configuring Database Applications
-
Configuring Web Server Devices
-
Configuring Web Proxy Devices
-
Configuring AAA Devices
-
Configuring Wireless LAN Devices
-
Configuring Custom Devices
-
Policy Table Lookup on Cisco Security Manager
-
Network Summary
-
Case Management
-
Incident Investigation and Mitigation
-
Queries and Reports
-
Rules
-
Sending Alerts
-
Management Tab Overview
-
System Maintenance
-
Cisco Security MARS XML API Reference
-
Regular Expression Reference
-
Date/Time Format Specfication
-
System Rules and Reports Reference
-
Glossary
-
Index
-
 Feedback
Table Of Contents
Supporting Cisco Secure ACS Server
Supporting Cisco Secure ACS Solution Engine
Configure Cisco Secure ACS to Generate Logs
Configure TACACS+ Command Authorization for Cisco Routers and Switches
Install and Configure the PN Log Agent
Upgrade PN Log Agent to a Newer Version
Application Log Messages for the PN Log Agent
Add and Configure the Cisco ACS Device in MARS
Configuring AAA Devices
Revised: February 23, 2007Authentication, authorization, and accounting (AAA) devices provide accountability throughout your network, ensuring that valid users are authorized to use the network services they request and providing detailed event logs regarding failures and successes in such requests.
The AAA server is a key component in the Network Access Control (NAC) initiative (see Configuring Network Admission Control Features, page 2-53 and Enable NAC-specific Messages, page 4-4). Cisco Secure Access Control Server (ACS), which is the AAA server for NAC, returns access control decisions to the network access device on the basis of the antivirus credentials of the hosts that are requesting network services.
MARS supports the Cisco Secure ACS software and the Cisco Secure ACS Solution Engine, version 3.3 and later. In the case of Cisco Secure ACS software, support is provided by an agent that resides on the Cisco Secure ACS server. For the Cisco Secure ACS Solution Engine, this agent must reside on a remote logging host. This agent provides MARS with three event logs in syslog format. The logs are as follows:
•
Passed authentication log (requires Cisco Secure ACS, 3.3 or later)
•
•
To support NAC and the 802.1x features, Cisco Secure ACS uses the RADIUS authentication protocol and the cisco-av-pair attributes. For more information on configuring Cisco Secure ACS as a posture validation server for NAC, see the following URLs:
•
•
•
For more information on the cisco-av-pair attributes, see the following URL:
This chapter explains how to prepare the Cisco Secure ACS server or the Cisco Secure ACS Solution Engine to allow MARS to collect the event logs. It also describes how to configure MARS to receive and process these logs correctly. Using the web interface, you must define a host to represent the Cisco Secure ACS server (or the remote logging agent collecting logs for the Cisco Secure ACS Solution Engine) and then add the software application to that host.
Supporting Cisco Secure ACS Server
To configure a Cisco Secure ACS server to act as a reporting device, you must perform three tasks:
1.
2.
3.
You can also configure Cisco Secure ACS to provide command authorization for the MARS Appliance. In this role, Cisco Secure ACS verifies that the MARS Appliance is authorized to execute specific commands on reporting devices and mitigation devices.
The following sections detail supporting a Cisco Secure ACS server:
•
•
Supporting Cisco Secure ACS Solution Engine
MARS supports the Cisco Secure ACS Solution Engine via a remote logging host. Cisco Secure ACS Remote Agent for Windows is a Windows-based application that supports Cisco Secure ACS Solution Engine for remote logging.
Even though the Cisco Secure ACS Solution Engine supports up to five appliance via a remote logging host, MARS currently supports only one Cisco Secure ACS Solution Engines per remote logging host. Otherwise, MARS cannot identify the IP address of the originating Cisco Secure ACS Solution Engine.
To enable this support, follow these steps:
1.
2.
For instructions on installing and configuring the remote agent, see see Installation and Configuration Guide for Cisco Secure ACS Remote Agents.
3.
For information on installing and configuring the pnLog Agent, see Install and Configure the PN Log Agent.
4.
Bootstrap Cisco Secure ACS
Bootstrapping the Cisco Secure ACS includes the following task:
•
•
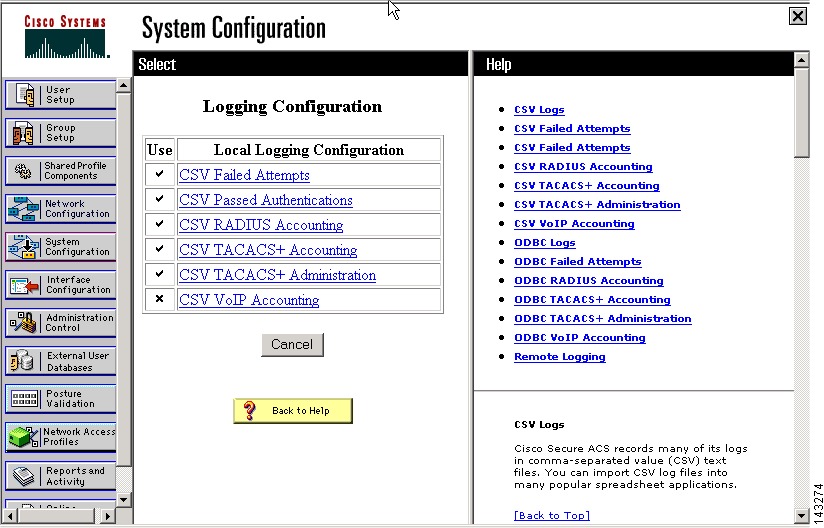
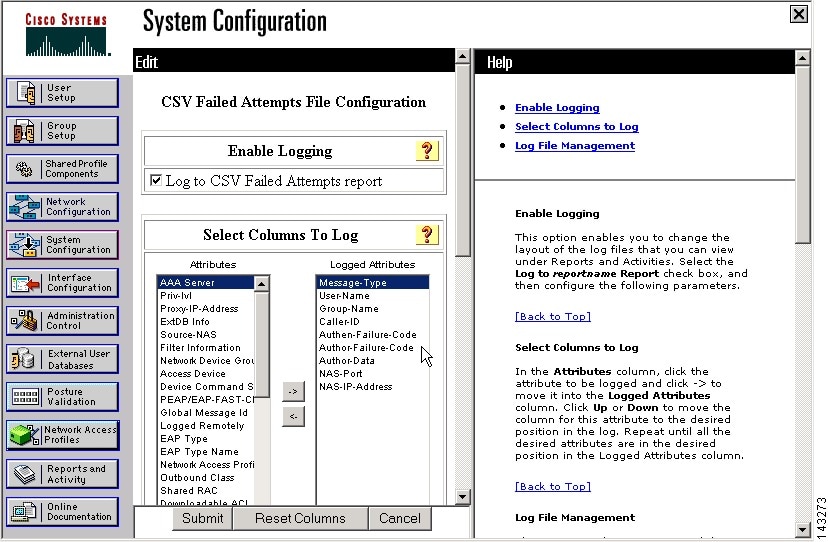
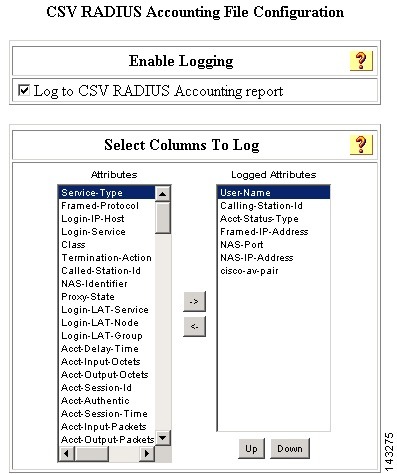
Configure Cisco Secure ACS to Generate Logs
To configure Cisco Secure ACS to generate the audit logs required by MARS, follow these steps:
Step 1
Step 2
Step 3
Step 4
•
•
•
•
•
•
•
Step 5
Step 6
•
•
•
•
•
•
•
Step 7
Step 8
•
•
•
•
•
•
•
Step 9
•
•
Step 10
For additional details on the RADIUS attributes supported by Cisco Secure ACS, see to the following URL:
Define AAA Clients
To support the 802.1x features of NAC, you must also define the Cisco switches as AAA clients within Cisco Secure ACS. When defining a AAA client, verify the following settings:
•
•
To enable 802.1x logging support, the following configuration must also be completed.
•
Note
Figure 15-1 displays example settings for such a client.
Figure 15-1 Configure a AAA Client to Support 802.1x
For more information on defining AAA clients, see the following URL:
Configure TACACS+ Command Authorization for Cisco Routers and Switches
You can use the TACACS+ feature of Cisco Secure ACS to authorize the command sets that MARS is allowed to execute on a reporting device. The use of this feature is not required by MARS. However, if you are using this feature on your routers and switches, you must ensure that MARS is allowed to execute specific commands. Required commands are grouped under two operations: configuration retrieval and mitigation.
The following commands support configuration retrieval:
•
•
•
•
•
•
•
•
•
The following commands support mitigation:
•
•
•
•
For more information on configuring command authorization sets in Cisco Secure ACS, see the following URL:
Install and Configure the PN Log Agent
MARS includes the PN Log Agent to monitor Cisco Secure ACS active log files (failed attempts, passed authentications, and RADIUS accounting). This agent pushes these log files via syslog to MARS. You can download the PN Log Agent from the software download center at the following URL:
http://www.cisco.com/pcgi-bin/tablebuild.pl/cs-mars-misc
Note
As part of its operation, the PNLog Agent service writes error and informational message to the Application Log, which can be viewed using the Event Viewer. To learn more about these messages, see Application Log Messages for the PN Log Agent.
To install and configure the PNLog Agent, follow these steps:
Step 1
Note
For instructions on installing and configuring the remote agent, see Installation and Configuration Guide for Cisco Secure ACS Remote Agents.
Step 2
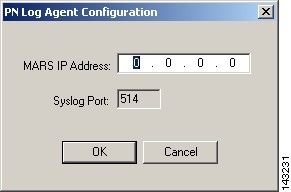
Step 3
Result: The PN Log Agent Configuration dialog box appears.
Step 4
Step 5
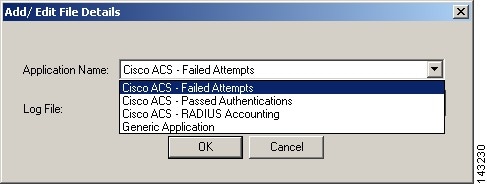
Step 6
Result: The Add/Edit File Details dialog box appears.
Step 7
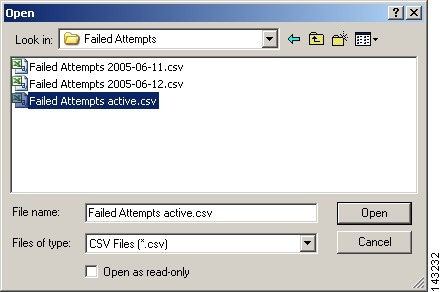
Step 8
Result: The Open dialog box appears.
Step 9
•
•
•
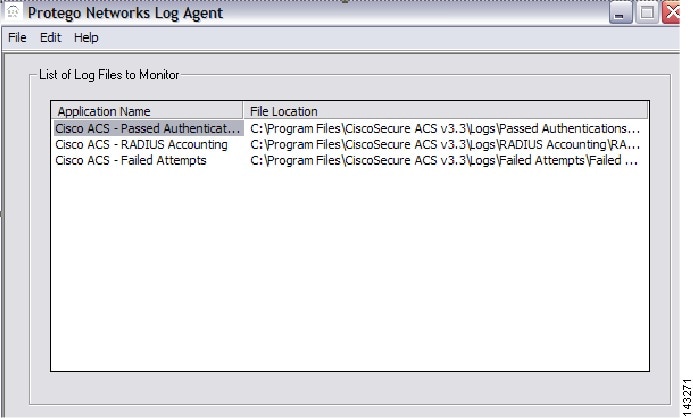
Result: The configured files appear in the List of Log Files to Monitor list.
Step 10
Upgrade PN Log Agent to a Newer Version
You can determine which version of the PN Log Agent is running on your server by selecting Help > About in the PN Log Agent Configuration dialog box. This program is updated independently of the MARS Appliance software updates. Therefore, the version number does not correspond to any release of the MARS Appliance software.
Note
To upgrade to the new PN Log Agent from an existing installation, you must perform the following steps:
Step 1
a.
b.
c.
Step 2
Step 3
http://www.cisco.com/pcgi-bin/tablebuild.pl/cs-mars-misc
Step 4
For information on configuring the pnLog Agent, see Install and Configure the PN Log Agent.
Application Log Messages for the PN Log Agent
The PN Log Agent service writes events to the Application Log of Event Viewer on the Cisco Secure ACS server. The agent, identified in the log messages as PNLogAgentService, writes status messages, such as successful service start and stop. It also writes error messages for incomplete configuration and error conditions, such as when the service is out of memory.
Table 15-1 categories the types of messages that can occur and explains their affects on the PNLog Agent service.
Add and Configure the Cisco ACS Device in MARS
To add the host and Cisco Secure ACS software application to MARS, follow these steps:
Step 1
Step 2
You can also select Add SW Security apps on an existing host if you have already defined the host within MARS, perhaps as part of the Management >IP Management settings or if you are running another application on the host, such as Microsoft Internet Information Services.
Step 3
Step 4
Step 5
This address is the same value as the Reporting IP address.
Step 6
Step 7
Step 8
Result: The Cisco ACS 3.x Windows Requirements page appears, explaining that you must have installed an agent on the server as described in Install and Configure the PN Log Agent.
Note
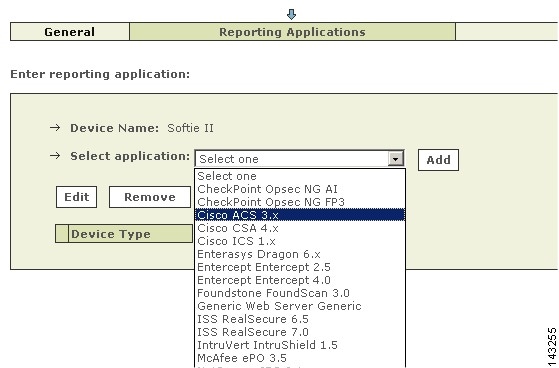
Step 9
Result: Cisco ACS 3.x appears in the Device Type list.
Step 10
Step 11
Result: The new host appears in the Security and Monitoring Information list.
Step 12