簡介
本文描述如何使用HTTP伺服器重新映像應用策略基礎設施控制器(APIC)。
必要條件
需求
- 必須使用OOB IP地址配置Cisco整合管理控制器(CIMC)。
- 檢查APIC版本說明,並確認需要重新映像哪個APIC軟體映像。
- 從software.cisco.com獲取軟體映像。
- 確認映像的MD5總和檢查碼與Cisco.com上發佈的校驗碼匹配。
- 將APIC映像上傳到HTTP伺服器上。
採用元件
本文件所述內容不限於特定軟體和硬體版本。
本文中的資訊是根據特定實驗室環境內的裝置所建立。文中使用到的所有裝置皆從已清除(預設)的組態來啟動。如果您的網路運作中,請確保您瞭解任何指令可能造成的影響。
背景資訊
如果APIC群集出現故障或硬體從L2/M2遷移到L4/M4,則單個APIC裝置可能需要重新映像才能恢復功能。此過程概述了一種使用HTTP伺服器逐一重新映像APIC的簡化方法,便於以最少的中斷實現更快的群集恢復。
對需要重新成像的每個APIC裝置按順序重複此過程。重新映像所有APIC後,根據需要恢復群集配置並進行徹底測試以驗證功能。
此簡要過程可實現高效的APIC恢復,使管理員能夠及時解決群集故障並有效地恢復網路操作。
解決方案
要使用HTTP伺服器重新映像APIC,需要執行以下步驟。
步驟1.從思科網站下載韌體。
開啟software.cisco.com/download。
步驟2.在此處輸入APIC並為ACI選擇適當的版本 — 在這種情況下,將選擇4.2(7F)。
舉例來說:
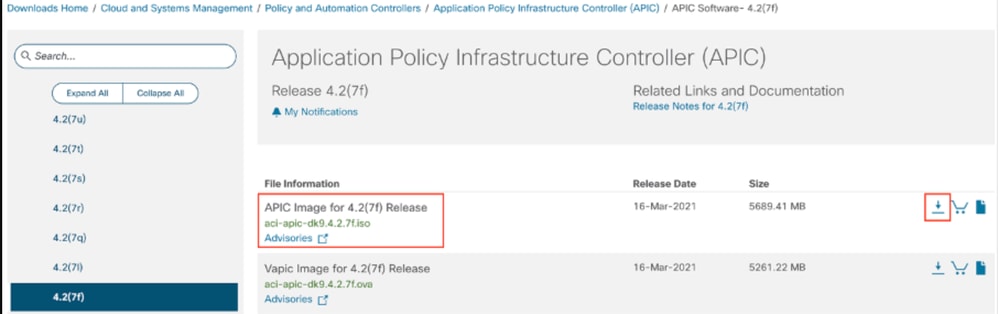
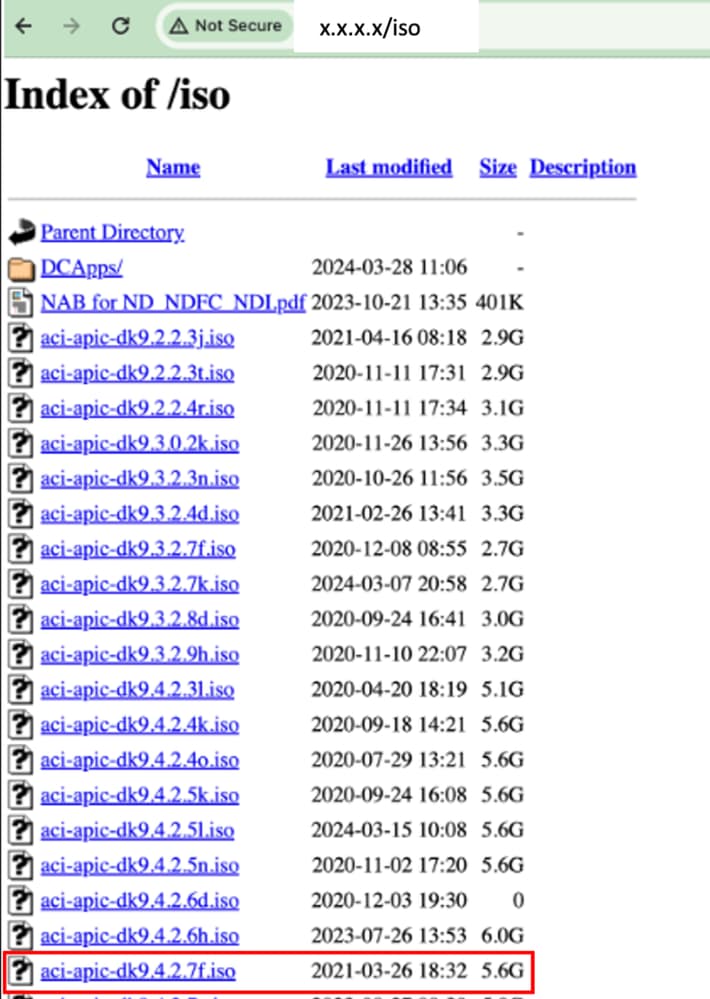
步驟3.將APIC軟體ISO映像複製到HTTP伺服器。
示例: http://x.x.x.x/iso/
步驟4.通過SSH/控制檯連線到思科整合管理控制器。
# ssh admin@cimc_ip
其中cimc_ip是CIMC IP地址。舉例來說:
# ssh admin@x.x.x.x
admin@x.x.x.x's password:
system#
system# scope vmedia
system /vmedia #
system /vmedia # map-www volume_name http://http_server_ip_and_path iso_file_name
其中:
- volume_name是卷的名稱。
- http_server_ip_and_path是HTTP伺服器的IP地址和.iso檔案位置的路徑。
- iso_filename是.iso檔案的名稱。

附註:http_server_ip_and_path與iso_filename之間存在空格。
舉例來說:
system /vmedia # map-www apic http://x.x.x.x/iso/ aci-apic-dk9.4.2.7f.iso
Server username: admin
Server password:
Confirm password:
附註:/*如果此處不需要身份驗證,只需按Enter鍵。
system /vmedia # show mappings detail
對映狀態必須顯示為OK。
舉例來說:
system /vmedia # show mappings detail
Volume apic:
    Map-Status: OK
    Drive-Type: CD
    Remote-Share: http://x.x.x.x/iso/

    Remote-File: aci-apic-dk9.4.2.7f.iso
    Mount-Type: www
    Mount-Options: noauto,username=admin,password=********3
    system /vmedia #
system /vmedia # connect host
CISCO Serial Over LAN:
Press Ctrl+x to Exit the session
步驟5.從CIMC GUI的KVM控制檯重新通電。
選擇「Power > Power Cycle System(cold boot)(電源> Power Cycle System(冷啟動))」以重新啟動控制器

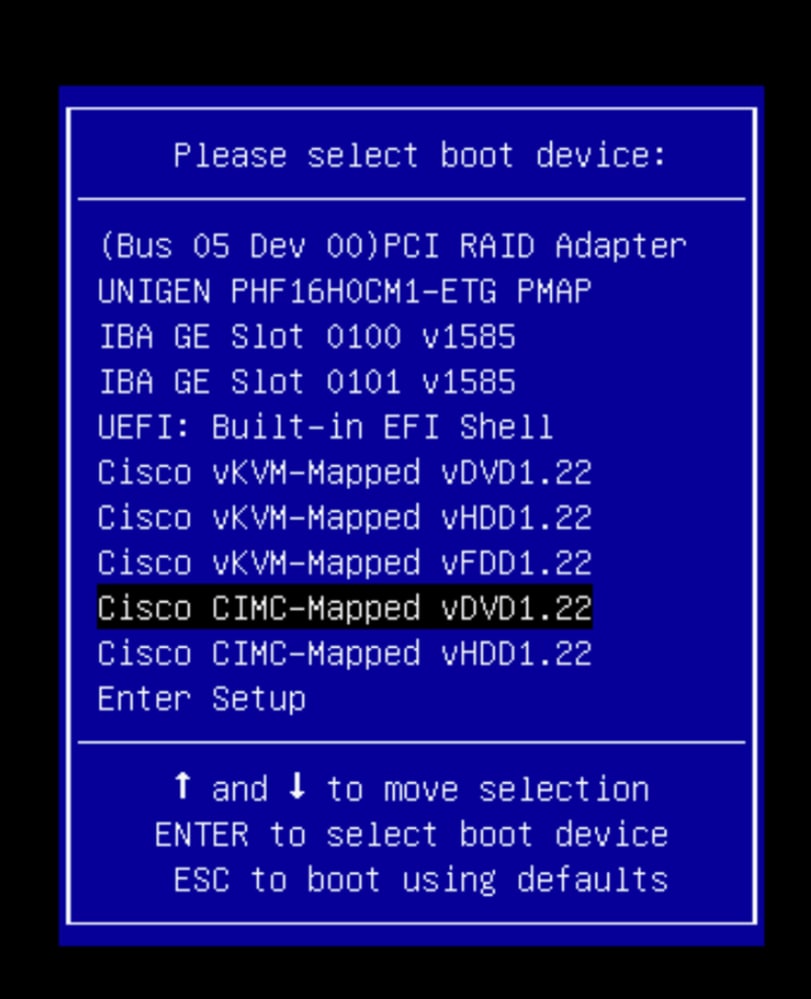
在SOL控制檯上:在引導過程中觀看螢幕,並準備在適當的時間按F6鍵以進入引導選擇選單。
舉例來說:
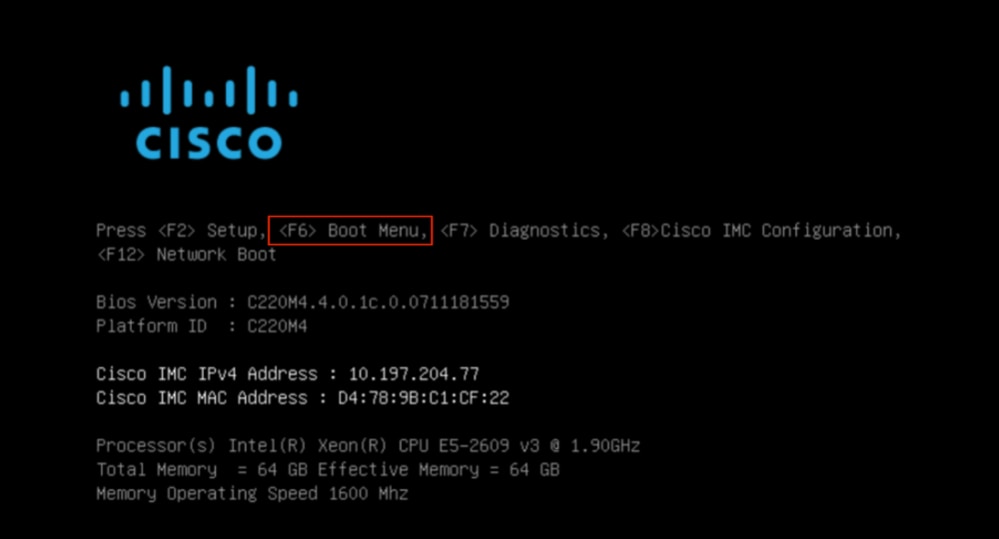
按F6後
附註:如果您錯過機會並且無法在適當的時刻按F6,請返回步驟5以重新啟動控制器並重複該過程,直到可以按F6進入引導選擇選單。
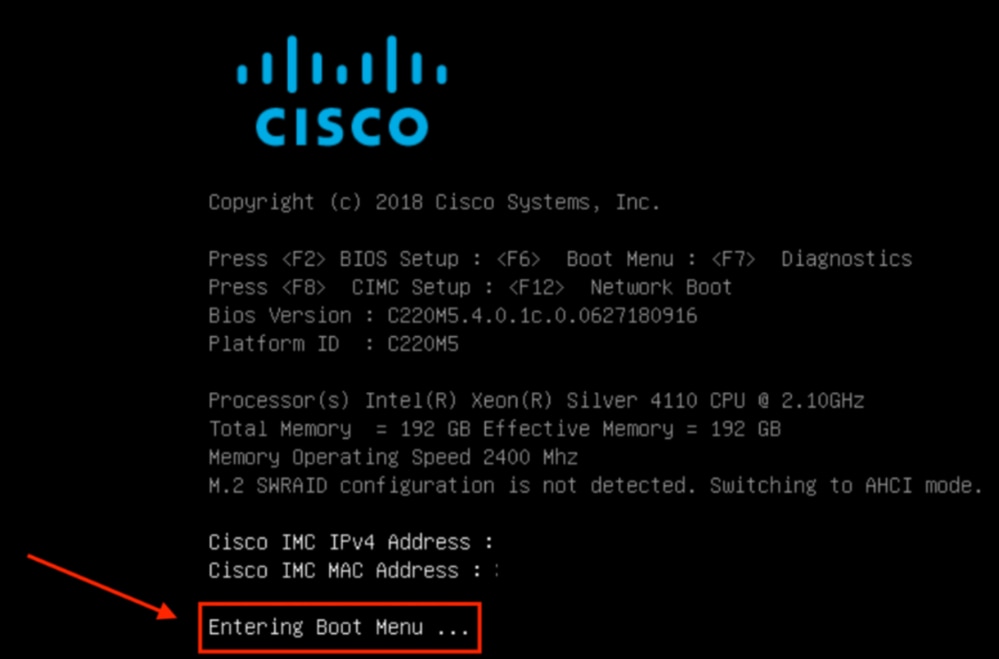
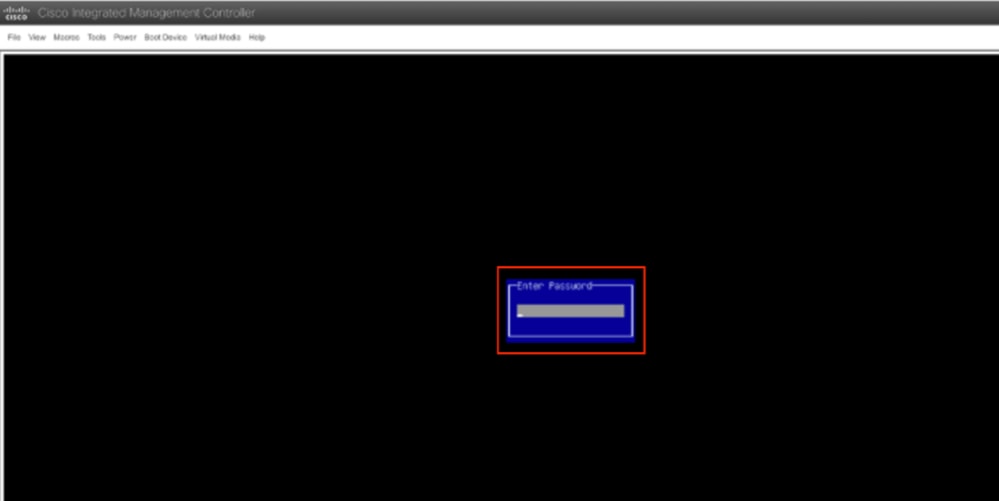
您還必須輸入BIOS密碼。預設密碼為password。
在啟動選擇選單中,選擇Cisco CIMC-Mapped vDVD1.22選項作為一次性啟動裝置。
步驟6.返回CIMC CLI並監控Connect Host的輸出。
監控CIMC cli ,當收到消息要加速安裝,請在接下來的10分鐘內輸入iso url,然後輸入帶有APIC映像的http伺服器URL。
++ grep /run/install/repo
++ cut -f 1 -d ' '
++ tr -d '[:digit:]'
+ usbdevice=/dev/sr
+ mkdir /mnt/usbdata
+ mount /dev/sr2 /mnt/usbdata
mount: special device /dev/sr2 does not exist
+ true
+ '[' -f /mnt/usbdata/ifabric.iso ']'
+ mountpoint -q /mnt/usbdata
+ true
+ echo 'INFO: found second partition on install media but did not find ifabric.iso. '
INFO: found second partition on install media but did not find ifabric.iso.
+ echo 'Continuing on to ISO URL prompt.'
Continuing on to ISO URL prompt.
+ '[' 0 -eq 0 ']'
+ read_iso_url
+ true,,
+ echo 'To speed up the install, enter iso url in next ten minutes: '      << Enter the http server URL with apic image  >>
To speed up the install, enter iso url in next ten minutes:
+ read -t 600 -p '? ' url
?
http://x.x.x.x/iso/aci-apic-dk9.4.2.7f.iso 5:program-log      << Enter the http server details  >>
[anaconda] 1:main* 2:shell  3:log  4:storage-lo> Switch tab: Alt+Tab | Help: F1
附註:http_server_ip_and_path與iso_filename之間沒有空格。
步驟 7. 輸入HTTP URL後,引導過程將繼續。
附註:如果選擇靜態選項,系統會要求您輸入介面名稱、管理IP地址和網關。
+ '[' 0 -eq 0 ']'
+ read_iso_url
+ true
+ echo 'To speed up the install, enter iso url in next ten minutes: '
To speed up the install, enter iso url in next ten minutes:
+ read -t 600 -p '? ' url
?
[ahttp://x.x.x.x/iso/aci-apic-dk9.4.2.7f.iso 5:program-log
++ awk -F '/|:' '{print $4}'
+ urlip=x.x.x.x
+ '[' -z http://x.x.x.x/iso/aci-apic-dk9.4.2.7f.iso ']'
+ '[' -z x.x.x.x ']'
+ break
+ '[' -n http://x.x.x.x/iso/aci-apic-dk9.4.2.7f.iso ']'
+ set +e
+ configured=0
+ '[' 0 -eq 0 ']'
+ echo 'Configuring network interface'
Configuring network interface
+ echo 'type static, dhcp, bash for a shell to configure networking, or url to re-enter the url: '
>>
<< Type static and configure the APIC OOB IP address with it’s gateway>>
type static, dhcp, bash for a shell to configure networking, or url to re-enter the url:
+ read -p '? ' ntype
? static.   << Enter the static  to configure the networking >>
[anaconda] 1:main* 2:shell  3:log  4:storage-lo> Switch tab: Alt+Tab | Help: F1
附註:在鍵入靜態命令後,它將列出CIMC介面,選擇正確的介面。如果您選擇了錯誤的介面,則資料包丟失率將為100%,然後,在三次嘗試執行ping失敗後,它會再次要求選擇正確的介面,直到資料包丟失為0(如果您不知道介面),請依次選擇所有介面。
舉例來說:
+ case $ntype in
+ configure_static
+ echo 'Available interfaces'
Available interfaces
+ ls -l /sys/class/net
total 0
lrwxrwxrwx. 1 root root 0 May  3 07:08 enp11s0 -> ../../devices/pci0000:00/0000:00:03.0/0000:06:00.0/0000:07:01.0/0000:09:00.0/0000:0a:00.0/0000:0b:00.0/net/enp11s0
lrwxrwxrwx. 1 root root 0 May  3 07:08 enp12s0 -> ../../devices/pci0000:00/0000:00:03.0/0000:06:00.0/0000:07:01.0/0000:09:00.0/0000:0a:01.0/0000:0c:00.0/net/enp12s0
lrwxrwxrwx. 1 root root 0 May  3 07:08 enp1s0f0 -> ../../devices/pci0000:00/0000:00:01.0/0000:01:00.0/net/enp1s0f0
lrwxrwxrwx. 1 root root 0 May  3 07:08 enp1s0f1 -> ../../devices/pci0000:00/0000:00:01.0/0000:01:00.1/net/enp1s0f1
lrwxrwxrwx. 1 root root 0 May  3 07:08 lo -> ../../devices/virtual/net/lo
+ read -p 'Interface to configure: ' interface
Interface to configure: enp1s0f0     <<  select the correct interface   >>
[anaconda] 1:main* 2:shell  3:log  4:storage-lo>
步驟8. 正確的介面檢查。
進入介面後,它將嘗試ping http伺服器,如果選定的介面正確,則資料包丟失率必須為0%,並開始從http伺服器提取映像。
舉例來說:在進入正確介面時出現0%的資料包丟失後。
+ read -p 'Interface to configure: ' interface
Interface to configure:  enp1s0f0
+ read -p 'address: ' addr
address: x.x.x.x/24
+ read -p 'gateway: ' gw
gateway: x.x.x.x
+ ip addr add x.x.x.x/24 dev enp1s0f0
+ ip link set enp1s0f0 up
+ ip route add default via x.x.x.x
++ seq 1 2
+ for count in '$(seq 1 2)'
+ ping -c 1 x.x.x.x
PING x.x.x.x (x.x.x.x) 56(84) bytes of data.
64 bytes from x.x.x.x: icmp_seq=1 ttl=64 time=55.0 ms
--- x.x.x.x ping statistics ---
1 packets transmitted, 1 received, 0% packet loss, time 0ms
rtt min/avg/max/mdev = 55.056/55.056/55.056/0.000 ms
+ configured=1
+ break
+ '[' 1 -eq 0 ']'
+ echo 'Fetching http://x.x.x.x/iso/aci-apic-dk9.4.2.7f.iso'

Fetching http://x.x.x.x/iso/aci-apic-dk9.4.2.7f.iso >> started fetching the apic image from HTTP server
+ wget -o /dev/null -O /tmp/cdrom.iso http://x.x.x.x/iso/aci-apic-dk9.4.2.7f.iso
如果您選擇了錯誤的介面,則資料包丟失率將為100%,在三次嘗試ping失敗後,它會再次要求選擇正確的介面。
舉例來說:進入錯誤介面後出現100%資料包丟失。
+ read -p 'Interface to configure: ' interface
Interface to configure: enp11s0
+ read -p 'address: ' addr
address: x.x.x.x/24
+ read -p 'gateway: ' gw
gateway: x.x.x.x
+ ip addr add x.x.x.x/24 dev enp11s0
+ ip link set enp11s0 up
+ ip route add default via x.x.x.x
++ seq 1 2
+ for count in '$(seq 1 2)'
+ ping -c 1 x.x.x.x
PING x.x.x.x (x.x.x.x) 56(84) bytes of data.
From x.x.x.x icmp_seq=1 Destination Host Unreachable

--- x.x.x.x ping statistics ---
1 packets transmitted, 0 received, +1 errors, 100% packet loss, time 0ms

+ sleep 20
+ for count in '$(seq 1 2)'
+ ping -c 1 x.x.x.x
PING x.x.x.x (x.x.x.x) 56(84) bytes of data.
From x.x.x.x icmp_seq=1 Destination Host Unreachable

--- x.x.x.x ping statistics ---
1 packets transmitted, 0 received, +1 errors, 100% packet loss, time 0ms

+ sleep 20
+ '[' 0 -eq 0 ']'
+ echo 'Configuring network interface'
Configuring network interface
+ echo 'type static, dhcp, bash for a shell to configure networking, or url to re-enter the url: ' <>
type static, dhcp, bash for a shell to configure networking, or url to re-enter the url:
+ read -p '? ' ntype
?
保持監控CIMC CLI並等待約40-50分鐘,您將在cli上獲得以下輸出。
[anaconda] 1:main* 2:shell  3:log  4:storage-lo> Switch tab: Alt+Tab | Help: F1
[  OK  ] Started Show Plymouth Power Off Screen.
[  OK  ] Stopped Availability of block devices.
         Stopping Logout off all iSCSI sessions on shutdown...
         Stopping LVM2 metadata daemon...
[  OK  ] Stopped LVM2 metadata daemon.
[  OK  ] Stopped Logout off all iSCSI sessions on shutdown.
[  OK  ] Stopped target Network.
[  OK  ] Stopped Remount Root and Kernel File Systems.
         Stopping Remount Root and Kernel File Systems...
[  OK  ] Started Restore /run/initramfs.
[  OK  ] Reached target Shutdown.
dracut Warning: Killing all remaining processes
Powering off.
reboot: Power down
步驟9. 關閉電源後退出SOL
等待,直到您在SOL控制檯中看到消息關閉,然後按下Ctrl和x(Ctrl+x)從SOL退出,然後再次登入CIMC並再次更改範圍。
(i) Change the scope to virtual media again:
system# scope vmedia
system /vmedia #
 (ii) Unmap the .iso image that you mapped in 2.c:
 system /vmedia # unmap volume_name
 At the Save mapping prompt, enter yes if you want to save the mapping or no if you do not want to save the mapping. For example:
 system /vmedia # unmap apic
 Save mapping? Enther 'yes' or 'no' to confirm (CTRL-C to cancel) → yes
 system /vmedia #
 (iii) Connect back to SOL again:
       system /vmedia #  connect host
步驟10.初始配置
在KVM控制檯上:選擇Power > Power on System以開啟控制器和Sunch KVM的電源,它將要求APIC初始配置。

注意:此方法專門適用於IPv4 APIC(HTTP伺服器)帶外(OOB)定址。請注意,目前不提供IPv6支援。
 意見
意見