Configurar a Tarefa de Serviço HTTP/HTTPS em um Ponto de Acesso WAP125 ou WAP581
Objetivo
O protocolo HTTPS é um protocolo de transferência mais seguro que o HTTP. O ponto de acesso pode ser gerenciado através de conexões HTTP e HTTPS quando os servidores HTTP/HTTPS estiverem configurados. Alguns navegadores usam HTTP, enquanto outros usam HTTPS. Um ponto de acesso deve ter um certificado SSL (Secure Socket Layer) válido para usar serviços HTTPS.
Por que precisamos configurar a Tarefa de Serviço HTTP/HTTPS?
Esse recurso é útil para evitar que hosts invasores acessem o utilitário baseado na Web. Usando a lista de controle de acesso de gerenciamento, ele permite especificar até 10 endereços IP, cinco para IPv4 e cinco para IPv6 para ter acesso ao utilitário baseado na Web.
O objetivo deste documento é mostrar a você como fortalecer sua rede, mostrando como configurar a Tarefa de Serviço HTTP/HTTPS no WAP125.
Dispositivos aplicáveis
- WAP125
- WAP581
Versão de software
- 1.0.0.4 — WAP581
- 1.0.0.5 — WAP125
Colete as informações de suporte
Etapa 1. Faça login no utilitário baseado na Web do seu WAP. O nome do usuário e a senha padrão são cisco/cisco.
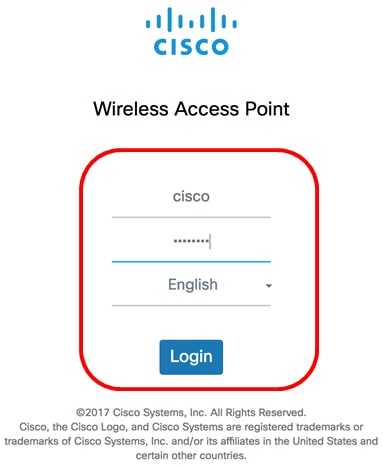
Note: Se você já tiver alterado a senha ou criado uma nova conta, insira suas novas credenciais.
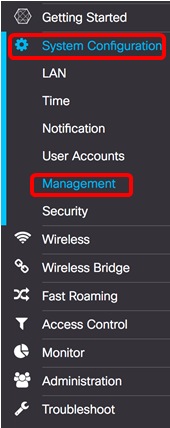
Etapa 2. Escolha Configuração do sistema > Gerenciamento.
Note: As opções disponíveis podem variar dependendo do modelo exato do dispositivo. Neste exemplo, WAP125 é usado.
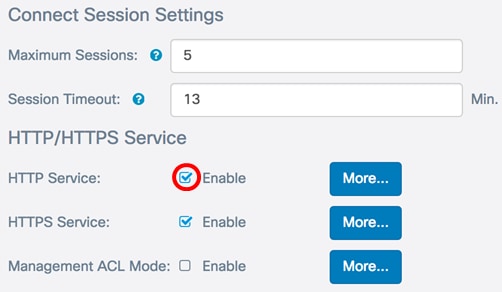
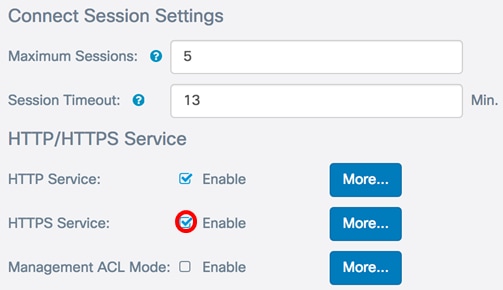
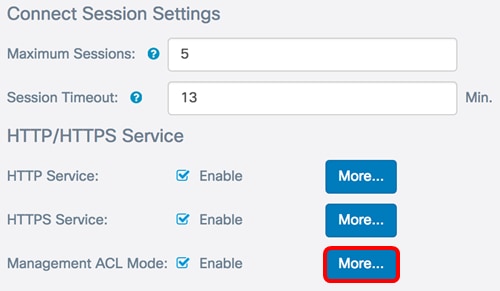
Etapa 3. No campo Máximo de sessões em Configurações da sessão de conexão, insira um valor de 1 a 10 para definir o número máximo de sessões simultâneas na Web. Uma sessão é criada toda vez que um usuário faz logon no dispositivo. Se a sessão máxima for atingida, o próximo usuário que tentar fazer logon no dispositivo com o serviço HTTP ou HTTPS será rejeitado. O padrão é 5.
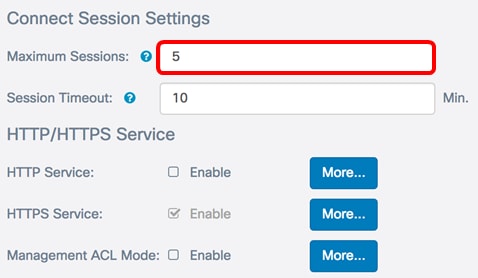
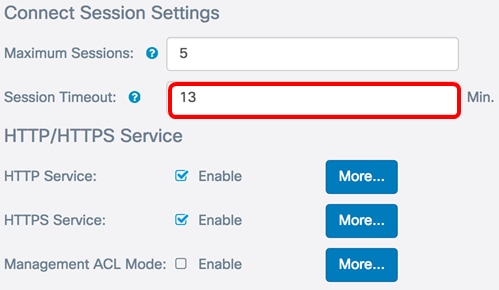
Etapa 4. No campo Session Timeout, insira um valor entre 2 e 60 minutos para definir o tempo em que a sessão da Web pode permanecer ociosa. O valor padrão é 10 minutos.
Note: Neste exemplo, 13 é usado.
Serviço HTTP
Etapa 5. Marque a caixa de seleção Habilitar Serviço HTTP para permitir que sessões da Web sejam conectadas por HTTP.
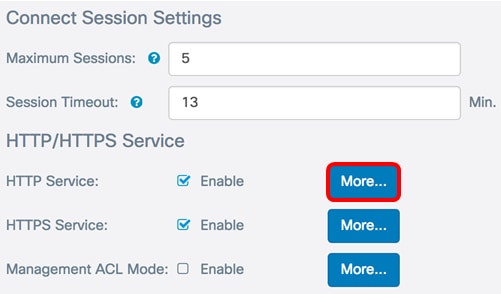
Etapa 6. (Opcional) Clique em Mais para ver mais opções e configurar um número de porta.
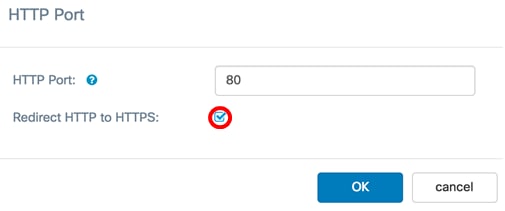
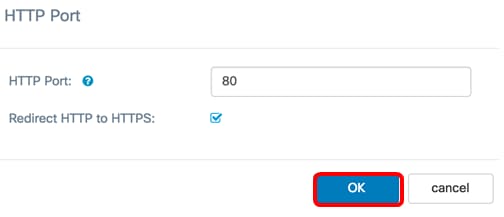
Passo 7. No campo Porta HTTP, insira um número de porta lógica para usar para conexões HTTP. O valor da porta varia de 1025 a 65535. A porta conhecida padrão para conexões HTTP é 80.
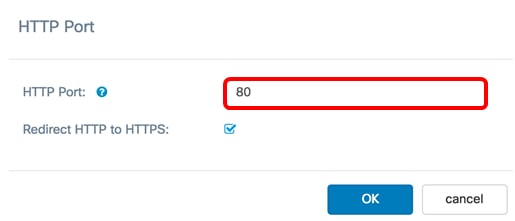
Etapa 8. (Opcional) Marque a caixa de seleção Redirecionar HTTP para HTTPS para permitir que o navegador o redirecione para um protocolo mais seguro, HTTPS, ao estabelecer uma sessão da Web.
Note: Essa opção só estará disponível se a caixa de seleção Serviço HTTP estiver desabilitada na Etapa 4. Neste exemplo, esta opção está marcada.
Etapa 9. Clique em OK para retornar à página Gerenciamento e continuar com a configuração.
Serviço HTTPS
Etapa 10. Marque a caixa de seleção Habilitar Serviço HTTPS para permitir que sessões da Web sejam estabelecidas por meio de um protocolo seguro, HTTPS. Essa opção está habilitada por padrão.
Note: Se essa opção estiver desabilitada, todas as conexões existentes usando o HTTPS serão desconectadas.
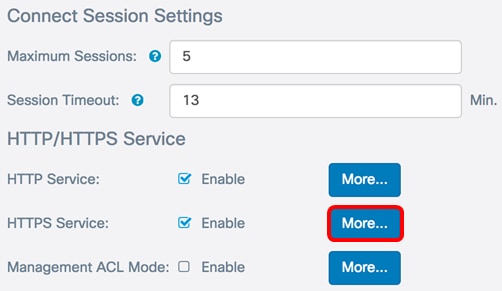
Etapa 11. Clique em Mais para definir uma porta a ser usada por HTTPS e para escolher as versões de segurança da camada de transporte a serem usadas em HTTPS.
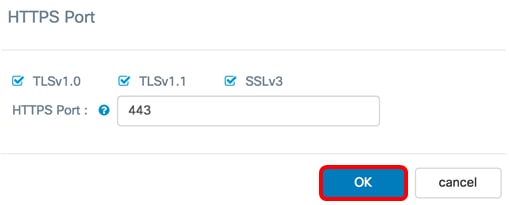
Etapa 12. Na área Porta HTTPS, marque as caixas de seleção dos seguintes protocolos de segurança usados em HTTPS:
- TLSv1.0 — O Transport Layer Security versão 1 (TLSv1) é um protocolo criptográfico que fornece segurança e integridade de dados para comunicação pela Internet.
- TLSv1.1 — Uma versão aprimorada da primeira versão do TSLv1 melhora a segurança e a integridade dos dados para comunicação.
- SSLv3 — SSLv3 (Secure Socket Layer versão 3) é um protocolo usado em HTTPS para estabelecer sessões seguras e comunicação pela Internet.
Note: Neste exemplo, todas as caixas de seleção estão marcadas.

Etapa 13. No campo Porta HTTPS, insira um número de porta lógica para usar para conexões HTTPS. A porta conhecida padrão é 443.
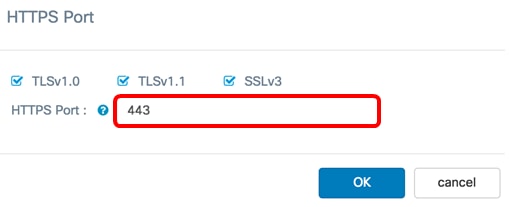
Etapa 14. Clique em OK para continuar.
Modo de ACL de gerenciamento
Etapa 15. Marque a caixa de seleção Enable ACL Mode para especificar uma ACL (Access Control List, lista de controle de acesso) de endereços IP que têm permissão para acessar o utilitário baseado na Web. Se esse recurso estiver desabilitado, ele concederá acesso ao utilitário baseado na Web.

Etapa 16. Clique em Mais para especificar uma lista de endereços IPv4 e IPv6 permitidos para acessar o utilitário baseado na Web.
Etapa 17. Nos campos Endereço IPv4 e Endereço IPv6, insira os endereços IP administrativos nos respectivos formatos que receberão acesso ao utilitário baseado na Web.
Tip: Atribua endereços IP estáticos aos endereços IP administrativos.
Note: Neste exemplo, 192.168.2.123 é usado como o endereço administrativo IPv4 e fdad:b197:cb72:0000:0000:0000:0000:000 é usado como o IPv6 administrativo endereço.
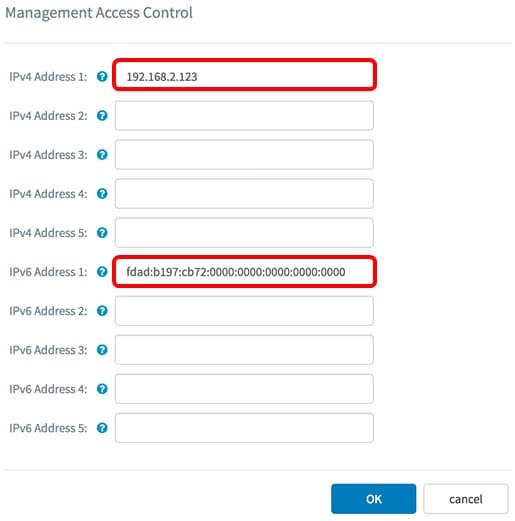
Etapa 18. Click OK.
Etapa 19. Clique no botão Salvar para salvar as configurações definidas.

Agora você deve ter configurado com êxito a Tarefa de Serviço HTTP/HTTPS no ponto de acesso WAP125 ou WAP581.
 Feedback