- Preface
- Chapter 1 - Product Overview
- Chapter 2 - Preparing for Installation
- Chapter 3 - Installing the Client Adapter
- Chapter 4 - Using the Profile Manager
- Chapter 5 - Configuring the Client Adapter
- Chapter 6 - Using EAP Authentication
- Chapter 7 - Viewing Status and Statistics
- Chapter 8 - Using the Aironet System Tray Utility (ASTU)
- Chapter 9 - Routine Procedures
- Chapter 10 - Troubleshooting
- Appendix A - Technical Specifications
- Appendix B - Translated Safety Warnings
- Appendix C - Declarations of Conformity and Regulatory Information
- Appendix D - Channels, Power Levels, and Antenna Gains
- Appendix E - Configuring the Client Adapter through the Windows XP Operating System
- Glossary
- Index
Cisco Aironet 802.11a/b/g Wireless LAN Client Adapters (CB21AG and PI21AG) Installation and Configuration Guide, OL-4211-02
Bias-Free Language
The documentation set for this product strives to use bias-free language. For the purposes of this documentation set, bias-free is defined as language that does not imply discrimination based on age, disability, gender, racial identity, ethnic identity, sexual orientation, socioeconomic status, and intersectionality. Exceptions may be present in the documentation due to language that is hardcoded in the user interfaces of the product software, language used based on RFP documentation, or language that is used by a referenced third-party product. Learn more about how Cisco is using Inclusive Language.
- Updated:
- June 29, 2007
Chapter: Chapter 10 - Troubleshooting
- Accessing the Latest Troubleshooting Information
- Interpreting the Indicator LEDs
- Troubleshooting the Client Adapter
- Using the Troubleshooting Utility
- Disabling the Microsoft Wireless Configuration Manager (Windows XP Only)
- Disabling the Microsoft 802.1X Supplicant
- Client Adapter Recognition Problems
- Resolving Resource Conflicts
- Problems Associating to an Access Point
- Problems Authenticating to an Access Point
- Problems Connecting to the Network
- Prioritizing Network Connections
- Parameters Missing from Profile Management Windows
- Windows Wireless Network Connection Icon Shows Unavailable Connection (Windows XP Only)
- Error Messages
Troubleshooting
This chapter provides information for diagnosing and correcting common problems that may occur when you install and operate the client adapter.
The following topics are covered in this chapter:
•![]() Accessing the Latest Troubleshooting Information
Accessing the Latest Troubleshooting Information
•![]() Interpreting the Indicator LEDs
Interpreting the Indicator LEDs
•![]() Troubleshooting the Client Adapter
Troubleshooting the Client Adapter
Accessing the Latest Troubleshooting Information
This chapter provides basic troubleshooting tips for your client adapter. For more up-to-date and detailed troubleshooting information, refer to the TAC web site. To access this site, go to Cisco.com, click Technical Support > Hardware Support > Wireless Devices. Then choose your product and click Troubleshooting to find information on the problem you are experiencing.
Interpreting the Indicator LEDs
The client adapter shows messages through its two LEDs. Table 10-1 interprets the LED operating messages.
Troubleshooting the Client Adapter
This section provides troubleshooting tips should you encounter problems with your client adapter. Use Table 10-2 to quickly find specific troubleshooting information.
Using the Troubleshooting Utility
The troubleshooting utility enables you to identify and resolve configuration and association problems with your client adapter. It is meant to be used only when the client adapter is in infrastructure mode because it assesses the connection between the adapter and an access point.
Follow the instructions in one of the subsections below to use the utility to diagnosis your client adapter's operation, save a detailed report to a text file, or access online help.
Diagnosing Your Client Adapter's Operation
Step 1 ![]() Perform one of the following to activate the troubleshooting utility:
Perform one of the following to activate the troubleshooting utility:
•![]() Open ADU; choose Troubleshooting from the Action drop-down menu.
Open ADU; choose Troubleshooting from the Action drop-down menu.
•![]() Open ADU; click the Diagnostics tab and Troubleshooting.
Open ADU; click the Diagnostics tab and Troubleshooting.
•![]() Right-click the ASTU icon; choose Troubleshooting from the pop-up menu.
Right-click the ASTU icon; choose Troubleshooting from the pop-up menu.
The Troubleshooting Utility window appears (see Figure 10-1).
Figure 10-1 Troubleshooting Utility Window
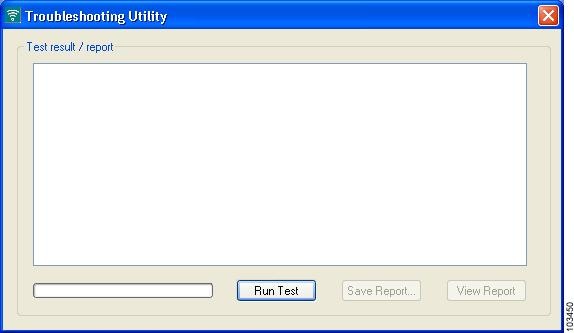
Step 2 ![]() Click Run Test. The utility performs the following series of seven tests to check the operation of your client adapter and to identify specific problems if they exist:
Click Run Test. The utility performs the following series of seven tests to check the operation of your client adapter and to identify specific problems if they exist:
1. ![]() Driver installation test
Driver installation test
2. ![]() Card insertion test
Card insertion test
3. ![]() Card enable test
Card enable test
4. ![]() Radio test
Radio test
5. ![]() Association test
Association test
6. ![]() Authentication test
Authentication test
7. ![]() Network test
Network test
The utility runs and then displays the results for each test (see Figure 10-2).
Figure 10-2 Troubleshooting Utility Window (with Test Results)
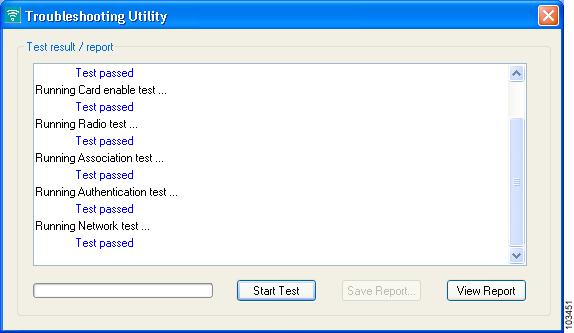
One of the following status messages appears for each test:
•![]() Test passed—The test completed successfully.
Test passed—The test completed successfully.
•![]() Test bypassed—The test was skipped because it was not required for the active profile.
Test bypassed—The test was skipped because it was not required for the active profile.
•![]() Test failed—The test failed. Follow the instructions in Step 3Step 3 to obtain more details.
Test failed—The test failed. Follow the instructions in Step 3Step 3 to obtain more details.

Note ![]() You can click Stop Test at any time to stop the testing process, or you can click Start Test after the testing process has stopped to run the test again.
You can click Stop Test at any time to stop the testing process, or you can click Start Test after the testing process has stopped to run the test again.
Step 3 ![]() To view more detailed information, click View Report. A report appears that provides more detailed results for your client adapter (see Figure 10-3).
To view more detailed information, click View Report. A report appears that provides more detailed results for your client adapter (see Figure 10-3).
Figure 10-3 Troubleshooting Utility Window (Detailed Report)
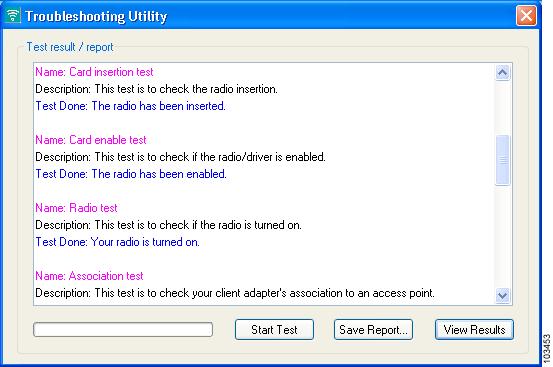
Note ![]() The report contains valuable information that, if necessary, could be used by your system administrator or TAC to analyze any problems. Follow the instructions in the next section if you want to save the report to a text file.
The report contains valuable information that, if necessary, could be used by your system administrator or TAC to analyze any problems. Follow the instructions in the next section if you want to save the report to a text file.
Step 4 ![]() If a problem is discovered, the report provides some possible repair suggestions. Follow the repair instructions carefully and run the troubleshooting utility again.
If a problem is discovered, the report provides some possible repair suggestions. Follow the repair instructions carefully and run the troubleshooting utility again.
Saving the Detailed Report to a Text File
Follow the steps below to save the detailed troubleshooting report to your computer's hard drive.
Step 1 ![]() Click Save Report. The Save Report window appears (see Figure 10-4).
Click Save Report. The Save Report window appears (see Figure 10-4).
Figure 10-4 Save Report Window
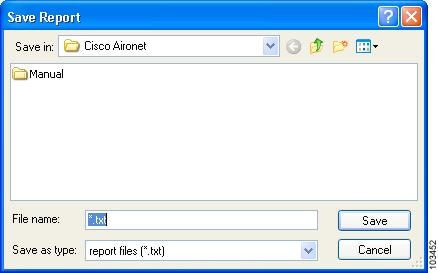
Step 2 ![]() Enter a name for the detailed report in the File name field. The report is saved as a *.txt file.
Enter a name for the detailed report in the File name field. The report is saved as a *.txt file.
Step 3 ![]() Use the Save in box at the top of the window to specify the location on your computer's hard drive where the file will be saved.
Use the Save in box at the top of the window to specify the location on your computer's hard drive where the file will be saved.
Note ![]() The default location is the directory where ADU is installed (such as C:\Program Files\Cisco Aironet).
The default location is the directory where ADU is installed (such as C:\Program Files\Cisco Aironet).
Step 4 ![]() Click Save. The file is saved as a text file in the location specified.
Click Save. The file is saved as a text file in the location specified.
Disabling the Microsoft Wireless Configuration Manager (Windows XP Only)
If any conflicts arise between ADU and the Microsoft Wireless Configuration Manager on a computer running Windows XP, follow these steps to disable the Microsoft configuration manager.
Note ![]() If you chose to configure your client adapter using ADU during installation, the Microsoft 802.1X supplicant should already be disabled.
If you chose to configure your client adapter using ADU during installation, the Microsoft 802.1X supplicant should already be disabled.
Note ![]() Disabling the Microsoft Wireless Configuration Manager on Windows XP also disables the Microsoft 802.1X supplicant.
Disabling the Microsoft Wireless Configuration Manager on Windows XP also disables the Microsoft 802.1X supplicant.
Step 1 ![]() Double-click My Computer, Control Panel, and Network Connections.
Double-click My Computer, Control Panel, and Network Connections.
Step 2 ![]() Right-click Wireless Network Connection and click Properties.
Right-click Wireless Network Connection and click Properties.
Step 3 ![]() Click the Wireless Networks tab and uncheck the Use Windows to configure my wireless network settings check box.
Click the Wireless Networks tab and uncheck the Use Windows to configure my wireless network settings check box.
Step 4 ![]() Click OK to save your settings.
Click OK to save your settings.
Disabling the Microsoft 802.1X Supplicant
The Microsoft 802.1X supplicant can be installed on a computer running Windows 2000 through either a Microsoft hot fix or Windows 2000 Service Pack 4. If any conflicts arise between ADU and the Microsoft 802.1X supplicant, follow these steps to disable the Microsoft supplicant on a Windows 2000 computer.
Note ![]() The Microsoft 802.1X supplicant, if installed, should have been disabled during installation.
The Microsoft 802.1X supplicant, if installed, should have been disabled during installation.
Note ![]() Disabling the Microsoft Wireless Configuration Manager on Windows XP also disables the Microsoft 802.1X supplicant.
Disabling the Microsoft Wireless Configuration Manager on Windows XP also disables the Microsoft 802.1X supplicant.
Step 1 ![]() Double-click My Computer, Control Panel, and Network and Dial-up Connections. Right-click Local Area Connection. Click Properties. The Local Area Connection Properties window appears.
Double-click My Computer, Control Panel, and Network and Dial-up Connections. Right-click Local Area Connection. Click Properties. The Local Area Connection Properties window appears.
Step 2 ![]() Click the Authentication tab.
Click the Authentication tab.
Step 3 ![]() Uncheck the Enable network access control using IEEE 802.1X or Enable IEEE 802.1x authentication for this network check box.
Uncheck the Enable network access control using IEEE 802.1X or Enable IEEE 802.1x authentication for this network check box.
Step 4 ![]() Click OK to save your settings.
Click OK to save your settings.
Client Adapter Recognition Problems
If your computer's PCMCIA adapter does not recognize your client adapter, check your computer's BIOS and make sure that the PC card controller mode is set to PCIC compatible.
Note ![]() A computer's BIOS varies depending on the manufacturer. For support on BIOS-related issues, consult your computer's manufacturer.
A computer's BIOS varies depending on the manufacturer. For support on BIOS-related issues, consult your computer's manufacturer.
Resolving Resource Conflicts
If you encounter problems while installing your client adapter on a computer running a Windows operating system, you may need to specify a different interrupt request (IRQ) or I/O range for the adapter.
The default IRQ for the client adapter is IRQ 10, which may not work for all systems. Follow the steps for your specific operating system to obtain an available IRQ.
During installation the adapter's driver installation script scans for an unused I/O range. The installation can fail if the I/O range found by the driver installation script is occupied by another device but not reported by Windows. An I/O range might not be reported if a device is physically present in the system but not enabled under Windows. Follow the steps for your specific operating system to obtain an available I/O range.
Resolving Resource Conflicts in Windows 2000
Step 1 ![]() Double-click My Computer, Control Panel, and System.
Double-click My Computer, Control Panel, and System.
Step 2 ![]() Click the Hardware tab and Device Manager.
Click the Hardware tab and Device Manager.
Step 3 ![]() Double-click Network Adapters and the Cisco Systems Wireless LAN Adapter.
Double-click Network Adapters and the Cisco Systems Wireless LAN Adapter.
Step 4 ![]() In the General window, the Device Status field indicates if a resource problem exists. If a problem is indicated, click the Resources tab.
In the General window, the Device Status field indicates if a resource problem exists. If a problem is indicated, click the Resources tab.
Step 5 ![]() Uncheck the Use automatic settings check box.
Uncheck the Use automatic settings check box.
Step 6 ![]() Under Resource Settings or Resource Type, click Input/Output Range.
Under Resource Settings or Resource Type, click Input/Output Range.
Step 7 ![]() Look in the Conflicting Device list at the bottom of the window. If it indicates that the range is being used by another device, click the Change Setting button.
Look in the Conflicting Device list at the bottom of the window. If it indicates that the range is being used by another device, click the Change Setting button.
Step 8 ![]() Scroll through the ranges in the Value dialog box and choose one that does not conflict with another device. The Conflict Information window at the bottom of the window indicates if the range is already being used.
Scroll through the ranges in the Value dialog box and choose one that does not conflict with another device. The Conflict Information window at the bottom of the window indicates if the range is already being used.
Step 9 ![]() Click OK.
Click OK.
Step 10 ![]() Under Resource Settings or Resource Type, click Interrupt Request.
Under Resource Settings or Resource Type, click Interrupt Request.
Step 11 ![]() Look in the Conflicting Device list at the bottom of the window. If it indicates that the IRQ is being used by another device, click the Change Setting button.
Look in the Conflicting Device list at the bottom of the window. If it indicates that the IRQ is being used by another device, click the Change Setting button.
Step 12 ![]() Scroll through the IRQs in the Value dialog box and choose one that does not conflict with another device. The Conflict Information window at the bottom of the window indicates if the IRQ is already being used.
Scroll through the IRQs in the Value dialog box and choose one that does not conflict with another device. The Conflict Information window at the bottom of the window indicates if the IRQ is already being used.
Step 13 ![]() Click OK.
Click OK.
Step 14 ![]() Reboot your computer.
Reboot your computer.
Resolving Resource Conflicts in Windows XP
Note ![]() These instructions assume you are using the Windows XP classic view, not the category view.
These instructions assume you are using the Windows XP classic view, not the category view.
Step 1 ![]() Double-click My Computer, Control Panel, and System.
Double-click My Computer, Control Panel, and System.
Step 2 ![]() Click the Hardware tab and Device Manager.
Click the Hardware tab and Device Manager.
Step 3 ![]() Under Network Adapters, double-click the Cisco Systems Wireless LAN Adapter.
Under Network Adapters, double-click the Cisco Systems Wireless LAN Adapter.
Step 4 ![]() In the General window, the Device Status field indicates if a resource problem exists. If a problem is indicated, click the Resources tab.
In the General window, the Device Status field indicates if a resource problem exists. If a problem is indicated, click the Resources tab.
Step 5 ![]() Uncheck the Use automatic settings check box.
Uncheck the Use automatic settings check box.
Step 6 ![]() Under Resource Settings, click I/O Range.
Under Resource Settings, click I/O Range.
Step 7 ![]() Look in the Conflicting Device list at the bottom of the window. If it indicates that the range is being used by another device, click the Change Setting button.
Look in the Conflicting Device list at the bottom of the window. If it indicates that the range is being used by another device, click the Change Setting button.
Step 8 ![]() Scroll through the ranges in the Value dialog box and choose one that does not conflict with another device. The Conflict Information window at the bottom of the window indicates if the range is already being used.
Scroll through the ranges in the Value dialog box and choose one that does not conflict with another device. The Conflict Information window at the bottom of the window indicates if the range is already being used.
Step 9 ![]() Click OK.
Click OK.
Step 10 ![]() Under Resource Settings, click IRQ.
Under Resource Settings, click IRQ.
Step 11 ![]() Look in the Conflicting Device list at the bottom of the window. If it indicates that the IRQ is being used by another device, click the Change Setting button.
Look in the Conflicting Device list at the bottom of the window. If it indicates that the IRQ is being used by another device, click the Change Setting button.
Step 12 ![]() Scroll through the IRQs in the Value dialog box and choose one that does not conflict with another device. The Conflict Information window at the bottom of the window indicates if the IRQ is already being used.
Scroll through the IRQs in the Value dialog box and choose one that does not conflict with another device. The Conflict Information window at the bottom of the window indicates if the IRQ is already being used.
Step 13 ![]() Click OK.
Click OK.
Step 14 ![]() Reboot your computer.
Reboot your computer.
Problems Associating to an Access Point
Follow the instructions below if your client adapter fails to associate to an access point.
•![]() If possible, move your workstation a few feet closer to an access point and try again.
If possible, move your workstation a few feet closer to an access point and try again.
•![]() Make sure that the client adapter is securely inserted in your computer's client adapter slot.
Make sure that the client adapter is securely inserted in your computer's client adapter slot.
•![]() If you are using a PCI card, make sure that the antenna is securely attached.
If you are using a PCI card, make sure that the antenna is securely attached.
•![]() Make sure that the access point is turned on and operating.
Make sure that the access point is turned on and operating.
•![]() Check that all parameters are set properly for both the client adapter and the access point. These include the SSID, EAP authentication, WEP activation, network type, channel, etc.
Check that all parameters are set properly for both the client adapter and the access point. These include the SSID, EAP authentication, WEP activation, network type, channel, etc.
•![]() Follow the instructions in the previous section to resolve any resource conflicts.
Follow the instructions in the previous section to resolve any resource conflicts.
•![]() If the client adapter still fails to establish contact, refer to the "Obtaining Technical Assistance" section in the Preface for technical support information.
If the client adapter still fails to establish contact, refer to the "Obtaining Technical Assistance" section in the Preface for technical support information.
Problems Authenticating to an Access Point
If your client adapter is a 40-bit card and LEAP or EAP is enabled, the adapter can associate but not authenticate to access points using 128-bit encryption. To authenticate to an access point using 128-bit encryption, you have two options:
•![]() Purchase a 128-bit client adapter. This is the most secure option.
Purchase a 128-bit client adapter. This is the most secure option.
•![]() Disable static WEP for the client adapter and configure the adapter and the access point to associate to mixed cells. This option presents a security risk because your data is not encrypted as it is sent over the RF network.
Disable static WEP for the client adapter and configure the adapter and the access point to associate to mixed cells. This option presents a security risk because your data is not encrypted as it is sent over the RF network.
Problems Connecting to the Network
After you have installed the appropriate driver and client utilities, contact your IS department if you have a problem connecting to the network. Proxy server, network protocols, and further authentication information might be needed to connect to the network.
Prioritizing Network Connections
If your computer has more than one network adapter enabled (such as a Cisco Aironet client adapter and an Ethernet card), you can choose which one to use by assigning a priority to your network connections.
Follow the steps below to prioritize your network connections.
Step 1 ![]() Right-click the My Network Places icon on your desktop.
Right-click the My Network Places icon on your desktop.
Step 2 ![]() Click Properties.
Click Properties.
Step 3 ![]() Choose the Advanced menu option at the top of the window.
Choose the Advanced menu option at the top of the window.
Step 4 ![]() Click Advanced Settings. Your network connections are listed in the Connections box on the Adapters and Bindings tab.
Click Advanced Settings. Your network connections are listed in the Connections box on the Adapters and Bindings tab.
Step 5 ![]() Use the arrows beside the Connections box to move the network connection that you want to use to the top.
Use the arrows beside the Connections box to move the network connection that you want to use to the top.
Step 6 ![]() Click OK.
Click OK.
Parameters Missing from Profile Management Windows
If some parameters are unavailable on the Profile Management windows, your system administrator may have used an administrative tool to deactivate these parameters. In this case, these parameters cannot be selected.
Windows Wireless Network Connection Icon Shows Unavailable Connection (Windows XP Only)
If your computer is running Windows XP and you configured your client adapter using ADU, the Windows Wireless Network Connection icon in the Windows system tray may be marked with a red X and show an unavailable connection even though a wireless connection exists. This is caused by a conflict between the wireless network settings of ADU and Windows XP. Simply ignore the Windows icon and use the ASTU icon to check the status of your client adapter's wireless connection.
Error Messages
This section provides a list of error messages that may appear during the installation, configuration, or use of your client adapter. The messages are listed in alphabetical order within each section, and an explanation as well as a recommended user action are provided for each message.
Error Message At least one wireless checkbox must be selected.
Explanation You clicked OK or selected another Profile Management tab before selecting any Wireless Mode options on the Profile Management (Advanced) window.
Recommended Action Choose at least one of the Wireless Mode options.
Error Message Authentication failed.
Explanation The domain logon failed for an unknown reason.
Recommended Action Try again to authenticate. If this message reappears, verify that all of the proper certificates have been loaded onto your computer and that your client adapter's current profile has been configured properly. If the domain logon continues to fail, contact your system administrator.
Error Message Authentication failed because server rejected username or password.
Explanation The domain logon failed because your username or password is invalid.
Recommended Action Re-enter your username and password on the Define PEAP (EAP-GTC) Configuration window or the Define PEAP (EAP-MSCHAP V2) Configuration window and save your settings. Then try again to authenticate.
Error Message    Authentication failed due to invalid client attributes (e.g., Login
Name).
Explanation The domain logon failed because of an invalid client configuration setting, such as a mistyped login name.
Recommended Action Return to the PEAP configuration windows, verify your settings, and make any necessary modifications.
Error Message Authentication failed due to invalid client certificate.
Explanation The domain logon failed because of an invalid client certificate.
Recommended Action Contact your system administrator to obtain a valid certificate.
Error Message Authentication failed due to invalid server certificate.
Explanation The domain logon failed because of an invalid server certificate.
Recommended Action Contact your system administrator.
Error Message Authentication failed due to invalid server/domain name.
Explanation The domain logon failed because of an invalid server/domain name.
Recommended Action Make sure the Specific Server or Domain field is blank on the Advanced Configuration window for PEAP (EAP-GTC) or PEAP (EAP-MSCHAP V2). Then follow the instructions in the "Enabling PEAP (EAP-GTC)" section or the "Enabling PEAP (EAP-MSCHAP V2)" section to correctly enter your username in the Login Name field.
Error Message Authentication timed out. Do you want to retry?
Explanation LEAP authentication failed because the authentication server is down.
Recommended Action Click Retry to try to authenticate again using the same credentials or click Cancel to cancel the operation.
Error Message Cannot load oemres.dll.
Explanation The oemres.dll file cannot be installed.
Recommended Action Uninstall the current client adapter software; then install the latest release.
Error Message    Cisco Aironet 802.11a/b/g wireless adapter software update can't
proceed. Please insert the adapter in the system and try again.
Explanation You attempted to upgrade your client adapter's software when the adapter was not inserted in your computer.
Recommended Action Click OK, insert your client adapter, and start the upgrade process again.
Error Message DHCP failure.
Explanation The domain logon failed because of a DHCP failure.
Recommended Action Try again to authenticate. If this message reappears, contact your system administrator.
Error Message Entry must be xx characters long. Please enter xx more characters.
Explanation The static WEP key that you entered on the Define Pre-Shared Keys window does not contain the correct number of characters.
Recommended Action Re-enter the static WEP key following the guidelines in the "Enabling Static WEP" section.
Error Message    Failed to initialize supplicant. This error may be due to the absence
of a valid machine certificate or the incomplete configuration of profiles.
Explanation The domain logon failed because the EAP supplicant could not be initialized.
Recommended Action Verify that a valid machine certificate has been loaded onto your computer and that your client adapter's current profile has been configured properly.
Error Message    In order to select an Ad Hoc network, you must have a Network Name. Do
you want to enter a Network Name?
Explanation You chose Ad Hoc for Network Type on the Profile Management (Advanced) window, but a network name was not entered on the Profile Management (General) window.
Recommended Action If you want to set up an ad hoc network, click Yes and enter a network name in the SSID1 field on the Profile Management (General) window. Otherwise, click No.
Error Message    No certificates were found in your computer. Please select a different
EAP option.
Explanation You tried to choose the EAP-TLS option on the Profile Management (Security) window, but no certificates are installed on your computer. EAP-TLS requires both a Certificate Authority (CA) certificate and a user certificate.
Recommended Action Contact your system administrator if you need help obtaining and importing the necessary certificates.
Error Message Please enter a profile name.
Explanation While creating a new profile, you clicked OK or chose another Profile Management tab before entering a profile name on the Profile Management (General) window.
Recommended Action Enter a profile name.
Error Message Please enter exactly 12 characters, or leave the entry field empty.
Explanation You entered fewer than 12 characters in one of the fields on the Preferred Access Points window.
Recommended Action Leave the fields on the Preferred Access Points window empty or re-enter the MAC address for the specified access point, which must be exactly 12 characters.
Error Message    The configuration name you entered is already being used. Enter a
unique name.
Explanation While creating a new profile, you entered a profile name on the Profile Management (General) window that already exists.
Recommended Action Enter a new profile name.
Error Message The Passphrase must be between 8 and 64 characters.
Explanation The WPA Passphrase that you entered on the Define WPA Pre-Shared Key window did not contain the correct number of characters.
Recommended Action Enter a WPA Passphrase with 8 to 64 characters.
Error Message The password is empty. Please enter a password.
Explanation You chose the Use Saved User Name and Password option on the LEAP Settings window but did not enter a password, or you did not enter a password on the Enter Wireless Network Password window.
Recommended Action Enter your LEAP password in the Password field.
Error Message The passwords you entered do not match. Please enter them again.
Explanation The passwords that you entered in the Password and Confirm Password fields on the LEAP Settings window do not match.
Recommended Action Re-enter your LEAP password in both fields.
Error Message The specified path does not exist. Please enter another path.
Explanation You chose the Make Driver Installation Diskette(s) option during installation, but a diskette was not inserted in the computer's A: drive.
Recommended Action Insert a floppy diskette into your computer's floppy disk drive, and choose the Make Driver Installation Diskette(s) option again.
Error Message The user name is empty. Please enter a user name.
Explanation You chose the Use Saved User Name and Password option on the LEAP Settings window but did not enter a username, or you did not enter a username on the Enter Wireless Network Password window.
Recommended Action Enter your LEAP username in the User Name field.
Error Message    This Device is controlled by the Windows XP Automatic Wireless Network
Configuration. It may override Network Name, Security and other settings from this
profile.
Explanation You attempted to activate ADU while the Microsoft Wireless Configuration Manager in Windows XP was enabled. When a message appeared asking if you wanted to disable the Microsoft configuration manager, you chose No.
Recommended Action If you want to use ADU to configure your client adapter, disable the Microsoft Wireless Configuration Manager.
Error Message    This Product does not support this version of Windows. Please check
the product documentation for the system requirements.
Explanation You tried to install the CB21AG and PI21AG client adapter software on an unsupported Windows operating system.
Recommended Action Install the CB21AG and PI21AG client adapter software on a computer running Windows 2000 or XP.
Error Message `x' contains characters which are non-hexadecimal.
Explanation One of the static WEP keys on the Define Pre-Shared Keys window contains non-hexadecimal characters even though Hexadecimal is specified as the Key Entry type.
Recommended Action Re-enter the static WEP key following the guidelines in the "Enabling Static WEP" section.
Error Message `x' is not a hexadecimal character.
Explanation The character you entered on the Define Pre-Shared Keys window is not a hexadecimal character.
Recommended Action Re-enter the static WEP key following the guidelines in the "Enabling Static WEP" section.
Error Message You must select a Passphrase to use Pre-Shared keys and WPA.
Explanation You chose the Pre-Shared Key (Static WEP) option on the Profile Management (Security) window and clicked OK without entering a static WEP key.
Recommended Action Enter a static WEP key on the Define Pre-Shared Keys window.
Error Message    You must set at least one shared key or the WPA Passphrase to enable
security.
Explanation You chose the WPA Passphrase option on the Profile Management (Security) window and clicked OK without entering a WPA Passphrase.
Recommended Action Enter a WPA Passphrase on the Define WPA Pre-Shared Key window.
Error Message    Your security setting is invalid for an Ad Hoc network. If you want,
security will be disabled for you. You can also configure security to Pre-shared
keys. Do you want to disable security?
Explanation Pre-Shared Key (Static WEP) is the only valid security option for an ad hoc network. You chose Ad Hoc for Network Type on the Profile Management (Advanced) window when a security option other than static WEP was already selected.
Recommended Action If you want to configure this profile for use in an ad hoc network, click Yes to disable security. Otherwise, click No.
 Feedback