Installation and Configuration (Release 4.6)
Available Languages
Table Of Contents
Installation and Configuration
Cisco CTI Driver for Siebel: Installing & Configuring
Installation of Cisco CTI Driver for Siebel
Configuration of Cisco CTI Driver for Siebel
Cisco Data Store: Installing & Configuring
Cisco Data Store Configuration
Step 2: Allow users to access server through DCOM
Step 3: Allow everyone to access Data Store
Step 4: Restrict user rights to Data Store
Step 5: Enter name of Data Store server
Testing Access for Microsoft SQL Server
Installation and Configuration
This chapter discusses installation and configuration of:
•
Cisco CTI Driver for Siebel
•
Cisco CTI Driver for Siebel: Installing & Configuring
The Cisco CTI Driver for Siebel is responsible for mediating between the Siebel application and the Cisco CTI product. This section presents the information that is necessary to install and configure the Cisco CTI Driver for Siebel.
Installation of Cisco CTI Driver for Siebel
This section describes how to use the Setup program to install the Cisco CTI Driver for Siebel. Setup.exe is found in the SiebelCTI folder of the CD. You can use this Setup program to:
•
•
Running Workstation Setup
To run the Setup program so as to install the Cisco CTI Driver for Siebel on a single workstation, perform the following steps:
Step 1
Step 2
Step 3
Step 4
Step 5
Step 6
Running Distribution Setup
To run the Setup program so as to be able to distributively install the Cisco CTI Driver for Siebel on multiple workstations, perform the following steps:

Note
Step 1
Step 2
Step 3
Step 4
Step 5
Step 6
Step 7
Step 8
To distributively install the Cisco CTI Driver for Siebel on other workstations, you can do one of the following:
•
•
Note
Configuration of Cisco CTI Driver for Siebel
Note
Once you have run the Cisco CTI Driver for Siebel Setup program, you must verify that the file uagent.cfg was configured properly. This file is located in c:\siebel\bin.
Step 1
c:\siebel\bin\uagent.cfg
which contains the driver information.
Step 2
Step 3
Table 2-1 describes the configuration parameters used by the Cisco CTI Driver for Siebel. The parameters must be configured in accordance with the CTI Server being used by the particular workstation. We recommend that entries be made for all of the parameters.
Table 2-1 Cisco CTI Driver for Siebel Configuration Parameters
Driver:IsEasySim
String
(TRUE or FALSE)
Simulate call in Siebel Client without CTI Server and GeoDCS.exe.
The default value is FALSE.
Driver: LogFileName
String
(pathname)
Path describing the location and name prefix for the driver log file. This is defaulted to c:\cisco in the shipped Cisco.INI file. If this path is deleted from the Cisco.INI file, the log file will be generated in the system \Win directory.
Driver: TraceLevel
String
(CTITRACE_NONE, CTITRACE_CRITICAL, CTITRACE_SEVERE, CTITRACE_SERIOUS, CTITRACE_WARN, CTITRACE_INFO, or CTITRACE_ALL)
No log information written to log file. Logs only critical events. Logs severe and critical events. Logs serious, severe, and critical events. Logs warnings, serious, ... events. Logs informational, warnings, ... events. Logs all events, including unclassified ones.
The default is CTITRACE_ALL.
Service: PeripheralID
Number
Peripheral ID of the ACD used by the agent.
Service: SideAHost
String
Cisco CTI Server A name or address.
Service: SideBHost
String
Cisco CTI Server B name or address.
Service: SideAPort
Number
Service A port number.
Service: SideBPort
Number
Service B port number.
Service: ViewBmkCookie
String
Call variable used for transferring SiebelView bookmark. During a transfer or conference, a view bookmark is exchanged between members of the call. The allowed values are: CallVariable1, CallVariable2, ... CallVariable10. The default is CallVariable10. Note that if a call variable is being used for this purpose, it cannot be used for any other purpose.
Service: DataServerName
String
Cisco Data Store server name or address.
Service: AgentWorkMode
String
(AutoIn, ManualIn, or Unspecified)
AutoIn: Agent automatically becomes available after handling a call.
ManualIn: Agent must explicitly indicate availability after handling a call.
Unspecified: Use default behavior.
The default is Unspecified.
Service: BroadcastStatistics
String
(TRUE or FALSE)
See "Statistics Broadcast Service" for details.
Cisco Data Store: Installing & Configuring
The Cisco Data Store is used to store the Siebel application call context data during conferences, transfers, and internal calls. This section presents the information that is necessary to install and configure the Cisco Data Store.
Cisco Data Store Installation
The Cisco Data Store must be installed on a commonly accessible machine. The system must be accessible from the current domain. Since your client applications can currently access the CTI Server, you may want to consider installing the data store on the CTI Server machine.
To install, copy the contents of the CiscoDataStore folder (contained in the SiebelCTI folder) from the CD to the root directory of a CTI Server machine. Then run the Install.bat file that is contained in the folder.
Cisco Data Store Configuration
Once you have installed the Cisco Data Store, you must configure the security environment for this component.
To begin configuration:
Step 1
Step 2
Step 3
Step 4
The configuration steps outlined below are designed to maintain a secure server environment and enables minimal user access rights to Cisco Data Store. You may alter this configuration to suit your specific security requirements. The Data Store can run on any NT 4.x system and has very minimal requirements.
Successfully configuring Cisco Data Store involves the following steps:
Step 1
Step 2
Step 3
Step 4
Step 5
The following discussion describes these steps in more detail.
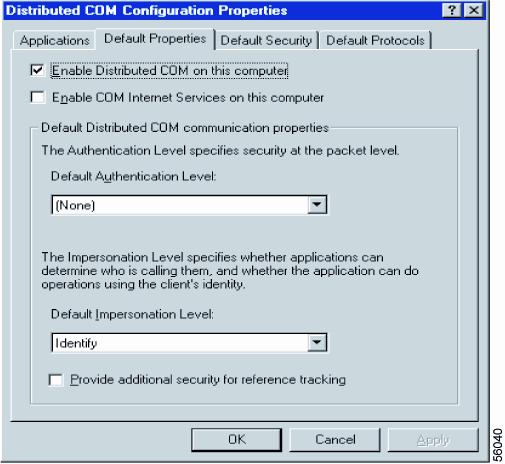
Step 1: Enable DCOM on server
Select the Default Properties tab and make sure the Enable Distributed COM on this computer checkbox is checked.
Step 2: Allow users to access server through DCOM
Step 1
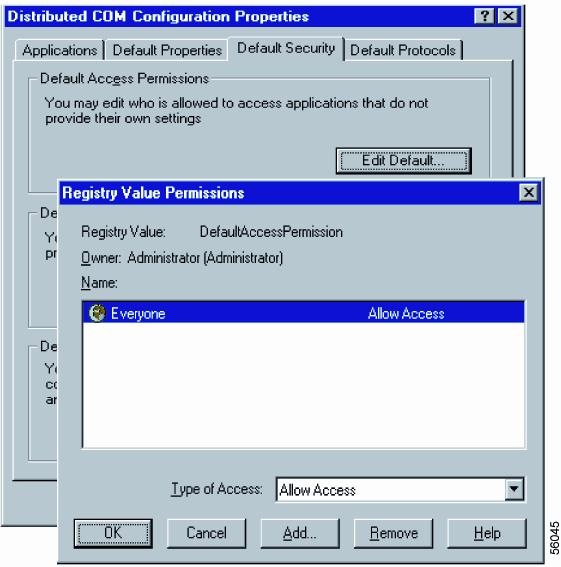
Step 2
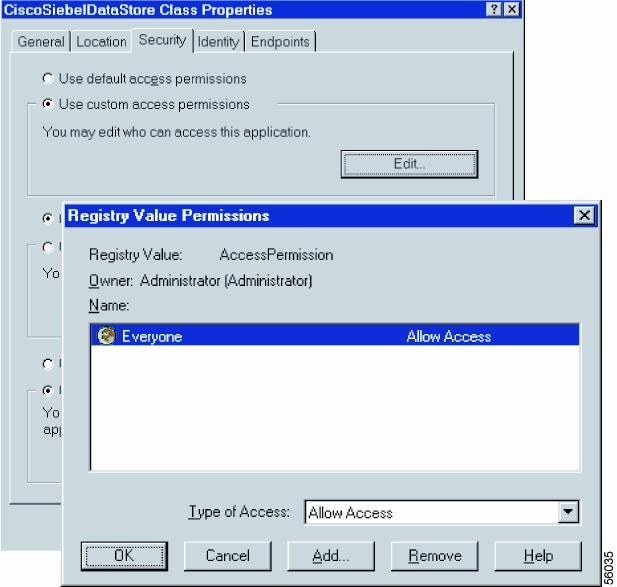
Step 3: Allow everyone to access Data Store
Now that you have granted access for DCOM clients to the server, you need to specify the access and launching rights for the Cisco Data Store.
Step 1

Step 2
Access Rights
Step 1
Step 2
Step 3
Step 4
Step 5
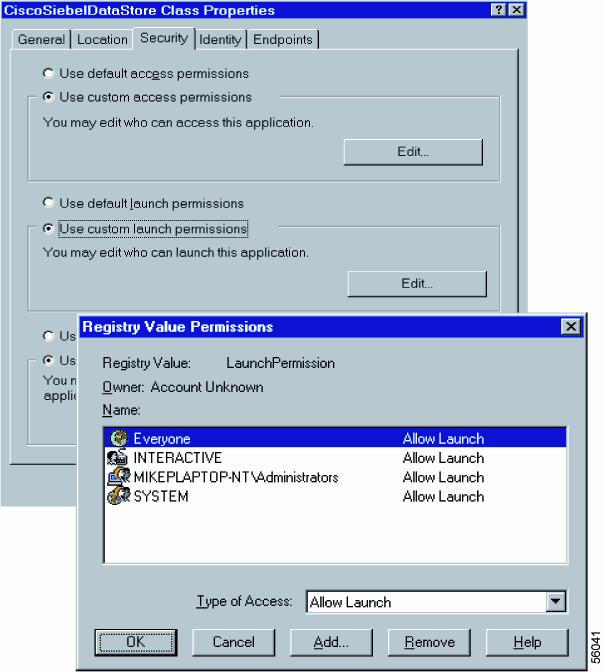
Launching Rights
Step 1
Step 2
Step 3
Step 4
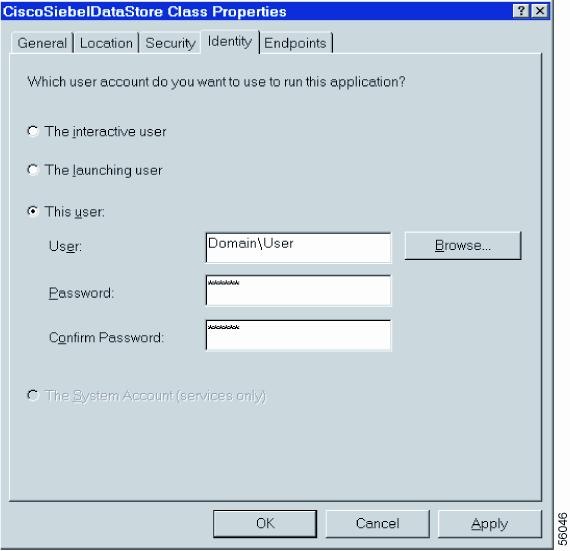
Step 4: Restrict user rights to Data Store
Now that access to the Data Store has been granted, you will want to restrict user rights. To do this, you must specify the identity of a single average user on the server.
Step 1
Step 2
Step 3
Step 5: Enter name of Data Store server
In the configuration of a call center (see step 9 in Table 2-2) be sure to enter the name of the server where the Cisco Data Store resides (see the parameter Service:DataServerName that is described in the "Configuration of Cisco CTI Driver for Siebel" section).
Installation Checklist
Having read the preceding sections, you may find the following checklist helpful.
Table 2-2 Installation Checklist for Integration
1.
Make sure Siebel Client 5.0.2 or above is installed on the host workstation.
Siebel Client Install Manual.
2.
Install Cisco CTI Driver for Siebel from the CD.
"Installation of Cisco CTI Driver for Siebel" section in the current manual.
3.
Install the Cisco Data Store
"Cisco Data Store Installation" section in the current manual.
4.
Configure the Cisco Data Store
"Cisco Data Store Configuration" section in the current manual.
5.
Verify the agent configuration file that uses the driver.
"Configuration of Cisco CTI Driver for Siebel" section in the current manual.
6.
Verify access to database server from workstation.
a.
b.
c.
<drive>:\siebel\bin\uagent.cfg
d.
e.
To test access for Microsoft SQL Server, see the "Testing Access for Microsoft SQL Server" section.
To test access for other database managers, refer to the ODBC driver documentation provided by the database vendor.
7.
Create a shortcut to Siebel Client executable on the workstation's desktop.
a.
b.
c.
d.
e.
/c "<drive>:\siebel\bin\uagent.cfg"
/d server /x
8.
Log into Siebel Enterprise Server as Administrator.
Execute the shortcut and enter User Name: SADMIN, Password: SADMIN. Pre-selected, the last field will display Server.
9.
Configure a Call Center, Users and Telesets in Siebel Server Database.
Section specifying CTI Configuration Settings in Siebel eBusiness Applications/Siebel CTI Guide (Siebel 2000 Manual).
10.
Configure driver parameters for the created Call Center by entering the parameters described in the reference.
Note
Table 2-1 in the "Configuration of Cisco CTI Driver for Siebel" section in the current manual.
Alternatively, rather than referring to Table 2-1 for default/recommended settings, you may refer to Cisco.INI, which can be found in (assuming that the default installation directory was used):
c:\Program Files\Cisco\CTI Desktop\Cisco.INI
11.
Configure Commands and Events in created Call Center.
The Cisco CTI Driver for Siebel Setup installed a sample definition file—CiscoENU.DEF—that can be imported into the database as described in the section on Importing and Exporting CTI Configuration Data in Siebel eBusiness Applications/Siebel CTI Guide (Siebel 2000 Manual). (CiscoENU.DEF is discussed in the current manual in the "Cisco CTI Driver Customization: CiscoENU.DEF" section.)
Note
12.
Test Installation
Obtain a configured Agent ID and Password. Log into the Siebel Client and log into the ACD. If successful, at the status bar you will see the state for the teleset you logged onto. If there is any problem, see "Troubleshooting and Testing"of the current manual.
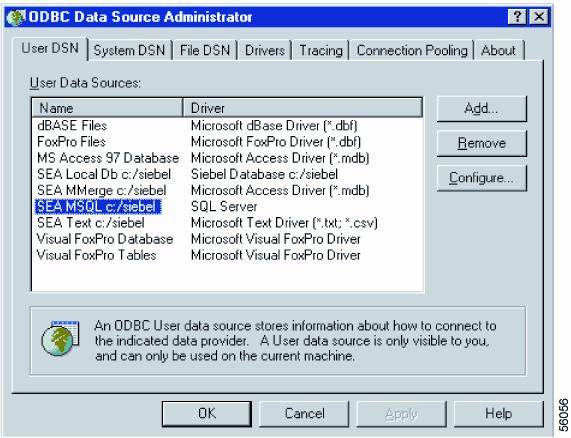
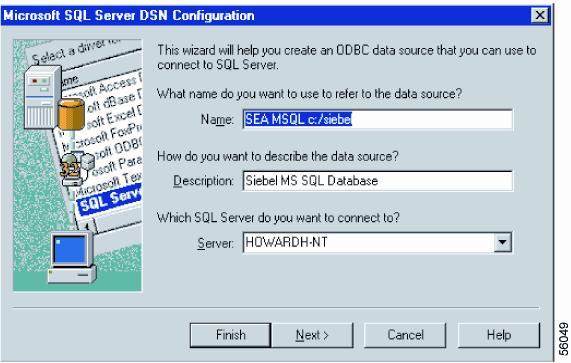
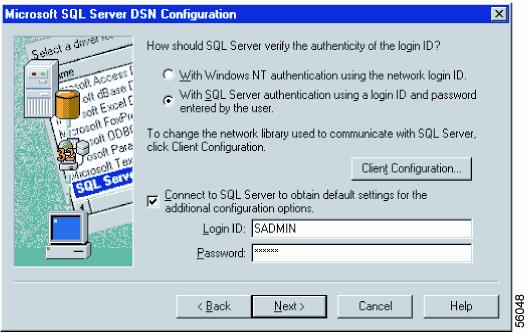
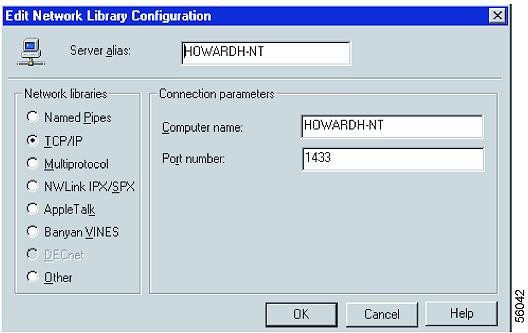
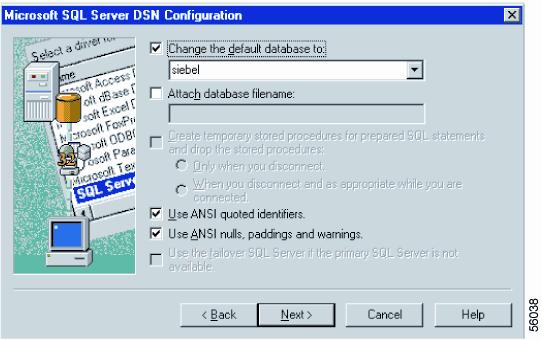
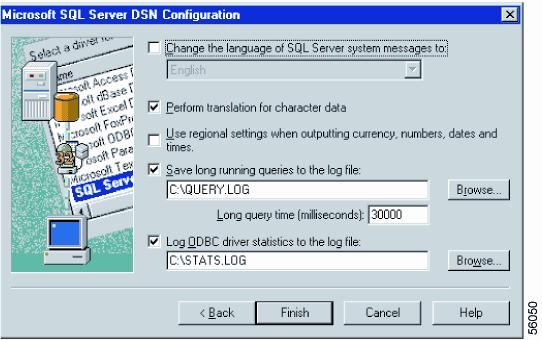
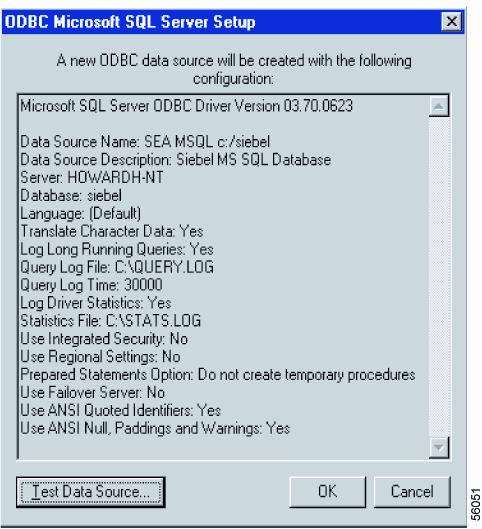
Testing Access for Microsoft SQL Server
Item 6 in the Table 2-2 checklist involves testing access to the database server. The following is a step-by-step process for testing access to a Microsoft SQL Server.
Step 1
Step 2
Step 3
Step 4
Step 5
Step 6
Step 7
Step 8
Step 9

 Feedback