Recovery Guide for Cisco Digital Media System 5.0 Appliances
Bias-Free Language
The documentation set for this product strives to use bias-free language. For the purposes of this documentation set, bias-free is defined as language that does not imply discrimination based on age, disability, gender, racial identity, ethnic identity, sexual orientation, socioeconomic status, and intersectionality. Exceptions may be present in the documentation due to language that is hardcoded in the user interfaces of the product software, language used based on RFP documentation, or language that is used by a referenced third-party product. Learn more about how Cisco is using Inclusive Language.
- Updated:
- March 13, 2015
Chapter: Recovery Procedure for Cisco Video Portal Appliances
Recovery Procedure for Cisco Video Portal
This chapter provides the procedure for recovering from a software failure of the Cisco Video Portal 5.0 in the following sections:
Prerequisites
Before attempting your recovery, you must complete the following tasks:
•![]() Contact your sales engineer or Cisco TAC to obtain the recovery CD for Cisco Video Portal 5.0.
Contact your sales engineer or Cisco TAC to obtain the recovery CD for Cisco Video Portal 5.0.
•![]() Create a backup of the Video Portal appliance. For more information, see the Administration Guide for Cisco Digital Media Manager Appliances 5.0 on Cisco.com.
Create a backup of the Video Portal appliance. For more information, see the Administration Guide for Cisco Digital Media Manager Appliances 5.0 on Cisco.com.
•![]() Write down the network configuration information appropriate for your site, either DHCP or Static (IP address, subnet mask, and gateway).
Write down the network configuration information appropriate for your site, either DHCP or Static (IP address, subnet mask, and gateway).
Recovery Procedure
To recover the Cisco Video Portal, complete the following steps:
Step 1 ![]() Turn on the power to the appliance.
Turn on the power to the appliance.
Step 2 ![]() Insert the recovery CD in the CD/DVD-ROM drive.
Insert the recovery CD in the CD/DVD-ROM drive.
Step 3 ![]() If you see the following screen briefly, the server appliance is booting from the recovery CD.
If you see the following screen briefly, the server appliance is booting from the recovery CD.
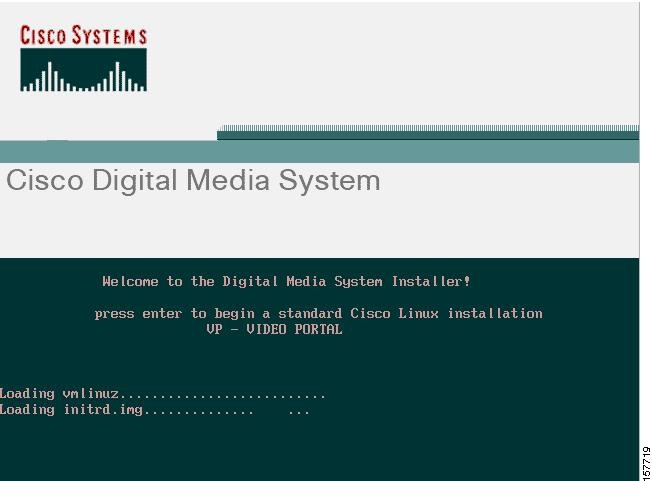
The driver loads. After approximately two minutes, you are asked for confirmation to overwrite the existing system. This erases all existing data on the DMM server appliance. The Video Portal appliance does not require backup. By default No is selected.
Step 4 ![]() Use the Tab key to navigate to Yes and press Enter to proceed.
Use the Tab key to navigate to Yes and press Enter to proceed.
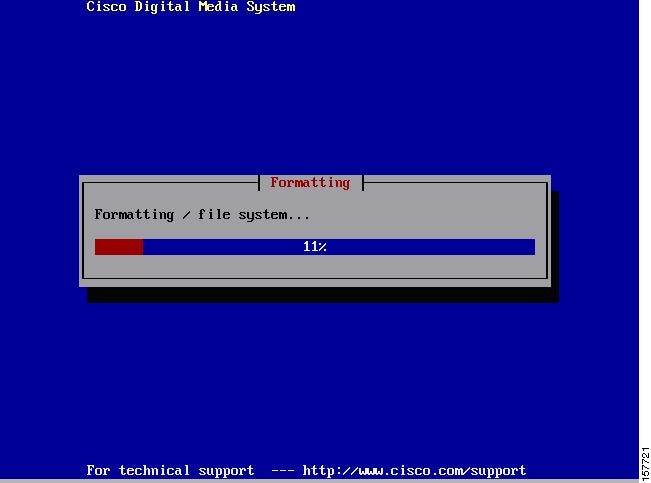
The Formatting screen displays.
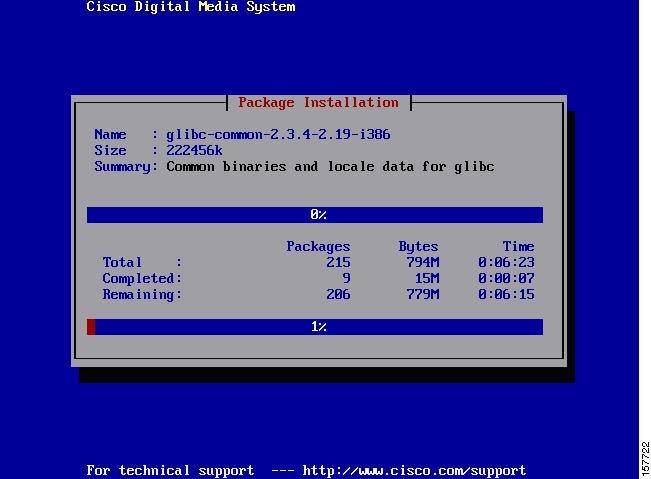
The package installation screen displays.
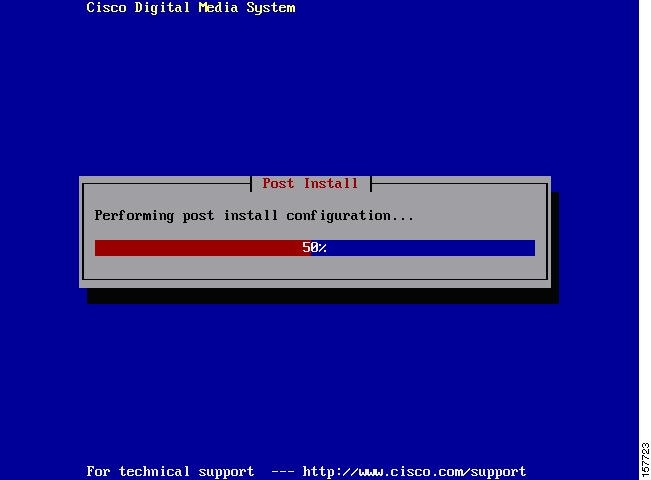
The Post Install screen displays.
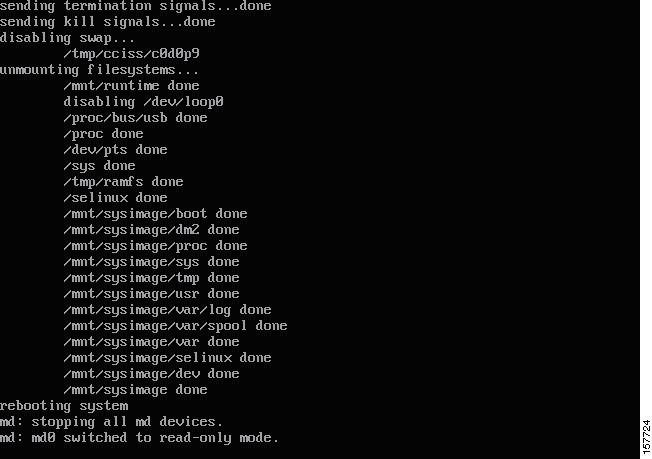
After installation completes, the appliance now reboots, and displays the rebooting system message.
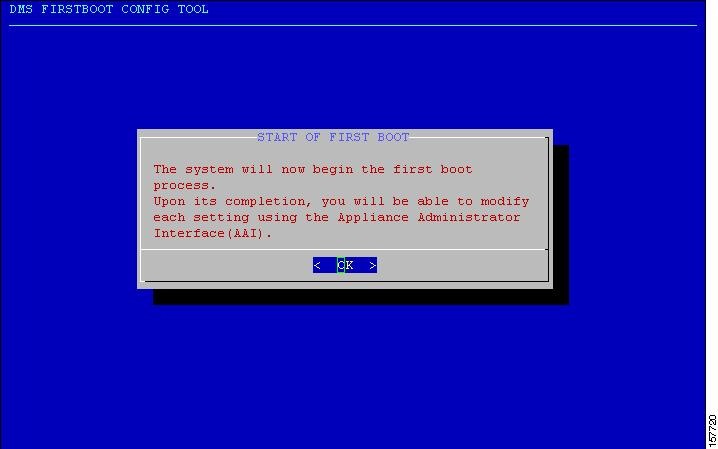
Step 5 ![]() The boot config tool starts automatically the first time you boot the Cisco Video Portal server appliance, taking you into the DMS appliance administration interface (AAI). When you see the Start of First Boot screen, press Enter.
The boot config tool starts automatically the first time you boot the Cisco Video Portal server appliance, taking you into the DMS appliance administration interface (AAI). When you see the Start of First Boot screen, press Enter.
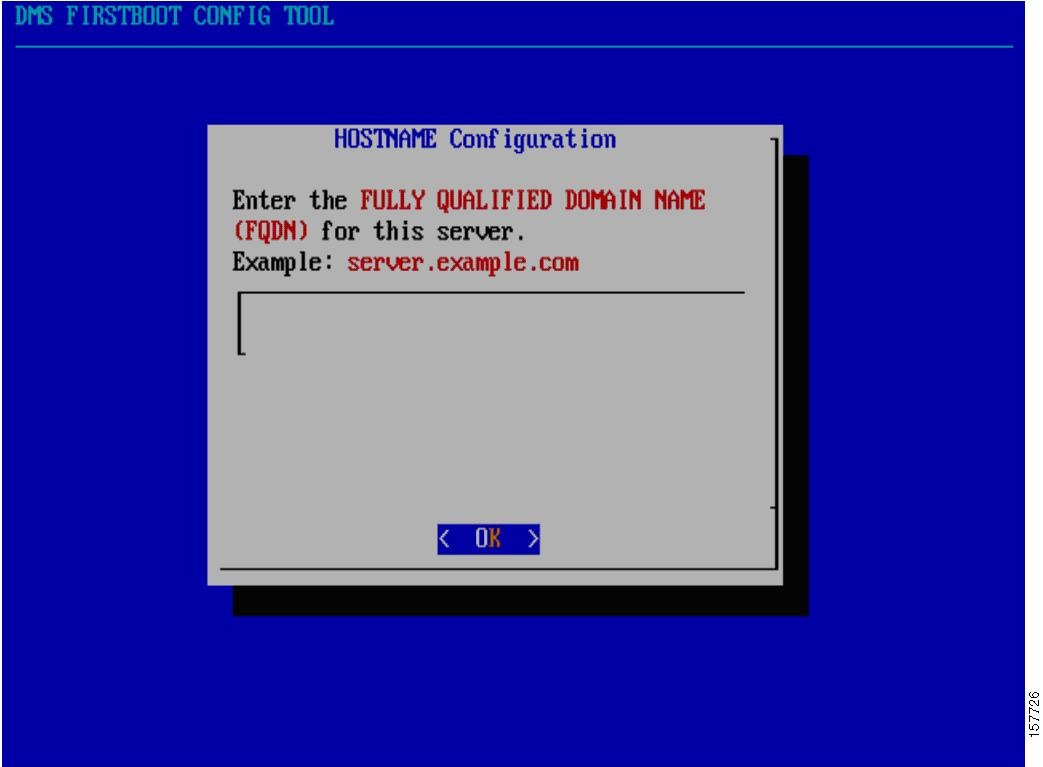
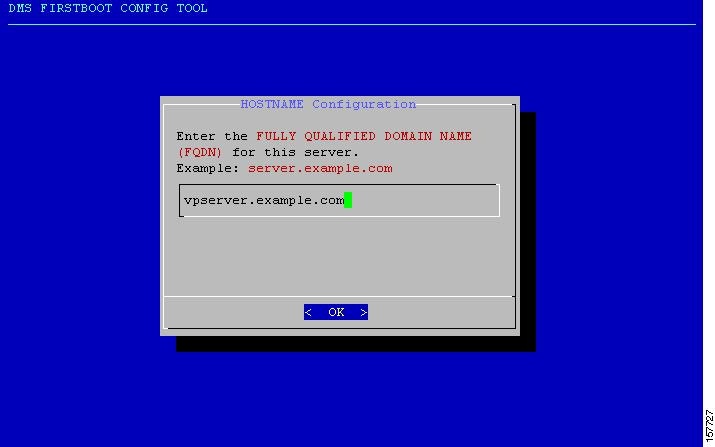
Step 6 ![]() Enter the hostname of the appliance.
Enter the hostname of the appliance.
This screen is an example of the hostname of the appliance being set to server.example.com.
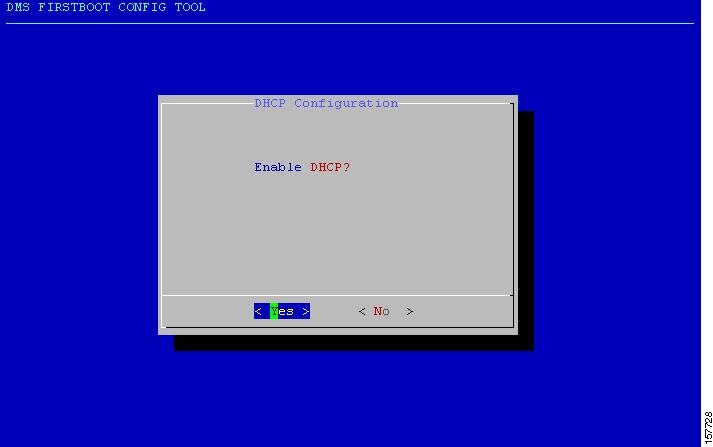
Step 7 ![]() The DHCP configuration screen displays. If the server appliance gets the IP address automatically from the DHCP server, select Yes.
The DHCP configuration screen displays. If the server appliance gets the IP address automatically from the DHCP server, select Yes.

Note ![]() Cisco does not recommend using DHCP. If the IP address of the Video Portal server appliance expires, you must reconfigure the DMM application for successful deployments.
Cisco does not recommend using DHCP. If the IP address of the Video Portal server appliance expires, you must reconfigure the DMM application for successful deployments.
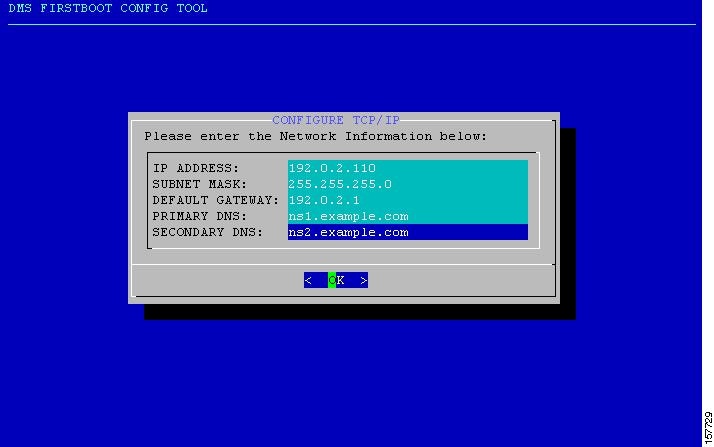
Step 8 ![]() If DHCP is enabled, proceed to Step 14, time zone configuration. If DHCP is disabled, enter the IP address, subnet mask, default gateway, primary DNS and, if available, a secondary DNS. in the Configure TCP/IP screen.
If DHCP is enabled, proceed to Step 14, time zone configuration. If DHCP is disabled, enter the IP address, subnet mask, default gateway, primary DNS and, if available, a secondary DNS. in the Configure TCP/IP screen.
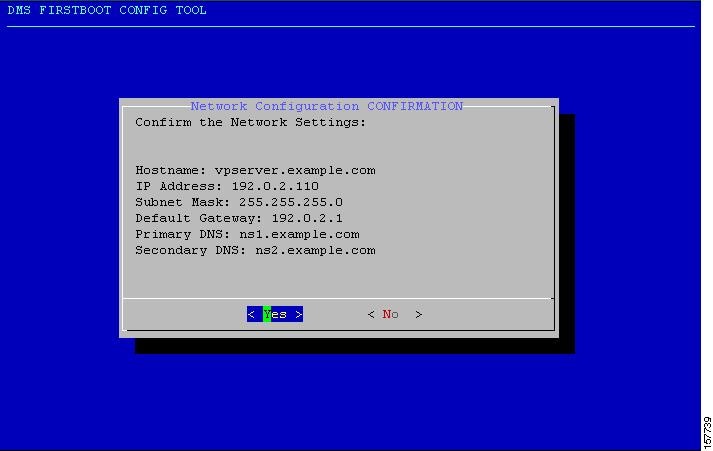
Step 9 ![]() Confirm the network settings. Press Enter if all the information is correct. If the information is incorrect, use the arrow keys to navigate to No and press Enter to re-configure your settings. Then, wait until the network settings are applied. The following example reflects the example configurations shown in Step 8.
Confirm the network settings. Press Enter if all the information is correct. If the information is incorrect, use the arrow keys to navigate to No and press Enter to re-configure your settings. Then, wait until the network settings are applied. The following example reflects the example configurations shown in Step 8.
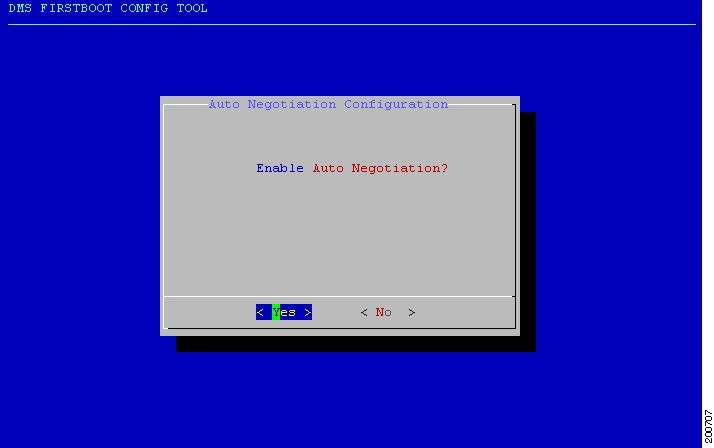
Step 10 ![]() If your network infrastructure requires you to manually specify network negotiation settings, select No to disable auto-negotiation.
If your network infrastructure requires you to manually specify network negotiation settings, select No to disable auto-negotiation.
Step 11 ![]() If you enabled auto-negotiation, go to Step 14, time zone configuration. If auto-negotiation is disabled, set the NIC speed to 10, 100, or 1000 Megabits.
If you enabled auto-negotiation, go to Step 14, time zone configuration. If auto-negotiation is disabled, set the NIC speed to 10, 100, or 1000 Megabits.

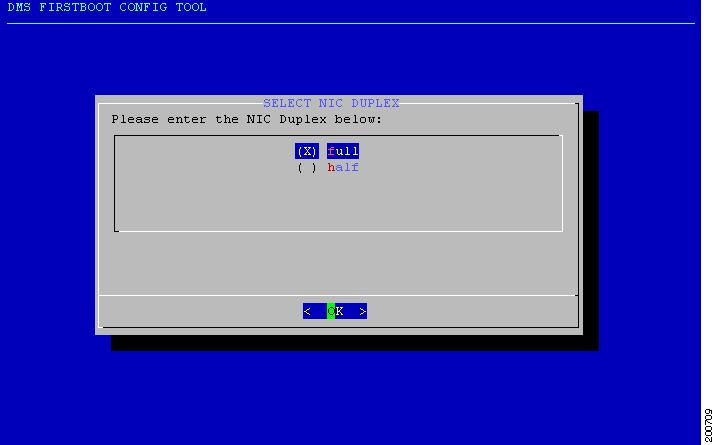
Step 12 ![]() Set your NIC to either full or half duplex.
Set your NIC to either full or half duplex.
Step 13 ![]() Confirm the NIC speed and duplex.
Confirm the NIC speed and duplex.
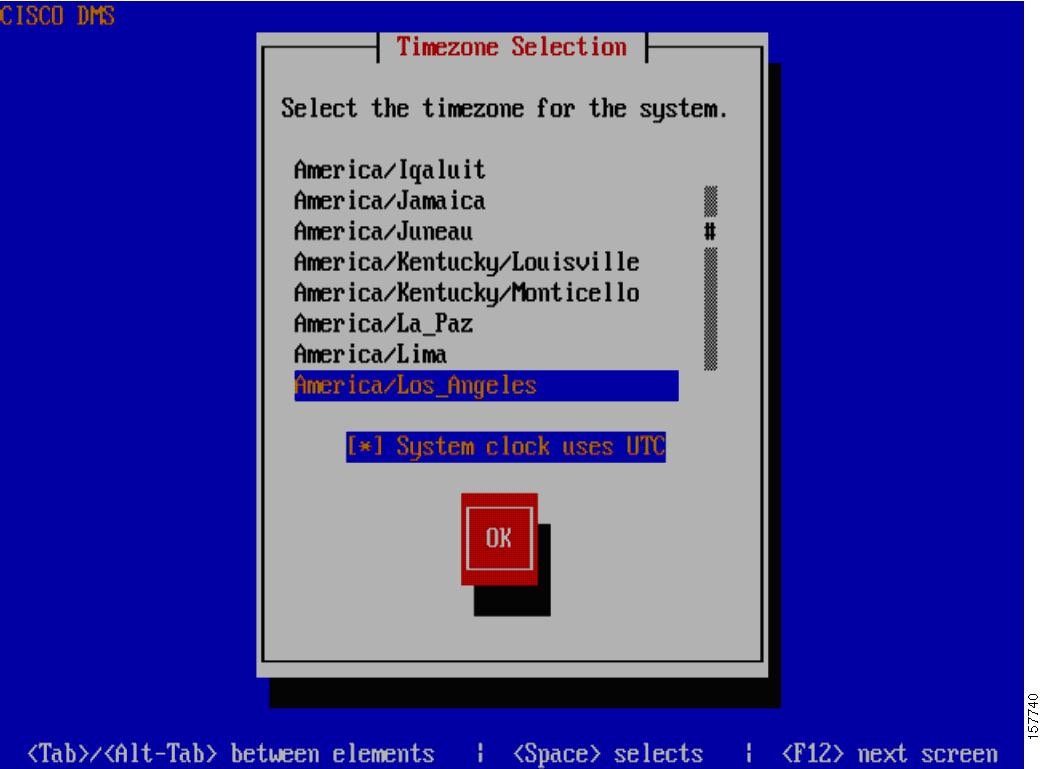
Step 14 ![]() Configure the time zone. Select the timezone by using the up and down arrow. Press Tab, and then press Space to select or deselect System clock uses UTC. Press Tab again to navigate to the OK button, and press Enter.
Configure the time zone. Select the timezone by using the up and down arrow. Press Tab, and then press Space to select or deselect System clock uses UTC. Press Tab again to navigate to the OK button, and press Enter.
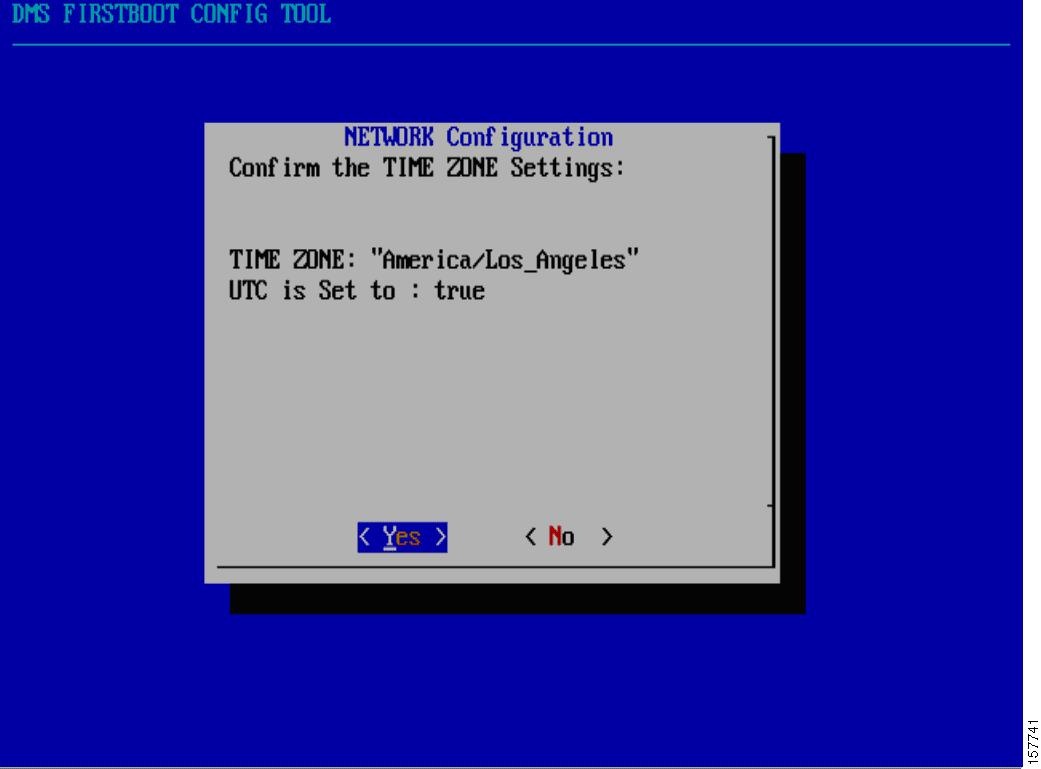
Step 15 ![]() Confirm the time zone setting. Press Enter on if all the information is correct. If the information is incorrect, use the arrow keys to navigate to No and press Enter to re-configure your settings.
Confirm the time zone setting. Press Enter on if all the information is correct. If the information is incorrect, use the arrow keys to navigate to No and press Enter to re-configure your settings.
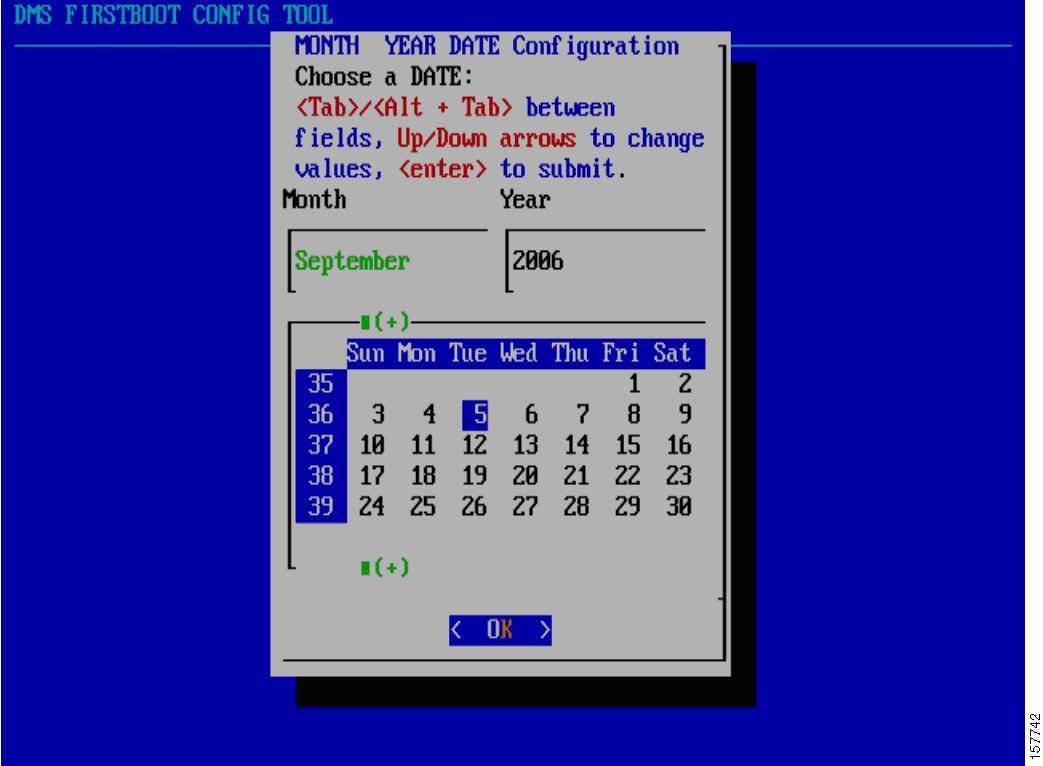
Step 16 ![]() Select the date. Press Tab, and use the up and down arrows to change the month. Press Tab, and use the up and down arrows to change the year. Press Tab, and use the up and down arrows and left and right arrows to select day. Press Tab, and select the OK button. Press Enter to submit the information.
Select the date. Press Tab, and use the up and down arrows to change the month. Press Tab, and use the up and down arrows to change the year. Press Tab, and use the up and down arrows and left and right arrows to select day. Press Tab, and select the OK button. Press Enter to submit the information.
Step 17 ![]() Confirm the date. Press Enter if the information is correct. If you need to change the information, use the arrow keys to navigate to No, and press Enter to reconfigure your settings.
Confirm the date. Press Enter if the information is correct. If you need to change the information, use the arrow keys to navigate to No, and press Enter to reconfigure your settings.
Step 18 ![]() Select the time in 24 hour format. Press Tab, and use the up and down arrows to set the hour. Press Tab, and use the up and down arrows to set the minutes. Press Tab, and use the up and down arrows to set the seconds. Press Tab, and select the OK button. Press Enter to submit the information.
Select the time in 24 hour format. Press Tab, and use the up and down arrows to set the hour. Press Tab, and use the up and down arrows to set the minutes. Press Tab, and use the up and down arrows to set the seconds. Press Tab, and select the OK button. Press Enter to submit the information.
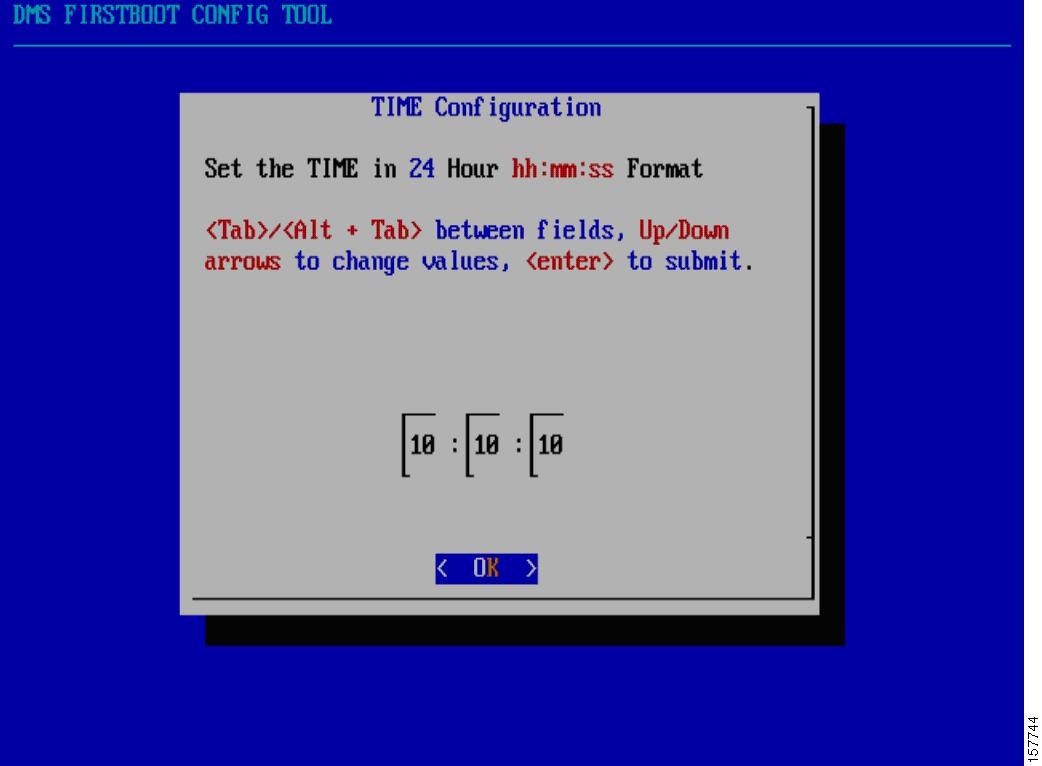
Step 19 ![]() Confirm the time. Press Enter if all the information is correct. If the information is incorrect, use the arrows to navigate to No and press Enter to reconfigure your settings.
Confirm the time. Press Enter if all the information is correct. If the information is incorrect, use the arrows to navigate to No and press Enter to reconfigure your settings.
Step 20 ![]() Enter the Video Portal instance name, and press Enter. This is used to generate a direct URL for to the Video Portal. In this example, the video portal instance name is portal1.
Enter the Video Portal instance name, and press Enter. This is used to generate a direct URL for to the Video Portal. In this example, the video portal instance name is portal1.
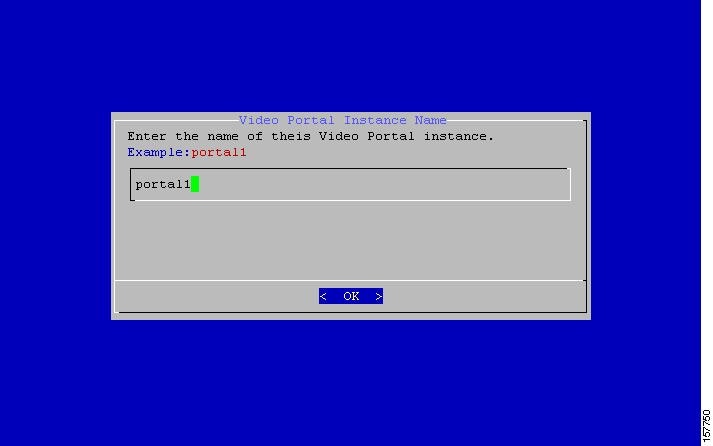
Step 21 ![]() Confirm the instance name. Press Enter to continue. If you made an error, you can go back into the appliance administrative interface (AAI) after the first boot process to modify these settings.
Confirm the instance name. Press Enter to continue. If you made an error, you can go back into the appliance administrative interface (AAI) after the first boot process to modify these settings.
Step 22 ![]() Set the password for admin, the default administrator account for this appliance. Your password cannot be null. The password should be at least six (6) characters long.
Set the password for admin, the default administrator account for this appliance. Your password cannot be null. The password should be at least six (6) characters long.
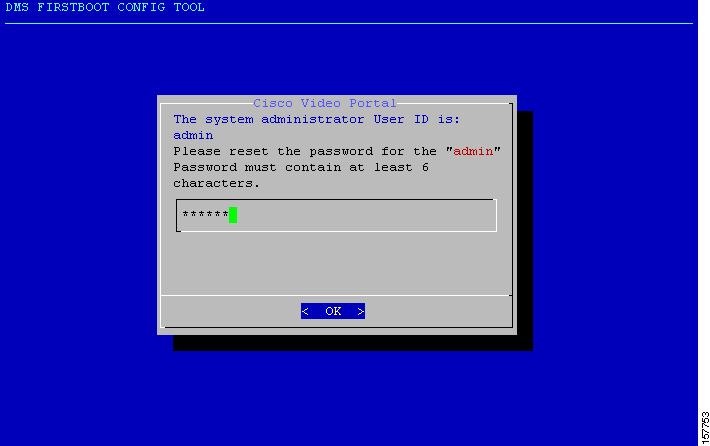
Step 23 ![]() Confirm the password for admin user.
Confirm the password for admin user.
Step 24 ![]() A confirmation screen displays for your admin password change. Press Enter to continue.
A confirmation screen displays for your admin password change. Press Enter to continue.
Step 25 ![]() Set the password for pwadmin user. The pwadmin account allows you to reset your admin user password (for example, if you were to forget it). The password cannot be null and must contain at least six (6) characters.
Set the password for pwadmin user. The pwadmin account allows you to reset your admin user password (for example, if you were to forget it). The password cannot be null and must contain at least six (6) characters.
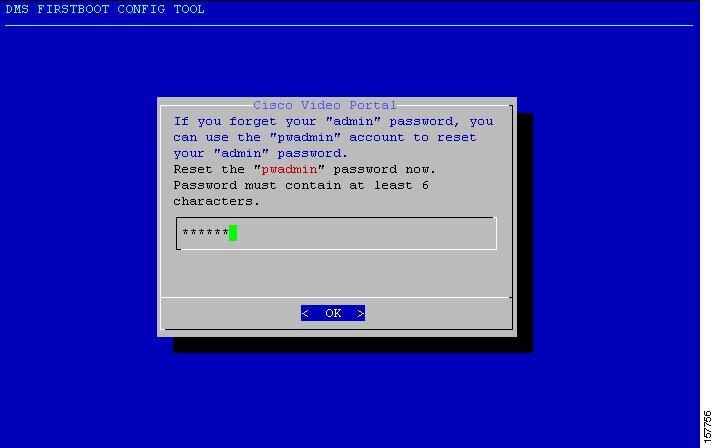
Step 26 ![]() Confirm the password for pwadmin user.
Confirm the password for pwadmin user.
Step 27 ![]() A confirmation screen displays for your pwadmin password change. Press Enter to continue.
A confirmation screen displays for your pwadmin password change. Press Enter to continue.
An end of the first boot screen displays. The recovery is now complete, and you can log in to AAI as admin by using the new password or as pwadmin by using the new password.
Step 28 ![]() (Optional) Verify replication by completing the procedure in the "Verifying Replication" section on page 1-14.
(Optional) Verify replication by completing the procedure in the "Verifying Replication" section on page 1-14.
 Feedback