User Guide for Cisco Digital Media Manager 5.5 and 5.6 Appliances
Bias-Free Language
The documentation set for this product strives to use bias-free language. For the purposes of this documentation set, bias-free is defined as language that does not imply discrimination based on age, disability, gender, racial identity, ethnic identity, sexual orientation, socioeconomic status, and intersectionality. Exceptions may be present in the documentation due to language that is hardcoded in the user interfaces of the product software, language used based on RFP documentation, or language that is used by a referenced third-party product. Learn more about how Cisco is using Inclusive Language.
- Updated:
- November 20, 2014
Chapter: Users and Groups
Users and Groups

Note![]() Although visible in the Cisco DMM user interface, Release 5.5 and 5.6 software does not support Cisco Digital Signs, Cisco Digital Media Players (DMPs), Cisco Cast, Cisco Digital Media Designer, or the Cisco Digital Media Player Device Manager.
Although visible in the Cisco DMM user interface, Release 5.5 and 5.6 software does not support Cisco Digital Signs, Cisco Digital Media Players (DMPs), Cisco Cast, Cisco Digital Media Designer, or the Cisco Digital Media Player Device Manager.
Concepts
Understand User Accounts
You can create user accounts manually or you can import them from an Active Directory server. Imported accounts and created accounts can coexist.
You cannot create any new user accounts manually while your authentication method is LDAP.
Understand User Roles
User roles in DMS-Admin are the automatic result of a logical operation. You cannot use DMS-Admin to assign a user role directly to any user.
In some cases, users who are authorized to use more than one licensed feature of Cisco DMS. The DMS-Admin user role that you see for a user account is based on all privileges and access settings that the user has, combined across all of your licensed and activated features.

Procedures
- Create User Groups
- Delete User Groups
- Create User Accounts
- Assign Users to Groups
- Edit User Accounts
- Delete User Accounts
- Assign User Access Rights and Permissions
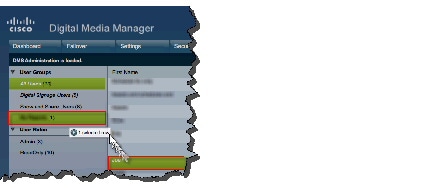
Create User Groups
Step 1![]() Choose Administration > Users.
Choose Administration > Users.
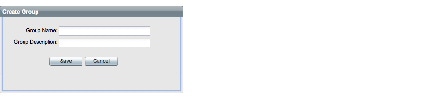
Step 3![]() Enter values to name and describe the group.
Enter values to name and describe the group.

Tip The name that you enter for a user group must not contain any spaces or special characters.
Step 4![]() Click Save to save your work.
Click Save to save your work.
Delete User Groups
Step 1![]() Choose Administration > Users.
Choose Administration > Users.
Step 2![]() Click a group name to highlight it.
Click a group name to highlight it.
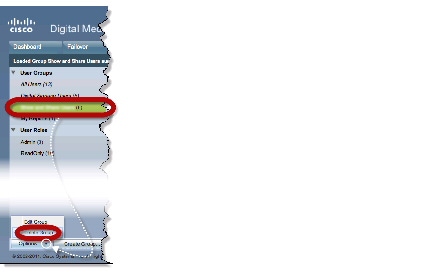
Step 3![]() Choose Options > Delete Group.
Choose Options > Delete Group.

Step 4![]() Click Yes in the Delete Confirmation dialog box.
Click Yes in the Delete Confirmation dialog box.
Create User Accounts
Step 1![]() Choose Administration > Users.
Choose Administration > Users.
Step 3![]() Enter the required values in the Add New User dialog box.
Enter the required values in the Add New User dialog box.
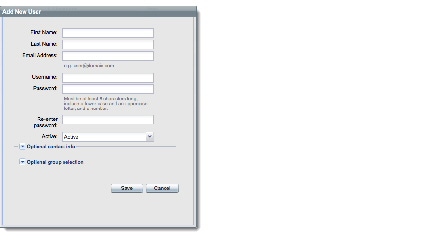
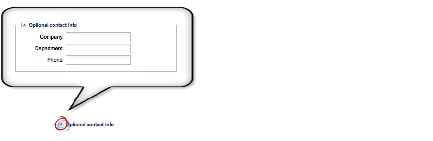
Step 4![]() (Optional) Enter contact information.
(Optional) Enter contact information.

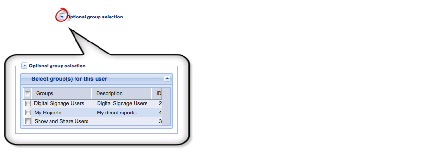
Step 5![]() (Optional) Assign the user to a user group.
(Optional) Assign the user to a user group.

Assign Users to Groups
When you first create a user account in DMS-Admin, you can associate the account with a user group immediately or you can do so after you assign access rights and permissions to the user.
Step 1![]() Drag a user from the table to the group name.
Drag a user from the table to the group name.
OR
Use the Edit User dialog box.
Edit User Accounts
You can edit user account settings manually.
Step 1![]() Choose Administration > Users.
Choose Administration > Users.
Step 2![]() Click an entry in the untitled table that describes all user accounts.
Click an entry in the untitled table that describes all user accounts.
Step 3![]() Choose Options > Edit User.
Choose Options > Edit User.

Step 4![]() Make changes to its values in the Edit User dialog box.
Make changes to its values in the Edit User dialog box.

Step 5![]() (Optional) Enter contact information.
(Optional) Enter contact information.
Step 6![]() (Optional) Assign the user to a user group.
(Optional) Assign the user to a user group.
Delete User Accounts
Note![]() You cannot delete the superuser account. However, you can delete any other user account.
You cannot delete the superuser account. However, you can delete any other user account.
Step 1![]() Choose Administration > Users.
Choose Administration > Users.
Step 2![]() Click an entry in the untitled table that describes all user accounts.
Click an entry in the untitled table that describes all user accounts.
To mark multiple user accounts for deletion, Ctrl-click.
Step 3![]() Choose Options > Delete User.
Choose Options > Delete User.
Assign User Access Rights and Permissions
Note![]() User rights and privileges are feature-specific. You cannot use DMS-Admin to assign rights or privileges to any user.
User rights and privileges are feature-specific. You cannot use DMS-Admin to assign rights or privileges to any user.
Step 1![]() Assign access rights and privileges to users in the individually licensed features they will use.
Assign access rights and privileges to users in the individually licensed features they will use.
Reference
Elements to Configure User Account Settings
FAQs
Q. What might prevent a user from logging in to DMM with an account that I created in DMS-Admin?
By default, DMS-Admin assigns all newly created user accounts to a user role called “ReadOnly.” Users with this role cannot log in to DMM. To grant this right to users, you must assign module-specific rights to them in Digital Signs or Show and Share Administration. Afterward, their user role changes to “Admin.”
 Feedback