Cisco TelePresence Content Server Release 5.0 Migration Assistant Tool
Available Languages
Table of Contents
Using the Cisco TelePresence Content Server Migration Assistant Tool for Release 5.0
Running the Migration Assistant
Obtaining Documentation and Submitting a Service Request
Using the Cisco TelePresence Content Server Migration Assistant Tool for Release 5.0
This document provides procedures for using the Cisco TelePresence Content Server Migration Assistant Tool to copy media and configuration settings from a first-generation hardware (source) Content Server Release 5.0 to a second-generation hardware (destination) Content Server Release 5.0.
Overview
The Cisco TelePresence Content Server Migration Assistant Tool (Migration Assistant) provides an easy-to-use utility for copying media and configuration settings between two Content Servers. The Migration Assistant is a standalone executable wizard that you can run from any folder, such as the desktop, on a Content Server.
When you run the Migration Assistant on the source Content Server, it copies relevant data from the source Content Server to a network shared location. When you run the Migration Assistant on the destination Content Server, it copies the data from the network shared location to the correct locations on the destination Content Server. The Migration Assistant also manages the starting and stopping of the Content Server services during the data migration and writes the migration log file to the E:\logs\SetupUtility directory for easy access and reference.
The Migration Assistant is applicable to stand-alone and stand-alone with NAS Content Servers migration scenarios only. For information about upgrading a cluster, see the “Upgrading a Cluster of First-Generation Content Servers to a Cluster of Second-Generation Content Servers” section.

What Data is Migrated
The Migration Assistant copies the following data from the source to the destination Content Server:
Prerequisites
Before you use the Migration Assistant, observe the following prerequisites:
- The Migration Assistant will migrate data from your first-generation hardware running Cisco TelePresence Content Server Release 5.0 software to a second-generation hardware Content Server also running Release 5.0. If your Content Server is at an earlier version, you must upgrade to Release 5.0 before migrating data. Follow the instructions for upgrading in the Release Notes at http://www.cisco.com/en/US/products/ps11347/prod_release_notes_list.html .
Caution The data migration process using the Migration Assistant assumes that the destination Content Server is a blank factory default server and overwrites any content or configurations found on the destination Content Server.
Caution Back up your Content Server and turn off anti-virus applications before using the wizard to migrate data. You will need a full backup for restoring in the unlikely event of a data migration failure. Follow the instructions for backing up and restoring the Content Server in the online help.
- Verify that both the source and destination Content Servers are at the same version and build number.
- Verify that both the source and destination Content Servers are set to the same date/time and timezone.
- Ensure that the Source content server is not in a call and has no offline jobs transcoding.
- If your Content Server is using a NAS, ensure that both the source and destination Content Servers are added to the same domain.
- If your source Content Server is using a NAS, ensure the destination Content Server has been given the same permissions on that NAS.
- You might need to reconfigure any frontend address information to point to the destination Content Server after running the Migration Assistant.
- The Administrator password might differ if you have not changed it from the default. If the user account that you use to run the Migration Assistant on the source or destination Content Server does not have the appropriate permissions to the storage folder, then the Migration Assistant will ask for the user account details of an account that does have appropriate permissions to the storage folder.
Running the Migration Assistant
Caution Do not use this tool to migrate data to upgrade a cluster of first-generation Content Servers. See the “Upgrading a Cluster of First-Generation Content Servers to a Cluster of Second-Generation Content Servers” section for more information.
Caution The migration process replaces all configurations and media on the destination Content Server.
Follow the setup procedures for the destination Content Server in the Cisco TelePresence Content Server 5.0 QuickStart Guide . As part of the setup process, confirm the correct frontend address. If the source Content Server was attached to a domain, then the destination Content Server needs to be attached to the same domain.

Note • If the source Content Server was standalone, then the Migration Assistant requires that the destination Content Server be configured as standalone to use this tool.
- If the source Content Server is NOT configured to use external storage (such as a NAS), then the Migration Assistant requires that the destination Content Server also NOT be configured to use external storage.
- If the source Content Server is configured to use external storage, then the destination Content Server must also be configured to use external storage, according to procedures described in the Cisco TelePresence Content Server Release 5.0 Administration and User Guide at http://www.cisco.com/en/US/products/ps11347/prod_maintenance_guides_list.html .
The approximate duration of a data migration varies based on how much data is migrated and network conditions. To migrate data from a source to a destination Content Server, do the following:
Step 1
Log in to the source Content Server by using Windows Remote Desktop Connection or through local console.
Step 2
Note Do not run the Migration Assistant from a mapped or network drive.
Step 3
Step 4
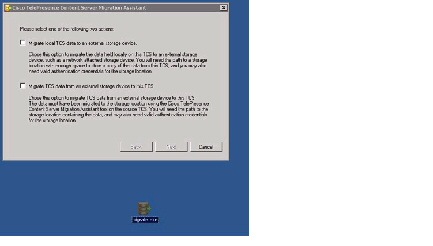
Figure 1 Content Server Migration Assistant: Wizard Executable and Migration Actions Screen
Step 5
Step 6
- If you select The Content Server is backed up , click Next to proceed with the migration.
- If you select The Content Server is not backed up , clicking Next proceeds with the migration. The migration log indicates that you have chosen to continue without backing up.
Note Cisco recommends that you back up the source Content Server before data migration begins.
Step 7
Step 8
Step 9
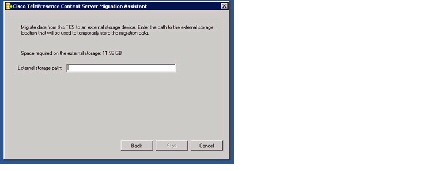
Figure 2 Content Server Migration Assistant: External Storage Path Screen
Step 10
Note At any point during the migration process, you can cancel the process by selecting the Cancel button. This reverts all changes made to the source Content Server.
Step 11
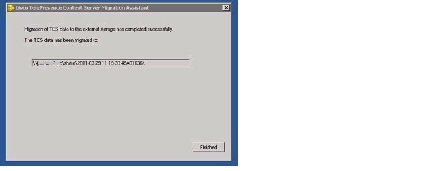
Note See the migration log if the Migration Assistant displays errors at the end of the migration process. The migration log is available in the E:\logs\SetupUtility directory; the file name begins with TCSMA.
Figure 3 Content Server Migration Assistant: Full External Storage Path Screen
Step 12
Step 13
Note Do not run the Migration Assistant from a mapped or network drive.
Step 14
Step 15
Step 16
Step 17
Step 18
Note At any point during the migration process, you can cancel the process by selecting the Cancel button. This reverts all changes made to the destination Content Server and leaves it in a factory default state.
Step 19
At the conclusion of exporting the data from the source Content Server, the Migration Assistant places the source Content Server in a mode suitable for returning to Cisco as part of the trade-in process:
- The Content Server will no longer function.
- All Content Server services are halted.
- The Content Server will not accept calls to make recordings.
Note Cisco recommends that customers run a full restore to factory defaults on the source Content Server to ensure that all recordings and configurations on the source Content Server are removed before returning it to Cisco. For more information, see the Cisco TelePresence Content Server Release 5.0 Administration and User Guide at http://www.cisco.com/en/US/products/ps11347/prod_maintenance_guides_list.html.
Upgrading a Cluster of First-Generation Content Servers
to a Cluster of Second-Generation Content ServersTo upgrade clusters of first-generation Content Servers, we recommend that you do the following:
Step 1
Step 2
Step 3
Step 4
Step 5
Related Documentation
For more information about the Cisco TelePresence Content Server, see these documents at http://www.cisco.com/en/US/products/ps11347/tsd_products_support_series_home.html .
- Cisco TelePresence Content Server Release 5.0 Quick Start
- Cisco TelePresence Content Server Release 5.0 Administration and User Guide
- Configuring the Cisco TelePresence Content Server for Streaming from a QuickTime Media Server
- Configuring the Cisco TelePresence Content Server for Streaming Flash from a Wowza Media Server
- Cisco TelePresence Content Server API Guide
Obtaining Documentation and Submitting a Service Request
For information on obtaining documentation, using the Cisco Bug Search Tool (BST), submitting a service request, and gathering additional information, see What’s New in Cisco Product Documentation at: http://www.cisco.com/c/en/us/td/docs/general/whatsnew/whatsnew.html .
Subscribe to What’s New in Cisco Product Documentation , which lists all new and revised Cisco technical documentation, as an RSS feed and deliver content directly to your desktop using a reader application. The RSS feeds are a free service.
This document is to be used in conjunction with the documents listed in the “Related Documentation” section.
Cisco and the Cisco logo are trademarks or registered trademarks of Cisco and/or its affiliates in the U.S. and other countries. To view a list of Cisco trademarks, go to this URL: www.cisco.com/go/trademarks . Third-party trademarks mentioned are the property of their respective owners. The use of the word partner does not imply a partnership relationship between Cisco and any other company. (1110R)
Any Internet Protocol (IP) addresses and phone numbers used in this document are not intended to be actual addresses and phone numbers. Any examples, command display output, network topology diagrams, and other figures included in the document are shown for illustrative purposes only. Any use of actual IP addresses or phone numbers in illustrative content is unintentional and coincidental.
 Feedback
Contact Cisco
- Open a Support Case

- (Requires a Cisco Service Contract)