- Title page
- Table of Contents
- What's in This Guide
- Getting to Know the Cisco TelePresence System
- Cisco TelePresence System Phone Softkeys (Systems that Use an IP Phone for Call Control Only)
- Cisco TelePresence System Calling Features (Systems That Use an IP Phone for Call Control Only)
- Cisco TelePresence System Meeting Controls (Systems That Use an IP Phone for Call Control Only)
- Booking Meeting Rooms and Scheduling Cisco TelePresence Meetings
- Using Cisco TelePresence Manager
- Using Cisco WebEx Conferencing
- Tips for Troubleshooting Your Cisco TelePresence Meeting (Systems That Use an IP Phone for Call Control Only)
- Managing Cisco TelePresence Call Security (Systems that Use an IP Phone for Call Control Only)
- Cisco TelePresence System Phone Alerts and CTS Main Display Screen Messages
- Creating and Viewing Recordings with the Cisco TelePresence Recording Server
- Glossary
- Index
Cisco TelePresence System User Guide (CTS 1.9)
Bias-Free Language
The documentation set for this product strives to use bias-free language. For the purposes of this documentation set, bias-free is defined as language that does not imply discrimination based on age, disability, gender, racial identity, ethnic identity, sexual orientation, socioeconomic status, and intersectionality. Exceptions may be present in the documentation due to language that is hardcoded in the user interfaces of the product software, language used based on RFP documentation, or language that is used by a referenced third-party product. Learn more about how Cisco is using Inclusive Language.
- Updated:
- March 21, 2014
Chapter: Tips for Troubleshooting Your Cisco TelePresence Meeting (Systems That Use an IP Phone for Call Control Only)
Tips for Troubleshooting Your Cisco TelePresence Meeting (Systems That Use an IP Phone for Call Control Only)
Contents
This chapter contains tips to help you manage and troubleshoot your Cisco TelePresence System (CTS):
Improving Call Quality
If you notice that the audio or video quality of your CTS call is not what you expected:
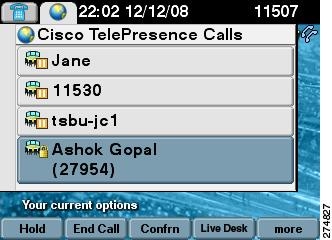
Step 1![]() Touch the Hold button, wait a few moments, and then touch Resume as shown in Figure 8-1.
Touch the Hold button, wait a few moments, and then touch Resume as shown in Figure 8-1.
Figure 8-1 Placing a Cisco TelePresence Call on Hold
Step 2![]() If this does not improve the audio or video, or if you have any other problem during the meeting, contact Live Desk for more help. See Reporting a Problem During a CTS Meeting.
If this does not improve the audio or video, or if you have any other problem during the meeting, contact Live Desk for more help. See Reporting a Problem During a CTS Meeting.
Reconnecting Dropped Calls
If your call is dropped, initiate the meeting again by locating and touching the name of your meeting on the CTS Cisco Unified IP phone.
If your meeting is no longer listed on the CTS Cisco Unified IP phone, reconnect using one of the following methods:
1.![]() Dial the Cisco TelePresence room phone number with which you wish to connect.
Dial the Cisco TelePresence room phone number with which you wish to connect.
2.![]() Touch SpdDial or touch the directory icon to dial from a directory.
Touch SpdDial or touch the directory icon to dial from a directory.
3.![]() Touch Redial to dial the last dialed number.
Touch Redial to dial the last dialed number.
The Cisco TelePresence phone screen changes to indicate that a call is being placed. Touch End Call to hang up.
Reporting a Problem During a CTS Meeting
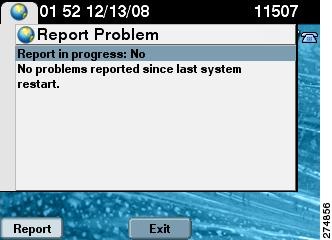
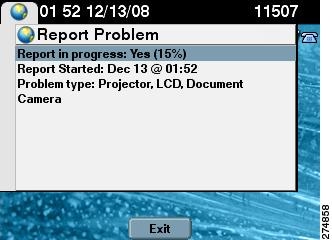
The Problem softkey allows you to report a problem on the system. Figure 8-2 shows example problem reports.

Tip Cisco supports single and multiple problem requests without negatively affecting system performance but we recommend that you end all calls before touching the Problem softkey.
To report a problem, follow these steps from the Cisco TelePresence System home screen on the Cisco Unified IP Phone:
Step 1![]() Touch the more softkey.
Touch the more softkey.
Step 2![]() Touch the Info softkey.
Touch the Info softkey.
Step 3![]() Touch the
Problem
softkey.
Touch the
Problem
softkey.
Step 4![]() Touch the
Report
softkey to display the Report types.
Touch the
Report
softkey to display the Report types.
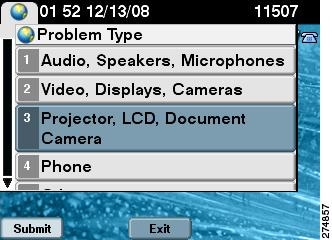
Step 5![]() Choose a Report type from the list and touch
Submit
.
Choose a Report type from the list and touch
Submit
.
Step 6![]() Touch the
Exit
softkey while the report is being submitted.
Touch the
Exit
softkey while the report is being submitted.
Figure 8-2 Reporting a Problem

Contacting the Live Desk
The Live Desk is a person who is assigned to a Cisco TelePresence endpoint to assist you with problems that may occur during a meeting.
Step 1![]() Touch the
Live Desk
softkey. Your call is immediately connected.
Touch the
Live Desk
softkey. Your call is immediately connected.
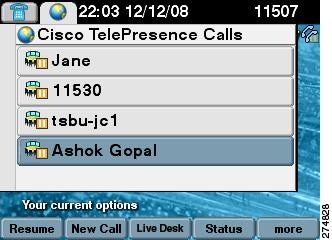
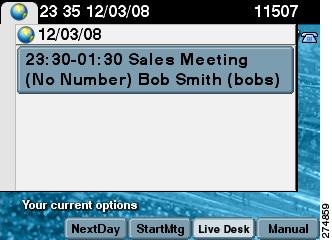
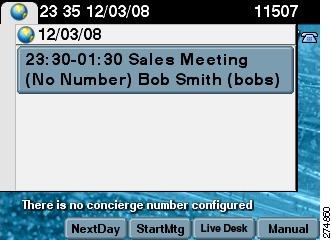
If Live Desk has not been assigned to your Cisco TelePresence endpoint, the following message is displayed on your phone screen:
“There is no Live Desk number configured.”Figure 8-3 shows Live Desk options and messages.
Step 2![]() If you receive this message, contact your Cisco TelePresence System Administrator to have Live Desk assigned to your system.
If you receive this message, contact your Cisco TelePresence System Administrator to have Live Desk assigned to your system.
Figure 8-3 Calling the Live Desk
How to Configure Favorites and Directory
This section contains the following information:
Configuring Favorites
End-users can easily log in to the Cisco Personal Communications Assistant (if installed) and then choose User Options from the menu bar to navigate to User Options. When logged in and viewing User Options, you can access a User Guide, change the locale for the windows, and access additional configuration options from the Related Links drop-down list, including speed dials, phone services, and line-specific options (call forwarding, message-waiting indicators, and ring patterns).
To access phone-specific features, users must select a device after logging in (User Options > Device). When a device is selected, the user can.
To manage your Speed-Dials (Favorites):
Step 1![]() Log in to the Cisco Unified CM User Options page, as shown in Figure 8-4.
Log in to the Cisco Unified CM User Options page, as shown in Figure 8-4.
Figure 8-4 Cisco Unified CM User Options Log In

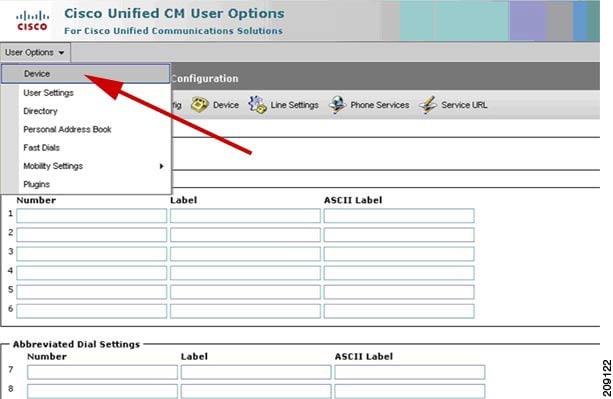
Step 2![]() Click User Options and select Device, as shown in Figure 8-5. The Device Configuration page appears, as shown in Figure 8-6.
Click User Options and select Device, as shown in Figure 8-5. The Device Configuration page appears, as shown in Figure 8-6.
Figure 8-5 User Options > Device
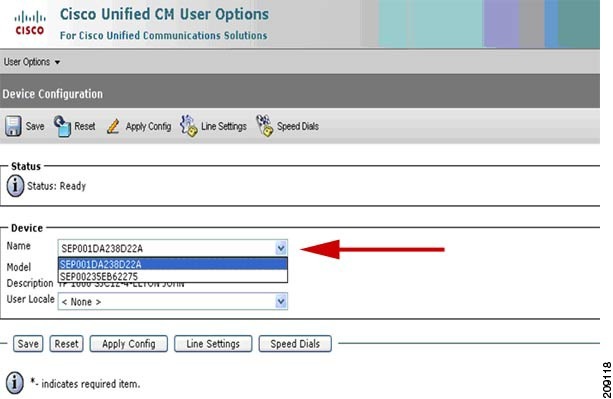
Step 3![]() In the Device box, click the Name drop down menu and select the phone for which you would like to create, modify, or delete speed dials, as shown in Figure 8-6. The model name will appear in the Description field, as shown in Figure 8-7.
In the Device box, click the Name drop down menu and select the phone for which you would like to create, modify, or delete speed dials, as shown in Figure 8-6. The model name will appear in the Description field, as shown in Figure 8-7.
Figure 8-6 Device Configuration
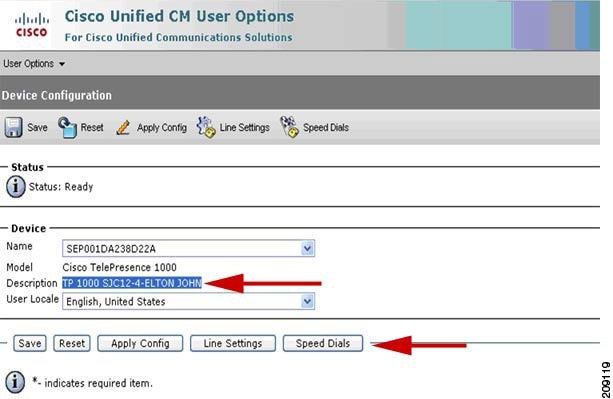
Step 5![]() Click Speed Dials. The Speed Dial and Abbreviated Dial Configuration page appears, as shown in Figure 8-8.
Click Speed Dials. The Speed Dial and Abbreviated Dial Configuration page appears, as shown in Figure 8-8.
Figure 8-8 Speed Dial and Abbreviated Dial Configuration
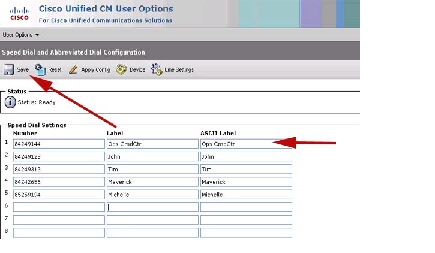
Step 6![]() In the Speed Dial Settings Number field, enter the Cisco TelePresence phone numbers (for example, 84243737). See Figure 8-8.
In the Speed Dial Settings Number field, enter the Cisco TelePresence phone numbers (for example, 84243737). See Figure 8-8.
Step 7![]() In the Speed Dial Settings Label and ASCII Label fields, enter a name or friendly name. These can be a combination of letters or numbers. Hyphens and spaces are ok, but do not use any special characters (for example, % @ ! $). See Figure 8-8.
In the Speed Dial Settings Label and ASCII Label fields, enter a name or friendly name. These can be a combination of letters or numbers. Hyphens and spaces are ok, but do not use any special characters (for example, % @ ! $). See Figure 8-8.
Step 8![]() Click Save when you are done. Once you save, the phone will reboot for the changes to take effect. This will take a few minutes.
Click Save when you are done. Once you save, the phone will reboot for the changes to take effect. This will take a few minutes.

Note Do not click Reset. Doing so will cause the phone to reset and the phone could take 10 to 30 minutes to come back up.
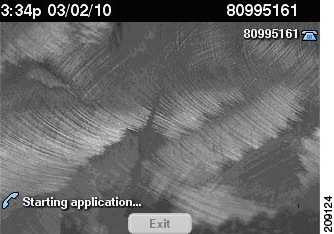
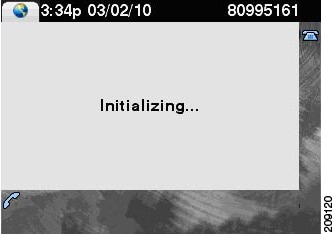
Your phone screens will appear like this while the phone is rebooting:
Figure 8-9 Phone Screens Rebooting
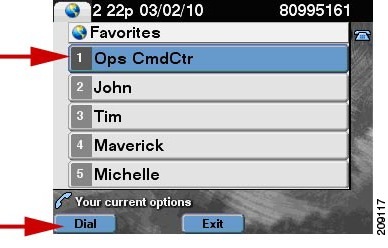
Your Favorites will now appear on the Favorites list, as shown in Figure 8-10. Simply scroll to the entry you want to call and touch Dial.
Figure 8-10 Favorites List on the Phone
Go to Favorites: Speed Dialing for information about making a call using Favorites.
Configuring the Directory
For information about configuring the Corporate and Personal Directories (Directory) from Cisco Unified Communications Manager, contact your Cisco Administrator. Administrators use information in the Managing Cisco Unified IP Phone Features chapter of the Cisco Unified Communications Manager Configuration Guide for the Cisco TelePresence System to configure the Directory.
 Feedback