Creating Dynamic VSANs
This chapter includes the following topics:
Information About DPVM
Port VSAN membership on the switch is assigned on a port-by-port basis. By default each port belongs to the default VSAN.
You can dynamically assign VSAN membership to ports by assigning VSANs based on the device WWN. This method is referred to as Dynamic Port VSAN Membership (DPVM). DPVM offers flexibility and eliminates the need to reconfigure the port VSAN membership to maintain fabric topology when a host or storage device connection is moved between two Cisco MDS 9000 family switches or two ports within a switch. It retains the configured VSAN regardless of where a device is connected or moved. To assign VSANs statically, see the Configuring and Managing VSANs chapter.
DPVM configurations are based on port world wide name (pWWN) and node world wide name (nWWN) assignments. A DPVM database contains mapping information for each device pWWN/nWWN assignment and the corresponding VSAN. The Cisco NX-OS software checks the database during a device FLOGI and obtains the required VSAN details.
The pWWN identifies the host or device and the nWWN identifies a node consisting of multiple devices. You can assign any one of these identifiers or any combination of these identifiers to configure DPVM mapping. If you assign a combination, then preference is given to the pWWN.
DPVM uses the Cisco Fabric Services (CFS) infrastructure to allow efficient database management and distribution. DPVM uses the application driven, coordinated distribution mode and the fabric-wide distribution scope (for information about CFS, refer to the Cisco MDS 9000 Family NX-OS System Management Configuration Guide .
 Note |
DPVM does not cause any changes to device addressing. DPVM only pertains to the VSAN membership of the device, ensuring that the host gets the same VSAN membership on any port on the switch. For example, if a port on the switch has a hardware failure, you can move the host connection to another port on the switch and you do not need to update the VSAN membership manually. |
Note |
DPVM is not supported on FL ports. DPVM is supported only on F ports. |
About DPVM Configuration
To use the DPVM feature as designed, be sure to verify the following requirements:
- The interface through which the dynamic device connects to the Cisco MDS 9000 Family switch must be configured as an F port.
- The static port VSAN of the F port should be valid (not isolated, not suspended, and in existence).
- The dynamic VSAN configured for the device in the DPVM database should be valid (not isolated, not suspended, and in existence).
Note |
The DPVM feature overrides any existing static port VSAN membership configuration. If the VSAN corresponding to the dynamic port is deleted or suspended, the port is shut down. |
About DPVM Databases
The DPVM database consists of a series of device mapping entries. Each entry consists of a device pWWN or nWWN assignment along with the dynamic VSAN to be assigned. You can configure a maximum of 16,000 DPVM entries in the DPVM database. This database is global to the whole switch (and fabric) and is not maintained for each VSAN.
The DPVM feature uses three databases to accept and implement configurations.
- Configuration (config) database—All configuration changes are stored in the configuration database when distribution is disabled.
- Active database—The database currently enforced by the fabric.
- Pending database—All configuration changes are stored in the DPVM pending database when distribution is enabled (see About DPVM Database Distribution).
Changes to the DPVM config database are not reflected in the active DPVM database until you activate the DPVM config database. Changes to the DPVM pending database are not reflected in the config or active DPVM database until you commit the DPVM pending database. This database structure allows you to create multiple entries, review changes, and let the DPVM config and pending databases take effect.
About Autolearned Entries
The DPVM database can be configured to automatically learn (autolearn) about new devices within each VSAN. The autolearn feature can be enabled or disabled at any time. Learned entries are created by populating device pWWNs and VSANs in the active DPVM database. The active DPVM database should already be available to enable autolearn.
You can delete any learned entry from the active DPVM database when you enable autolearn. These entries only become permanent in the active DPVM database when you disable autolearn.
Note |
Autolearning is only supported for devices connected to F ports. Devices connected to FL ports are not entered into the DPVM database because DPVM is not supported on FL ports. |
The following conditions apply to learned entries:
- If a device logs out while autolearn is enabled, that entry is automatically deleted from the active DPVM database.
- If the same device logs multiple times into the switch through different ports, then the VSAN corresponding to last login is remembered.
- Learned entries do not override previously configured and activated entries.
-
Learning is a two-part process—Enabling autolearning followed by disabling autolearning. When the auto-learn option is enabled, the following applies:
- Learning currently logged-in devices—Occurs from the time learning is enabled.
- Learning new device logins— Occurs as and when new devices log in to the switch.
About DPVM Database Distribution
Using the CFS infrastructure, each DPVM server learns the DPVM database from each of its neighboring switches during the ISL bring-up process. If you change the database locally, the DPVM server notifies its neighboring switches, and that database is updated by all switches in the fabric.
If fabric distribution is enabled, all changes to the configuration database are stored in the DPVM pending database. These changes include the following tasks:
- Adding, deleting, or modifying database entries.
- Activating, deactivating, or deleting the configuration database.
- Enabling or disabling autolearning.
These changes are distributed to all switches in a fabric when you commit the changes. You can also discard (abort) the changes at this point.
 Tip |
You can view the contents of the DPVM pending database by using the show dpvm pending command. |
Tip |
See the Viewing the Pending Database to view the contents of the of the pending database. |
If the DPVM database is available on all switches in the fabric, devices can be moved anywhere and offer the greatest flexibility. To enable database distribution to the neighboring switches, the database should be consistently administered and distributed across all switches in the fabric. The Cisco NX-OS software uses the Cisco Fabric Services (CFS) infrastructure to achieve this requirement (refer to the Cisco MDS 9000 Family NX-OS System Management Configuration Guide ).
About Locking the Fabric
The first action that modifies the existing configuration creates the DPVM pending database and locks the feature in the fabric. Once you lock the fabric, the following conditions apply:
- No other user can make any configuration changes to this feature.
- A copy of the configuration database becomes the DPVM pending database. Modifications from this point on are made to the DPVM pending database. The DPVM pending database remains in effect until you commit the modifications to the DPVM pending database or discard (abort) the changes to the DPVM pending database.
About Copying DPVM Databases
The following circumstances may require the active DPVM database to be copied to the DPVM config database:
- If the learned entries are only added to the active DPVM database.
- If the DPVM config database or entries in the DPVM config database are accidently deleted.
Note |
If you copy the DPVM database and fabric distribution is enabled, you must commit the changes. |
Licensing Requirements for VSANs
The following table shows the licensing requirements for this feature:
|
License |
License Description |
|---|---|
|
ENTERPRISE_PKG |
The enterprise license is required to enable VSAN. For a complete explanation of the licensing scheme, see the Cisco MDS 9000 Family NX-OS Licensing Guide . |
Guidelines and Limitations
This section explains the database guidelines for this feature.
A database merge refers to a union of the configuration database and static (unlearned) entries in the active DPVM database. For information about CFS merge support, refer to the Cisco MDS 9000 Family NX-OS System Management Configuration Guide for detailed concepts.
When merging the DPVM database between two fabrics, follow these guidelines:
- Verify that the activation status and the autolearn status is the same is both fabrics.
- Verify that the combined number of device entries in each database does not exceed 16 K.
 Caution |
If you do not follow these two conditions, the merge will fail. The next distribution will forcefully synchronize the databases and the activation states in the fabric. |
Default Settings
Table 1 lists the default settings for DPVM parameters.
|
Parameters |
Default |
|---|---|
|
DPVM |
Disabled. |
|
DPVM distribution |
Enabled. |
|
Autolearning |
Disabled. |
Creating DPVM
This section includes the following topics:
Configuring DPVM with the DPVM Wizard
To use the DPVM Setup Wizard to set up dynamic port VSAN membership, follow these steps:
Procedure
| Step 1 |
Click the DPVM Setup Wizard icon in the DCNM-SAN toolbar. 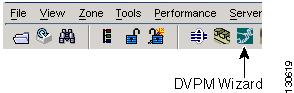 You see the Select Master Switch page. |
| Step 2 |
Click the switch you want to be the master switch. This switch controls the distribution of the DPVM database to other switches in the fabric. |
| Step 3 |
Click Next. You see the AutoLearn Current End Devices page. |
| Step 4 |
(Optional) Click the Create Configuration From Currently Logged In End Devices check box if you want to turn on autolearning. |
| Step 5 |
Click Next. You see the Edit and Activate Configuration page. |
| Step 6 |
Verify the current or autolearned configuration. Optionally, click Insert to add more entries into the DPVM config database. |
| Step 7 |
Click Finish to update the DPVM config database, distribute the changes using CFS, and activate the database, or click Cancel to exit the DPVM Setup Wizard without saving changes. |
| Step 8 |
Select the switch you want to be the master switch. This switch controls the distribution of the DPVM database to other switches in the fabric. |
| Step 9 |
Click Next. You see the AutoLearn Current End Devices page. |
| Step 10 |
(Optional) Check the Create Configuration From Currently Logged In End Devices check box if you want to enable autolearning. |
| Step 11 |
Click Next. You see the Edit and Activate Configuration page. |
| Step 12 |
Verify the current or autolearned configuration. Optionally, click Insert to add more entries into the DPVM config database. |
| Step 13 |
Click Finish to update the DPVM config database, distribute the changes using CFS, and activate the database, or click Cancel to exit the DPVM Setup Wizard without saving changes. |
Configuring DPVM Config and Pending Databases
To create and populate the config and pending databases, follow these steps:
Procedure
| Step 1 |
Expand Fabricxx> All VSANs, and then select DPVM in the Logical Attributes pane. You see the DPVM configuration in the Information pane. |
||
| Step 2 |
Click the CFS tab and select a master switch by checking a check box in the Master column.
|
||
| Step 3 |
Click the Config Database tab and then click the Create Row to insert a new entry. You see the Create Config Database dialog box. |
||
| Step 4 |
Choose an available WWN and VSAN combination or fill in the pWWN and Login VSAN fields. |
||
| Step 5 |
Click Create to save these changes in the config or pending database or click Close to discard any unsaved changes. |
||
| Step 6 |
Click the CFS tab and select the Config Action drop-down menu for the master database. |
||
| Step 7 |
Select commit from the drop-down menu to distribute these changes or abort to discard the changes. |
Activating DPVM Config Databases
To activate the DPVM config database, follow these steps:
Procedure
| Step 1 |
Expand Fabricxx> All VSANs, and then select DPVM from the Logical Attributes pane. You see the DPVM configuration in the Information pane. |
||
| Step 2 |
Click the Action tab and set the Action drop-down menu to activate or forceActivate to activate the DPVM config database. |
||
| Step 3 |
Click the CFS tab and select the Config Action drop-down menu for the master database. |
||
| Step 4 |
Select commit from the drop-down menu to distribute these changes or abort to discard the changes.
|
Enabling Autolearning
To enable autolearning, follow these steps:
Procedure
| Step 1 |
Expand Fabricxx> All VSANs, and then select DPVM from the Logical Attributes pane. You see the DPVM configuration in the Information pane. |
| Step 2 |
Click the Actions tab and check the Auto Learn Enable check box to enable autolearning. |
| Step 3 |
Click the CFS tab and select commit to distribute these changes or abort to discard the changes. |
Clearing a Single Autolearned Entry
To clear a single autolearn entry, follow these steps:
Procedure
| Step 1 |
Expand Fabricxx> All VSANs, and then select DPVM from the Logical Attributes pane. You see the DPVM configuration in the Information pane. |
| Step 2 |
Click the Actions tab and select clearOnWWN from the Auto Learn Clear drop-down menu. |
| Step 3 |
Check the clear WWN check box next to the WWN of the autolearned entry that you want to clear. |
| Step 4 |
Click CFS and select commit to distribute these changes or abort to discard the changes. |
Clearing All Autolearned Entries
To clear all autolearn entries, follow these steps:
Procedure
| Step 1 |
Expand Fabricxx> All VSANs, and then select DPVM from the Logical Attributes pane. You see the DPVM configuration in the Information pane. |
| Step 2 |
Click the Actions tab. You see the DPVM Actions menu. |
| Step 3 |
Select clear from the Auto Learn Clear drop-down menu. |
| Step 4 |
Click the CFS tab and select commit to distribute these changes or abort to discard the changes. |
Disabling DPVM Database Distribution
To disable DPVM database distribution to the neighboring switches, follow these steps:
Procedure
| Step 1 |
Expand Fabricxx> All VSANs, and then select DPVM from the Logical Attributes pane. You see the DPVM configuration in the Information pane. |
| Step 2 |
Click the CFS tab and select disable from the Admin drop-down menu. |
| Step 3 |
Click Apply Changes to save this change or click Undo Changes to discard the change. |
Locking the Fabric
To lock the fabric and apply changes to the DPVM pending database, follow these steps:
Procedure
| Step 1 |
Expand Fabricxx> All VSANs, and then select DPVM from the Logical Attributes pane. You see the DPVM configuration in the Information pane. |
| Step 2 |
Click the Config Database tab and Create Row. You see the Create Config Database dialog box. |
| Step 3 |
Choose an available pWWN and login VSAN. |
| Step 4 |
Click Create to save this change to the pending database or click Close to discard any unsaved change. |
Committing Changes
If you commit the changes made to the configuration, the configuration in the DPVM pending database are distributed to other switches. On a successful commit, the configuration change is applied throughout the fabric and the lock is released.
To commit the DPVM pending database, follow these steps:
Procedure
| Step 1 |
Expand Fabricxx> All VSANs, and then select DPVM from the Logical Attributes pane. You see the DPVM configuration in the Information pane. |
| Step 2 |
Click the CFS tab and select commit from the Config Action drop-down menu. |
| Step 3 |
Click Apply Changes to save this change or click Undo Changes to discard the change. |
Discarding Changes
If you discard (abort) the changes made to the DPVM pending database, the configurations remain unaffected and the lock is released.
To discard the DPVM pending database, follow these steps:
Procedure
| Step 1 |
Expand Fabricxx> All VSANs, and then select DPVM from the Logical Attributes pane. You see the DPVM configuration in the Information pane. |
| Step 2 |
Click the CFS tab and select abort from the Config Action drop-down menu. |
| Step 3 |
Click Apply Changes to save this change or click Undo Changes to discard the change. |
Clearing a Locked Session
If you have performed a DPVM task and have forgotten to release the lock by either committing or discarding the changes, an administrator can release the lock from any switch in the fabric. If the administrator performs this task, your changes to the DPVM pending database are discarded and the fabric lock is released.
Note |
The DPVM pending database is only available in the volatile directory and is subject to being discarded if the switch is restarted. To use administrative privileges and release a locked DPVM session using DCNM-SAN, follow these steps: |
Procedure
| Step 1 |
Expand Fabricxx> All VSANs, and then select DPVM from the Logical Attributes pane. You see the DPVM configuration in the Information pane. |
| Step 2 |
Click the CFS tab and select clear from the Config Action drop-down menu. |
| Step 3 |
Click Apply Changes to save this change or click Undo Changes to discard the change. |
Copying DPVM Databases
To copy the currently active DPVM database to the DPVM config database, follow these steps:
Procedure
| Step 1 |
Expand Fabricxx> All VSANs, and then select DPVM in the Logical Attributes pane. You see the DPVM configuration in the Information pane. |
| Step 2 |
Click the Actions tab and check the CopyActive to Config check box. |
| Step 3 |
Click the CFS tab and select commit from the Config Action drop-down menu. |
Comparing Database Differences
To compare the currently active database entries to the DPVM config database, follow these steps:
Procedure
| Step 1 |
Expand Fabricxx> All VSANs, and then select DPVM from the Logical Attributes pane. You see the DPVM configuration in the Information pane. |
| Step 2 |
Click the Active Database tab. You see the DPVM active database in the Information pane. |
| Step 3 |
Select Config from the Compare With drop-down menu. You see the comparison dialog box. |
| Step 4 |
Select Close to close the comparison dialog box. |
Viewing the Pending Database
To view the pending database, follow these steps:
Procedure
| Step 1 |
Expand Fabricxx> All VSANs, and then select DPVM from the Logical Attributes pane. You see the DPVM configuration in the Information pane. |
| Step 2 |
Click the CFS tab and set the Config View drop-down menu to pending. |
| Step 3 |
Click Apply Changes. |
| Step 4 |
Click the Config Database tab. You see the pending database entries. |
Field Descriptions for DPVM
This section describes the field descriptions for this feature.
DPVM Actions
|
Field |
Description |
|---|---|
|
Action |
Helps in activating the set of bindings. |
|
Result |
Indicates the outcome of the activation. |
|
Status |
Indicates the state of activation. If true, then activation has been attempted as the most recent operation. If false, then an activation has not been attempted as the most recent operation. |
|
CopyActive to Config |
When set to copy(1), results in the active (enforced) binding database to be copied on to the configuration binding database. The learned entries are also copied. |
|
Auto Learn Enable |
Helps to learn the configuration of devices logged into the local device on all its ports and the VSANs to which they are associated. |
|
Auto Learn Clear |
Assists in clearing the autolearned entries. |
|
Clear WWN |
Represents the Port WWN (pWWN) to be used for clearing its corresponding autolearned entry. |
DPVM Config Database
|
Field |
Description |
|---|---|
|
Type |
Specifies the type of the corresponding instance of cdpvmLoginDev object. |
|
WWN or Name |
Represents the logging-in device. |
|
VSAN Id |
Represents the VSAN to be associated to the port on the local device on which the device represented by cdpvmLoginDev logs in. |
|
Switch Interface |
Represents the device alias. |
DPVM Active Database
|
Field |
Description |
|---|---|
|
Type |
Specifies the type of the corresponding instance of cdpvmEnfLoginDev. |
|
WWN or Name |
Represents the logging in device address. |
|
VSAN Id |
Represents the VSAN of the port on the local device through which the device represented by cdpvmEnfLoginDev logs in. |
|
Interface |
Represents the device alias. |
|
IsLearnt |
Indicates whether this is a learned entry or not. If true, then it is a learned entry. If false, then it is not. |
Additional References
For additional information related to implementing VSANs, see the following section:
Related Document
|
Related Topic |
Document Title |
|---|---|
|
Cisco MDS 9000 Family Command Reference |
Cisco MDS 9000 Family Command Reference |
Standards
|
Standard |
Title |
|---|---|
|
No new or modified standards are supported by this feature, and support for existing standards has not been modified by this feature. |
– |
RFCs
|
RFC |
Title |
|---|---|
|
No new or modified RFCs are supported by this feature, and support for existing RFCs has not been modified. |
– |
MIBs
|
MIBs |
MIBs Link |
|---|---|
|
To locate and download MIBs, go to the following URL: http://www.cisco.com/en/US/products/ps5989/prod_technical_reference_list.html |
 Feedback