Cisco Secure Access Help

PDF

Cisco Secure Access Help

Cisco Security Connector: Secure Access Setup Guide

Want to summarize with AI?

Log in

Describes Cisco Security Connector: Secure Access Setup Guide. The Cisco Security Connector: Secure Access Setup Guide only explains how to configure the Secure Access portion of the Cisco Security Connector (CSC).


Note
  • The Cisco Security Connector: Secure Access Setup Guide only explains how to configure the Secure Access portion of the Cisco Security Connector (CSC). For information about how to configure your Mobile Device Manager (MDM) system, see your MDM system's documentation.

  • The Cisco Security Connector is only supported for DNS policies.

The Cisco Security Connector provides visibility and control for organization-owned and MDM managed mobile Apple iOS devices, such as iPhones and iPads. The CSC's Secure Access component directs DNS traffic, including functionality for the intelligent proxy, to the Cisco Secure Access cloud where filtering against malicious sites, such as phishing sites or sites that exfiltrate information, takes place.

The CSC's Secure Access portion does not require an on-demand or always-on VPN or a full proxy to gain complete visibility and control through cloud security (not locally on the device). This makes for both easier management and simpler, more effective security.

Note

Your iOS mobile device must be managed by a MDM system.

Note

Remote Browser Isolation (RBI), which protects users by redirecting browsing to a cloud-based host, is not supported on mobile devices running iOS or Android.

For more information about the Cisco Security Connector, see Cisco Security Connector.

Requirements

For the Cisco Security Connector:

  • iOS device must be running iOS 15.0 or higher OR must be running in supervised mode with iOS 13.2 or higher.

  • iOS device must be managed by a Mobile Device Manager (MDM) system and use one of the following Apple device managers:

    • Apple School Manager

    • Apple Business Manager

  • Five MB free space.

One of the following MDM systems:

  • Meraki System Manager (SM) with API access enabled

    Note
    Only System Manager and Combined network types are supported.
  • Apple Configurator 2.5 or higher

  • IBM MaaS360

  • Intune

  • Jamf

  • MobiConnect

  • MobileIron Enterprise Mobility Management (EMM) On-Prem and Cloud versions 9.4 or higher

  • Workspace ONE

  • Generic—Other MDMs may be used to manage your organization-owned iOS mobile device; however, success results may vary. For more information, see Register an iOS Device Through a Generic MDM System.

    For information about configuring your specific MDM system, see your MDM system's documentation or contact your MDM's support team.

You will also need:

  • Cisco Secure Access account.

  • Direct access to the IPv4 IP addresses 208.67.222.222 or 208.67.220.220 is required for IPv4 DNS protection on ports 53 and 443.

  • Direct access to the IPv6 IP addresses 2620:119:35::35 or 2620:119:53::53, or access to IPv4 addresses on ports 53 and 443 through NAT64/DNS64 translation is required for IPv6 DNS protection.

    Note
    If DNS protection fails to engage, DNS traffic is not encrypted.
  • The device must be able to communicate with registration.polaris.qq.opendns.com for registration and validation purposes at least once a day—when actively used—otherwise, the device cannot be protected.

  • Depending on the MDM, you may also require each device's serial number.


Optionally


Getting Started

For a quick explanation of how to protect your iOS device with Secure Access through CSC, see Quick Start.

For MDM specific Secure Access procedures, see:

Note

For information about configuring your specific MDM system, see your MDM system's documentation.


Quick Start

The following is a short description of the general procedure for registering your supervised iOS device through your Mobile Device Manager (MDM) to Secure Access. For Secure Access procedures specific to an MDM, see:

Procedure

Below are the steps to follow for registering your IOS device through your MDM to Secure Access.

Before you begin, confirm that you meet all requirements as listed here.


1. Install the Cisco Security Connector App

Procedure

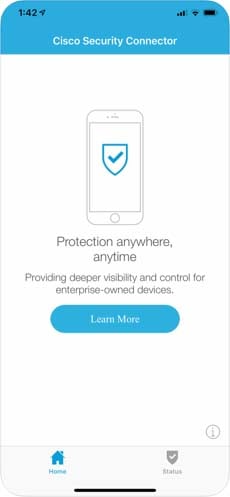
On your iOS device, download and install the Cisco Security Connector app.

Get the Cisco Security Connector app from the App Store. Depending on your MDM, you may be able to deploy the Cisco Security Connector to supervised iOS mobile devices through your MDM.

Cisco Security Connector app from the App Store. Depending on your MDM, you may be able to deploy the Cisco Security Connector to supervised iOS mobile devices through your MDM.

2. Add an Organization Administrator's Email Address

The administrator email address is the email address that your end-user can use to send diagnostic reports from the app by clicking the I icon from within the iOS device. These reports can then be passed onto Cisco support. Once set, this email address is automatically added when managing an MDM.

Procedure

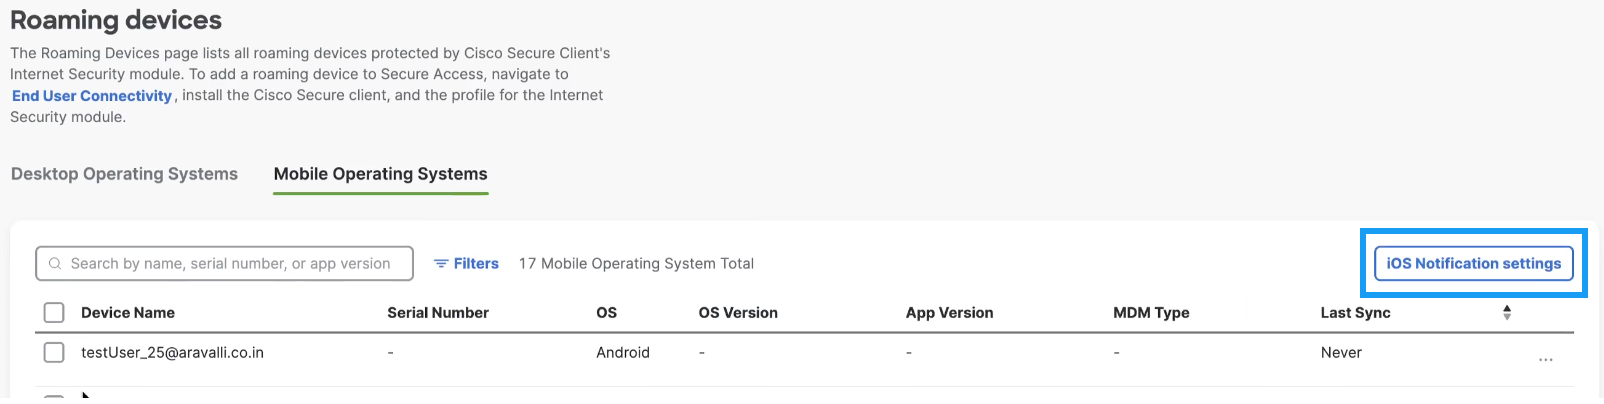
  1. Navigate to Resources > Roaming Devices > Mobile Operating System and click iOS Notification settings.


    The Ios Settings List interface.
  2. In the iOS Notification settings window, enter an administrator email address, choose a device identification method, and choose a notifications level (Protection failure notifications only or notify on all state changes), and click Save.


    The Ios Notification Setting interface.

3. Register Your iOS Device Through Your MDM to Secure Access

Procedure

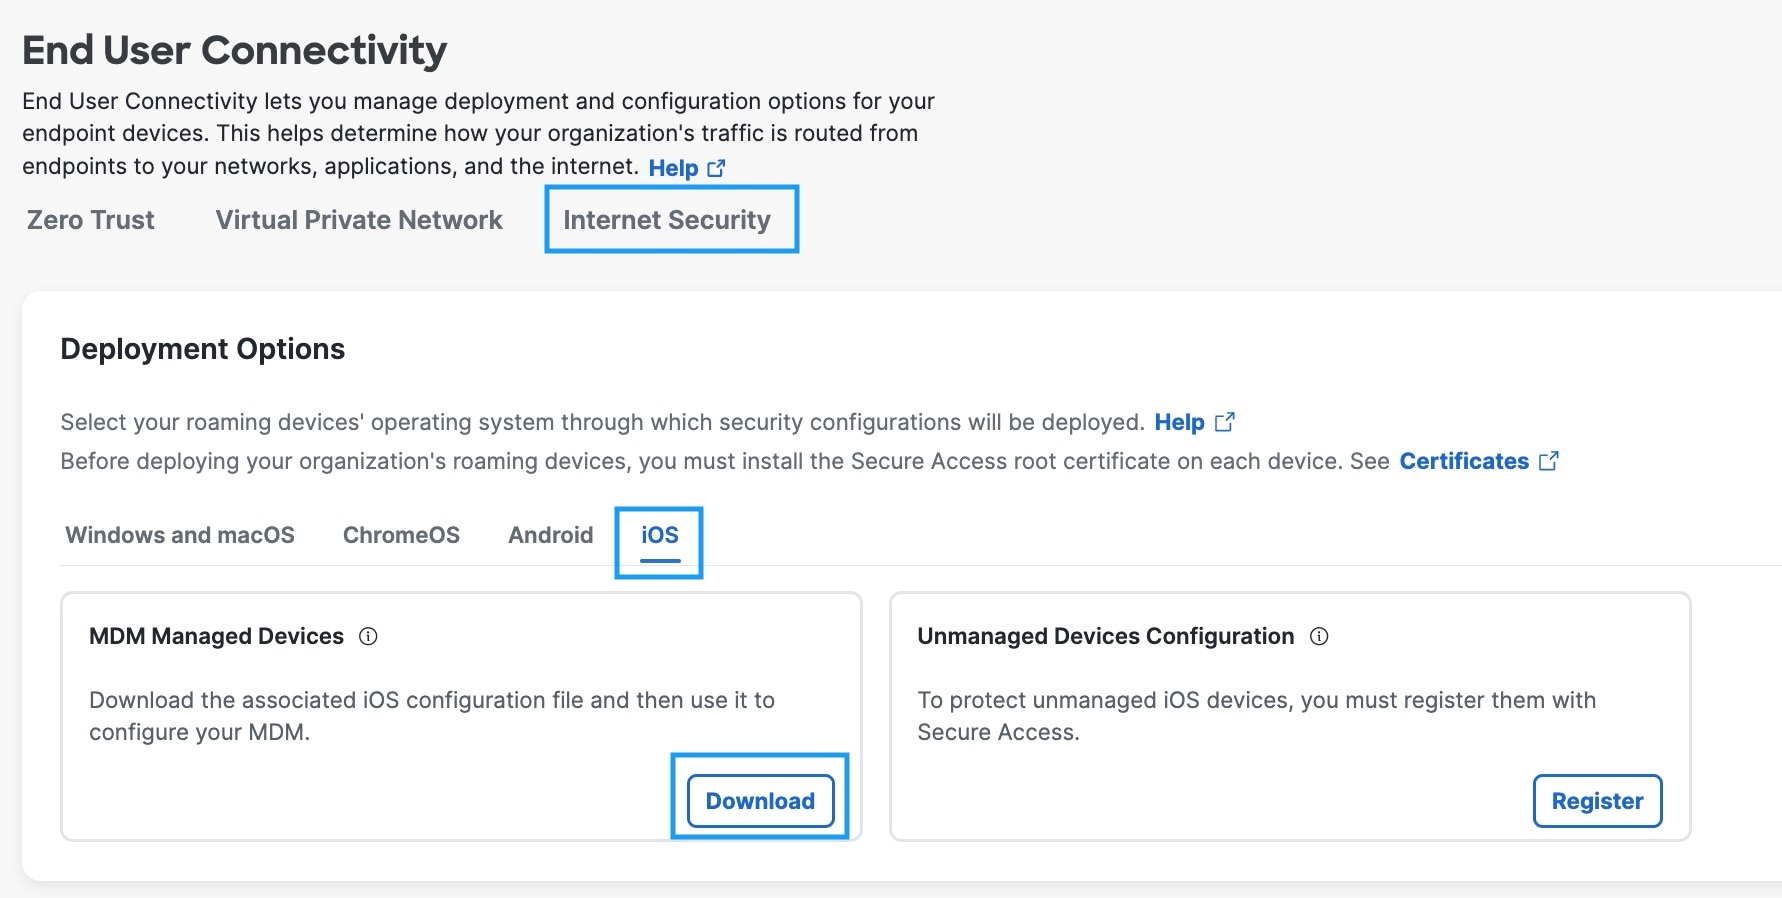
  1. In Secure Access, navigate to Connect > End User Connectivity and click Internet Security.

  2. Click the IOS tab.


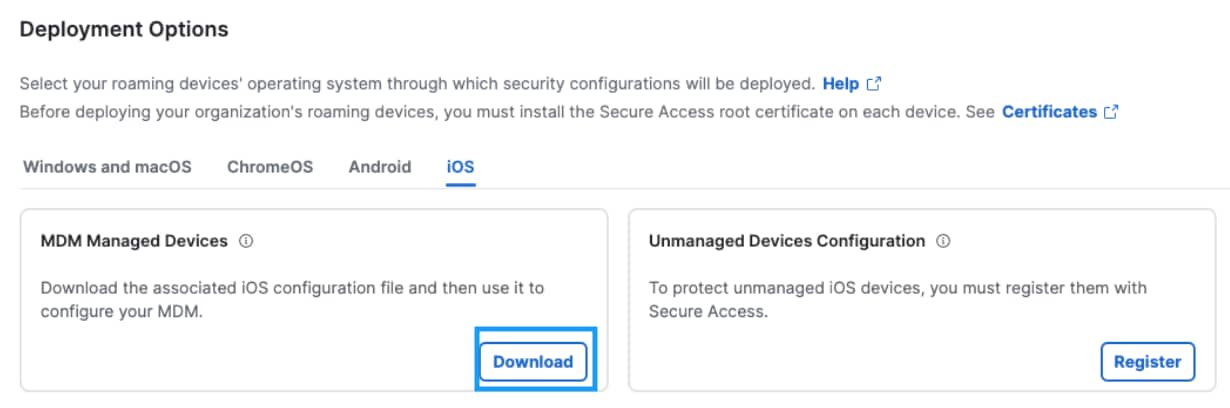
    The Download Configuration File interface.
  3. Under the MDM Managed Devices section, click Download

  4. Procedures to register your iOS device with Secure Access differ depending on the MDM system you are using:

    For information about configuring your specific MDM system, see your MDM system's documentation.

  5. When you have successfully registered your iOS device, Secure Access lists it in Resources > Roaming Devices > Mobile Operating Systems.


    The Registered Device List interface.
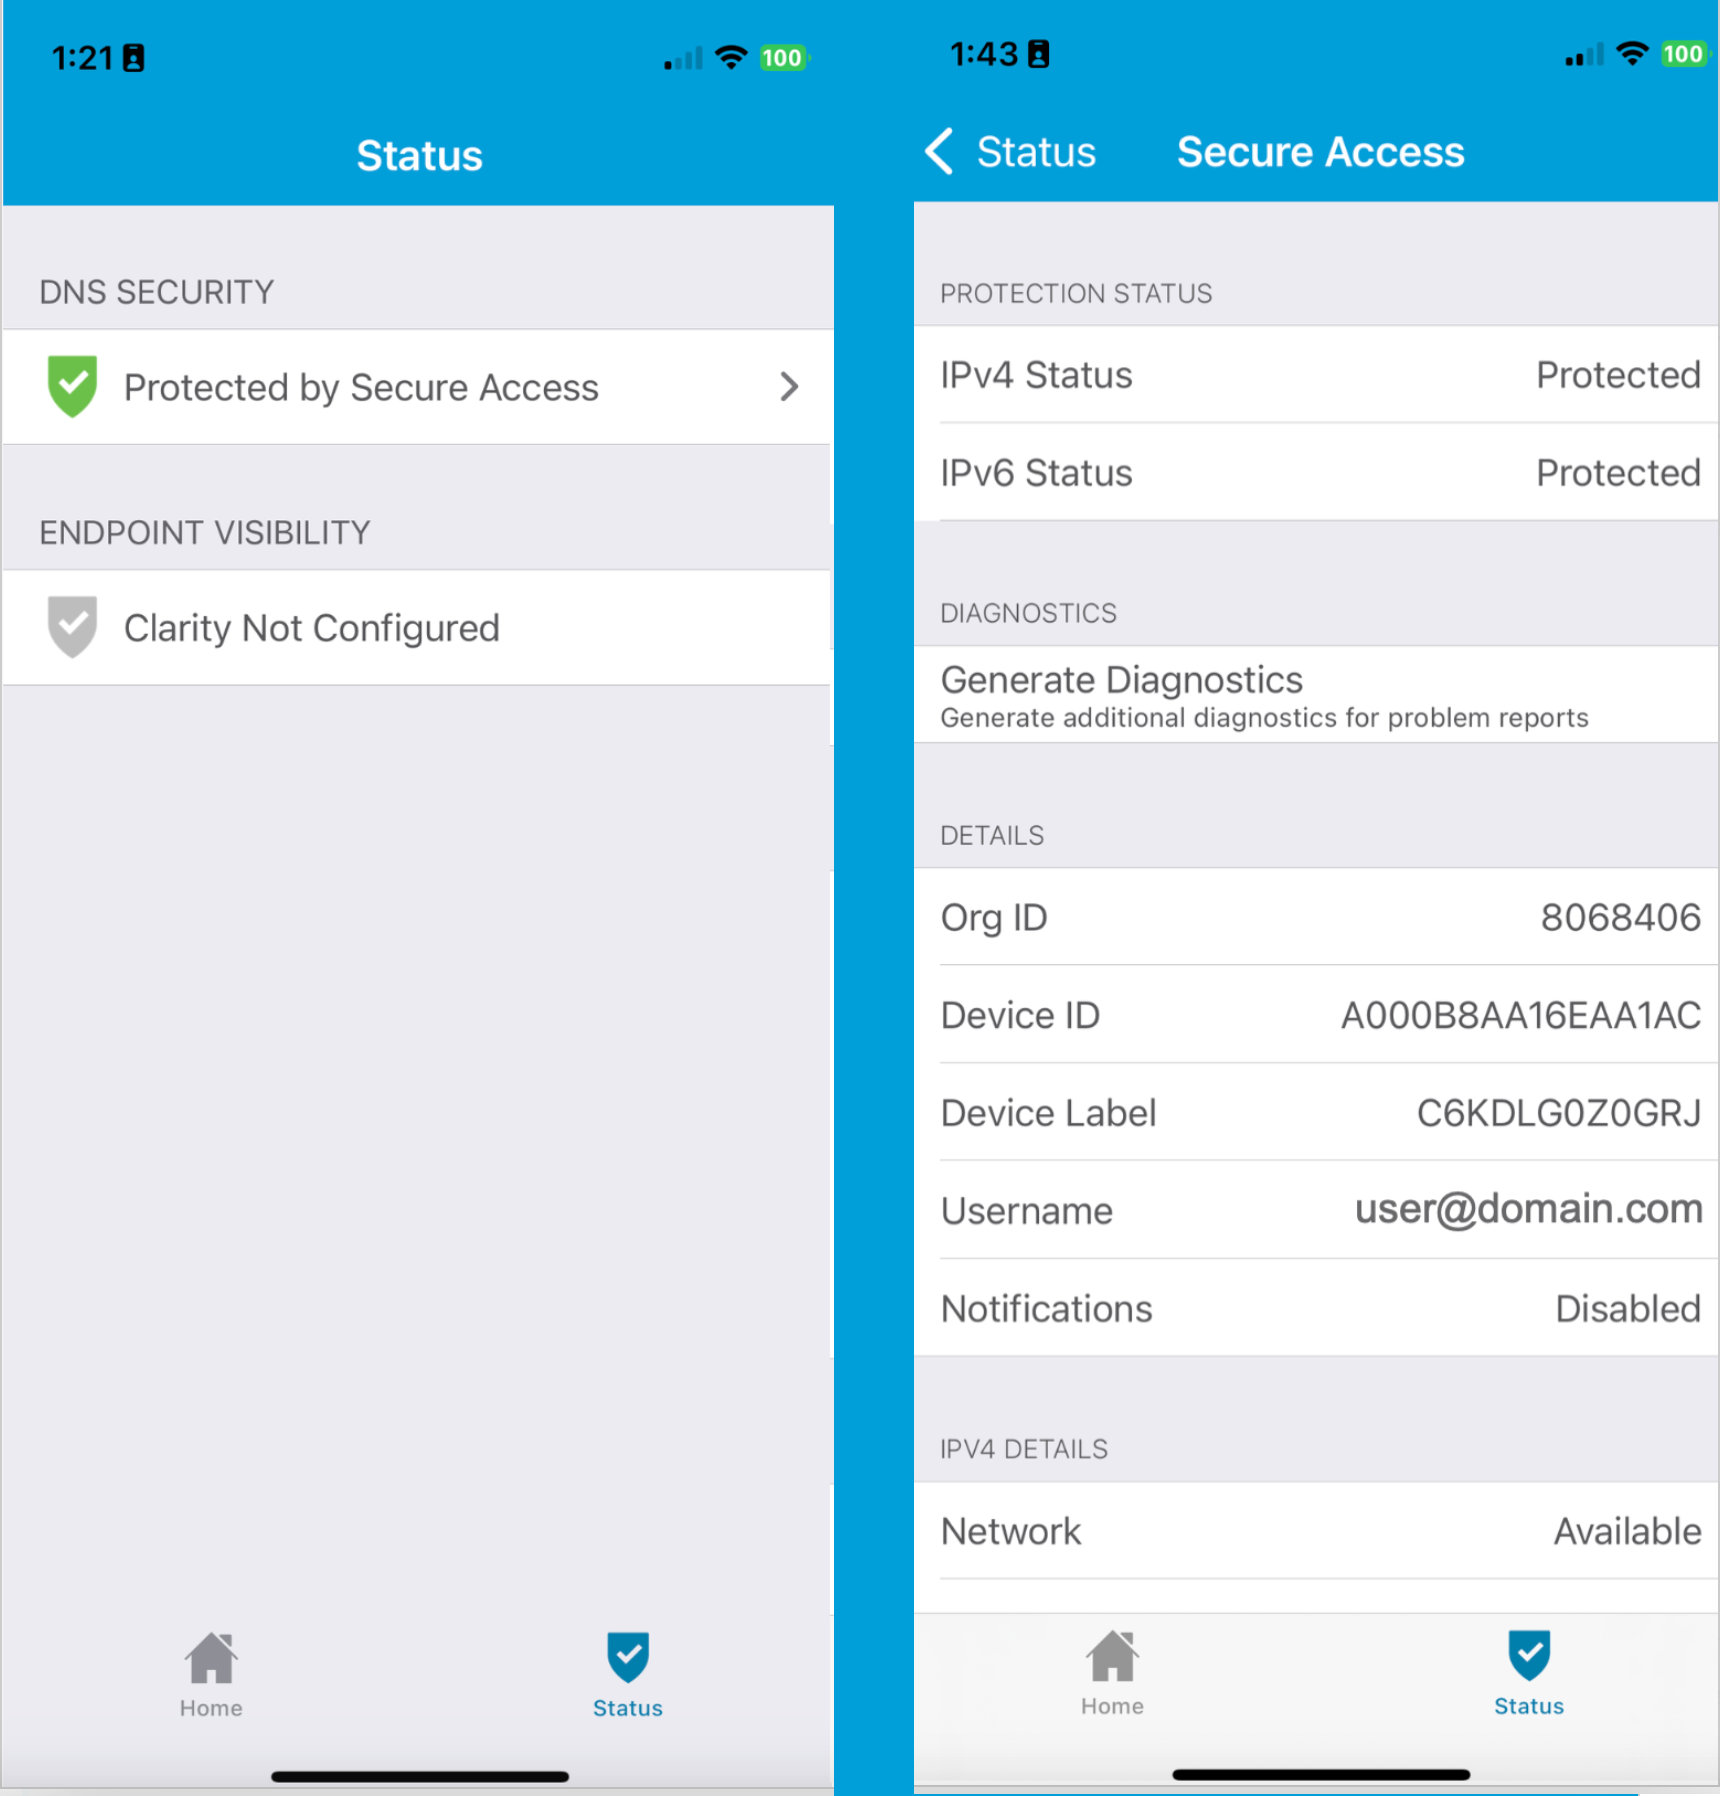
  6. On your mobile device, in the Cisco Security Connector app, tap the Status icon and confirm that it shows Protected by Secure Access. For protection details, tap Protected by Secure Access.


    The Secure Access Status interface.

Unregister a Mobile Device

To unregister a mobile device that is successfully registered with Secure Access through MDM, follow these steps:

Procedure

  1. Navigate to Resources > Roaming Devices > Mobile Operating System.

  2. Choose one of the following options as per your requirement:

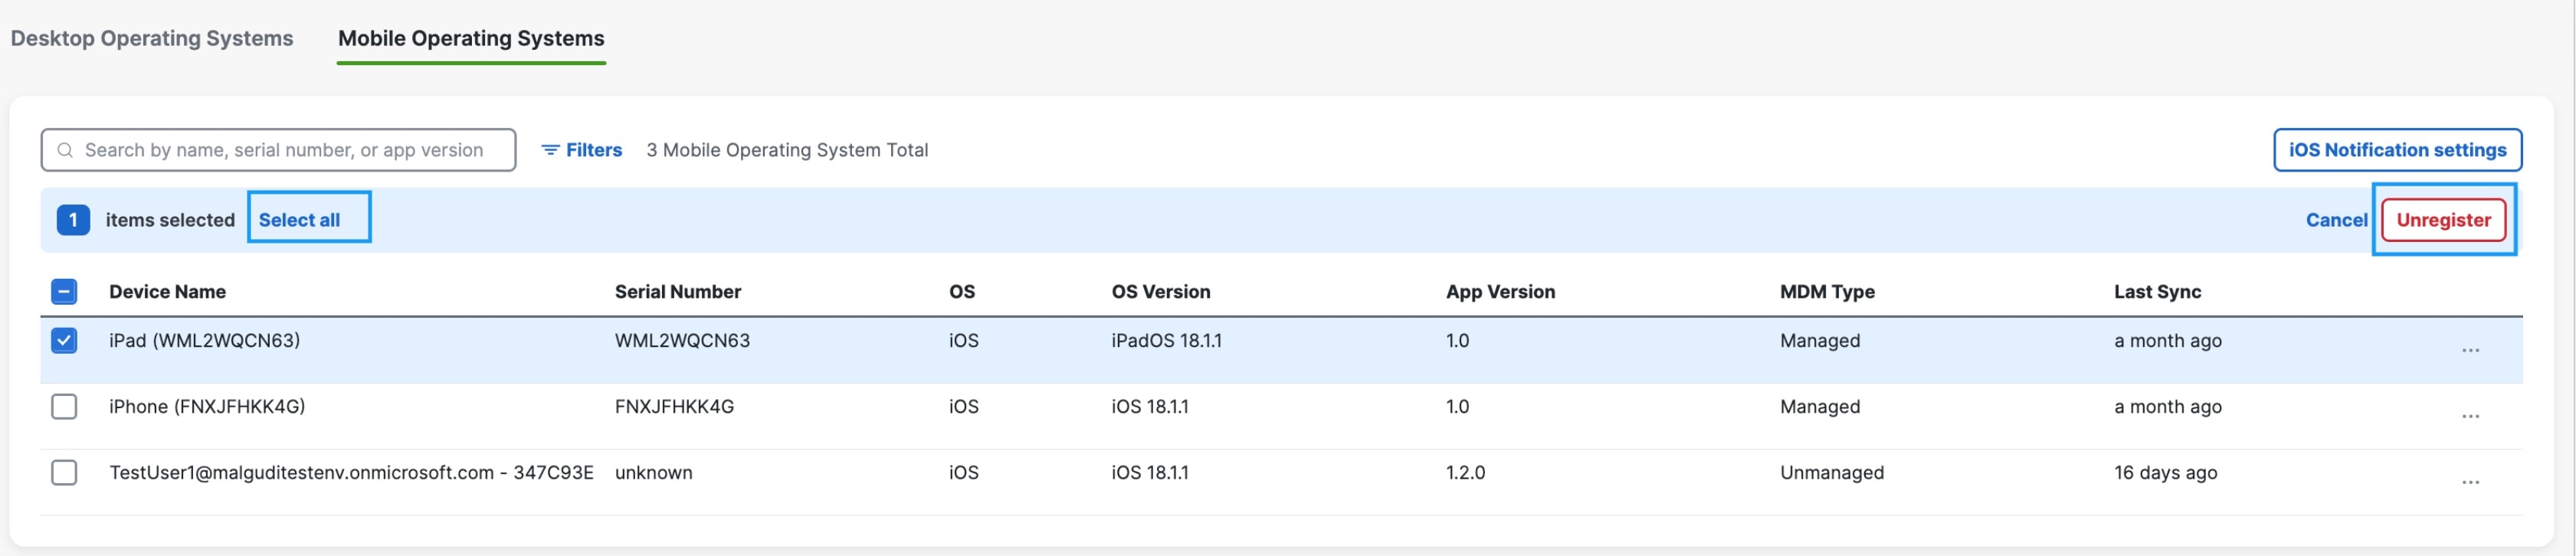
    • To unregister a device, check the check box next to the device and click Unregister at the top-right corner of the device list.

    • To unregister multiple devices simultaneously, check the check boxes next to all the required devices and click Unregister at the top-right corner of the device list.

    • To unregister all the devices, click Select all at the top of the table to choose all the devices at once and click Unregister at the top-right corner of the device list.


    To unregister all the devices, click Select all at the top of the table to choose all the devices at once and click Unregister at the top-right corner of the device list.
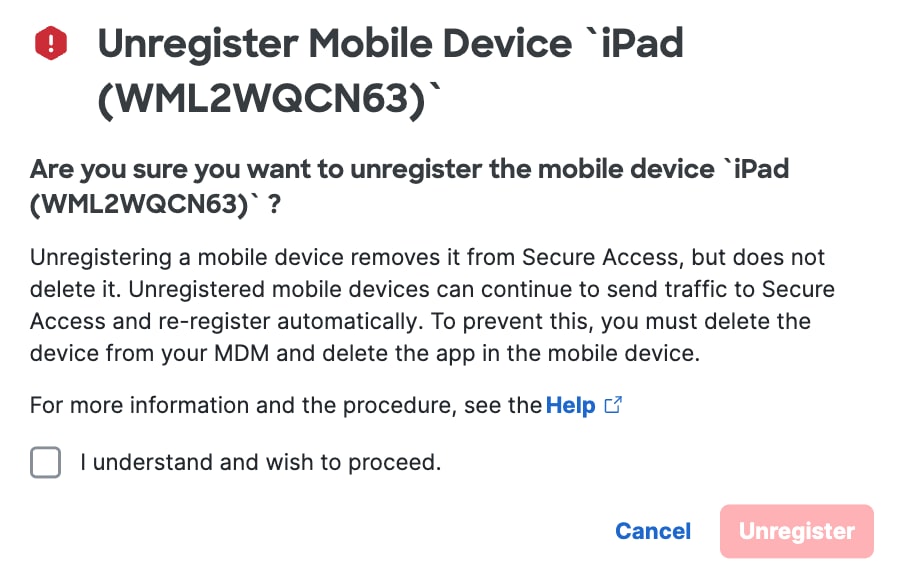
  3. In the confirmation dialog box, check the I Understand and wish to proceed check box and click Unregister.


    The Unregister Confirmation interface.
    Note
    Unregistering a mobile device from the dashboard does not prevent it from sending traffic to Secure Access. To stop a mobile device from sending traffic to Secure Access, you must delete the device from the MDM and remove the Cisco Security Connector app from the mobile device.

Manage Device Deployment

The Deployment Keys feature provides an effective way to manage device registration within organizations while mitigating unauthorized access. This feature introduces the concept of a deployment key that can be activated, deactivated, and revoked. By utilizing deployment keys, administrators gain control over the credentials used by devices during registration for Secure Access protection. A deployment key is a field in the .mobileconfig file, which is used when registering devices to your organization's network. This feature ensures that only authorized devices are enrolled by requiring an active deployment key for registration.

This feature facilitates seamless device registration and ongoing validation while offering the flexibility to deactivate keys when necessary. If any unauthorized devices try to connect, administrators can swiftly deactivate the current deployment key and delete the suspected devices from the dashboard, ensuring a secure and efficient network environment. The devices will not be able to reregister with the now-deactivated deployment key. Administrators can then activate a new deployment key. This allows IT teams to maintain operational continuity while safeguarding against unauthorized access.

Prerequisites for Device Deployment Management

  • For the Global deployment, the Deployment key feature is optional. Enable the Deployment Keys feature (Connect > End User Connectivity > Internet Security) if it is disabled.


    The Deployment Disabled interface.

Add and Activate Deployment Key

Procedure

  1. Navigate to Connect > End User Connectivity.

  2. Click Internet Security.


    The Deployment Management interface.
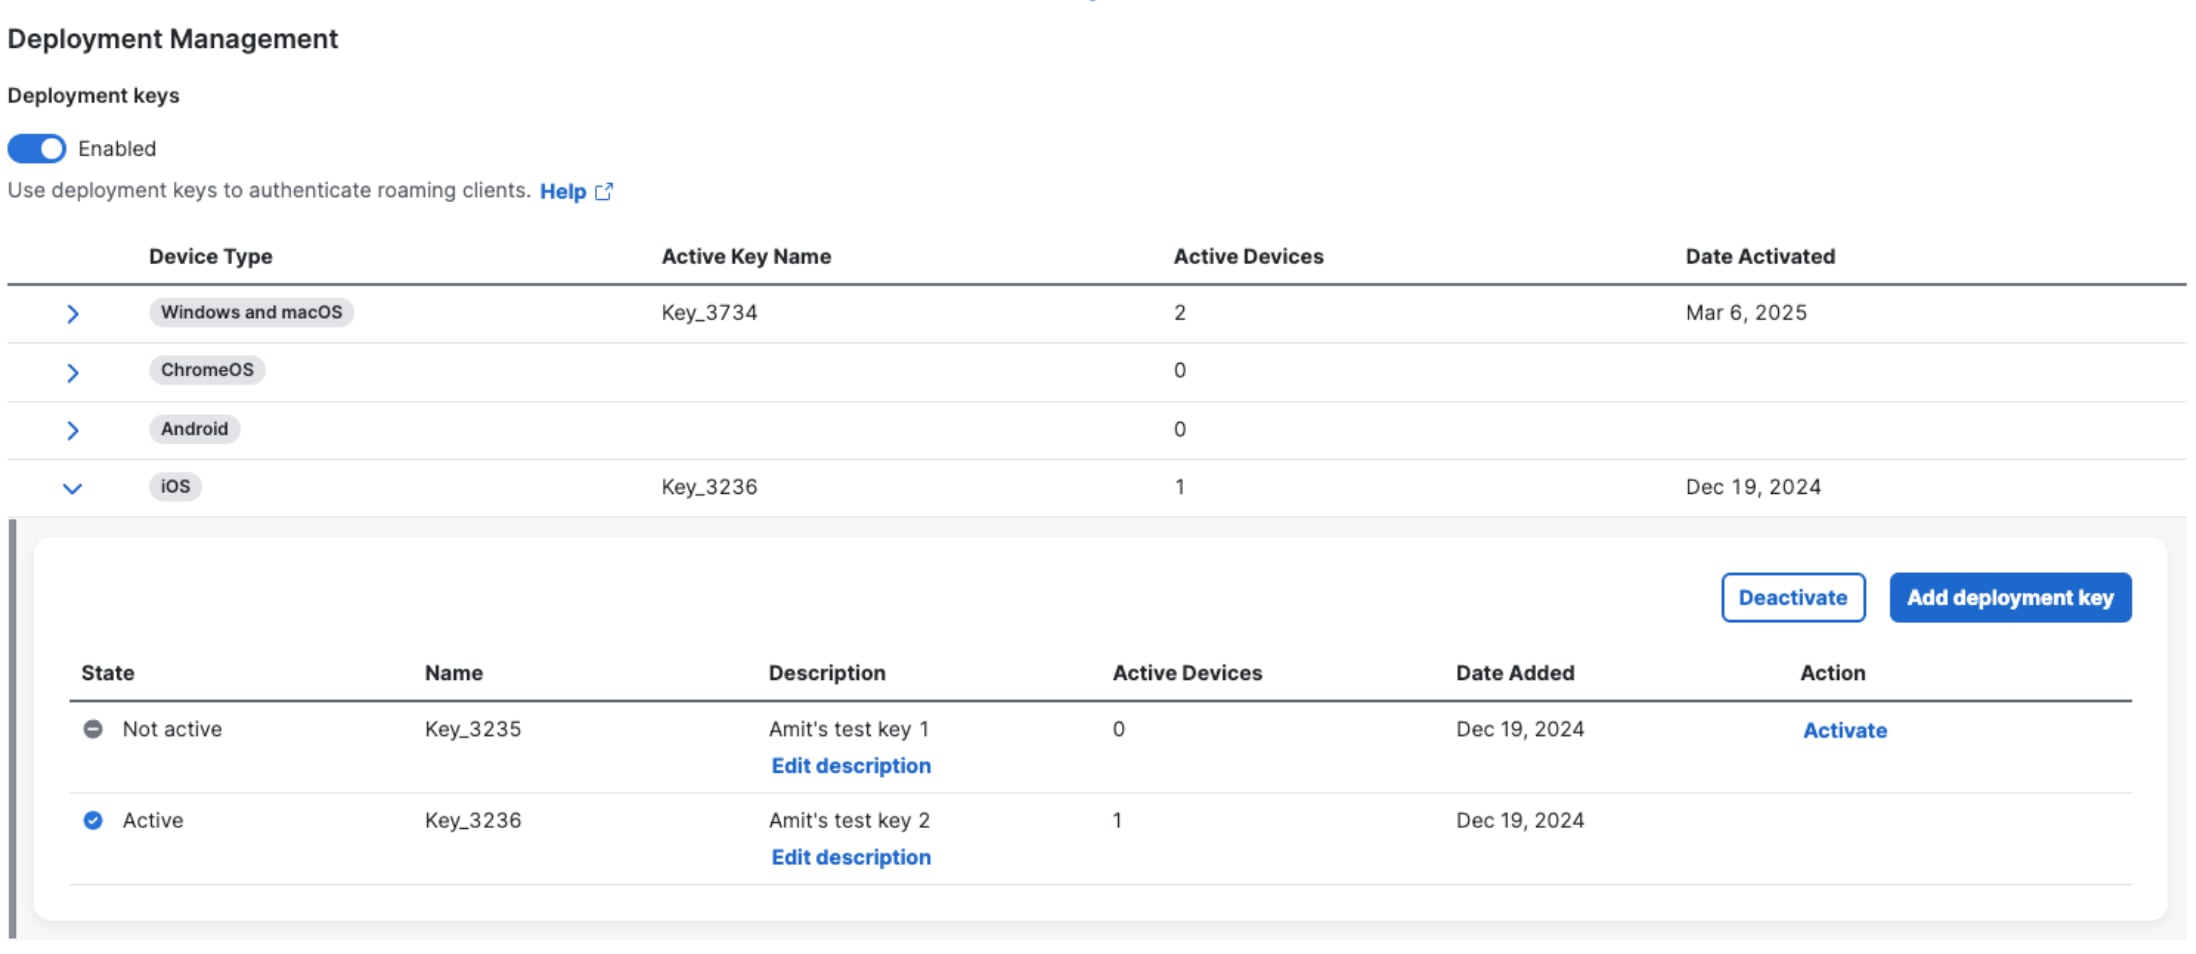
  3. In the Deployment Management section, expand the device type (iOS).


    The Add Deployment Key interface.
  4. Click Add deployment key.

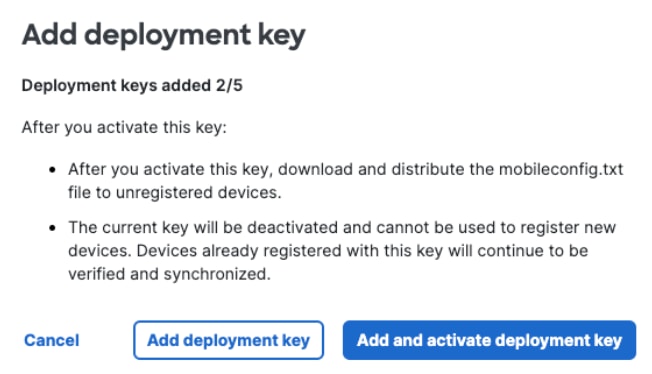
  5. In the Add deployment key window, click Add & activate deployment key to create and activate a deployment key for inclusion in your organization's .mobileconfig file.


    The Add Deployment Key Window interface.

What to do next

You can choose to add the deployment key immediately, but activate it later. In such a scenario, click Add deployment key. The deployment key is added to the table. When you are ready to activate the deployment key, click Activate in the Action column.

  • Only one deployment key can be active at a time for each device type.

  • You can add up to five deployment keys per device type. To remove a key, contact Cisco support or your Account Manager.

  • The deployment key name includes a random number to ensure its uniqueness.

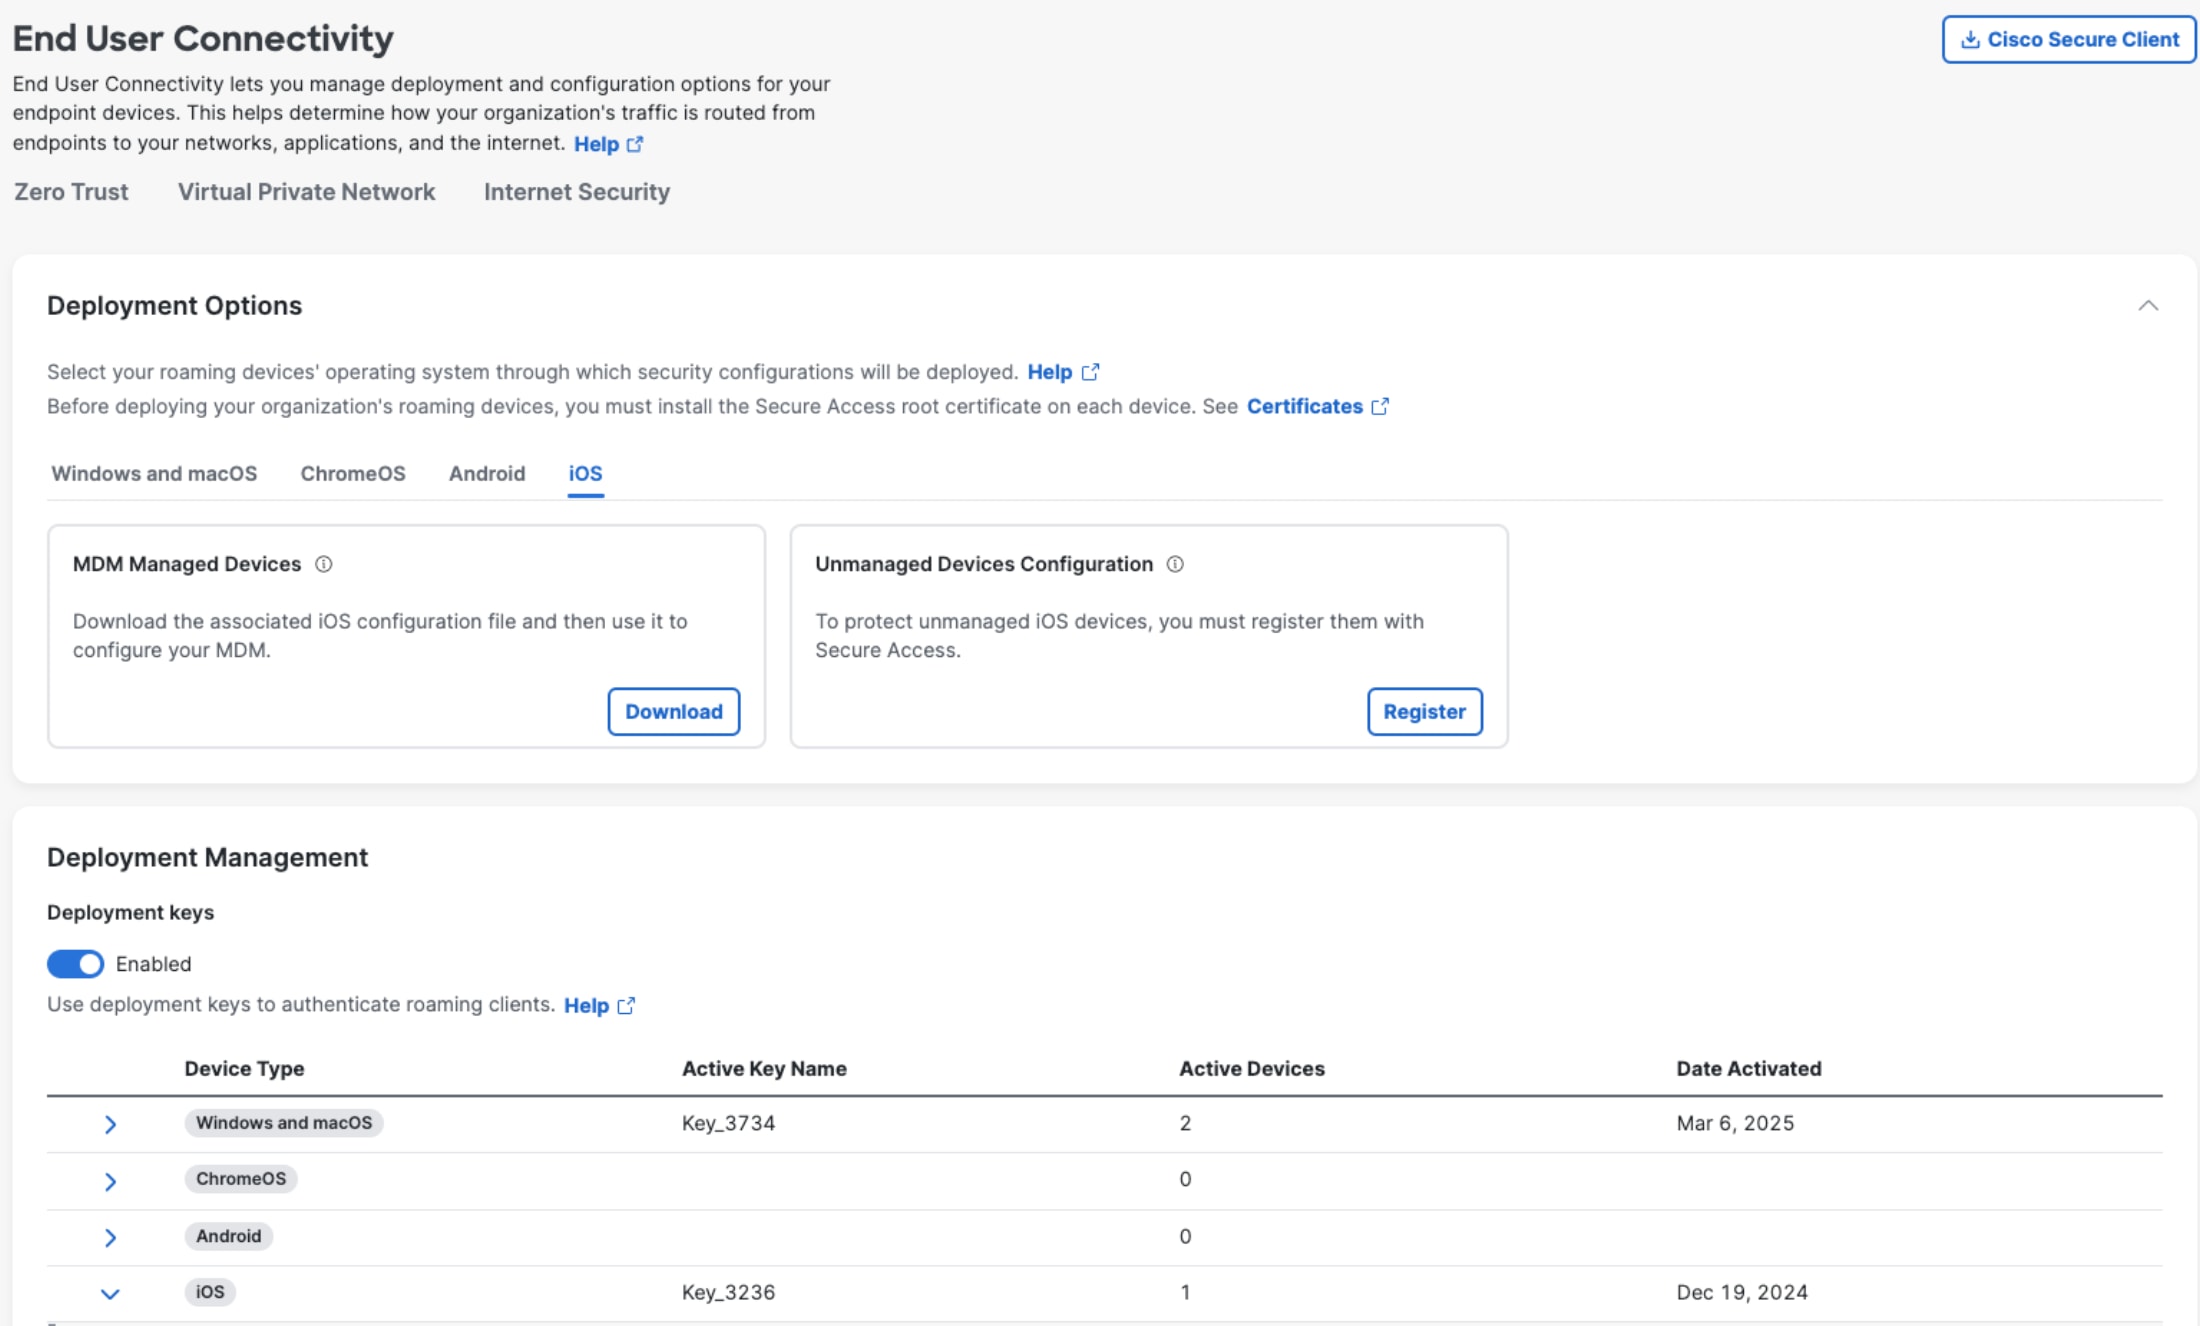
If your Secure Access deployment requires a deployment key, or if your organization has already enabled them, the .mobileconfig file can only be downloaded when there is an active deployment key (see image below). Then, register your supervised iOS device through your Mobile Device Manager (MDM) to Secure Access. For procedures specific to an MDM, see Register Your iOS Device Through Your MDM to Secure Access.


The Deployment Options interface.

Manage Deployment Key Compromise

If you determine that a key has been compromised, take action to protect your network's integrity and security. Compromised keys can pose significant risks, as they may allow unauthorized access to your network.

This section outlines the necessary actions to be taken to ensure network security and continuity, including deactivating compromised keys, understanding the effects on existing clients, and steps for activating and distributing a new key for secure device registration.

Procedure

  1. Deactivate the Compromised Key: Deactivate the compromised key. This action prevents any further device registrations using the deactivated key, ensuring that your network remains secure.

    To deactivate a deployment key, perform the following steps:

    1. Navigate to Connect > End User Connectivity.

    2. Click Internet Security.

    3. In the Deployment Management section, expand the device type.

    4. Click Deactivate in the Action column.

      Upon deactivating the compromised deployment key, it is important to consider its implications on both existing clients and the registration of new devices:

      • Effect on existing clients: It's important to note that deactivating a key will not disrupt the operation of clients already using it. These clients will continue to function normally, minimizing any potential impact on your current network operations.

      • Limitations for new devices: However, deactivated keys cannot be used for registering new devices. This means that any device attempting to register itself with the deactivated key will be unable to do so.

    Note
    Devices that are deleted from the dashboard will automatically get reregistered when the Umbrella module is restarted, provided the deployment key in their .mobileconfig file is active.
  2. Activate the new deployment key: To facilitate the registration of new devices, you must activate a different deployment key. This new key will replace the compromised one and will be used for future device registrations.

  3. Download a new profile: After the new key is activated, download a new profile, specifically the .mobileconfig file. This file contains the updated information, including the new active deployment key.

  4. Distribute the new profile to new devices: Distribute the updated .mobileconfig profile to any new devices that need to connect to your network. This ensures that they have the correct and secure credentials to register and operate within your network environment.

  5. Update the .mobileconfig file for registered devices: Devices that are already registered and require an update to the .mobileconfig file will automatically receive changes once the configuration is updated in the MDM.


Delete a Deployment Key

To delete a deployment key, submit a support ticket to Cisco support or contact your Account Manager.

Caution
Deleting a Deployment Key is a high-impact action. It immediately disconnects existing roaming devices and stops new device registrations and synchronizations. Ensure that you have identified the correct key before performing any management actions.

If an active deployment key is deleted, administrators must generate a new key, download the updated profile, and distribute the profile to all affected devices to restore connectivity. For detailed recovery steps, see Manage deployment key compromise.


Reverting to Using Legacy Deployment Implementation

If needed, you can revert to the legacy registration mechanism by disabling the Deployment Keys feature (Connect > End User Connectivity > Internet Security).


The Deployment Disabled interface.

Procedure

  1. After disabling the Deployment Keys feature, devices that are currently using the last activated deployment key will continue to be protected by Secure Access. However, new devices will not be able to register with the deactivated deployment key.

  2. To revert to the legacy registration mechanism, download the updated .mobileconfig file, which will no longer include the deployment key. New devices can now register using the legacy method.


Backward Compatibility

This feature is designed for backward compatibility, allowing organizations to adopt the new deployment key functionality at their own pace without disrupting existing workflows or functionality.

For example, on iOS:

  • Cisco Security Connecter for iOS Release 1.7.3 or earlier will continue to use the legacy registrationToken-based process for registration, regardless of whether a deployment key is present.

  • Cisco Security Connecter for iOS Release 1.7.4 or later will use the deployment key for registration, regardless of whether the registrationToken is present. If the deployment key is unavailable, the legacy registrationToken will be used for registration instead.