Cisco Secure Access Help

PDF

Cisco Secure Access Help

Add an Internet Access Rule

Want to summarize with AI?

Log in

Provides instructions for completing the Add an Internet Access Rule workflow in Cisco Secure Access. It explains the sequence of actions and relevant settings presented in the procedure.


The Cisco Secure Access policy is a collection of an organization's internet and private access rules. To start protecting user devices that connect to the Internet, add internet access rules to the organization's Access policy.

This guide describes the steps to add an internet access rule and configure the security controls and profiles.

Before you begin

Note
Prerequisites for internet access rules are similar to but different from prerequisites for private access rules.

Procedure

  1. Navigate to Secure > Access Policy.

  2. Click Add Rule > Internet Access.

    At the top of the rule is a summary section. The Summary describes the security controls that you configure on this rule.


    The Internet Rule Summary interface.
  3. Navigate to Specify Access, and then configure the access criteria for the rule.

    For more information, see Access Criteria
  4. Click Next.

    Note
    The Next button is not available until you give the rule a name and then click out of the Rule name field.
  5. Navigate to Configure Security, and then configure the security control settings for the rule.

    For more information, see Security Control Options.
  6. Click Save.

  7. (Optional) Enable or disable the rule using the toggle at the top of the page.

What to do next

Return to Get Started with Internet Access Rules and review additional steps you should take after configuring a rule.

Additional rules are required for most traffic. For more information, see Ensure Rule Matching for Encrypted Internet Traffic.

Access Criteria


Enable the Rule and Edit Your Logging Settings

Enable the internet access rule in the Access policy and manage the logging settings on the access rule.

Before you begin

Procedure

  1. Navigate to Secure > Access Policy > Add Rule > Internet Access.

  2. Click Rule is enabled to toggle on the rule.

    After you configure and save the rule to your policy, the rule is enabled. You can toggle off the rule at any time to disable it.

    The Internet Access Rule Enable interface.
  3. Navigate to the Logging options on the top right corner of the page.

    The Internet Access Enable Logging interface.
    1. Click Edit to manage your logging settings on the access rule.
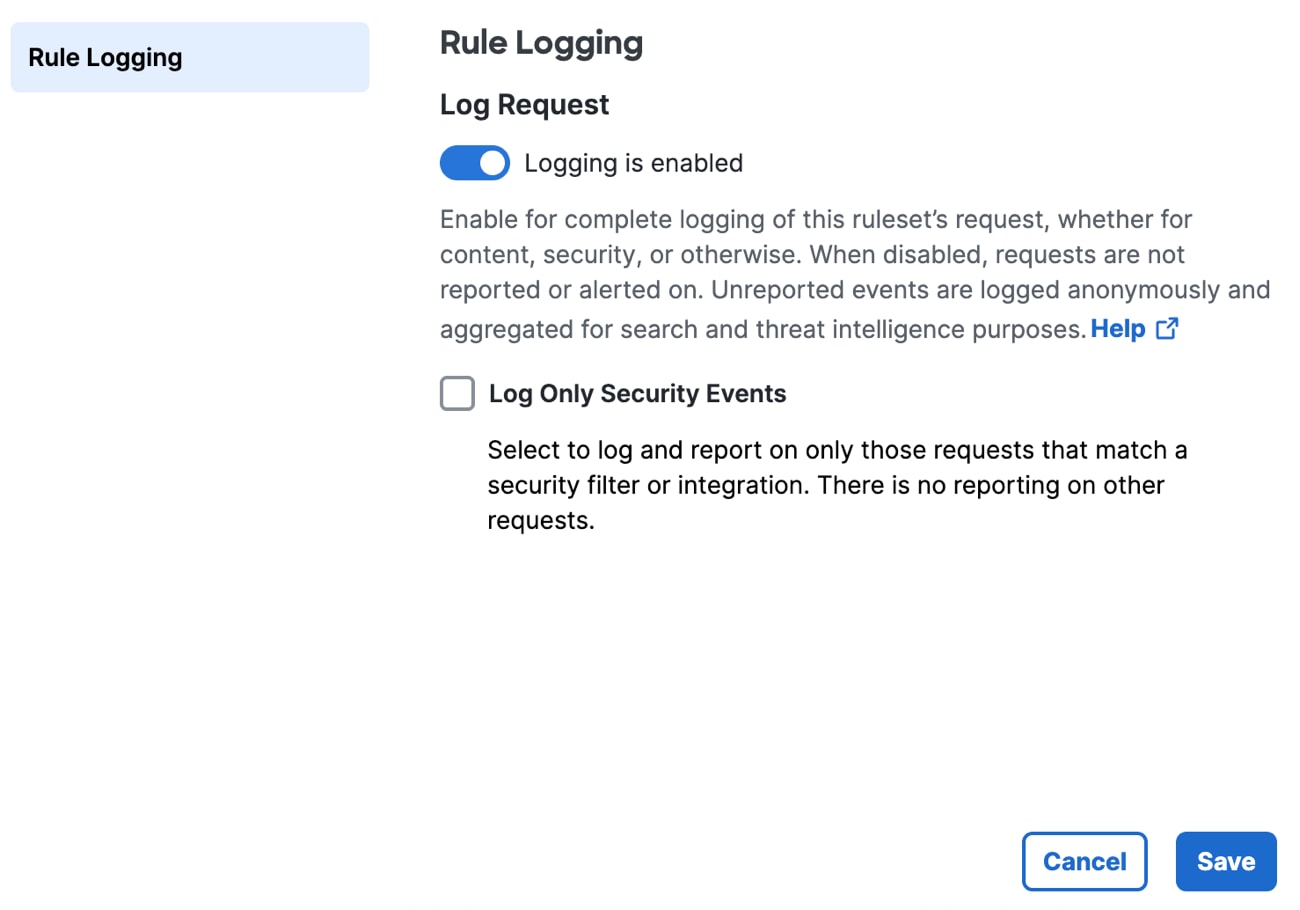
      The Internet Access Rule Edit Logging interface.
    2. For Log Request, toggle off or on to choose whether Secure Access logs the events for the traffic managed by the access rule.
    3. For Log Only Security Events, select whether Secure Access logs the events that match thesecurity filters.

      For more information, see Manage Logging.

    4. Click Save.

Summary

After you add a rule to your policy, you can edit the rule and then view the rule summary.

Before you begin

Procedure

  1. Navigate to Secure > Access Policy.

  2. Navigate to a rule, and then click on the horizontal ellipsis (...) to expand the rule menu.


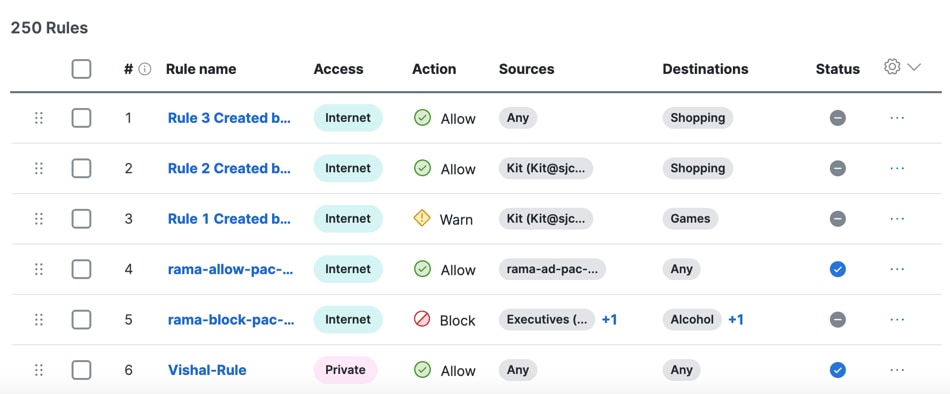
    The Access Rule Small List interface.
  3. Click Edit to open the rule and view the rule summary.


    The Internet Access Rule Summary interface.

    The summary contains the components that you configured on the access rule:

    • Sources

    • Action

    • Security Controls

    • Destinations

What to do next

If you see an Upgrade button, this means your organization has an opportunity to upgrade to a licensing package that offers additional functionality. For details, contact your Cisco representative.


Rule Name

You must give your access rule a meaningful name. The Rule name is required. You must add a rule name before you can continue to configure the Security Controls on the access rule.

Note
The Next button on the access rule is not available until you enter a name for the rule.

Guidelines for Creating a Rule Name

Secure Access enforces the number and type of characters supported in a rule name. You can add a rule name with these constraints:

  • A rule name is a sequence of 2–50 alphanumeric, hyphen, underscore, and space characters.

  • A rule name must be unique across all access rules in the organization's Access policy.


Rule Order

Specify where you want this rule in the overall rule order.

Secure Access applies the first rule in the list on the Access Policy page that matches the traffic.
Order your rules so that more specific rules are above more general rules that might also apply to the traffic.
For important guidelines, see Edit the Order of Rules on the Access Policy Page.


Rule Action

By default, access to internet destinations is allowed unless an access rule blocks or modifies access using the Warn or Isolate options.

The action you choose determines which other options are available in the rule.

Specify the rule action before you specify other settings including source and destination, or those configurations will be reset when you change the action.

  • Allow — When the action is Allow, traffic can still be blocked if it does not pass the security controls specified in the rule.

  • Block — If you want to display a notification page to end users who attempt to access a blocked destination. For more information, see Manage Notification Pages.

  • Warn — When the action is Warn:

    • End users must click a link in a warning notification to access the destination.

    • The destination can include applications and application categories as well as content categories and content category lists.

    • You can configure a custom warning notification that Secure Access will present to users who attempt to access a warned destination. You can also preview the notification page. See Manage Notification Pages.

    • Decryption must be enabled in order to present the notification.

    • For required certificates for displaying notifications, see Certificates for Internet Decryption.

  • Isolate — If your license includes the Remote Browser Isolation feature, Secure Access creates a virtual browser that hosts applicable destination access requests. This action is available only for certain destinations.

    For information about the Isolate action, see Understand Isolated Destinations.

    If you see an Upgrade button, click it for information about enhanced functionality for this feature.


Enable a Schedule on an Internet Access Rule

Configure the Schedule Enablement Time and Date setting and add a Schedule on the internet access rule. For information about configuring Schedules in Secure Access, see Manage Schedules.

Before you begin

Procedure

  1. On an internet access rule in the Access policy, navigate to Specify Access, and then navigate to Schedule Enablement Time and Date.


    The Schedule Enablement Selector interface.
  2. Click Enabled to activate a Schedule on the internet access rule.

    1. (Optional) To disable a Schedule on the internet access rule, toggle off the Schedule Enablement Time and Date setting.
  3. Click the Select Schedule drop-down menu and then choose a schedule to enable on the internet access rule.

  4. Click Save.


Pre-Configured Sources

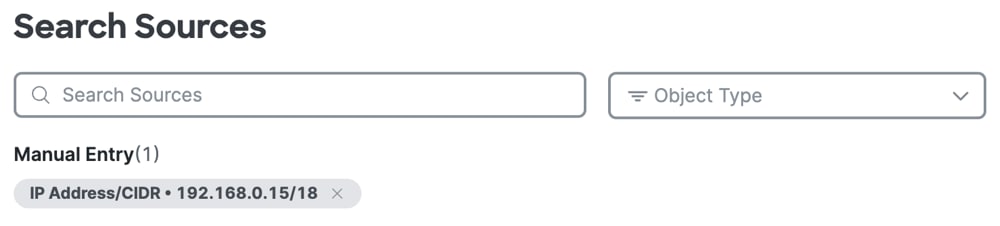
We recommend that you create reusable components rather than adding source IP addresses, CIDR blocks, wildcard masks, and ports directly to a rule. For more information, see Components for Internet Access Rules.

On an internet access rule, you can select multiple pre-configured sources with the boolean AND operator. For information about combining sources on internet access rules with boolean logic, see Sources.

Note
The arrows out icon opens a window to configure the sources in your rule.

Before you begin

Procedure

  1. Navigate to Secure > Access Policy > Add Rule > Internet Access.

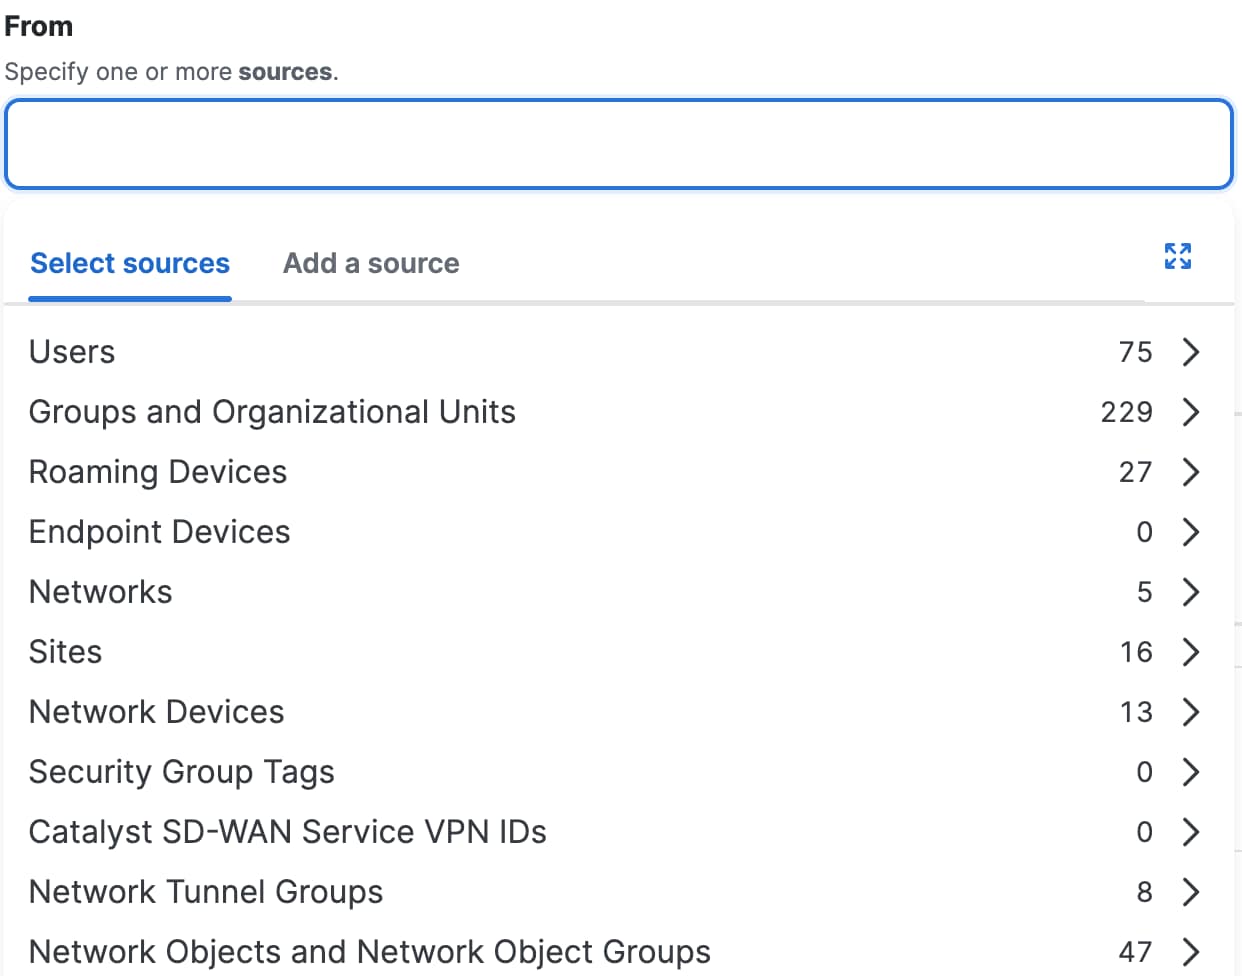
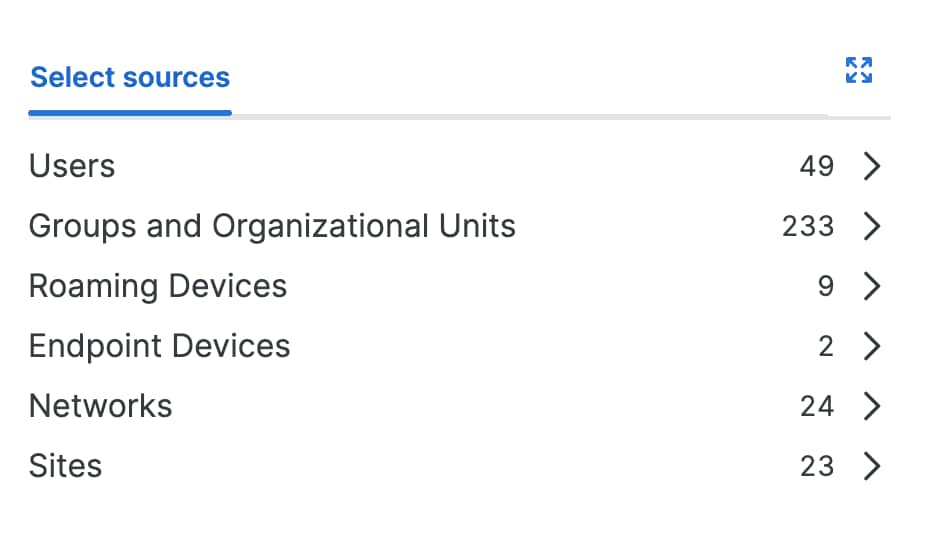
  2. Navigate to Specify Access, click on the search bar under From, and then navigate to Select sources.

  3. Choose a source and all of its members or choose specific sources in your organization.

    For descriptions of the different types of sources, including links to how to create reusable sources, see Components for Internet Access Rules.

    The Internet Access Rule Source Components interface.
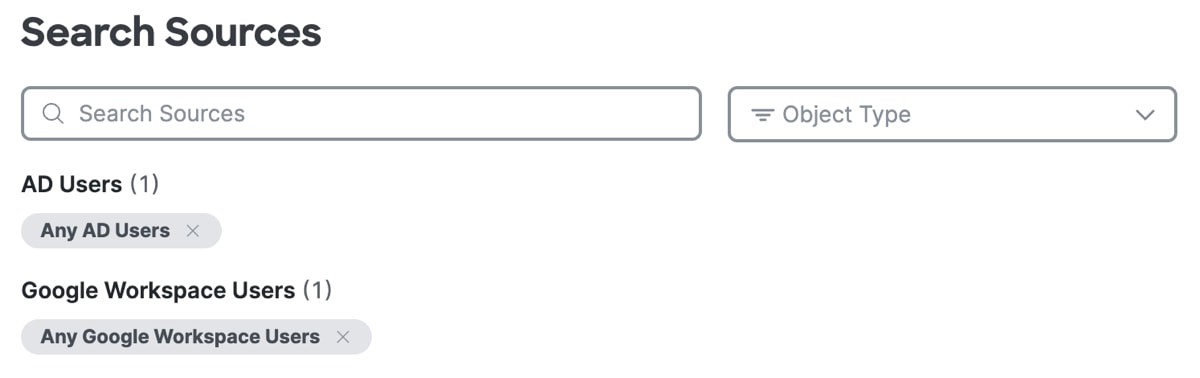
    1. (Optional) After you add a source, click +More to view the list of sources that you added to the access rule.
      The Search Source Components interface.
    2. Click on the X to remove a previously-added source.
    3. Click Done when you finish modifying the list of added sources.
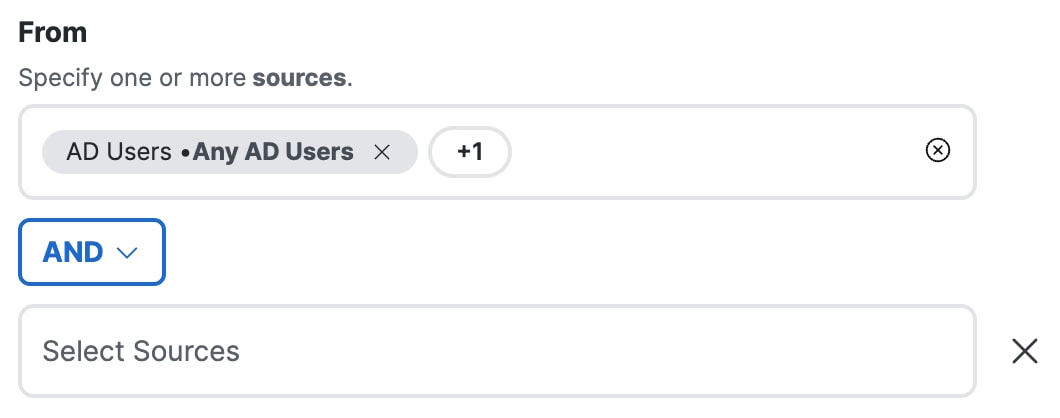
  4. (Optional) Click AND, and then click in the Select Sources text area.

    The Internet Rule Click and interface.
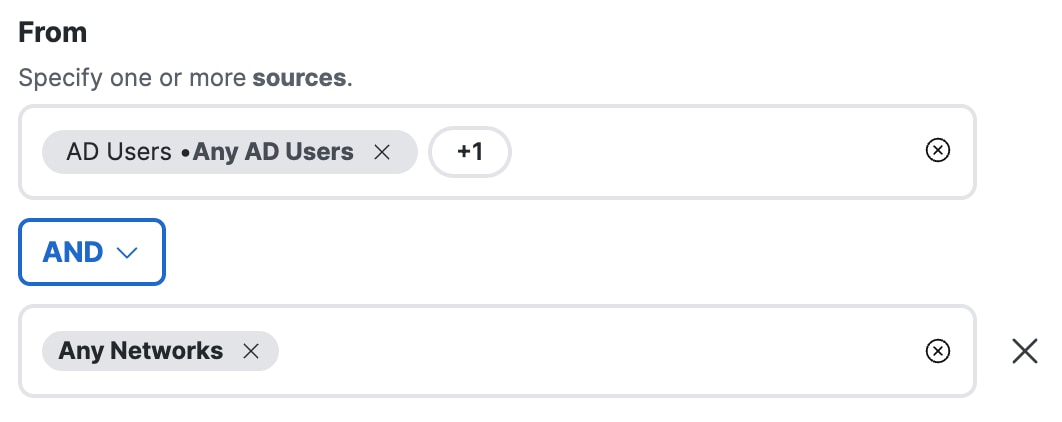
    1. Choose a source and all of its members or choose specific sources in your organization.
      The And Sources List interface.
    2. (Optional) Click on the X outside of the second Select Sources text area.

      Secure Access removes the selected AND operator with the sources.

      The Internet Rule Anded Sources Dismiss interface.

Composite Sources

You can add network information as composite sources directly on an internet rule. This option is useful if you need to quickly address a specific issue that arises, for example to immediately block a particular user's access to an internet destination. For information about configuring composite sources, see Composite Sources for Internet Access Rules.

Before you begin

Note
Prerequisites for internet access rules are similar to but different from prerequisites for private access rules.

Procedure

  1. Navigate to Secure > Access Policy > Add Rule > Internet Access.

  2. Navigate to Specify Access and then click on the search bar under From.

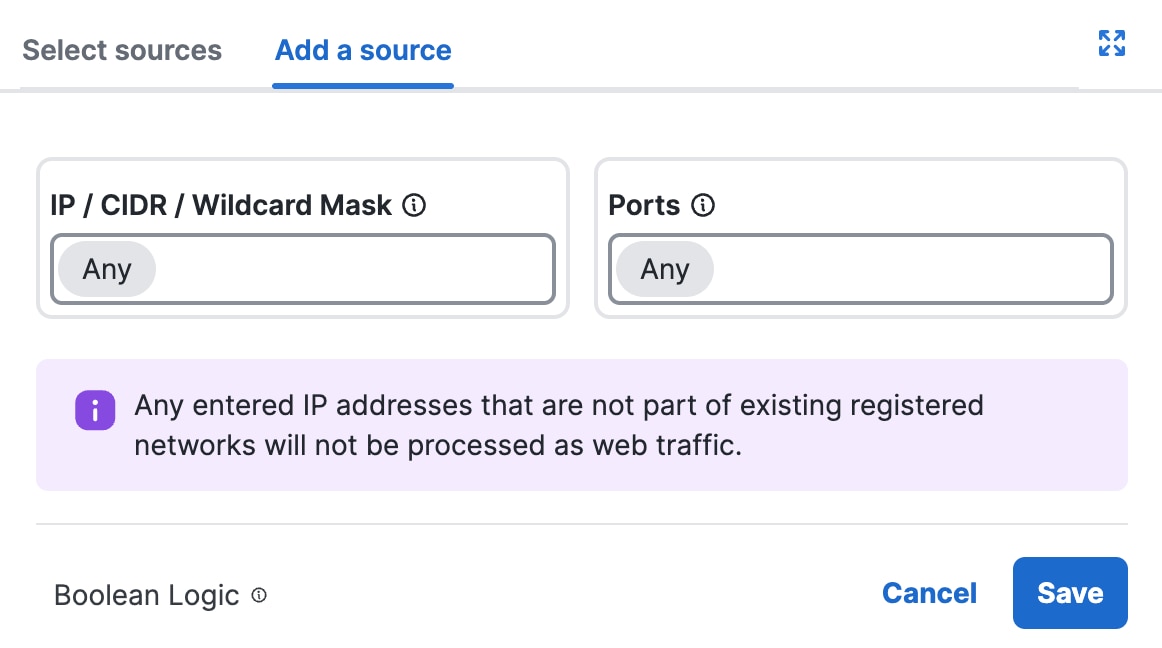
  3. For Add a source, enter the network components that Secure Access combines on a source in the internet access rule.

    1. For IP/CIDR/Wildcard Mask , enter a single IPv4 or IPv6 address, CIDR block, IPv4 address with a wildcard mask, or a comma-separated list of IP addresses or CIDR blocks. You can also choose the Any option instead of entering IP addresses or CIDR blocks.

      The Internet Rules Sources Add Ports interface.

      For example:

      • IPv4 address—1.2.3.4

      • CIDR block—1.2.3.4/24

      • Wildcard mask—1.2.3.4/255.255.255.255

        For Wildcard Mask, use this format: <IP address>/<Wildcard Mask>. For information about wildcard masks, see Using Wildcard Masks on Internet Rules.

    2. For Ports, enter a port or range of ports separated by a hyphen (-), or a comma-separated list of ports and port ranges. You can also choose the Any option instead of entering the ports for the source.
  4. Click Save to add the source.

    1. (Optional) After you add a composite source, click +number to view the list of sources that you added to the internet access rule.

      The Rule Source Search Source interface.
    2. Click on the X to remove a source entry.
    3. Click Done to confirm the list of sources.

Pre-Configured Destinations

We recommend that you create reusable components rather than adding destinations directly in a rule. For more information, see Components for Internet Access Rules.

The rule action sets the the destination options that are available on the rule. Usually you will select destinations that you or others have previously configured.

Note

The arrows out icon opens a window to configure the destinations in your rule.

Procedure

  1. Navigate to Secure > Access Policy > Add Rule > Internet Access.

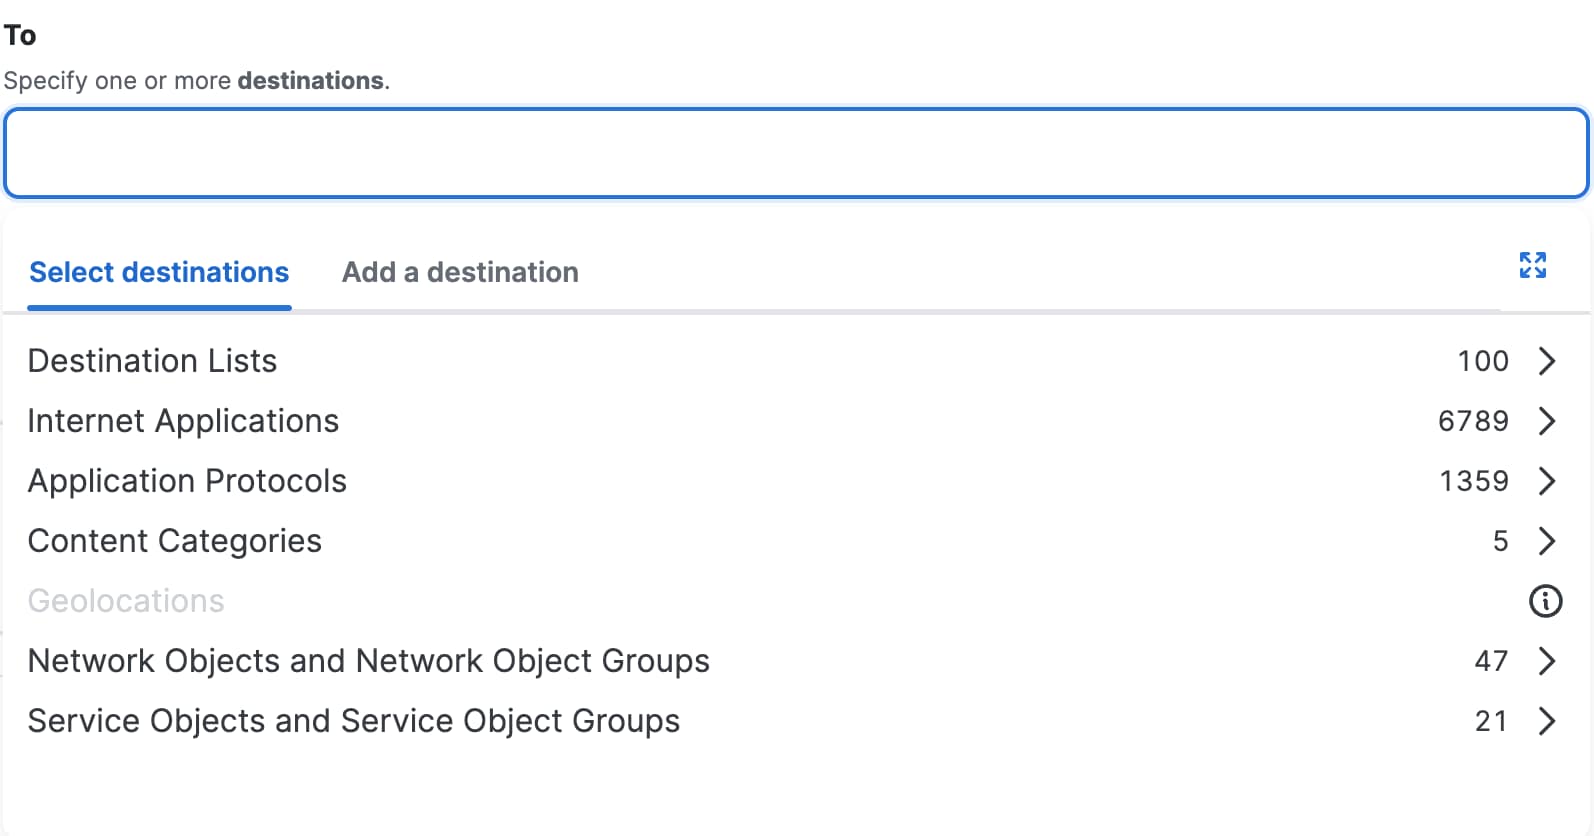
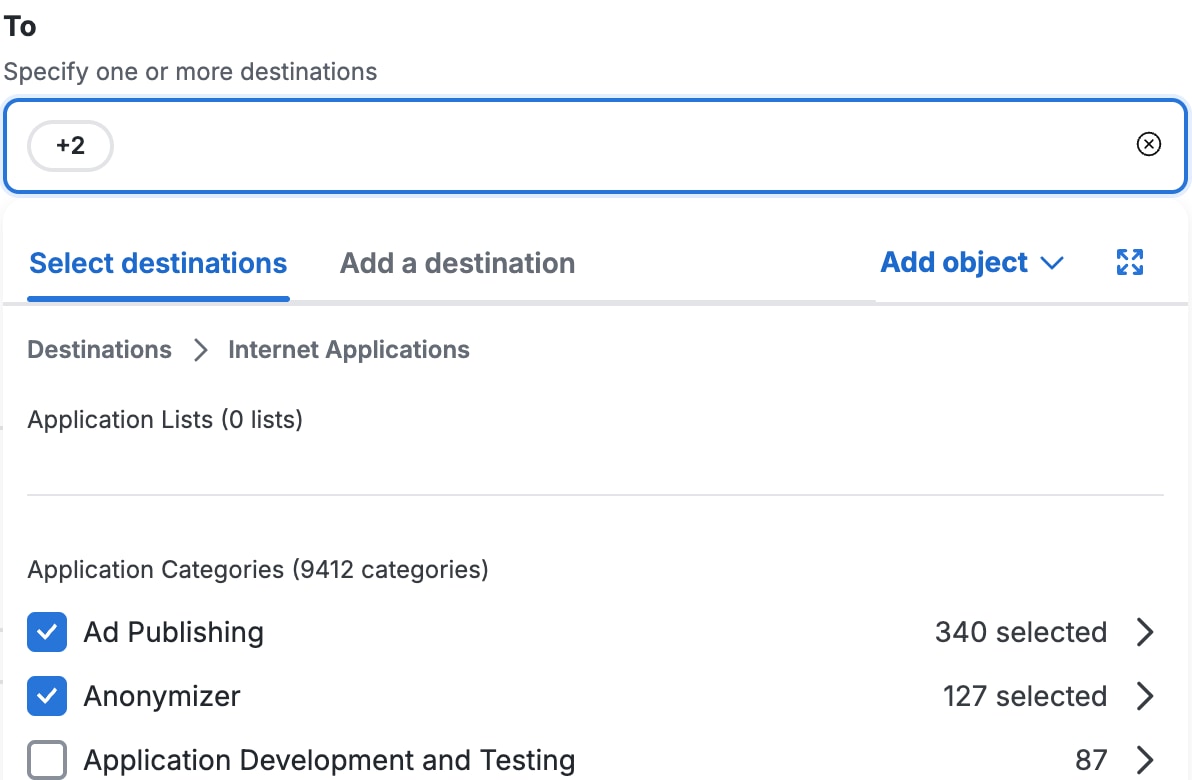
  2. Navigate to Specify Access and then click on the search bar under To.

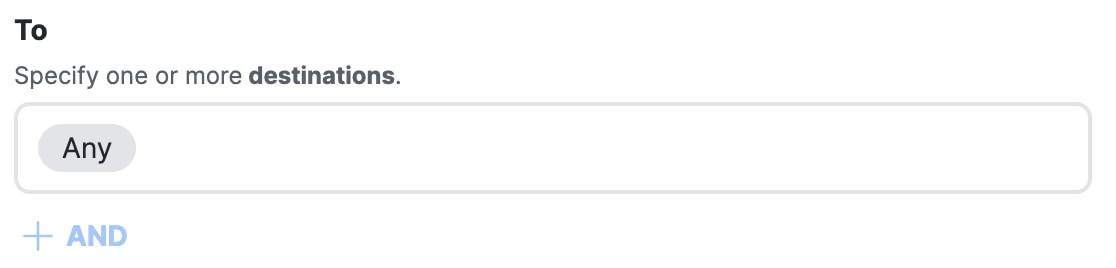
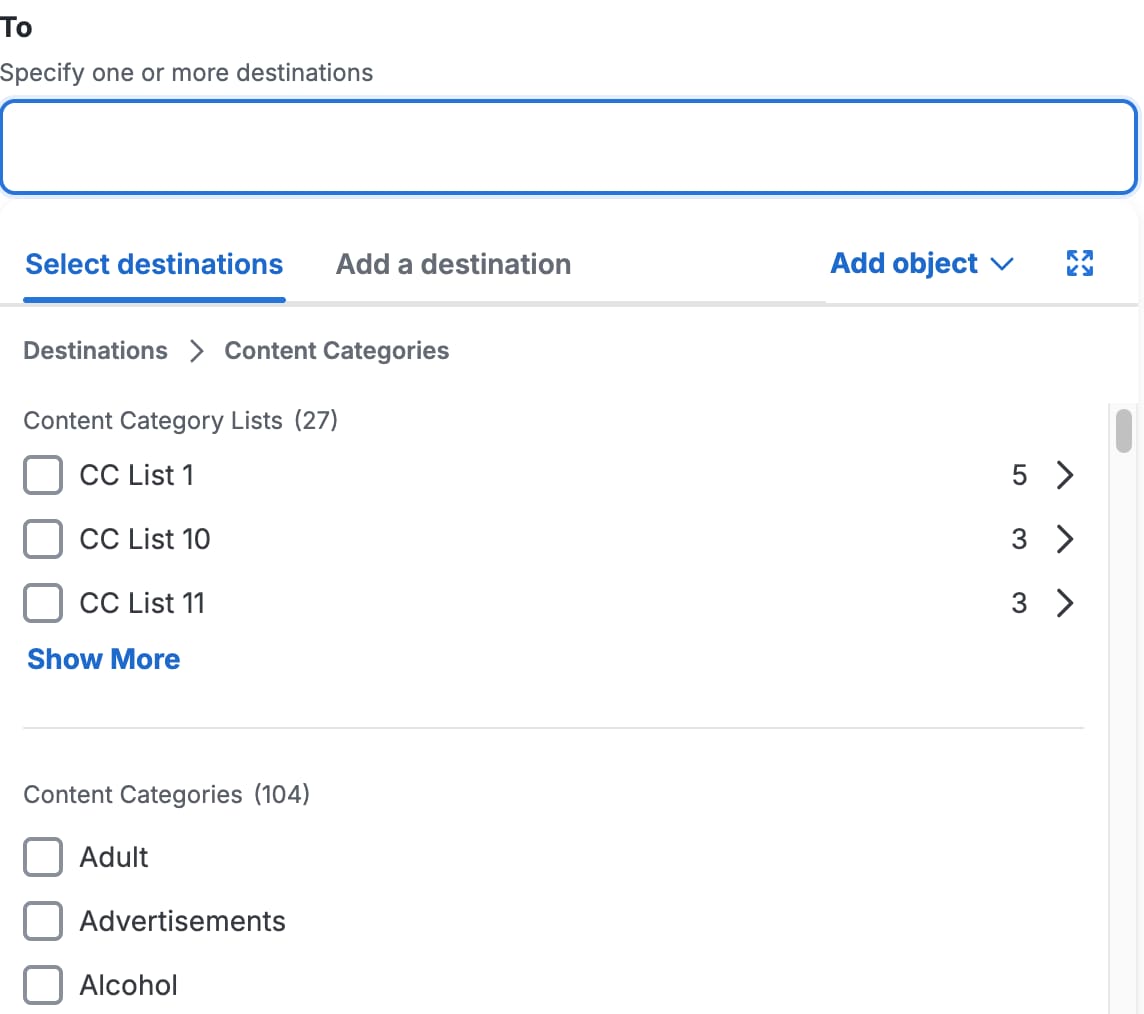
  3. Click Select destinations, click in the white space beside the default value (Any) and choose the configured destinations in your organization.

    Note
    If the rule action is Block, Secure Access displays the Geolocations.

    The Internet Access Rules Destination Components All interface.
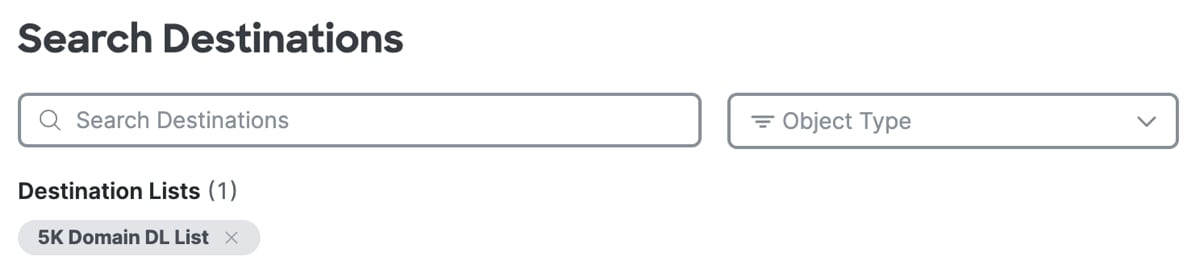
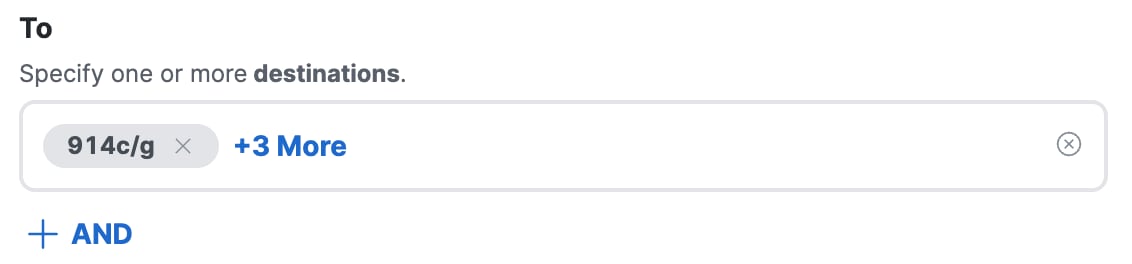
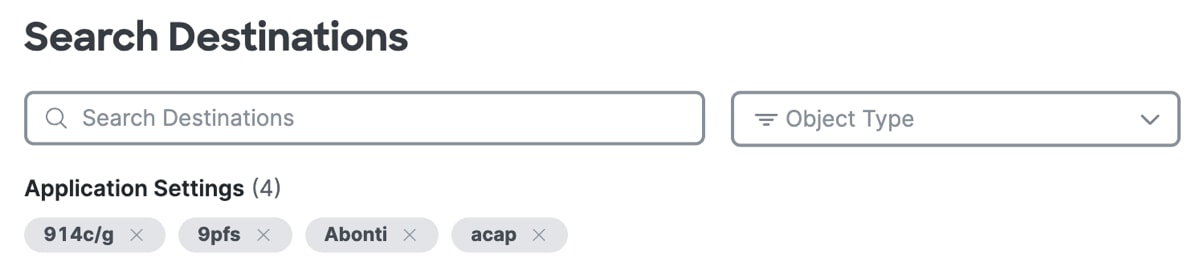
  4. (Optional) After you add a destination component, click +More to view the list of destinations that you added to the rule.

    1. Click on the X to remove a previously-added destination. Click Done when the list of destinations is complete.

      The Search Destination Components interface.

Select Applications with Objects or Groups on Rules

You can select reusable internet application lists, application categories, and internet applications for the destination component on internet access rules in the Access policy.

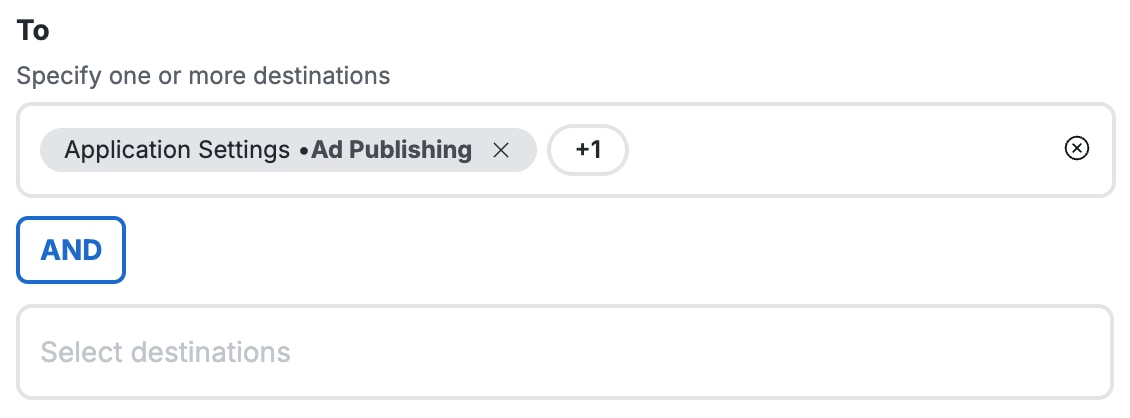
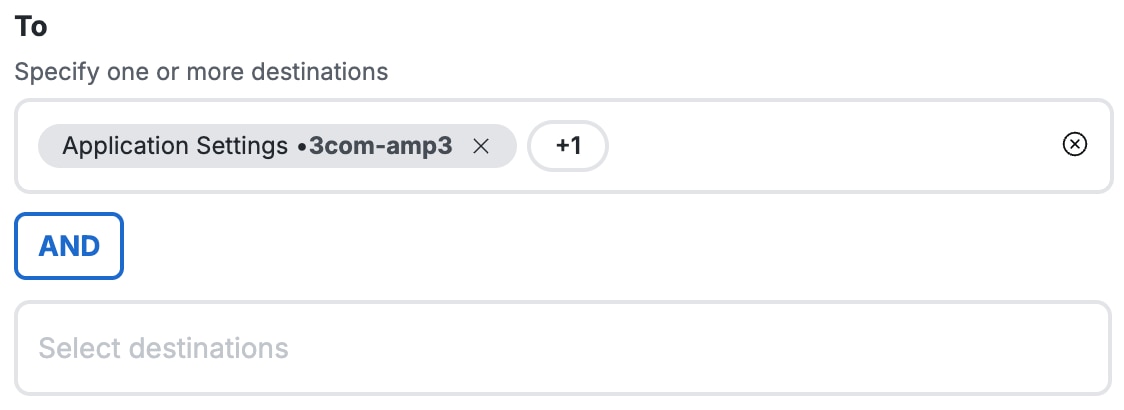
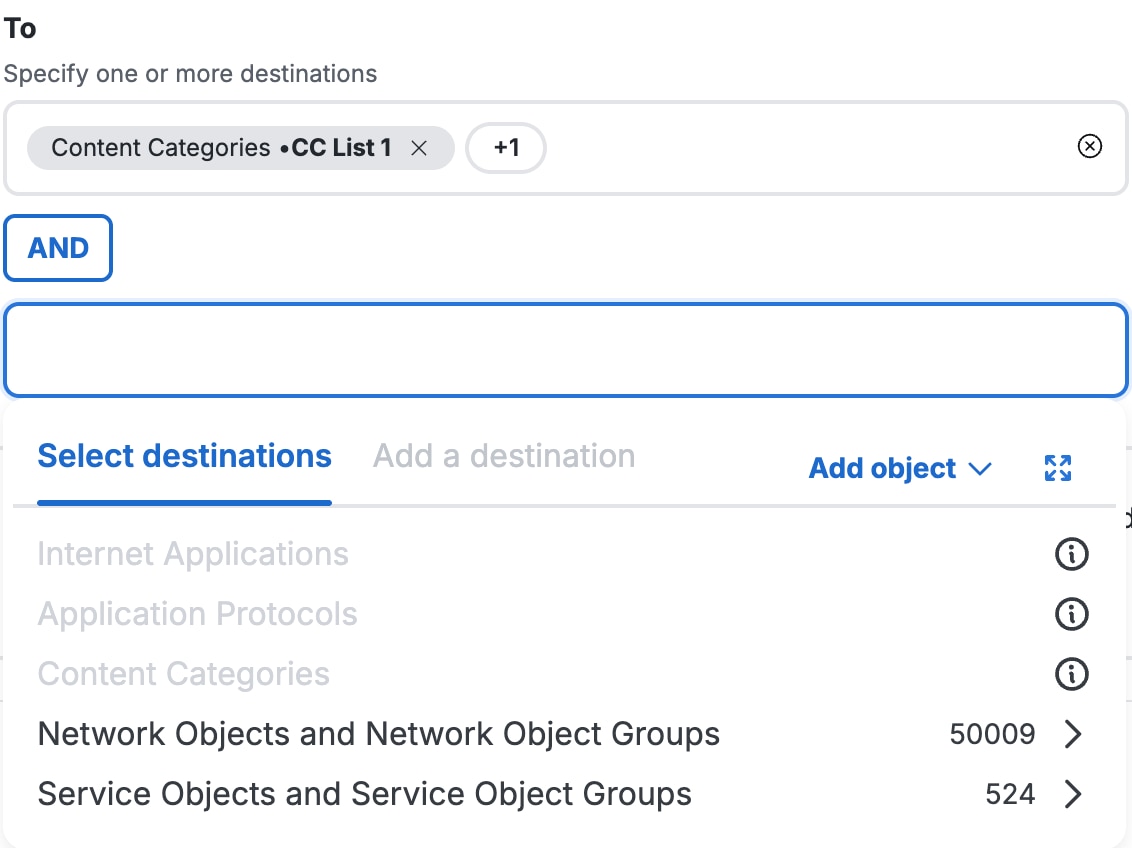
Once you add applications on an access rule, Secure Access enables the +AND button. Then, you can combine any Network Objects or Network Object Groups or Service Objects or Service Object Groups using the logical AND operator with the internet application lists, applications, and application categories.

Note
To determine if any internet access rules in the Access policy match the traffic on an application, Secure Access inspects 3-10 packets from an outbound client connection. The number of packets inspected depends on the application. Secure Access allows a few packets to reach the Internet regardless if you enabled the block action on the access rule.

Before you begin

Procedure

  1. Navigate to Secure > Access Policy > Add Rule > Internet Access.

  2. Navigate to Specify Access and then click on the search bar under To.


    The Internet Rule to with and interface.
  3. Click Select destinations, expand Internet Applications, and then select the internet applications and application categories to add to the internet rule.


    The Internet Rule Applications Select interface.
  4. (Optional) Click +AND.


    The Internet Rule Applications and interface.
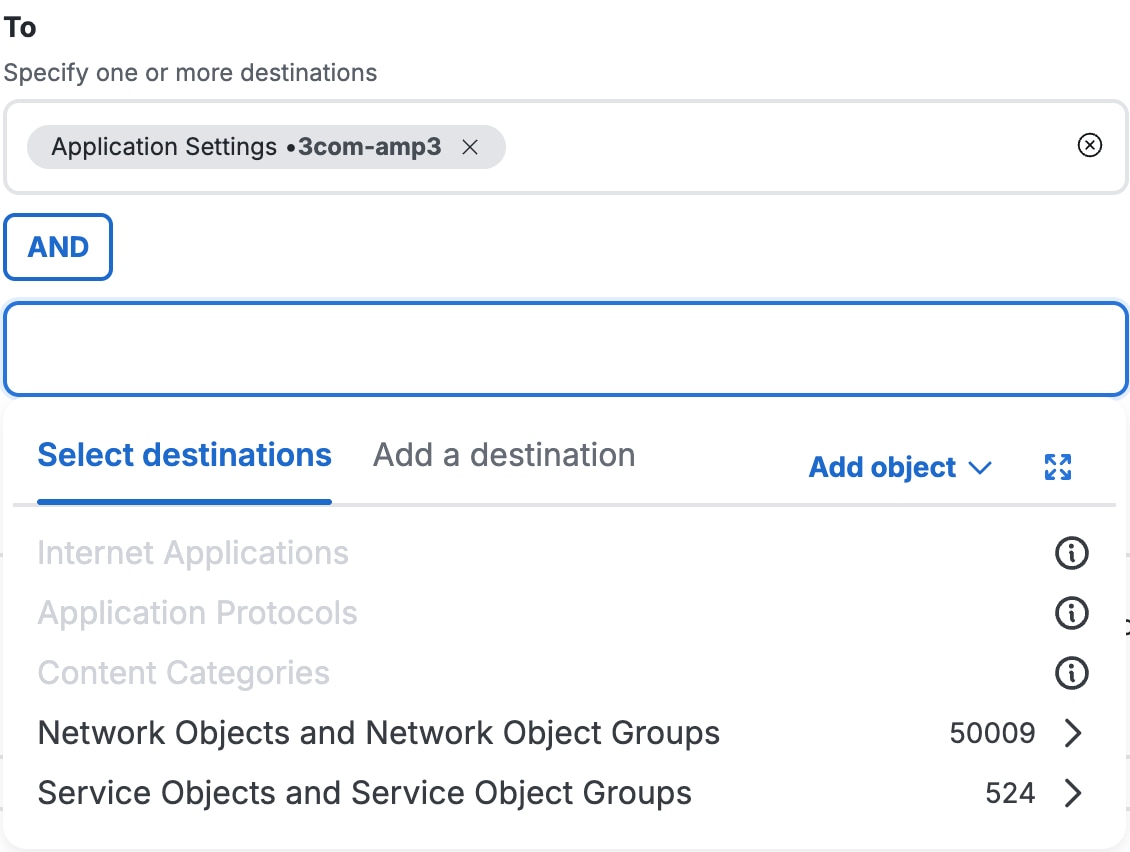
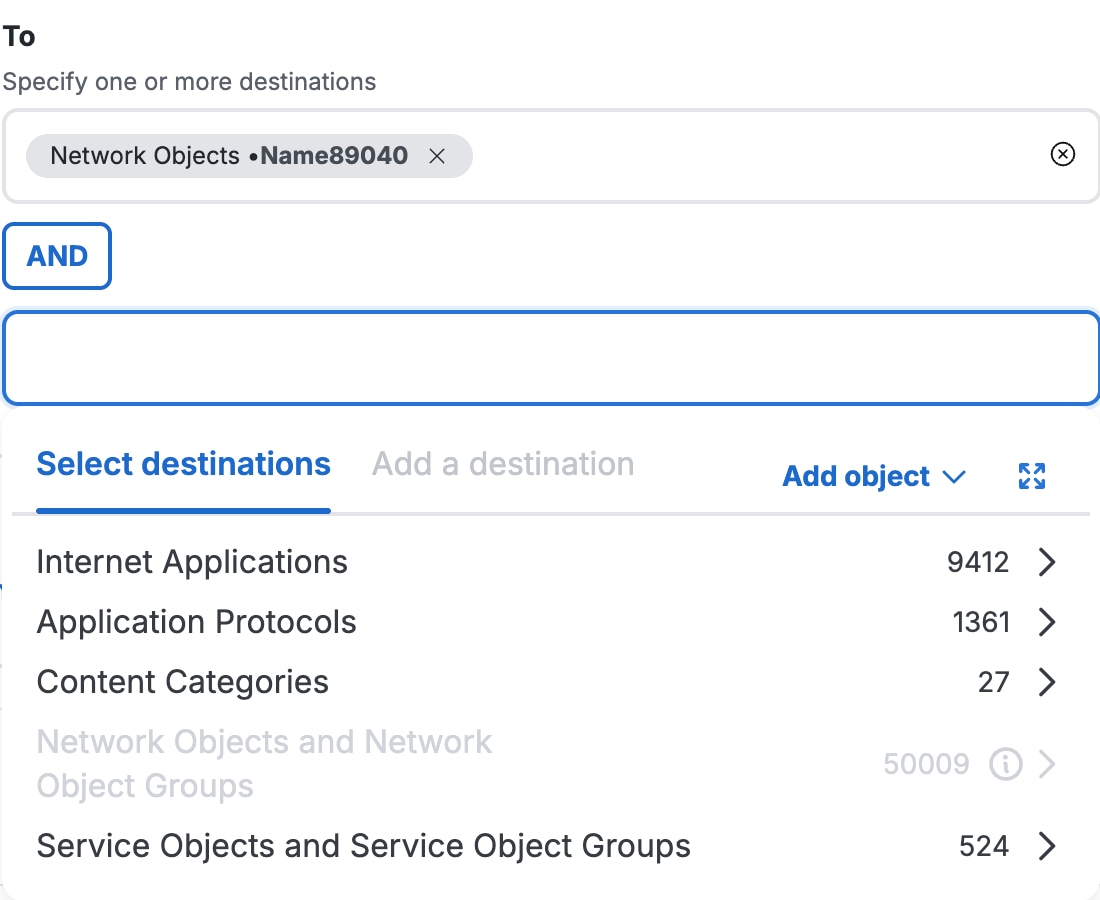
  5. Click in the Select destinations search bar.


    The Internet Rule App Protocols with Objects interface.
    1. Choose the Network Objects or Network Objects Groups to combine with the selected internet applications.
    2. Choose the Service Objects or Service Objects Groups to combine with the selected internet applications.

Select Application Protocols with Objects or Groups on Rules

You can select application protocols for the destination component on internet access rules in the Access policy.

Once you add application protocols on an access rule, Secure Access enables the +AND button. You can combine any Network Objects or Network Object Groups or Service Objects or Service Object Groups using the logical AND operator with the selected internet application protocols.

Before you begin

Procedure

  1. Navigate to Secure > Access Policy > Add Rule > Internet Access.

  2. Navigate to Specify Access and then click on the search bar under To.


    The Internet Rule to with and interface.
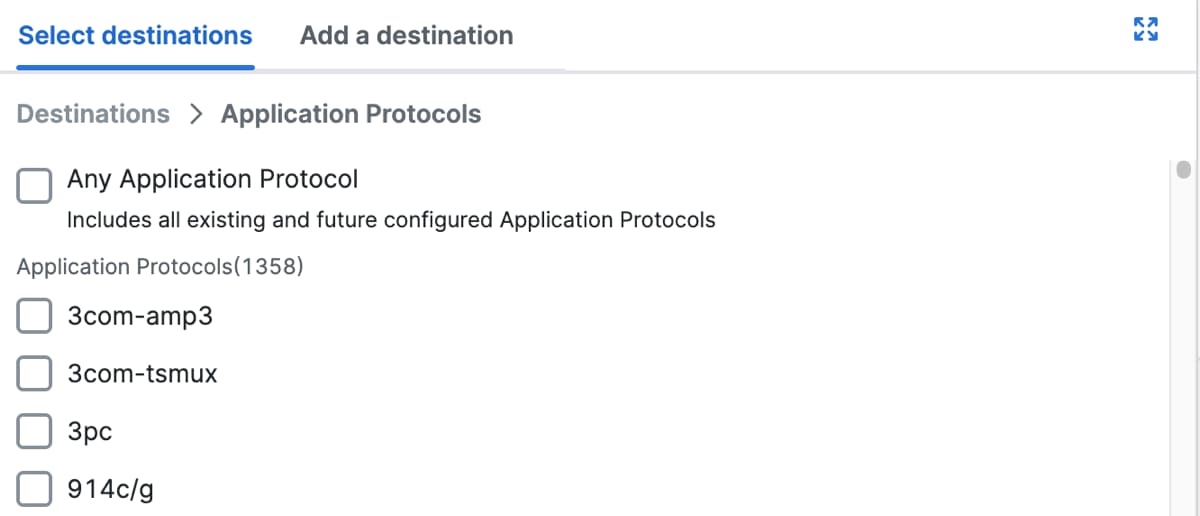
  3. Click Select destinations, expand Application Protocols, and then select the application protocols to add to the internet rule.


    The Select Single App Protocols interface.
  4. Click +More to view the added application protocols.


    The App Protocols with More interface.
  5. View or search for the added application protocols.


    The App Protocols More View interface.
  6. (Optional) Click +AND.


    The Internet Rule App Protocols and interface.
  7. Click in the Select destinations search bar.


    The Internet Rule App Protocols with Objects interface.
    1. Choose the Network Objects or Network Objects Groups to combine with the selected internet applications.
    2. Choose the Service Objects or Service Objects Groups to combine with the selected internet applications.

Select Content Categories with Objects or Groups on Rules

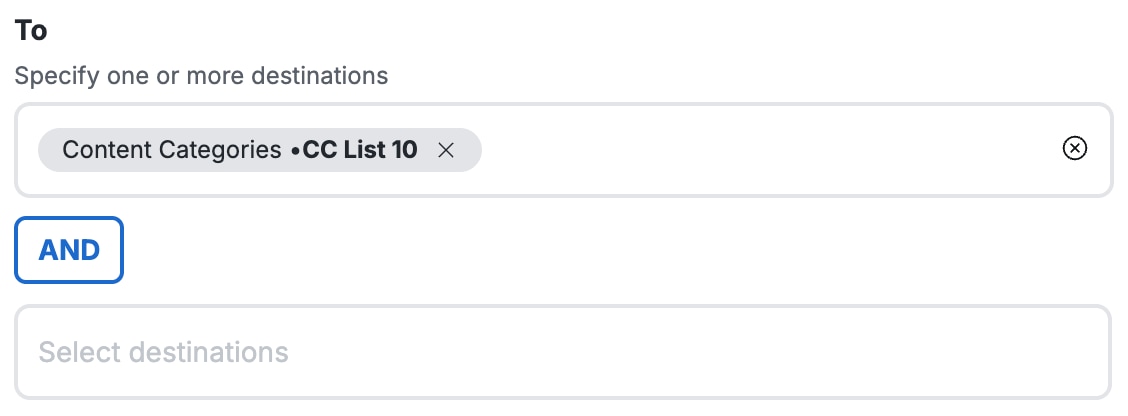
You can select content categories on an internet access rule in the Access policy. Once you add the content categories for the destination component on an access rule, Secure Access enables the +AND button. Then, you can combine any Network Objects or Network Object Groups or Service Objects or Service Object Groups using the logical AND operator with the selected content categories.

Before you begin

Procedure

  1. Navigate to Secure > Access Policy > Add Rule > Internet Access.

  2. Navigate to Specify Access and then click on the search bar under To.


    The Internet Rule to with and interface.
  3. Click Select destinations, expand Content Categories, and then select the content categories to add to the internet rule.


    The Internet Rule Content Categories Selected interface.
  4. (Optional) Click +AND.


    The Internet Rule Content Categories and interface.
  5. Click in the Select destinations search bar.


    The Internet Rule Content Categories with interface.
    1. Choose the Network Objects or Network Objects Groups to combine with the selected internet applications.
    2. Choose the Service Objects or Service Objects Groups to combine with the selected internet applications.

Select Objects and Groups with Other Destinations on Rules

You can select Network Objects and Groups and Service Objects and Groups for the destination component on internet access rules in the Access policy. When you choose the objects and groups, you have the option to combine the objects and groups with the logical AND operator.

If you do not add the logical AND operator with the selected destinations, Secure Access combines the destinations with the logical OR operator. For more information, see Combining Multiple Destinations in a Rule (Boolean Logic).

Before you begin

Procedure

  1. Navigate to Secure > Access Policy > Add Rule > Internet Access.

  2. Navigate to Specify Access and then click on the search bar under To.

    The Internet Rule to with and interface.
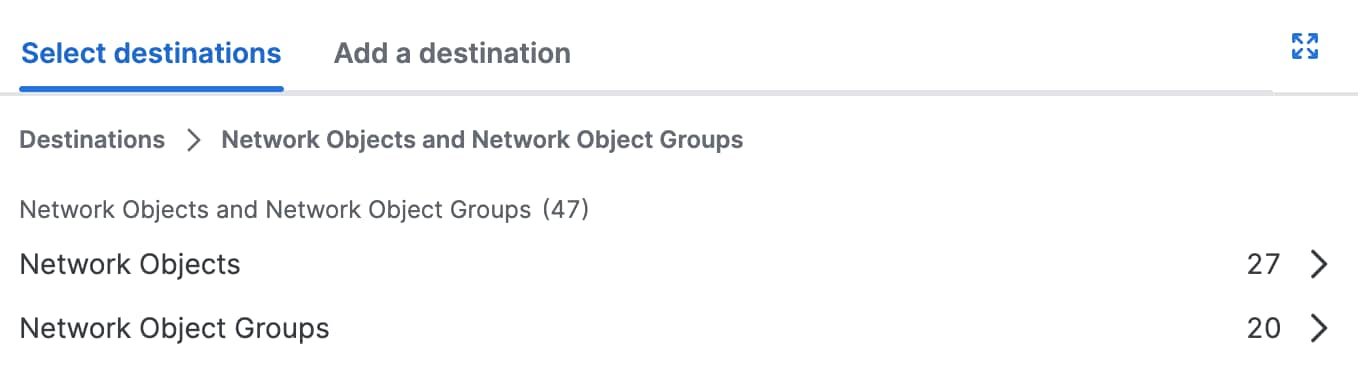
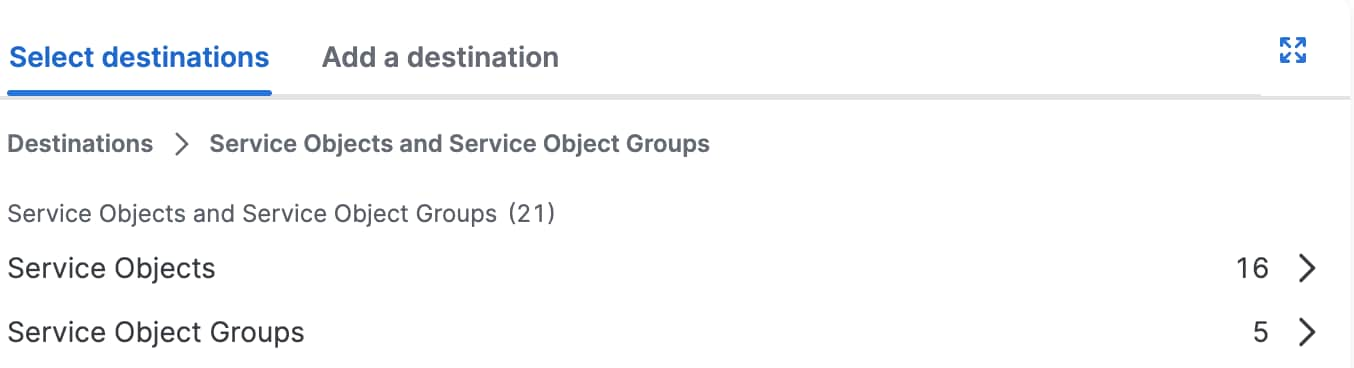
  3. Select the Network Objects and Groups or Service Objects and Groups.

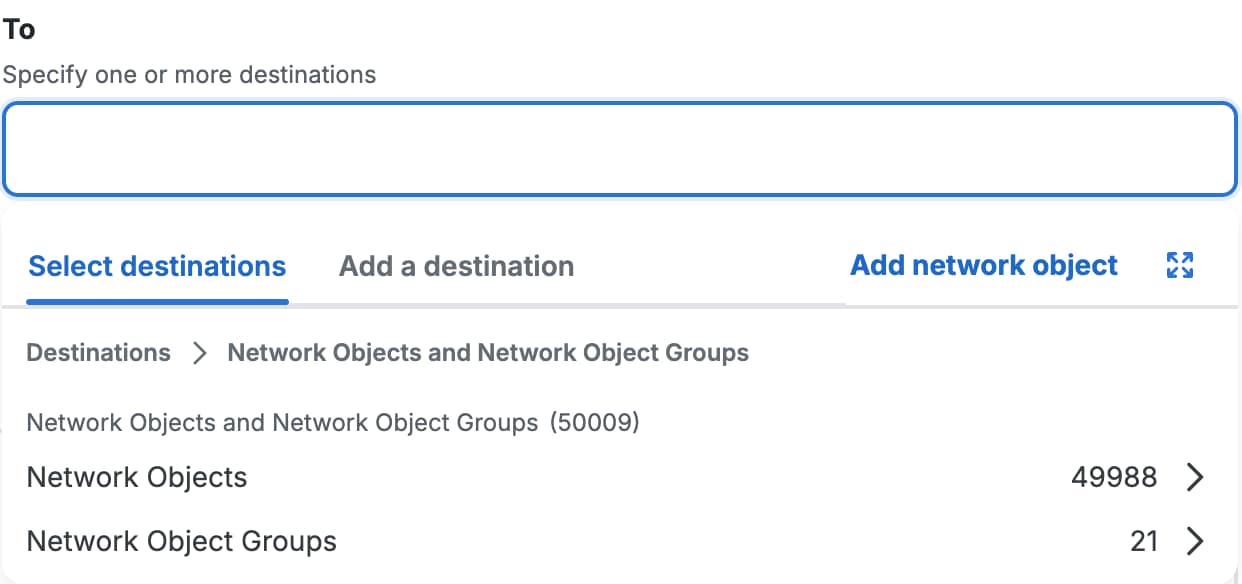
    1. Click Select destinations, and then choose the Network Objects and Groups to add to the internet rule.
      The Internet Access Rule Destination Nog interface.
    2. Click Select destinations, and then choose the Service Objects and Groups to add to the internet rule.
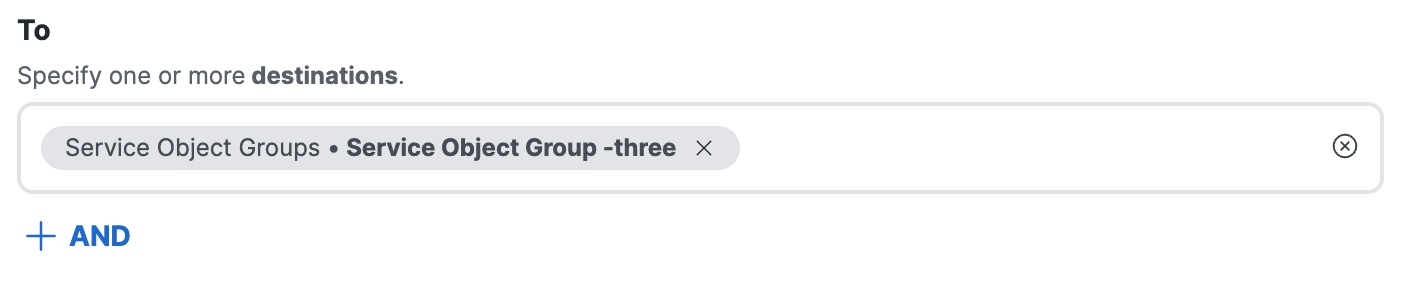
      The Internet Access Rule Destination Sog interface.
  4. (Optional) Click +AND.

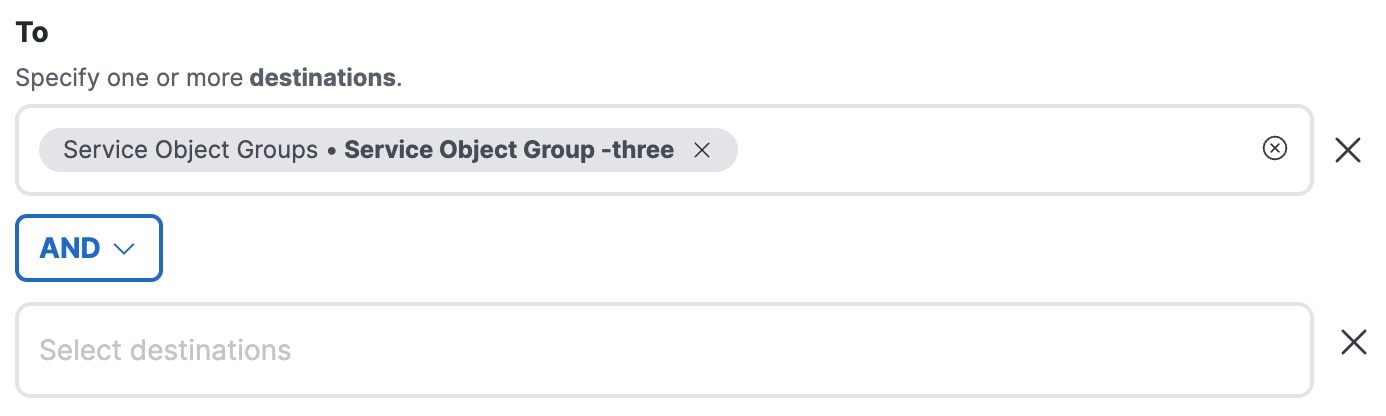
    The Internet Access Rule Destination Select and interface.
    1. Click in the Select destinations search bar.
      The Internet Access Rule Destination with and interface.
    2. Choose a destination to combine with the other selected destinations using the logical AND operator.

      For more information, see Combine Destinations With Boolean Logic.
      The Internet Rule Select Destinations and interface.
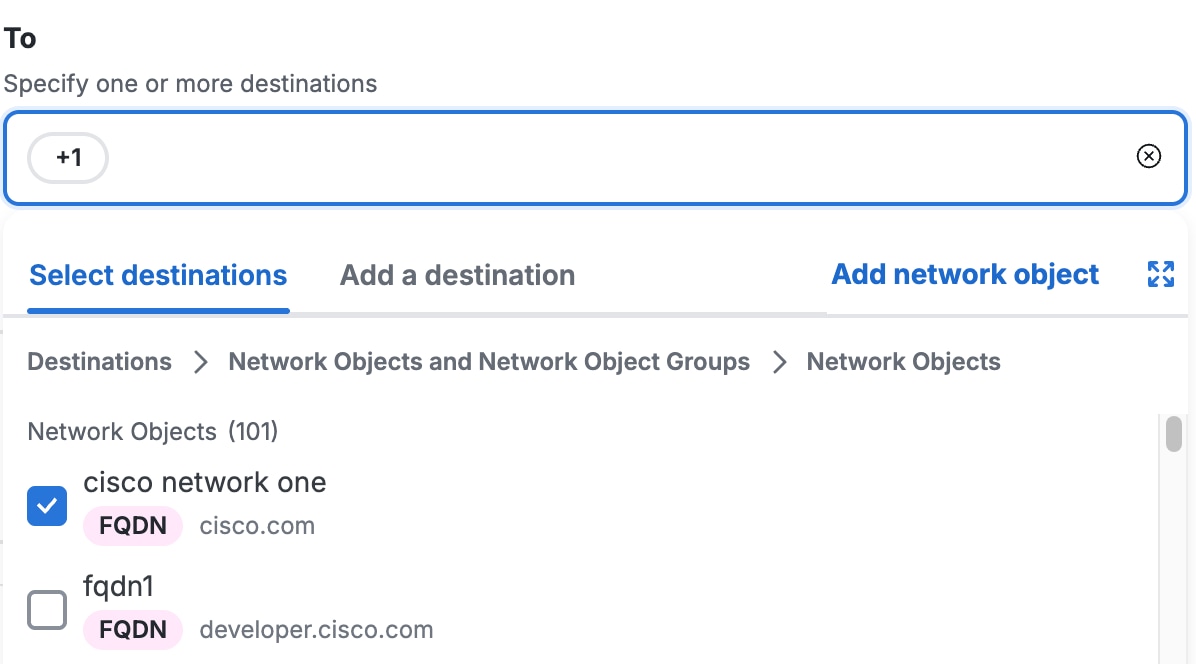
      After you select the objects and groups to use with the AND operator, you can remove the destinations and then add new destinations.


Add Reusable Network Objects on Rules

You can add a reusable Network Object resource for the destination component on the internet access rules in the Access policy. A Network Object represents a network resource—a single IPv4 address, IPv4 or IPv6 CIDR block, range of IPv4 addresses, wildcard mask, or fully-qualified domain name (FQDN).

Before you begin

Procedure

  1. Navigate to Secure > Access Policy.

    1. To add a network object on a new access rule, click Add Rule > Internet Access.
    2. To add a network object on an existing access rule, click on the name of rule in the access rules table and then click Edit.
  2. Navigate to Specify Access and then click on the search bar under To.


    The Internet Rule to with and interface.
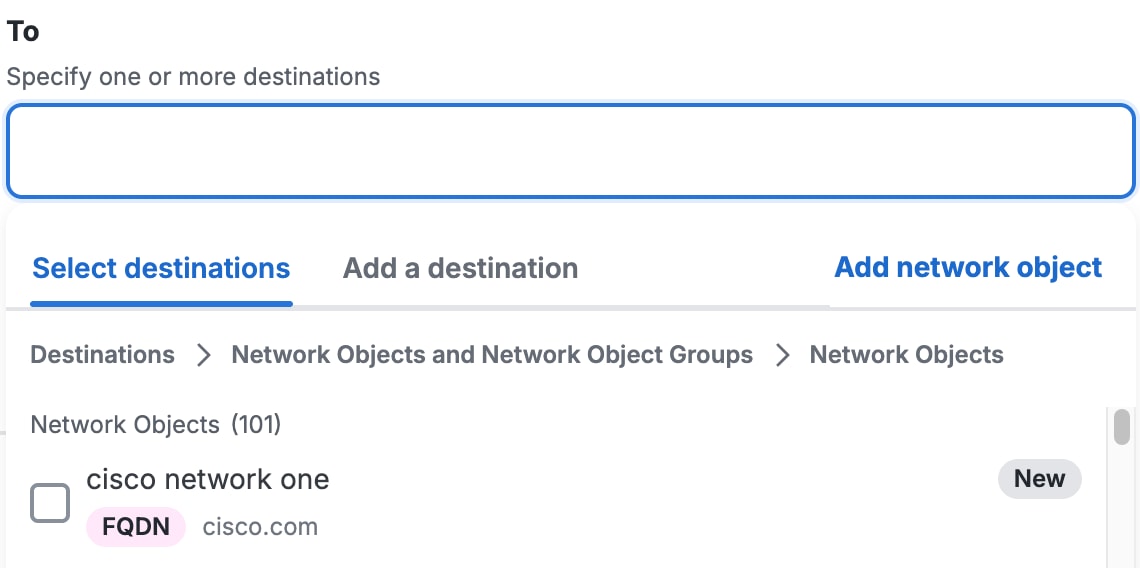
  3. Navigate to Select destinations.

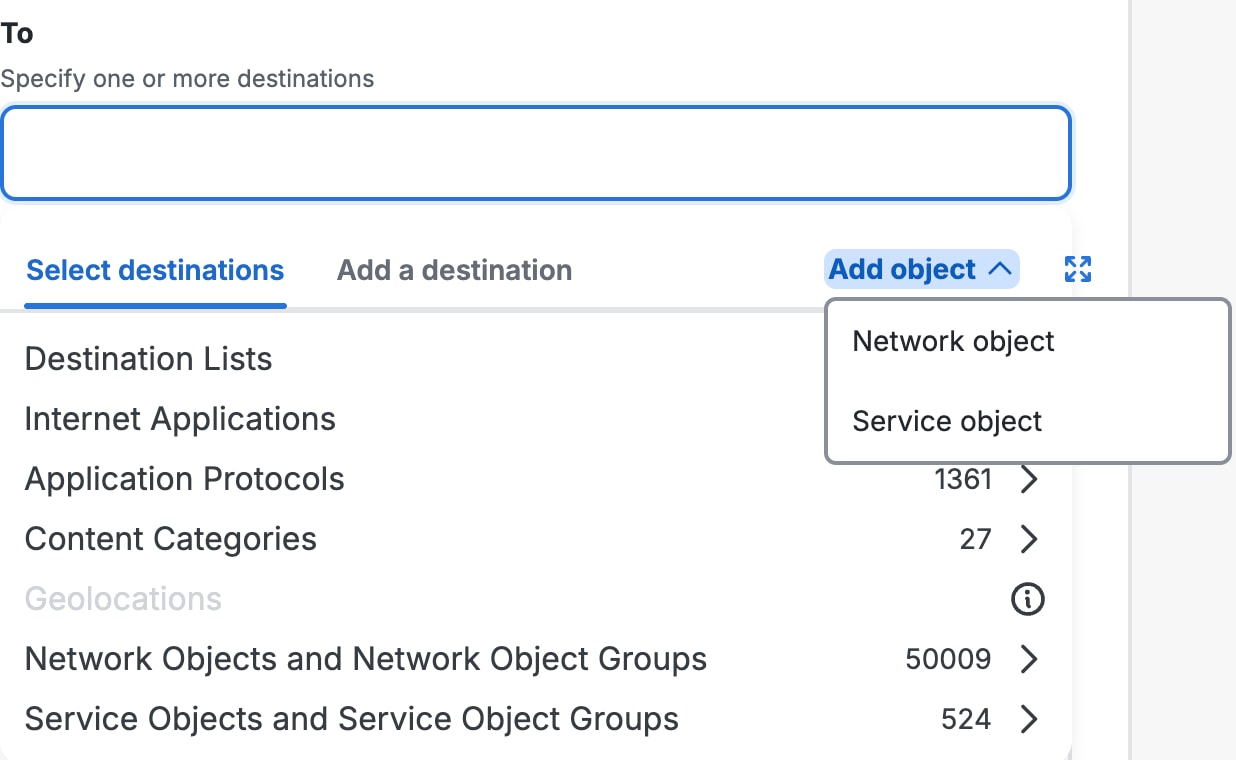
    1. Option 1: Click in the search bar for a network or service object, click Add object, and then choose Network object.

      The Internet Rule Add Objects Directly interface.
    2. Option 2: Navigate to Network Objects and Network Object Groups > Network Objects, and then click Add network object.

      The Internet Rule Add Network Object Directly interface.
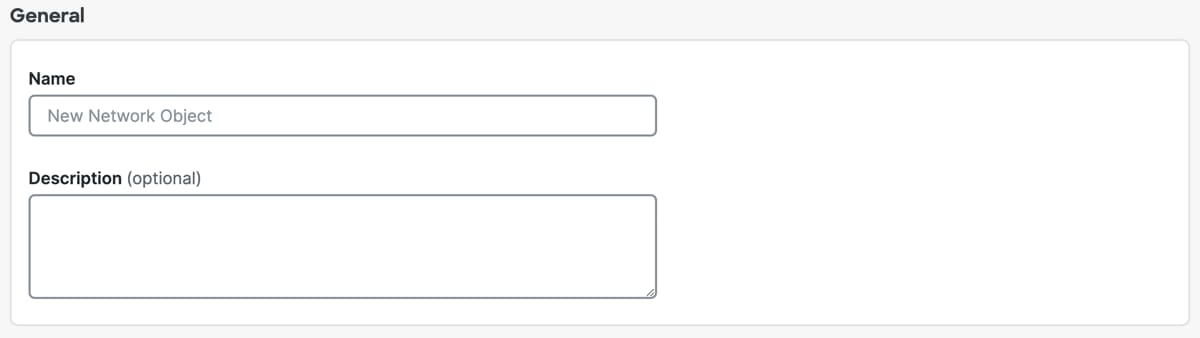
  4. On Add Network Object, add a name and description for the network object.

    1. For Network Object Name, enter a unique name for the network object. Secure Access supports a sequence of 1–255 alphanumeric, space, hyphen, and underscore characters for the name of the network object.
    2. (Optional) For Description, enter text that describes the network object.
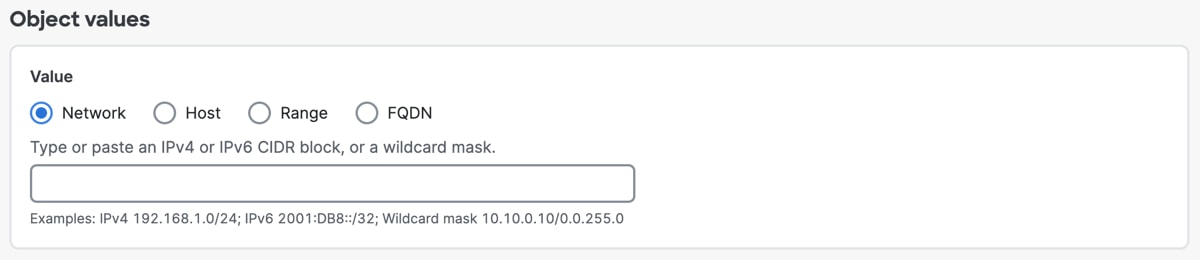
  5. Navigate to Object values.

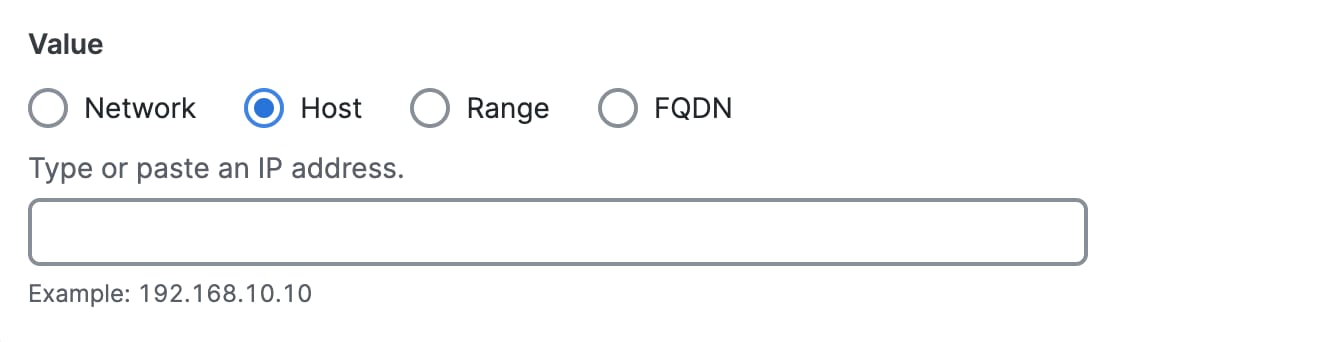
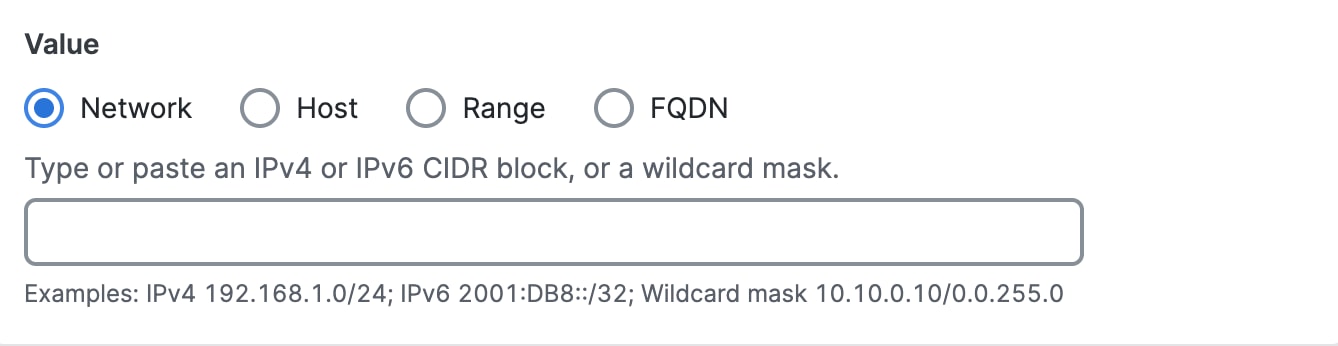
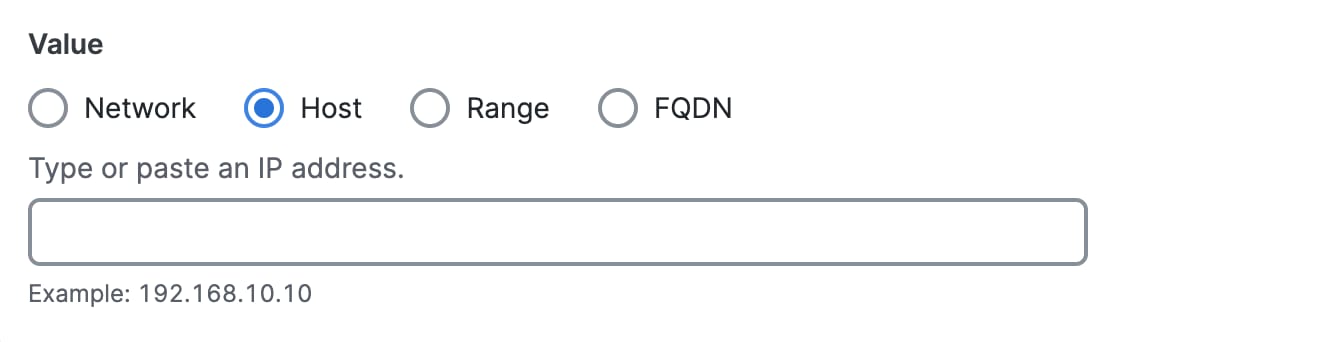
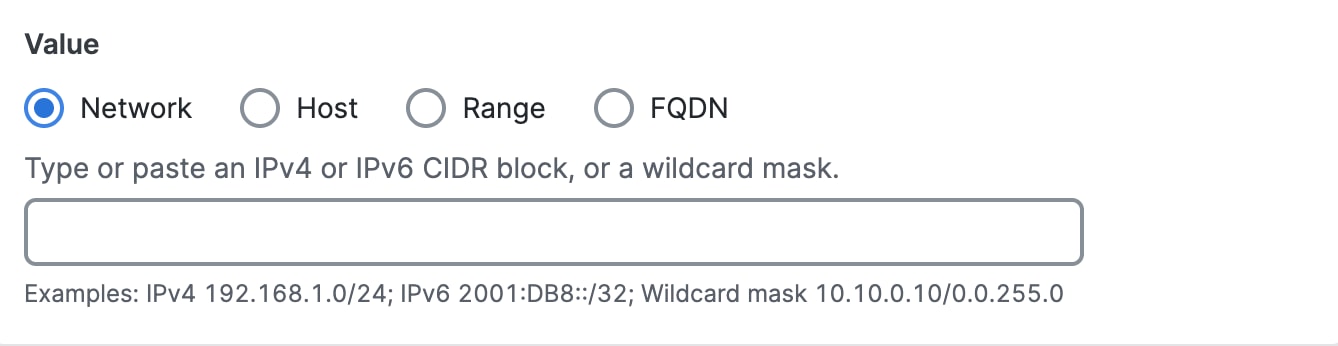
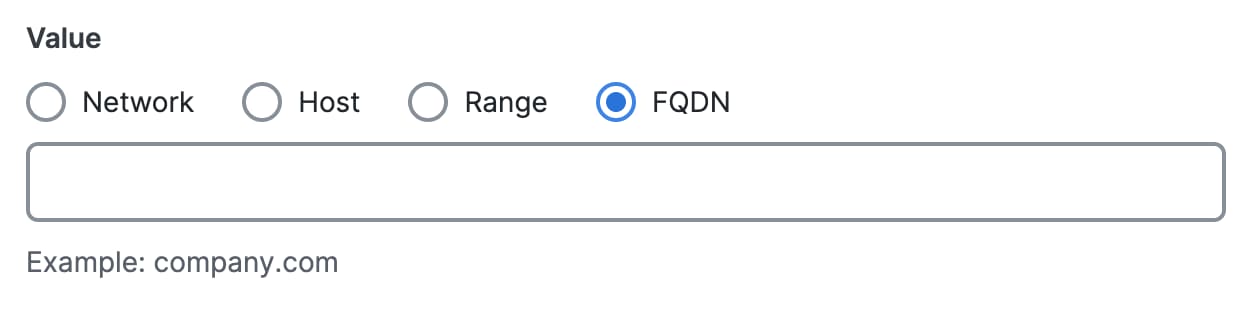
  6. For Value, choose either Network, Host, Range, or FQDN.

    You must choose the type of the Network Object and enter the IP address information.

    1. Click Network, and then enter a IPv4 CIDR block, IPv6 address, or Wildcard mask.

      The Network Objects Network interface.
    2. Click Host, and then enter an IPv4 address.

      The Network Object Host interface.
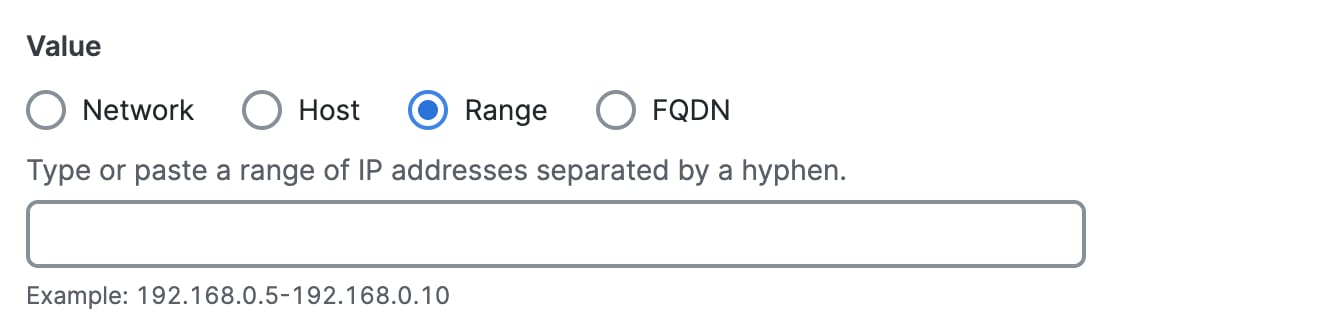
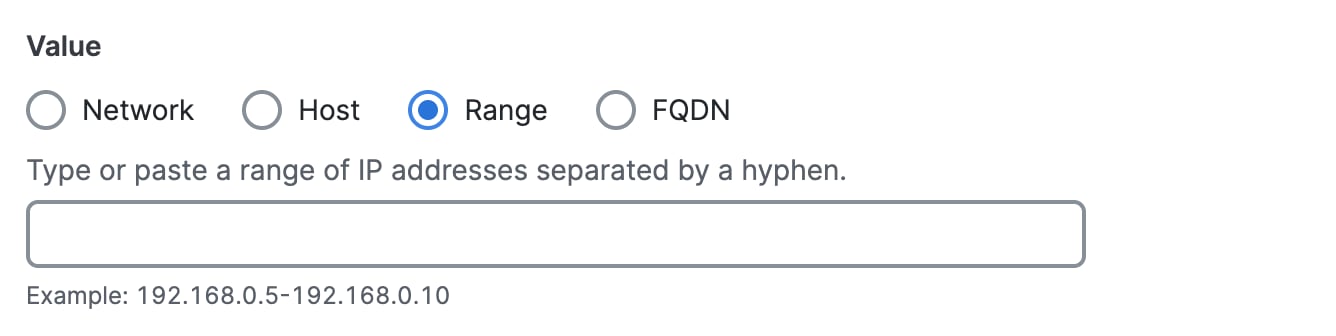
    3. Click Range, and then enter a range of IPv4 addresses separated by a hyphen (-).

      For example: 192.168.0.0-192.168.0.10.


      The Network Object Range interface.
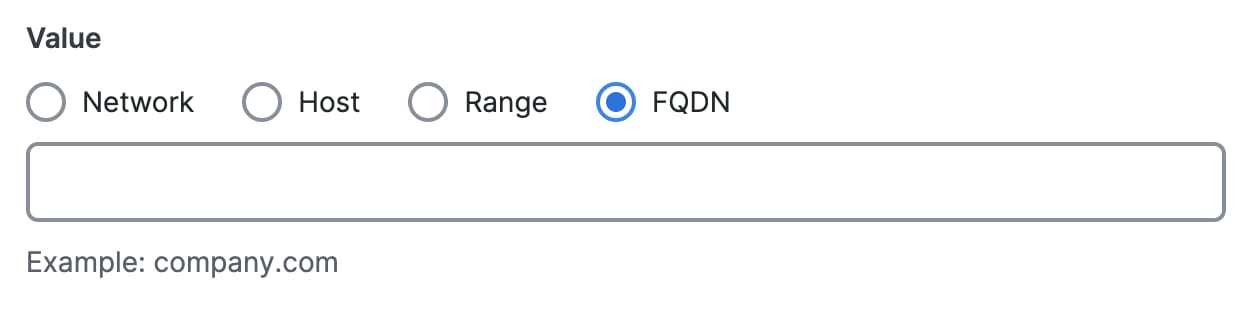
    4. Click FQDN, and then enter a fully-qualified domain name (FQDN).

      The Network Object Fqdn interface.
  7. Click Add network object.

    Secure Access displays the object with the New label in the list of Network Objects.


    The Internet Rule Network Object Directly interface.

Edit Network Objects on Rules

Edit the properties of a reusable network object directly on internet rules in the Access policy.

Note
If an VPN profile references a network object, you cannot edit the network object.

Before you begin

Procedure

  1. Navigate to Secure > Access Policy .

    1. To modify the settings on an access rule, navigate to a row in the rules table, and either click on the name of rule or click on the ellipsis (...) at the end of the row, and then click Edit.
    2. To modify the destinations in an access rule from the Rule Name column in the rules table, click on the name of rule in the access rules table, navigate to Destinations, and then click Edit.
    3. To modify the destinations in an access rule from the Destinations column in the rules table, click on a destination or +[number-of-selected-destinations], click View details and then click Edit.
  2. Navigate to Specify Access and then navigate to the search bar under To.


    The Internet Rule to with and interface.
  3. Navigate to Destinations.


    The Internet Rule Network Object Nav Edit interface.
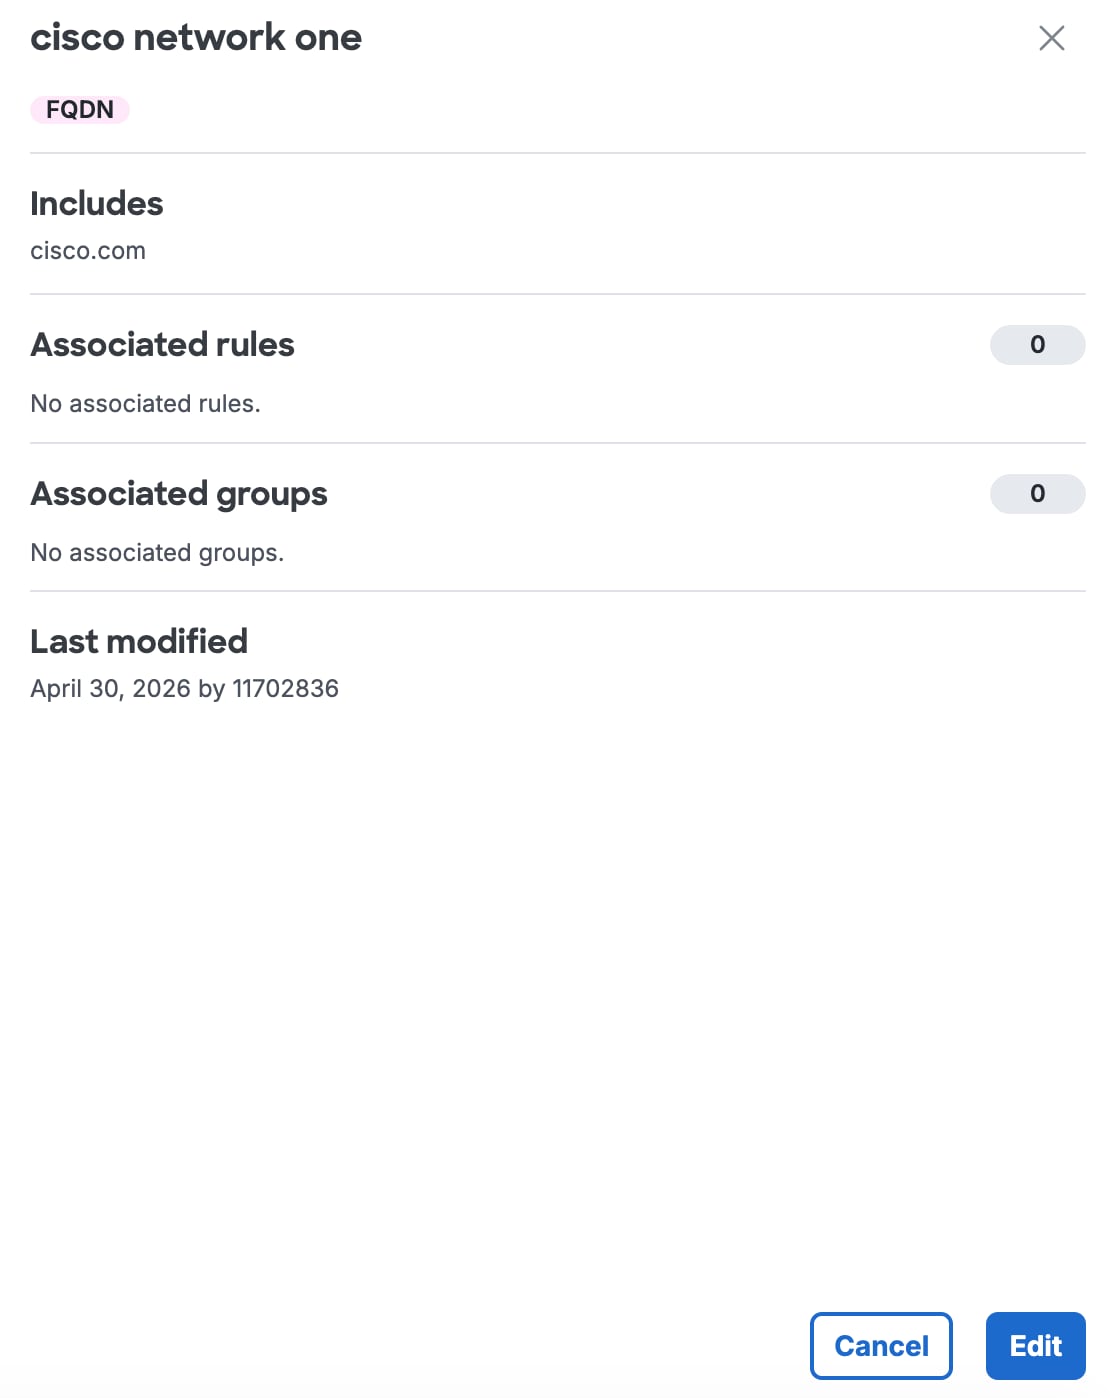
    1. To edit the settings on a reusable network object, click in the blank space in the Destinations search bar, navigate to Select destinations > Network Objects and Network Object Groups > Network Objects, click on a network object, and then click Edit.

      The Internet Rule Network Obj Edit interface.
  4. In Edit Network Object, modify the settings on the network object.


    The No General Full interface.
    1. For Network Object Name, enter a unique name for the network object. Secure Access supports a sequence of 1–255 alphanumeric, space, hyphen, and underscore characters.
    2. (Optional) For Description, enter text that describes the network object.
  5. Navigate to Object values.


    The Network Object Values interface.
  6. For Value, choose either Network, Host, Range, or FQDN.

    Note
    You must choose the type of the network object and enter the IP address information.
    1. Click Network, and then enter an IPv4 CIDR block, IPv6 address, or Wildcard mask.

      The Network Objects Network interface.
    2. Click Host, and then enter an IPv4 address.

      The Network Object Host interface.
    3. Click Range, and then enter a range of IPv4 addresses separated by a hyphen (-).

      For example: 192.168.0.0-192.168.0.10.


      The Network Object Range interface.
    4. Click FQDN, and then enter a fully-qualified domain name (FQDN).

      The Network Object Fqdn interface.
  7. Click Save.


Add Reusable Service Objects on Rules

You can add a reusable Service Object resource for the destination component on the internet access rules in the Access policy. A Service Object represents a port, range of ports, specific protocols, or any protocols of a service.

Before you begin

Procedure

  1. Navigate to Secure > Access Policy.

    1. To add a service object on a new access rule, click Add Rule > Internet Access.
    2. To add a service object on an existing access rule, click on the name of rule in the access rules table and then click Edit.
  2. Navigate to Specify Access and then click on the search bar under To.


    The Internet Rule to with and interface.
  3. Navigate to Select destinations.

    1. Option 1: Click in the search bar for a network or service object, click Add object, and then choose Service object.

      The Internet Rule Add Objects Directly interface.
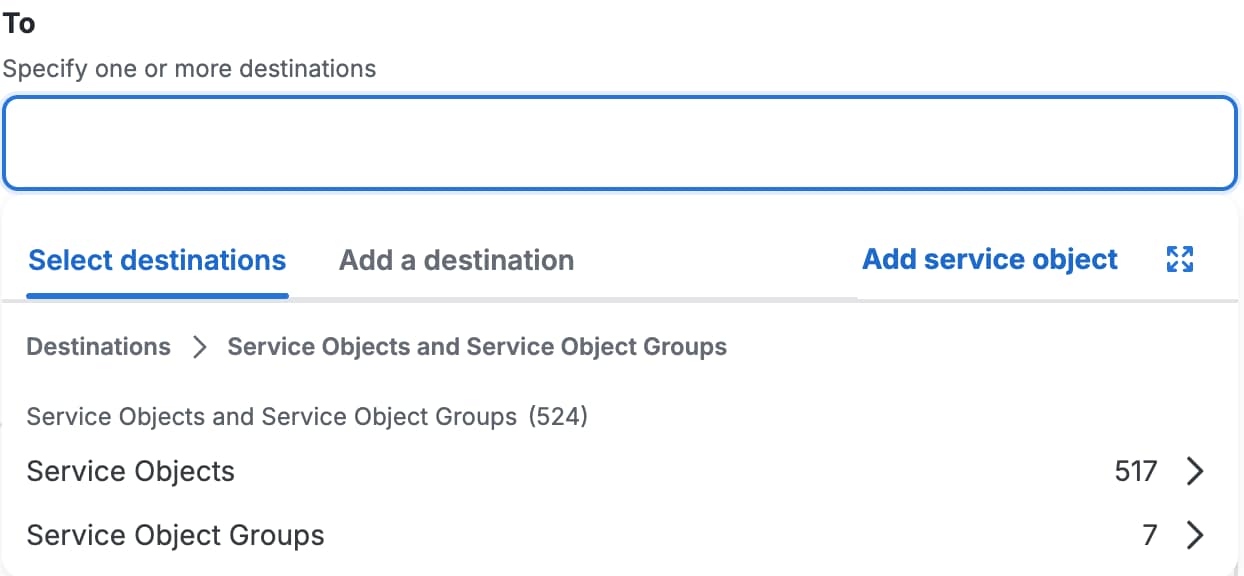
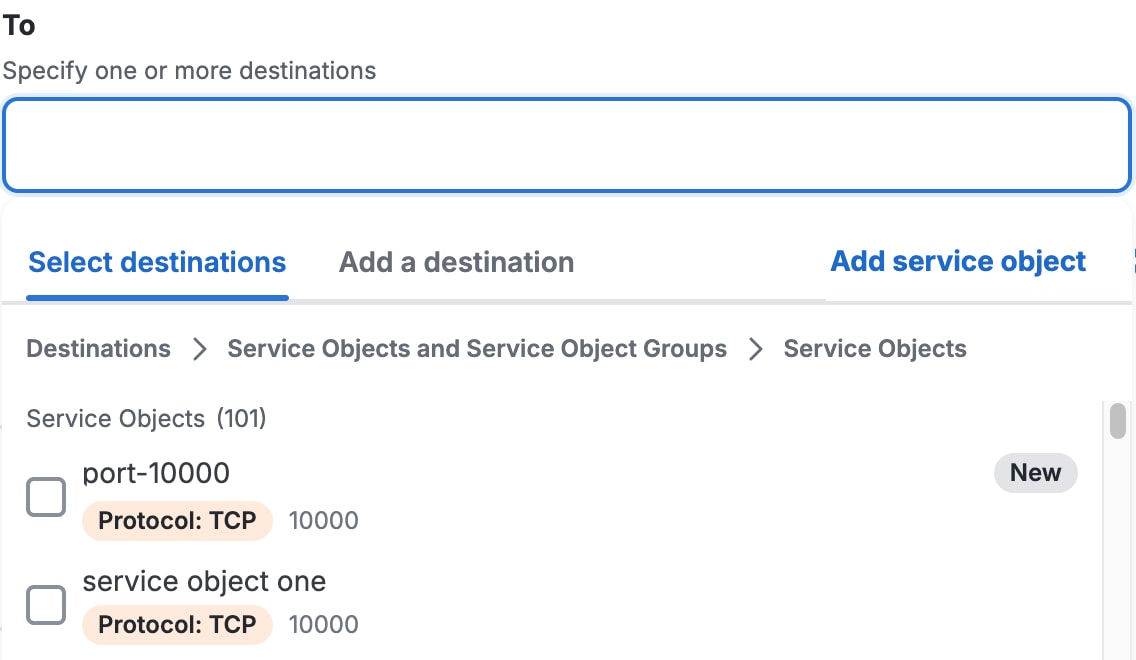
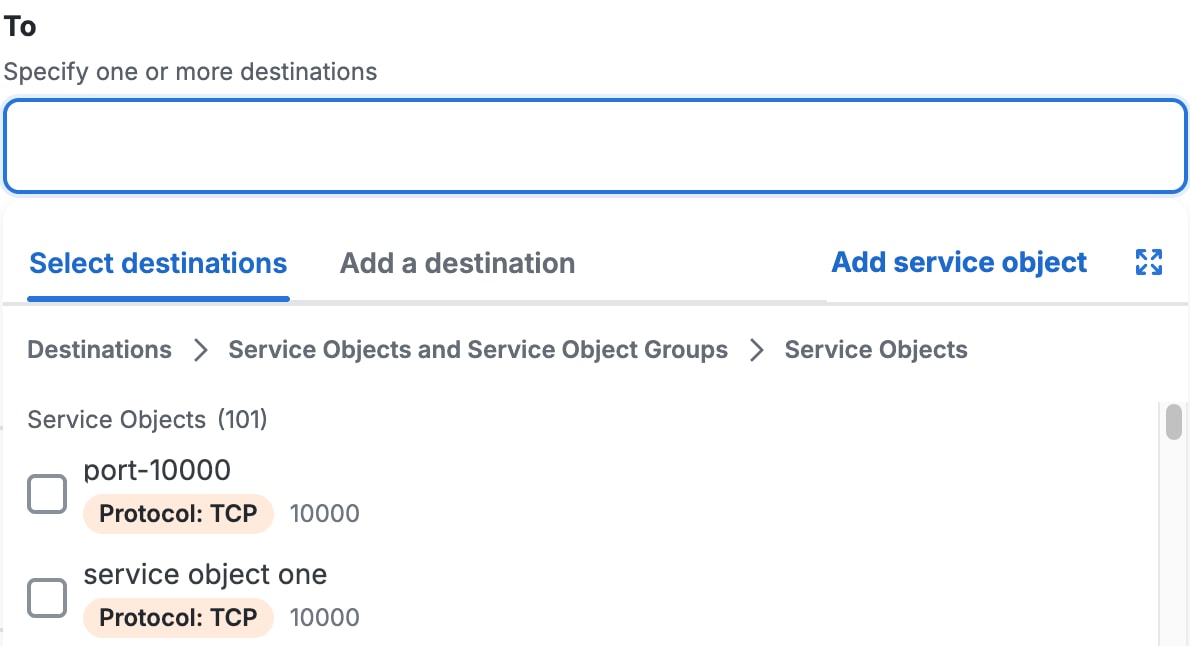
    2. Option 2: Navigate to Service Objects and Service Object Groups > Service Objects, and then click Add service object.

      The Internet Rule Add Service Object Directly interface.
  4. On Add Service Object, add a name and description for the service object.

    1. For Service Object Name, enter a unique name for the service object. Secure Access supports a sequence of 1–255 alphanumeric, space, hyphen, and underscore characters for the name of the service object.
    2. (Optional) For Description, enter text that describes the service object.
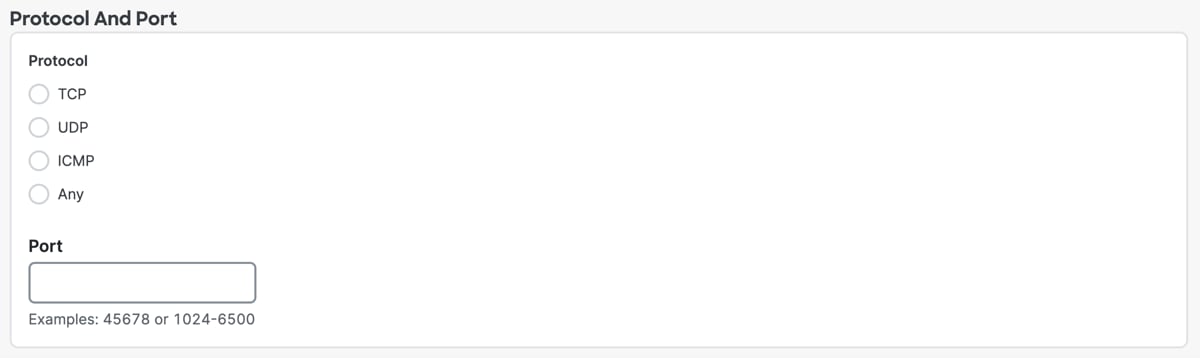
  5. Navigate to Protocol And Port.

    1. For Protocol, choose a protocol for the service object.
      Note
      Select Any to add any protocols for the service object.
    2. For Port, enter a port or range of ports.

      Separate the range of ports with a hyphen (-), for example, 1024-6500.


      The So Protocol Port Full interface.
  6. Click Add service object.

    Secure Access displays the object with the New label in the list of Service Objects.


    The Internet Rule Service Object Created interface.

Edit Service Objects on Rules

Edit the properties of a reusable service object directly on the internet rules in the Access policy.

Note
If an VPN profile references a service object, you cannot edit the service object.

Before you begin

Procedure

  1. Navigate to Secure > Access Policy.

    1. To modify the settings on an access rule, navigate to a row in the rules table, and either click on the name of rule or click on the ellipsis (...) at the end of the row, and then click Edit.
    2. To modify the destinations in an access rule from the Rule Name column in the rules table, click on the name of rule in the access rules table, navigate to Destinations, and then click Edit.
    3. To modify the destinations in an access rule from the Destinations column in the rules table, click on a destination or +[number-of-selected-destinations], click View details and then click Edit.
  2. Navigate to Specify Access and then navigate to the search bar under To.


    The Internet Rule to with and interface.
  3. Navigate to Destinations.


    The Internet Rule Service Object Nav Edit interface.
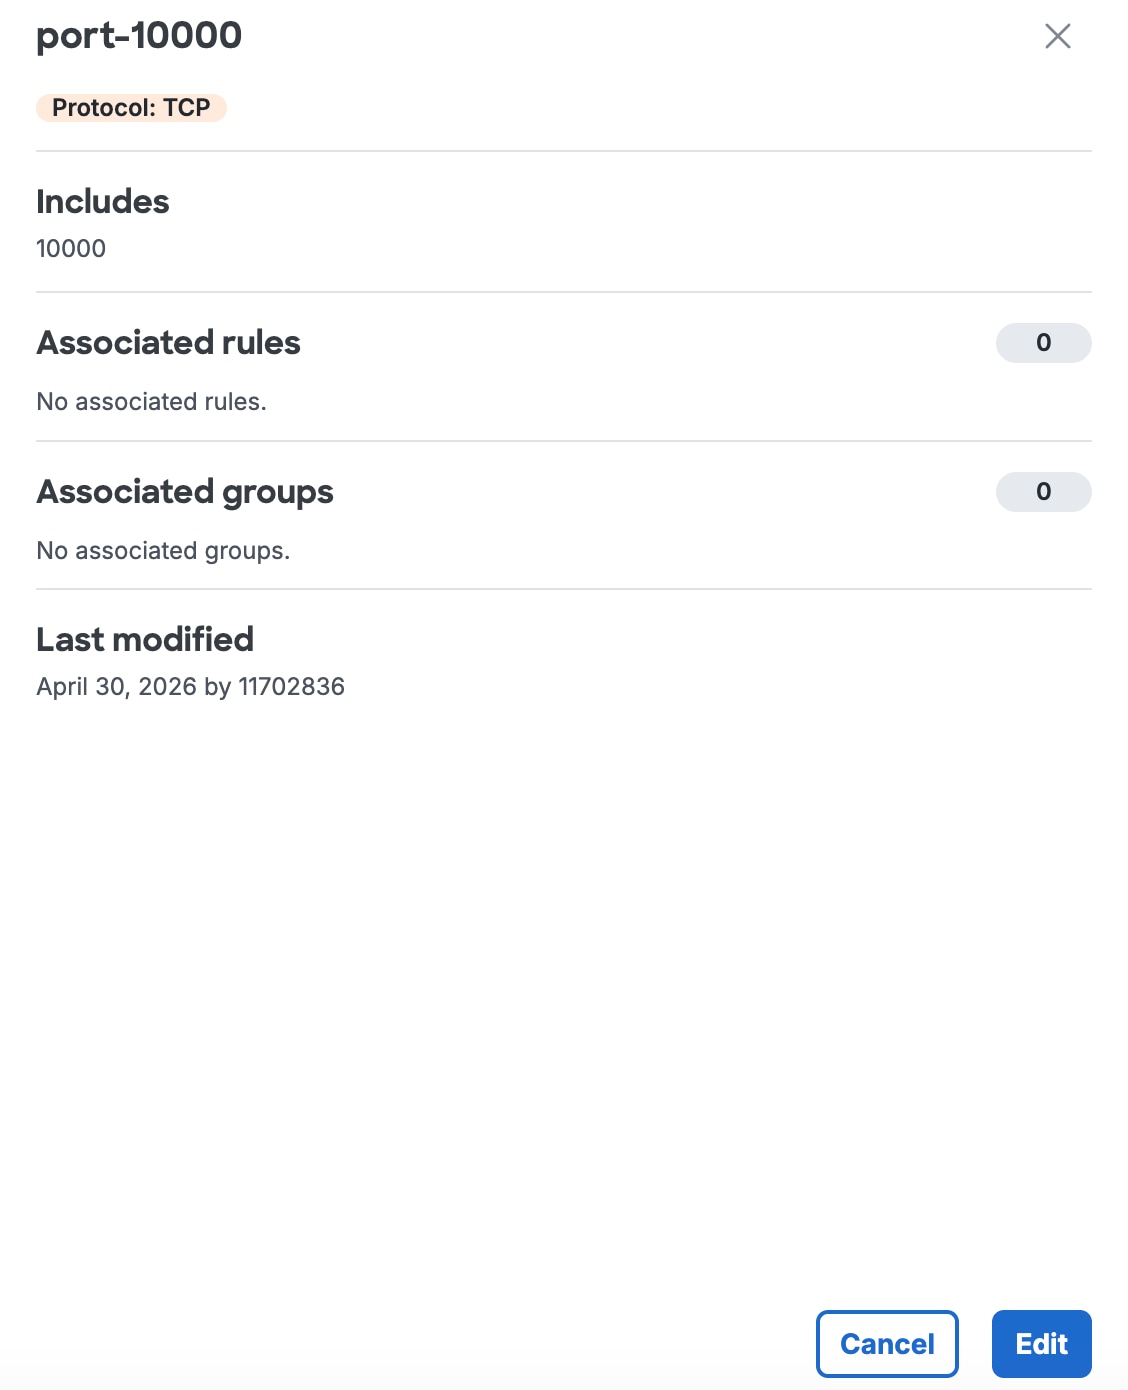
    1. To edit the settings on a reusable service object, click in the blank space in the Destinations search bar, navigate to Select destinations > Service Objects and Service Object Groups > Service Objects, click on a service object, and then click Edit.

      The Internet Rule Service Obj Edit interface.
  4. In Edit Service Object, modify the settings for the service object.


    The No General Full interface.
    1. For Service Object Name, enter a unique name for the service object. Secure Access supports a sequence of 1–255 alphanumeric, space, hyphen, and underscore characters.
    2. (Optional) For Description, enter text that describes the service object.
  5. Navigate to Protocol And Port.

    1. For Protocol, choose a protocol for the service object.
      Note
      Select Any to add any protocols for the service object.
    2. For Port, enter a port or range of ports.

      Separate the range of ports with a hyphen (-), for example, 1024-6500.


      The So Protocol Port Full interface.
  6. Click Save.


Add Composite Destinations on Rules

You can add a composite destination directly on an access rule in your Access policy. Compose destinations on a rule by entering network addresses, protocols, ports and port ranges. Destinations that you enter directly on a rule are not reusable components. For more information, see About Configuring Destinations for Internet Access Rules.

After you add destinations on an access rule, you can remove or modify the destinations. For more information, see Edit Composite Destinations on Rules.

Before you begin

Procedure

  1. Navigate to Secure > Access Policy > Add Rule > Internet Access.

  2. Navigate to Specify Access and then click on the search bar under To.

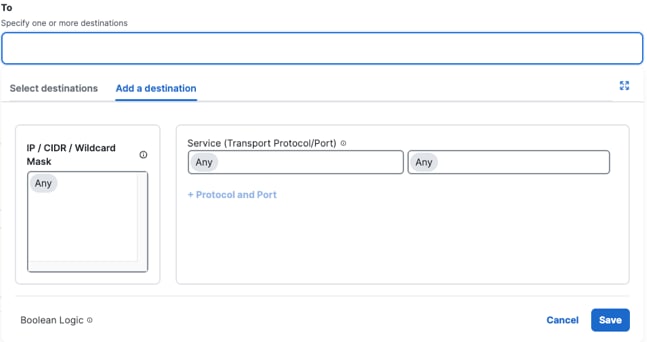
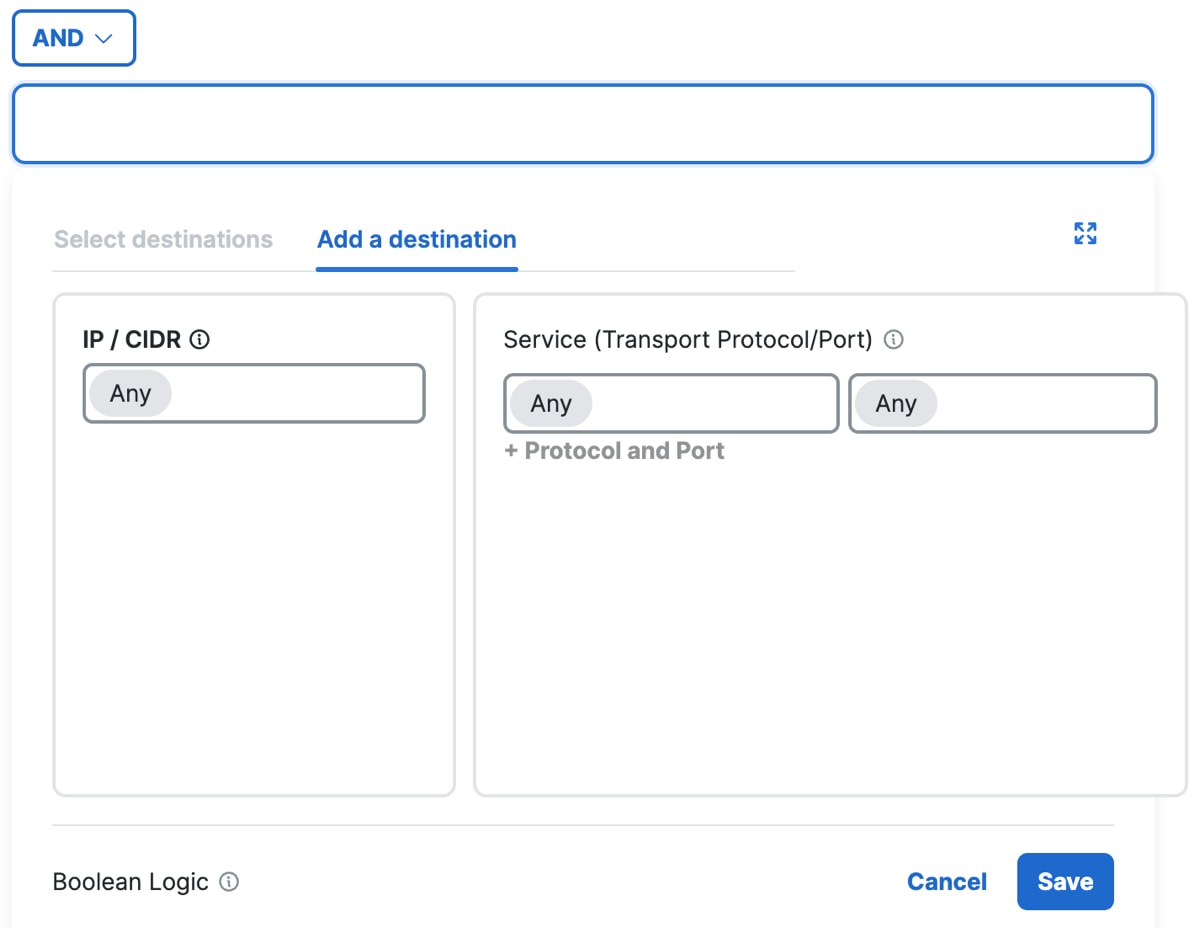
  3. Click Add a destination.

    1. For IP, CIDR, or Wildcard Mask, enter an IPv4 address or CIDR block, or IPv4 address with wildcard mask.

      For example:

      • IPv4 address—1.2.3.4

      • CIDR block—1.2.3.4/24

      • Wildcard mask—1.2.3.4/255.255.255.255

        For Wildcard Mask, use the syntax: <IP address>/<Wildcard Mask>. For information about wildcard masks, see Using Wildcard Masks on Internet Rules .

    2. For Protocol, choose from one of the supported protocols: ANY, TCP, UDP, or ICMP.
    3. For Port/Port Range, enter a port or range of ports separated by a hyphen (-).
    4. Click +Protocol and Ports to add a protocol, port or range of ports separated by a hyphen (-) and repeat this step to enter additional protocols and ports on the rule.
    5. Click Save to confirm the addition of the composite destination.

      The Add a Composite Destinations interface.
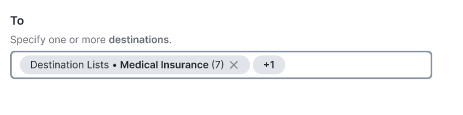
  4. (Optional) After you add destinations on the access rule, you can view the selected destinations. In the To search bar, click on the selected destinations.


    The Destinations in to Bar interface.
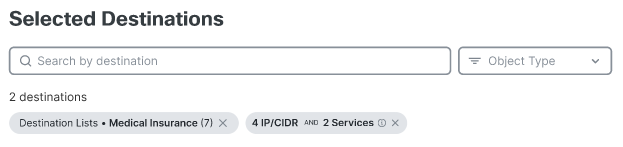
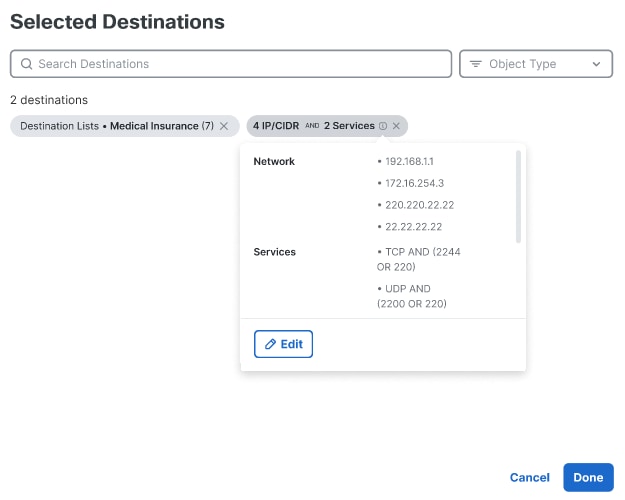
  5. Click on the set of composite destinations.


    The Selected Destinations No Close interface.
  6. After you view the selected destinations, click Close.


Edit Composite Destinations on Rules

After you add composite destinations on an access rule, you can modify or remove the destination directly on the rule.

Destinations that you enter directly on a rule are not reusable components. For more information, see About Configuring Destinations for Internet Access Rules.

For a composite destination entered on a rule, you can deselect the entries in a component, remove an entire component, enter additional entries in a component, or add new components in a composite destination.

Before you begin

Procedure

  1. Navigate to Secure > Access Policy > Add Rule > Internet Access.

  2. Navigate to Specify Access, and then navigate to the search bar under To.

  3. Click on the selected destinations.


    The Destinations in to Bar interface.
  4. Click on the set of reusable destinations or click on the set of composite destinations.


    The Selected Destinations No Close interface.
  5. You can view the selected destinations, then click Close.

  6. To remove a reusable destination or an entire composite destination, click on the X next to the destination.

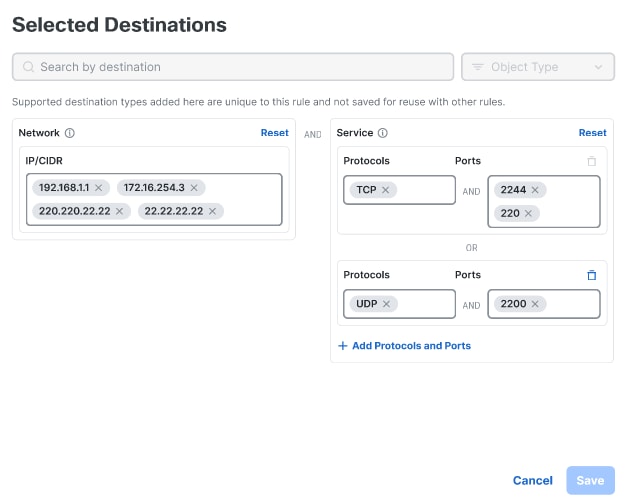
  7. To modify the Network and Services composite destinations, click Edit.


    The Inline Editing Selected Destinations Edit Button interface.
    1. Click Reset to revert to the last saved state of the component on the composite destination.

      The Inline Editing Selected Destinations interface.
    2. Click on an X next to an entry to remove the entry in a destination component.
    3. Click on a trash can (delete icon) to remove an entire set of entries.
    4. Click +Protocol and Ports to add a protocol, port or range of ports separated by a hyphen (-). Repeat this step to enter additional protocols and ports on the rule.
    5. Click Save to confirm the Network and Service components on the composite destination.
  8. To confirm the selected destinations, click Done.


Select Application Protocols with Composite Destinations on Rules

You can select application protocols on a internet rule. Once you add the application protocols, click +AND to add composite destinations with the application protocols on the internet access rule in the Access policy.

Before you begin

Procedure

  1. Navigate to Secure > Access Policy > Add Rule > Internet Access.

  2. Navigate to Specify Access and then click on the search bar under To.


    The Internet Rule to with and interface.
  3. Click Select destinations, expand Application Protocols, and then select the application protocols to add to the internet rule.


    The Select Single App Protocols interface.
  4. Click +More to view the added application protocols.


    The App Protocols with More interface.
  5. View or search for the added application protocols.


    The App Protocols More View interface.
  6. (Optional) Click +AND, and then click on the Select destinations text area.

    Add composite destinations with Services (Transport protocols, and ports or port ranges) and combine with the application protocols that you added on the rule using the AND operator.

    1. Add IP addresses and CIDR blocks.

      Type or paste a comma-separated list of IPv4 addresses, IPv6 addresses, and CIDR blocks. For example: 192.168.1.1, 192.168.1.0/24, fd00:b0fc:8844:3345:186a:6fd7:bab:5f72.

    2. Add Services.

      Select transport protocols or Any, and enter a comma-separated list of ports or port ranges.

      Example port ranges and lists of ports: 7800-7805, 7800,8900,9006.


      The And with Service Protocols interface.
  7. Click Save.


How Application Protocols Combine with Composite Destinations

You can select application protocols on internet access rules in the Access policy. Secure Access provides the option to add the logical AND operator on the rule with the application protocols and then add composite destinations. Composite destinations are network addresses, transport protocols, ports and port ranges entered directly on an internet access rule.

Secure Access does not support selecting application lists, application categories, content categories, or destination lists combined with composite destinations.

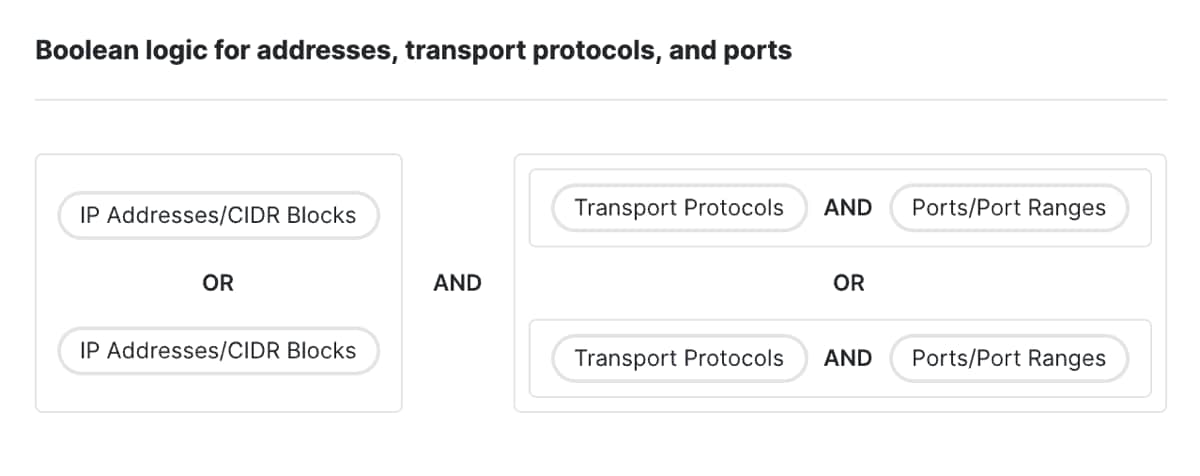
Secure Access uses boolean logic to combine the composite destinations on a rule with Services. Services are groups of transport protocols and port or port ranges.


The App Protocols Boolean Logic interface.
  • First, Secure Access combines the individual network addresses (IP addresses or CIDR blocks) together with the OR operator.

  • Next, Secure Access combines each set of selected Service components together with the AND operator. Transport protocols are ANDed with the ports or port ranges.

  • Next, Secure Access combines the Services together with the OR operator.

  • Then, Secure Access combines the set of composite destinations with the set of Services using the AND operator.


App Risk Profiles

If for Destination you have selected Any Internet Destination or a destination that includes an internet application, you will see the App Risk Profile section. For more information, see App Risk Profile.

Once you create an App Risk profile, you may choose the profile to add the criteria it defines to your rule.

To incorporate an app risk profile in this rule:

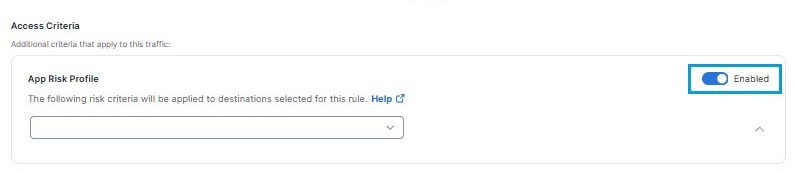
  1. Click the toggle to the right of App Risk Profile to enable the feature.


    The App Risk Profile1 interface.
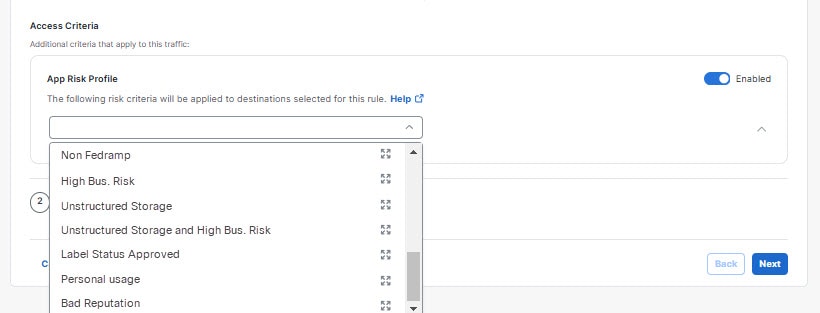
  2. From the Select profile drop-down list, click on the name of an app risk profile to apply it to this rule.


    The App Risk Profile2a interface.
    Tip
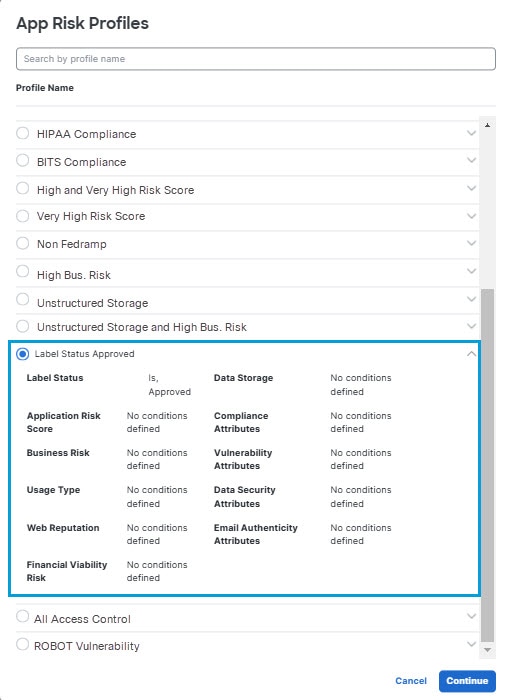
    Alternatively, you may click the expand icon to the right of an app risk profile name to display a dialog showing the risk criteria it defines. Then click Cancel to dismiss the dialog, or click Continue to select the profile.

    The App Risk Profile2b interface.

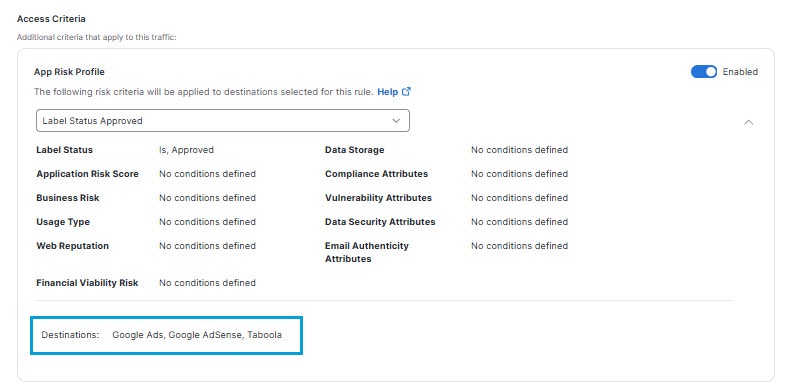
Once you select an app risk profile, a summary of the risk criteria the profile applies to your rule appears. Below it, a list of Destinations that match the profile appears. This list reflects the restriction the app risk profile places on the list of destinations you selected for the rule.


The App Risk Profile2c interface.

Advanced Application Controls

Some web-based applications offer the option to allow users to access the site but not to perform activities such as uploading, downloading, posting, or sharing content on those sites.

Depending on the destinations you select in an internet access rule, you will see an Advanced Application Controls section.

This section appears only if destinations added to the rule include one or more applications that allow granular controls on activities. These applications must be included in application lists selected as destinations, or be individual applications selected from application categories.

For example:

  • Configured destinations that include applications selected from Application Categories that support the ability to control uploads, downloads, posting, or sharing without entirely blocking access to the application.

  • Application lists that include such applications.

Use these advanced controls if you want to allow access to the site but block certain actions. If you don't want to allow access to the site at all, select the application or application list in the destination list for the rule.

Note
Advanced controls for these applications have no impact in “Block,” “Warn,” or “Isolate” rules.

Applications with Advanced Controls

If apps have advanced app controls, you can block all content for the app, block the app from uploading content including posts and shares, block the app from downloading content, or block the app from deleting content.

Note

Be aware that the support status of each application list may change without prior notice due to specification changes implemented by the SaaS vendor.

Note

Both "posting" and "sharing" refer to exposing information to other accounts within the same application. Some applications refer to this action as "posting," and some refer to it as "sharing."


Cloud Storage
Applications Category Upload Download Post/Share Delete
Box Cloud Storage Cloud Storage Yes Yes Yes Yes
Dropbox Cloud Storage Yes Yes Yes Yes
Flickr Cloud Storage Yes Yes
File Dropper Cloud Storage Yes
GrosFichiers Cloud Storage Yes Yes Yes Yes
Google Drive Cloud Storage Yes Yes Yes
Leap File Cloud Storage Yes Yes Yes
MediaFire Cloud Storage Yes Yes Yes Yes
Microsoft OneDrive Cloud Storage Yes Yes Yes Yes
OpenDrive Cloud Storage Yes
Onehub Cloud Storage Yes
PicDrop Cloud Storage Yes Yes Yes Yes
SendThisFile Cloud Storage Yes Yes Yes
SmugMug Cloud Storage Yes Yes Yes
SlideShare Cloud Storage Yes Yes Yes
4shared Cloud Storage Yes Yes Yes

Collaboration
Applications Category Upload Download Post/Share Delete AI Mode Notes
Cisco Webex Teams Collaboration Yes Yes Yes
Microsoft Teams Collaboration Yes Yes Yes Yes
Google Collaboration Yes AI Overview as part of Google Search cannot be blocked.
Gyazo Teams Collaboration Yes Yes Yes Yes
Slack Collaboration Yes Yes Yes Yes
WhatsApp Collaboration Yes Yes If you upload a Whatsapp file that has already been previously uploaded, Secure Access does block the upload of the file. As a workaround, manually delete the existing version of the file from the Whatsapp servers.

Content Management
Applications Category Upload Download Post/Share Delete
Egnyte Connect Content Management Yes
Lucidchart Content Management Yes
Pastebin Content Management Yes Yes Yes

Media
Applications Category Upload Download Post/Share Delete
Dailymotion Media Yes Yes
Giphy Media Yes
Veoh Media Yes Yes
Vimeo Media Yes Yes Yes
YouTube Media Yes Yes

Office Productivity
Applications Category Upload Download Post/Share Delete
Basecamp Office Productivity Yes Yes Yes Yes
DocHub Office Productivity Yes Yes Yes Yes
AOL Mail Office Productivity Yes
Gmail Office Productivity Yes Yes Yes Yes
Mail.ru Office Productivity Yes
Smartsheet Office Productivity Yes Yes Yes Yes
Trello Office Productivity Yes Yes
Yandex Mail Office Productivity Yes
Yahoo Mail Office Productivity Yes Yes Yes

P2P
Applications Category Upload Download Post/Share Delete
Citrix ShareFile P2P Yes
Filesend P2P Yes
GigaFile P2P Yes
Hightail P2P Yes
WeTransfer P2P Yes Yes
Wikisend P2P Yes

Social Networking
Applications Category Upload Download Post/Share Delete
Facebook Social Networking Yes Yes Yes
Facebook Messenger Social Networking Yes
Instagram Social Networking Yes Yes Yes
LinkedIn Social Networking Yes Yes Yes Yes
Pinterest Social Networking Yes Yes Yes
Tik Tok Social Networking Yes Yes Yes Yes
Twitter Social Networking Yes Yes Yes

Add Advanced Application Controls

When you create or edit an internet access rule, you can add specific applications or application lists as destinations. You can select applications from the Advanced Application Controls tables or use a configured application list.

Before you begin

Procedure

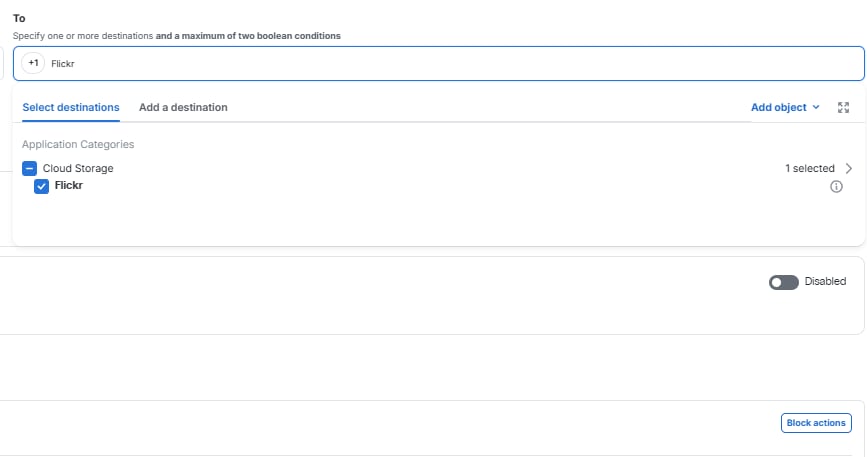
  1. When creating or editing an internet access rule, enter the application name in the To text box, and select the Application categories check box.

    Note
    You can select all applications or a single application in the To text box.
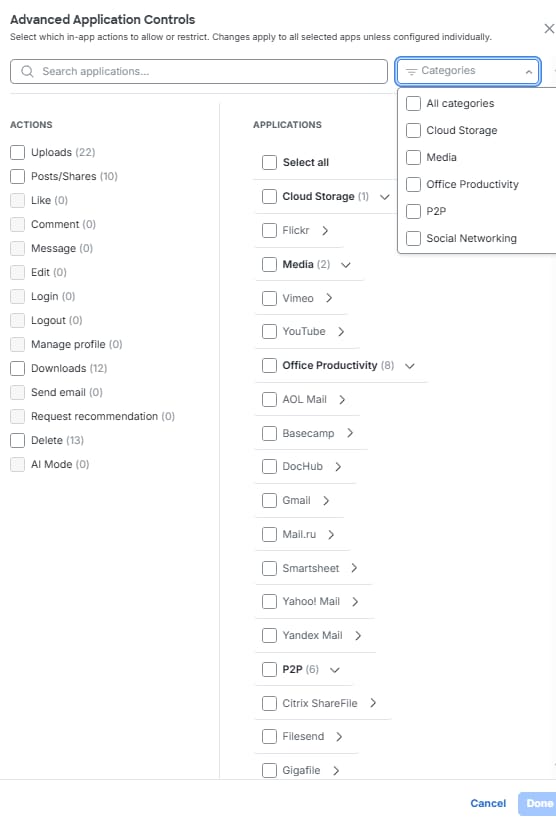
  2. Click Block actions to restrict specific activities.

  3. In the left pane, select the types of actions to block.

  4. (Optional) Filter the list in the main pane by clicking All categories and choosing a specific category.

  5. In the main pane, select the Activities to block for each application in the list.

  6. (Optional) If you filtered the list, choose a different category, and then select the activities to block for that category. Repeat this process for each category as needed.

  7. Click Done to apply your changes.


Troubleshooting Advanced Application Controls

If advanced application control is not working as expected, check the following:

  • Decryption must be enabled in the security profile selected in the rule.

  • The site must not be on the Do Not Decrypt list selected in the security profile.

  • The domain—for example, dropbox.com—is not configured for Bypass Web Proxy on the Connect > End User Connectivity> Internet Security page. Any domains or IPs on this list will bypass Secure Access and be routed by your local DNS server. This list applies to PAC file and AnyConnect deployments.

  • When an application is blocked, a web notification page will not be displayed. Instead, an error message will be displayed in the application.


About Configuring Threat Categories on Internet Access Rules

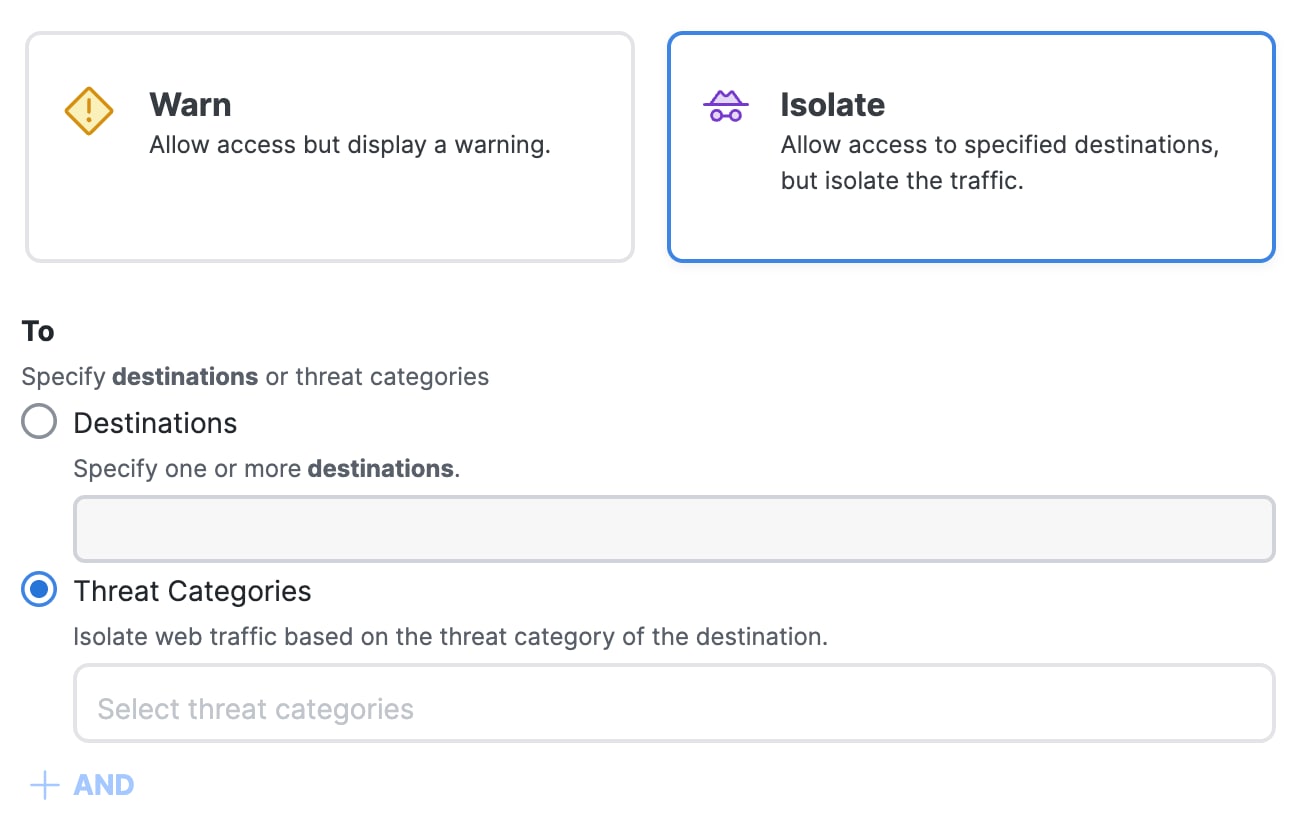
For internet access rules where the rule action is Isolate, you can add the threat categories for web destinations instead of pre-configured or composite destinations. Secure Access isolates the internet-bound traffic based on the threat categories assigned to the web destinations. For information about the requirements for isolating web traffic in Secure Access, see About Isolated Destinations.

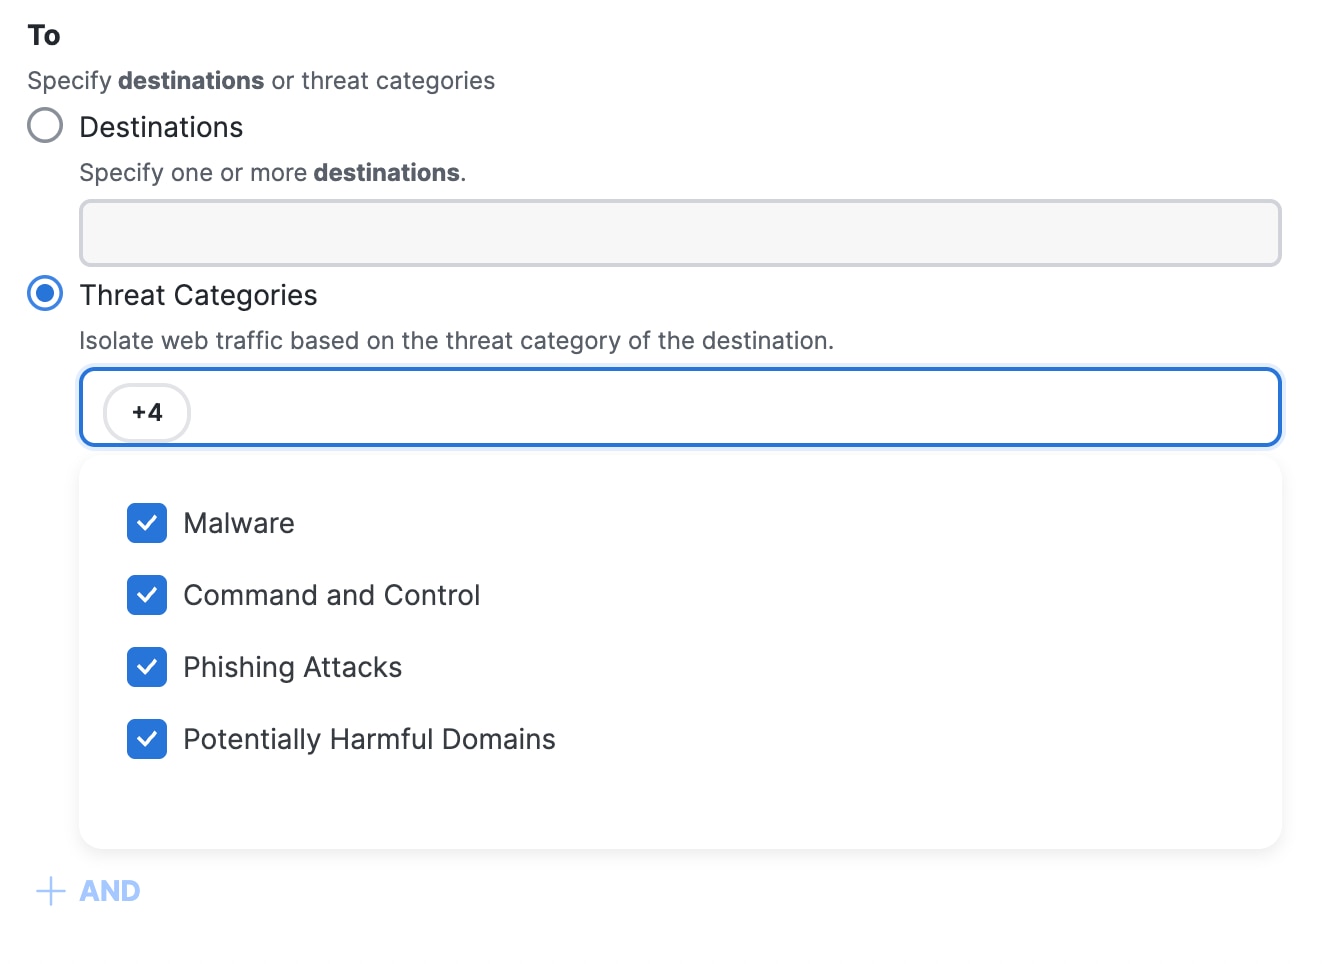
Secure access supports these threat categories for selection on the internet access rules with the Isolate action:

  • Malware

  • Command and Control

  • Phishing Attacks

  • Potentially Harmful Domains

In Secure Access, you can also use a Security profile to add threat categories for internet destinations. After you add the Security profile in the organization, select the Security profile on the internet access rules in the Access policy.

For information about the Secure Access threat categories, see Manage Threat Categories.

For information about Security profiles, see Manage Security Profiles.

How to Add Threat Categories on Internet Access Rules

  1. Navigate to Secure > Access Policy.

  2. Click Add Rule > Internet Access..

  3. Navigate to Specify Access, and then for the rule action click Isolate.

    The Threat Categories on Internet Access Rules interface.
  4. For the To side of the access rule, click Threat Categories.

  5. Select the threat categories for the internet access rule.

    The Threat Categories Listed All Selected interface.

Isolation Profile Configuration

When you select the Isolate action, the Isolation Profile section appears. This allows you to apply specific security controls to the isolated session. In this section you can choose an Isolation Profile from the dropdown menu. The System Default Profile is selected by default. You can search for a profile by name using the search bar within the dropdown.

The Rbi13 interface.

Once a profile is selected, a summary of its settings (such as watermarking, copy and paste restrictions, and document isolation) is displayed.


Security Control Options

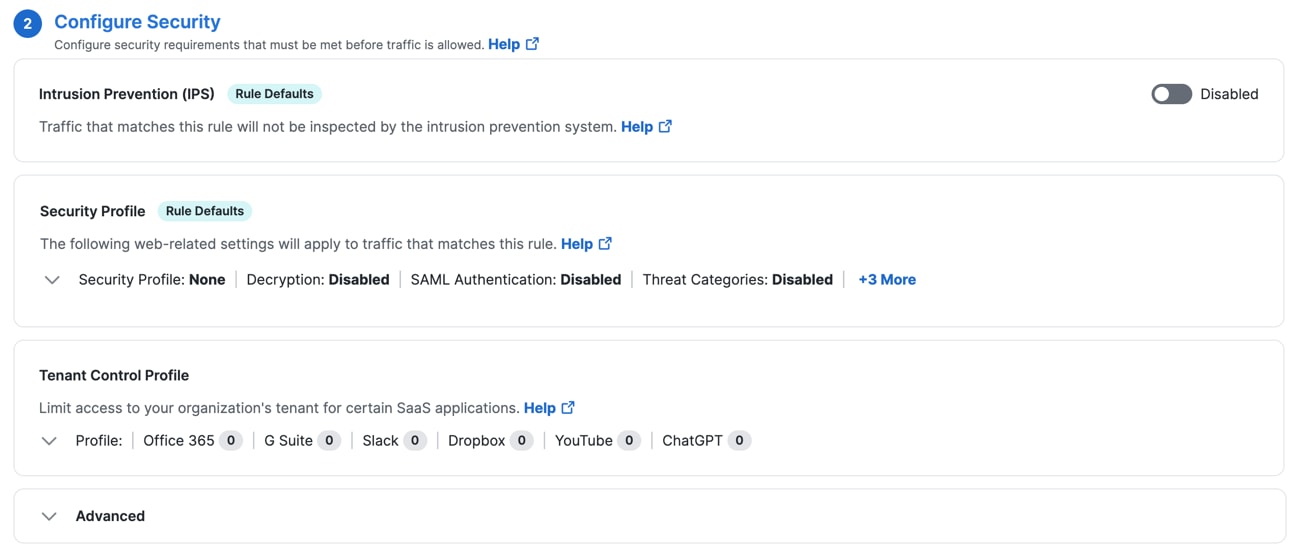
Intrusion Prevention (IPS) Profile

Choose the IPS profile that includes the threat detection settings that you want applied to traffic that matches this rule. You can also disable intrusion prevention for this rule.

For more information, see Manage IPS Profiles.

Security Profile

  • Choose the security profile that includes the web-related settings that you want applied to traffic that matches this rule.

  • For all rules, including Block, Warn, and Isolate rules, unless you have good reason not to, choose a security profile that is configured to decrypt the traffic that will hit the rule. Decryption is required to accurately process traffic to most internet destinations.

  • If the rule will block traffic or warn users, you can choose a security profile that specifies the notifications to display to end users.

For more information, see Security Profiles for Internet Access.

Tenant Control Profile

Tenant controls affect access to Microsoft 365, Google G Suite, Slack, and Dropbox.


Manage Advanced Security Controls

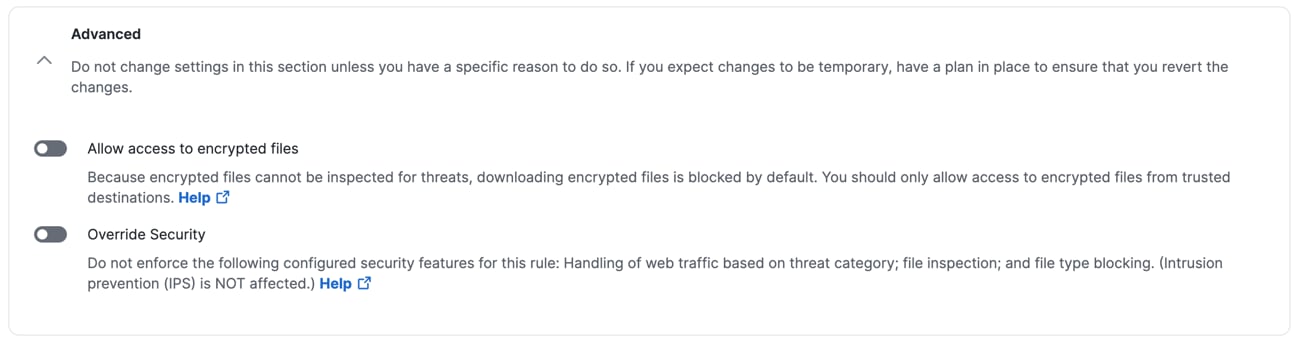
The Advanced Security Controls provides the option to skip the enforcement of certain security features. For example, you may want to disable advanced security controls for trusted destinations permanently or to troubleshoot an issue temporarily. Disable security features only when you have a specific reason to do so.

Before you begin

Procedure

  1. Follow the general steps to add or edit an internet access rule, then navigate to Configure Security > Advanced.

  2. Expand Advanced and choose the advanced security controls to enable on the internet access rule.


    The Internet Access Rule Advanced interface.
    1. Toggle on the Allow access to encrypted files option.

      When you enable the Allow access to encrypted files, Secure Access allows end users to access files that are encrypted.

      Because the system cannot inspect encrypted files for threats, the default setting is block downloads of encrypted files. You should only allow access to encrypted files from trusted destinations.

    2. To prevent Secure Access from applying threat category enforcement, file inspection, and file type control to traffic that matches the rule, turn on Override Security.

      The security override applies only to Secure Web Gateway controls.