Cisco Identity Services Engine Sponsor Portal User Guide, Release 1.0.4
Bias-Free Language
The documentation set for this product strives to use bias-free language. For the purposes of this documentation set, bias-free is defined as language that does not imply discrimination based on age, disability, gender, racial identity, ethnic identity, sexual orientation, socioeconomic status, and intersectionality. Exceptions may be present in the documentation due to language that is hardcoded in the user interfaces of the product software, language used based on RFP documentation, or language that is used by a referenced third-party product. Learn more about how Cisco is using Inclusive Language.
- Updated:
- May 17, 2011
Chapter: Cisco ISE Sponsor Portal
Overview
A sponsor user is a person who creates the guest user account and is often an employee of the organization; for example, a lobby ambassador who creates and manages guest user accounts through a sponsor-oriented web portal. The Cisco ISE authenticates sponsors through a local database or external Lightweight Directory Access Protocol (LDAP) or Microsoft Active Directory identity stores.
A sponsor portal allows a sponsor to create temporary accounts for guests, visitors, contractors, consultants, or customers to perform HTTP or HTTPS login to gain access to the network. The network could be a corporate network or access could provide access to the Internet.
You can provide account details to the guest by printout, email, or SMS. The entire experience, from user account creation to guest network access, is stored for auditing and reporting. These topics are discussed here:
Connecting to the Sponsor Portal
You can open a web browser and get connected to the sponsor portal through the web interface. To connect to the sponsor portal, enter the address as provided by your network administrator.
Step 1 Enter the sponsor portal URL in the web browser, for example, http:// ip address:port number /sponsorportal or https:// ip address:port number /sponsorportal. The port number is configurable in the Cisco ISE Admin portal.
Step 2 Enter your username and password in the sponsor portal login page (Figure 1-1), and click Login. Use the login credentials that are specified by your network administrator.
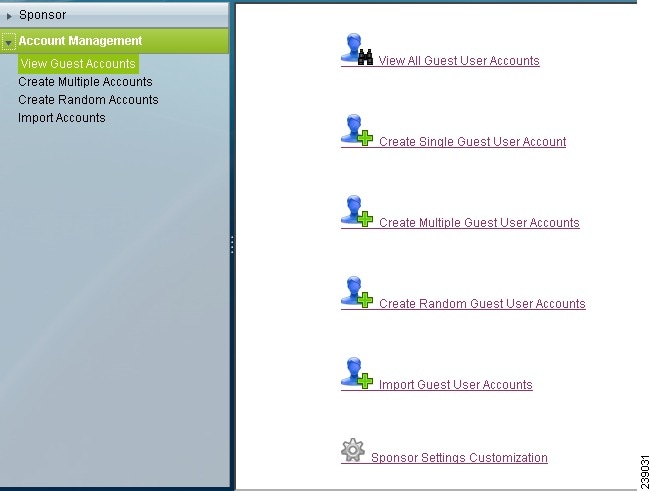
Step 3 When you first log in, the Getting Started page is displayed as shown in Figure 1-2.

Note If your network administrator has not configured Sponsor portal on the Cisco ISE server, you will be redirected to the Cisco ISE Admin portal.
Figure 1-1 Sponsor Portal Login Page
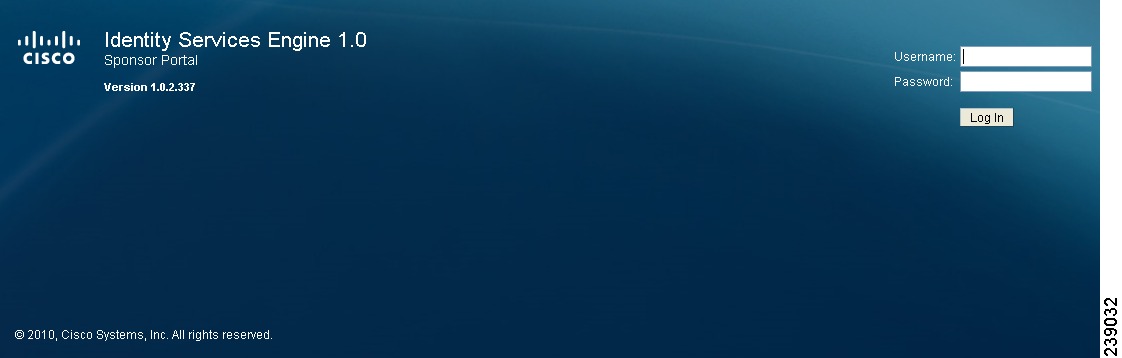
Figure 1-2 Getting Started Page
Note After logging out, you must close all browser windows before logging in back to the Sponsor portal.
Sponsor Groups
Guest sponsor groups contain the permissions and settings for the sponsor user. Sponsor users that belong to a particular sponsor group have a certain set of permissions and settings when they are logged into the sponsor portal.
Sponsor groups have role-based permissions for sponsors to allow or restrict access to different functions in the sponsor portal. Based on the permissions that are set for the sponsor group, a sponsor may be allowed or restricted to perform these actions:
- Create guest accounts
- Modify guest accounts
- Suspend or reinstate guest accounts
- View guest details
- Send account details to guests by email or SMS
Sponsor groups are configured by your network administrator in the Cisco ISE Admin portal.
See the “Guest Management” chapter of the Cisco Identity Services Engine User Guide, Release 1.0.4, for more information on creating and editing sponsor groups.
Customizing the Sponsor Portal
You can customize default settings of the sponsor portal such as the language template, time zone, telephone country code, and default login page from the Settings Customization page.
To customize default settings of the sponsor portal, complete the following steps:
Step 1 Choose Sponsor > Settings Customization .
Step 2 Modify the following settings:
- Language Template —If your administrator has added additional templates, you can choose a language template from this drop-down menu to change the language of the application interface or the guest printout, email, or SMS notification.
- Timezone—This is default as chosen in the list on the account creation pages.
- Location—Specify the default guest location that you want to use for creating accounts.
- Sponsor’s Email Address—Enter your email address here. This is required to receive a copy of the guest’s account details by email.
To receive a copy of the guest’s account details by email, the Cisco ISE administrator must first setup an email server. For details on how to setup an email server, see the “Guest Management” chapter of the Cisco Identity Services Engine User Guide, Release 1.0.4.
To notify guest users through email, your Cisco ISE administrator must set appropriate authorization levels while creating sponsor groups. For details on how to set sponsor group authorization levels, see the “Guest Management” chapter of the Cisco Identity Services Engine User Guide, Release 1.0.4.
Note If you do not have the privilege to view the guest password, the Receive Email Confirmation option will not work.
Note If you do not have privilege to view guest password, taking printout of guest details will show **** against the password.
Account Management
- Creating a Single Guest Account
- Creating Multiple Guest Accounts
- Creating Random Guest Accounts
- Importing Guest Accounts
- Editing an Existing Guest User Account
- Deleting an Existing Guest User Account
- Suspending a Guest User Account
- Reinstating a Suspended Account
Creating a Single Guest Account
You can create a single guest user accounts to provide network access to any guest. User account is created with a randomly generated password, based on the Password Policy that is set globally for the system.
To create a single guest user account:
Step 1 Log in to the Sponsor portal.
Step 2 Click Create Single Guest Account , from the Home page
The Create Guest Account dialog box appears.
Step 3 Enter the values as described in Table 1-1 .
The Successfully Created Guest Account screen appears with the Guest details and the system-generated username and password for the guest account. Do one of the following:
a. Choose the notification form by clicking Print, Email, or SMS. Depending on the privileges given to the sponsor group by your network administrator in the Cisco ISE Admin portal, you may or may not get these notification buttons.
b. Click Create Another Account to create more guest user accounts.
c. Click View All Accounts to view a list of all the guest user accounts created.
Initially, when you create a guest user account, the status that is shown for that account is Inactive. After the guest logs in with the given username and password, and accepts the Use Policy, the status changes to Active.
Note The fields on this screen may be made Mandatory, Optional, or Not Used as configured by your network administrator in the Cisco ISE Admin portal. All fields might not appear on the page, depending on the configurations that your network administrator made.
First name of the guest user; maximum length is 24 characters. |
|
Last name of the guest user; maximum length is 24 characters. |
|
A valid email address of the guest user; maximum length is 48 characters. For example, username@domain.com. The Cisco ISE sends the login credentials to this email address if the guest user chooses to be notified through email. To notify guest users through email, your Cisco ISE administrator must set appropriate authorization levels while creating sponsor groups. For details on how to set sponsor group authorization levels, see the “Guest Management” chapter of the Cisco Identity Services Engine User Guide, Release 1.0.4. |
|
A valid phone number of the guest user. The Cisco ISE sends the login credentials to this telephone number if the guest user chooses to be notified through SMS. |
|
Add any additional information that you want to enter about the guest user. |
|
Assign a group role for the guest user. Group role is the Identity Group that is to be assigned to the guest user. This Identity Group is used in authorization policies to map the guest users to their appropriate network access privileges. |
|
Set a time zone under which you want to keep the guest user. |
Note Guest objects use internal dates in UTC timezone. As a result, all dates and time will appear in UTC time when logged in audit logs.
Note When the primary Administration ISE node is down, you cannot create new guest user accounts. During this time, the guest and sponsor portals provide read-only access to the existing guest and sponsor users respectively. Also, a sponsor admin who has never logged into the sponsor portal before the primary Administration ISE node went offline, can not login to the sponsor portal until a secondary Administration ISE node is promoted or the primary Administration ISE node becomes available."
Creating Multiple Guest Accounts
You can create a series of guest users by using the Create Multiple Accounts screen. This screen has the same functionality as the Create Single Guest Account screen, except that it allows multiple users to be specified one after another. Apart from the guest users, several other fields like Guest Role, Time Profile, and Timezone appear prepopulated with the values that you provided for the previous guest user.
To create multiple guest accounts, complete the following steps:
Step 1 Log into the sponsor portal.
Step 2 Click Create Multiple Guest User Account.
The Create Multiple Guest Accounts dialog box appears.
Step 3 Enter the values as described in Table 1-1 .
The details get added to the listing table on top of the page and allows you to add additional guest user accounts. See Figure 1-3.
Step 5 To edit the user details:
a. Choose the user in the listing table.
The details are displayed again in the following fields.
Step 6 Assign a group role for the guest users. The guest users will have the privileges that are defined for this group. This group role will be common for all the guest user accounts that are created at once.
Step 7 Assign a time profile for the guest users. This time profile will be common for all the guest user accounts that are created at once.
Step 8 Set the time zone for the guest users. This time zone will be common for all the guest user accounts that are created at once.
Guest Accounts Created confirmation is displayed with the username and password of all the guest user accounts that are created, as shown in figure Figure 1-4.
Step 10 Do one of the following:
a. Click Print to print the account details.
b. Click Export to export the account details to a .csv file.
c. Click View All to go back to the Guest User Accounts List page and see the list of all the guest user accounts.
Figure 1-3 Create Multiple Guest User Accounts Dialog Box
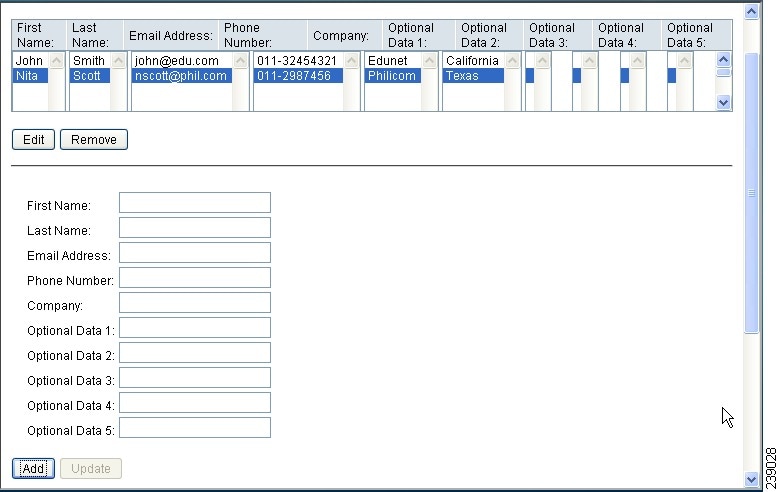
Figure 1-4 Confirmation Screen for Multiple Guest Accounts Created

Creating Random Guest Accounts
You can also create random guest accounts. You might need to create and provide accounts to guests at times when you have no computer access. In such cases, this feature allows you to create accounts in advance, record the details separately, and store them in the system for correlation at a later time. You can create a maximum of 10,000 random guest user accounts.
An example of random accounts usage ia a lobby ambassador handing out guest user access accounts from a predefined list of accounts.
Note Random accounts are created with randomly generated usernames and passwords. You can add a username prefix to each account name. The remainder of the username and generation of the password follow the username and password policies respectively, that are set by your network administrator in the Cisco ISE Admin portal.
To create a random guest account, complete the following steps:
Step 1 Log into the Sponsor portal.
Step 2 Click Create Random Guest Account.
Step 3 Enter the values as described in Table 1-2 in the dialog box.
The Current Guests listing page is displayed with the list of newly created guest accounts.
Table 1-2 describes the fields that are available in the Create Random Guest Account dialog box.
Importing Guest Accounts
To create numerous guest user accounts whose account information is stored in an external database, you can use the Import Guest Accounts feature to import the details. Upload a .csv file to the sponsor portal. The sponsor portal parses the information in the .csv file and creates new guest user account for each entry in the file.
To import a .csv file, complete the following steps:
Step 1 Log into the Sponsor portal.
Step 2 Click Import Accounts under Account Management.
The Import Accounts dialog box appears.
Step 3 Enter the values as described in Table 1-3 in the dialog box.
Table 1-3 describes the fields that are available in the Import Guest Account dialog box.
The import process creates as many guest accounts as there are entries in the .csv file. If there is an error in any entry, that entry is omitted and the remaining entries are imported.
Editing an Existing Guest User Account
To edit an existing guest user account, complete the following steps:
Step 1 Log into the sponsor portal.
Step 2 Click View All Guest User Accounts to go to the Guest User Accounts List page.
Step 3 Click the guest account name that you want to modify, or check the check box next to the name and click Edit .
The Edit Guest User page appears.
Step 4 Modify the values as described in Table 1-1 .
Status displays the current status of the guest user account.
Step 5 Check the Suspend check box if you want to suspend a guest user account.
Deleting an Existing Guest User Account
To delete an existing guest user account, complete the following steps:
Step 1 Log into the sponsor portal.
Step 2 Click View All Guest User Accounts to go to the Guest User Accounts List page.
Step 3 Check the check box next to the guest user name and click Delete .
Suspending a Guest User Account
To suspend a guest user account, complete the following steps:
Step 1 Log into the sponsor portal.
Step 2 Click View All Guest User Accounts to go to the Guest User Accounts List page.
Step 3 Check the check box next to the guest user name and click Suspend .
Reinstating a Suspended Account
To reinstate a suspended guest user account, complete the following steps:
Step 1 Log into the sponsor portal.
Step 2 Click View All Guest User Accounts to go to the Guest User Accounts List page.
Step 3 Check the check box next to the guest user name and click Reinstate .
Viewing Guest Accounts and Resending Account Details
All the guest user accounts that you created appear on the Guest User Accounts List page. This page allows you to view, print, or email the account access details to guests if they have lost or forgotten them. This page also allows you to edit, delete, reinstate, or suspend a guest account as shown in Figure 1-5.
Depending on the privileges set for the sponsor group that you belong to, you may or may not have permission to perform some of the following actions. See Sponsor Groups for more details.
The following actions can be performed from the Guest User Accounts List page:
- Create—To create a new guest user account.
- Edit—To edit an existing guest account. Click the guest account name that you want to modify, or check the check box next to the name and click Edit.
- Delete—To delete an existing account. Check the check box next to the name and click Delete.
- Reinstate—To reactivate a suspended account. Check the check box next to the name and click Reinstate.
- Suspend—To suspend a guest user account. Check the check box next to the name and click Suspend.
- Print—To print the account details of an existing account. Check the check box next to the name and click Print. This button is available only if Allow Printing Guest Details option is set to Yes in Authorization Levels while creating the Sponsor Group.
- Email—To send mail with the account details to the guest. Check the check box next to the name and click Email. This button is available only if Send Email option is set to Yes in Authorization Levels while creating the Sponsor Group. For details on how to set sponsor group authorization levels, see the “Guest Management” chapter of the Cisco Identity Services Engine User Guide, Release 1.0.4.
- To send the guest’s account details by email, the Cisco ISE administrator must first setup an email server. For details on how to setup an email server, see the “Guest Management” chapter of the Cisco Identity Services Engine User Guide, Release 1.0.4.
SMS—To send SMS with the account details to the guest. Check the check box next to the name and click SMS. This button is available only if Send SMS option is set to Yes in Authorization Levels while creating the Sponsor Group.
- Filter—To filter and search the existing guest accounts based on the username.
- Display records per page—To set the numbers of records to be displayed per page, choose the record limit from the list available and click Go . The available denominations are 10, 25, 50, 100, and 200.
- Page Navigation—On existence of more records that cannot be accommodated in a single page, the records are displayed in multiple pages. Table 1-4 describes the icons that are used for page navigation.


Figure 1-5 Guest Users Listing Page

 Feedback