Installation Tasks Summary
|
Task |
Reference |
|---|---|
|
Deploy HX Data Platform Installer |
Step 1 - Deploying HX Data Platform Installer |
|
Configure Cisco UCS Manager (using HX Data Platform Installer) |
Step 2 - Cisco UCS Manager Configuration |
|
Install Microsoft Windows Server |
|
|
Hypervisor configuration, HX Data Platform and Cluster deployment |
Step 4 - Hypervisor Configuration, HX Data Platform and Cluster Deployment |
Step 1 - Deploying HX Data Platform Installer
Deploy HX Data Platform Installer using Microsoft Hyper-V Manager to create a HX Data Platform Installer virtual machine.
Procedure
| Step 1 |
Locate and download the HX Data Platform Installer.vhdx zipped file ( for example, Cisco-HX-Data-Platform-Installer-v3.0.1a-build-hyperv.vhdx) from the Cisco Software Downloads site. |
||
| Step 2 |
Extract the zipped folder to your local computer and copy the .vhdx file to the Hyper-V host where you want to host the HX Data Platform Installer. For example, \\hyp-v-host01\....\HX-Installer\Cisco-HX-Data-Platform-Installer-v3.0.1a-29499-hyperv.vhdx |
||
| Step 3 |
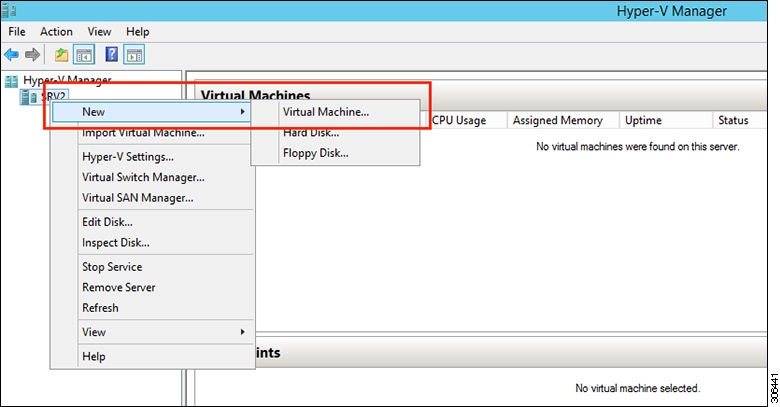
In Hyper-V Manager, navigate to one of the Hyper-V servers. |
||
| Step 4 |
Select the Hyper-V server, and right click and select . The Hyper-V Manager New Virtual Machine Wizard displays.
|
||
| Step 5 |
In the Before you Begin page, click Next.
|
||
| Step 6 |
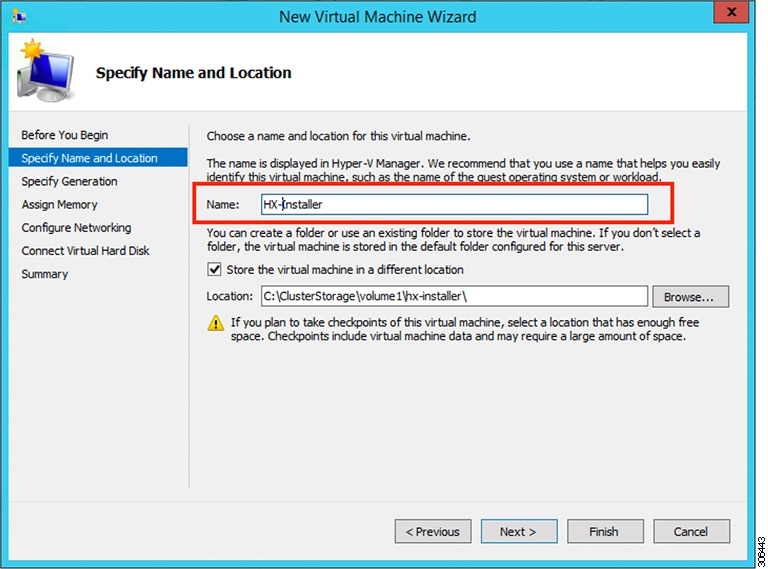
In the Specify Name and Location page, enter a name and location for the virtual machine where the virtual machine configuration files will be stored. Click Next.
|
||
| Step 7 |
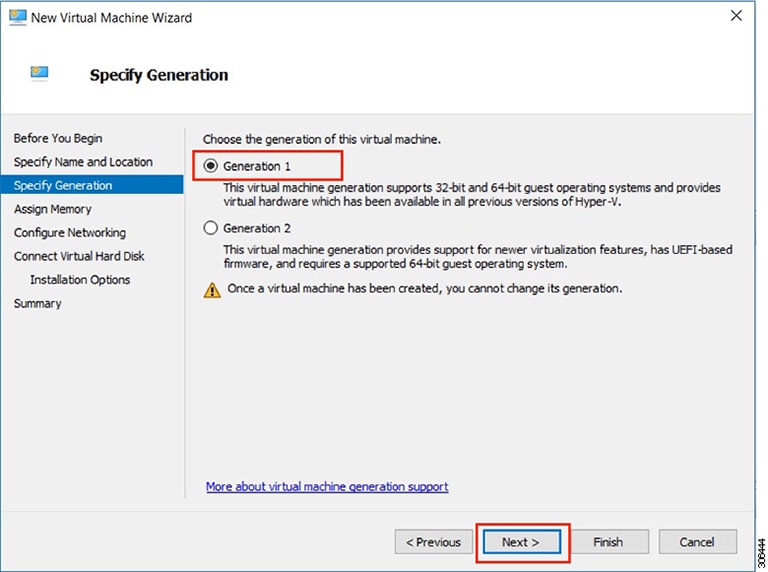
In the Specify Generation page, select Generation 1. Click Next.If you select Generation 2, the VM may not boot.
|
||
| Step 8 |
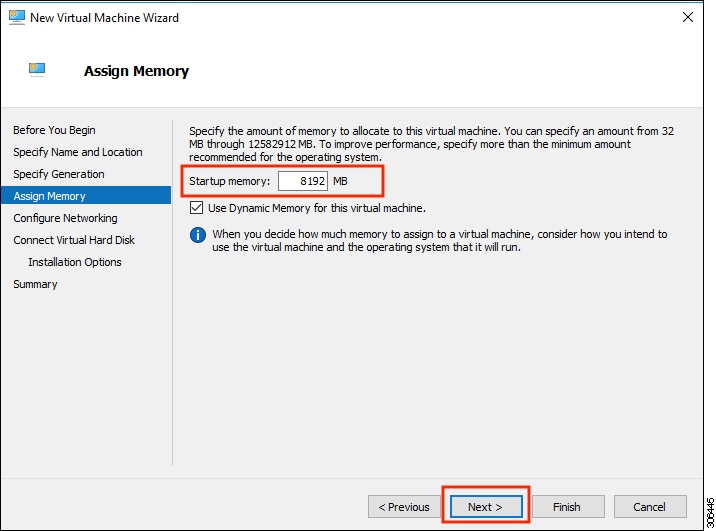
In the Assign Memory page, set the start up memory value to 4096 MB. Click Next.
|
||
| Step 9 |
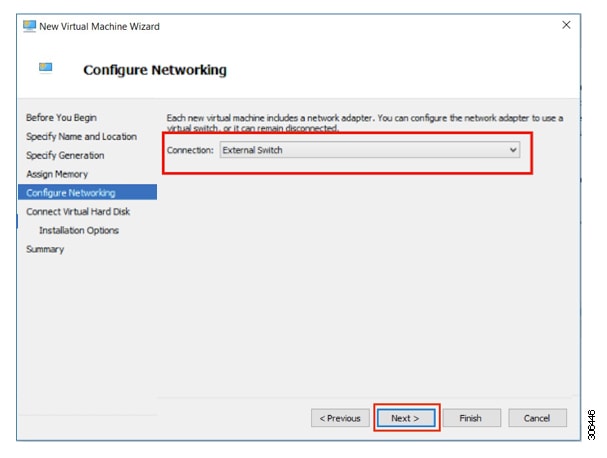
In the Configure Networking page, select a network connection for the virtual machine to use from a list of existing virtual switches. Click Next.
|
||
| Step 10 |
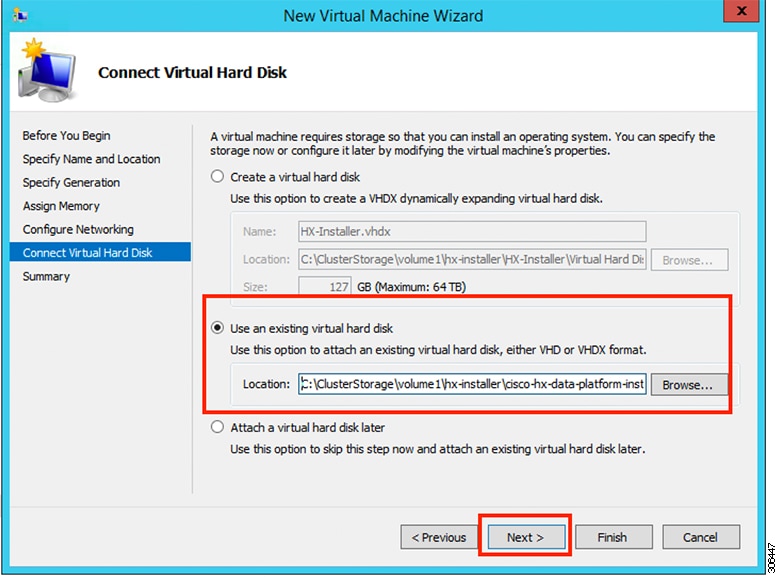
In the Connect Virtual Hard Disk page, select Use an existing virtual hard disk, and browse to the folder on your Hyper-V host that contains the .vhdx file. Click Next.
|
||
| Step 11 |
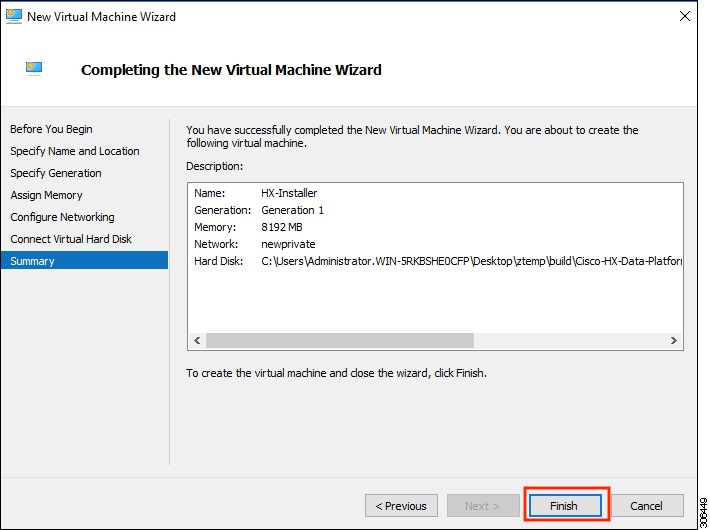
In the Summary page, verify that the list of options displayed are correct. Click Finish.
|
||
| Step 12 |
After the VM is created, power it ON, and launch the GUI.
|

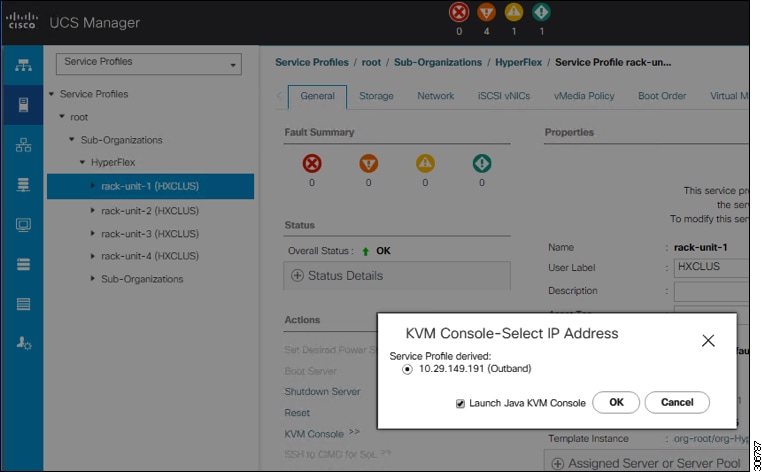
Step 2 - Cisco UCS Manager Configuration
The following procedure describes configuring Cisco UCS Manager using HX Installer.
Procedure
| Step 1 |
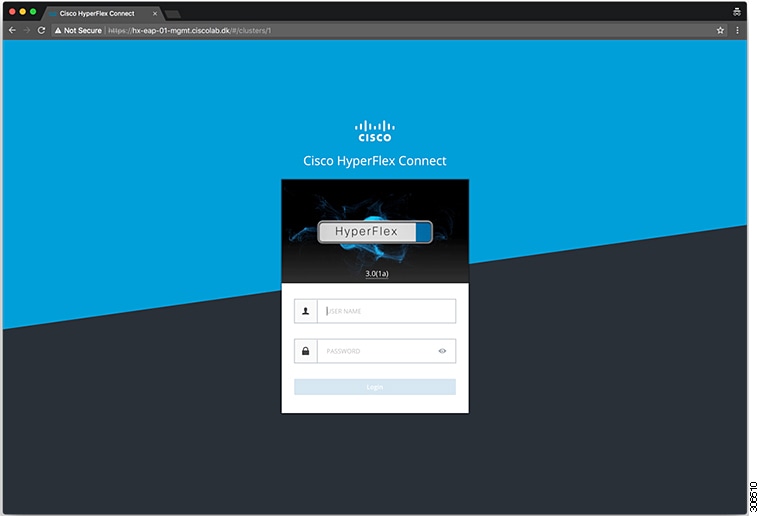
Log into the HX Data Platform Installer using the following steps:
|
|||||||||||||||||||
| Step 2 |
From the HX Data Platform Installer Workflow page, select I know what I'm doing, let me customize my workflow. 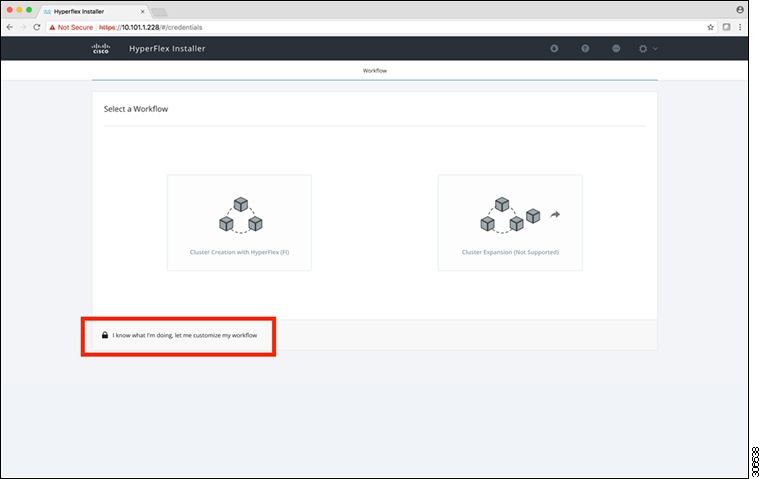 |
|||||||||||||||||||
| Step 3 |
On the next screen, click Run UCS Manager Configuration and then Continue. 
|
|||||||||||||||||||
| Step 4 |
Click Confirm in the pop-up that displays.  |
|||||||||||||||||||
| Step 5 |
UCS Manager Credentials At this point the right side of the page is unused. Further in the setup process a configuration JSON is saved, so in subsequent installations the JSON file can be imported to add the data quickly. Complete the following fields for UCS Manager.
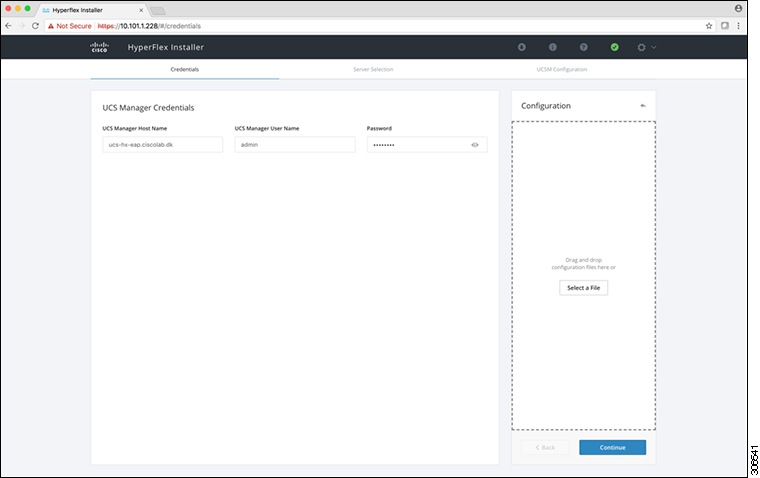 Click Continue to proceed. The installer will now try to connect to the UCSM and query for available servers. The configuration pane will be populated as the installer progresses. You can at any time save the JSON file so you can re-use it for subsequent installations. This feature works on all the different workflows in the installer. After the query finishes then you will get a screen with the available servers Choose all the servers that you want to install in the cluster and click Continue. 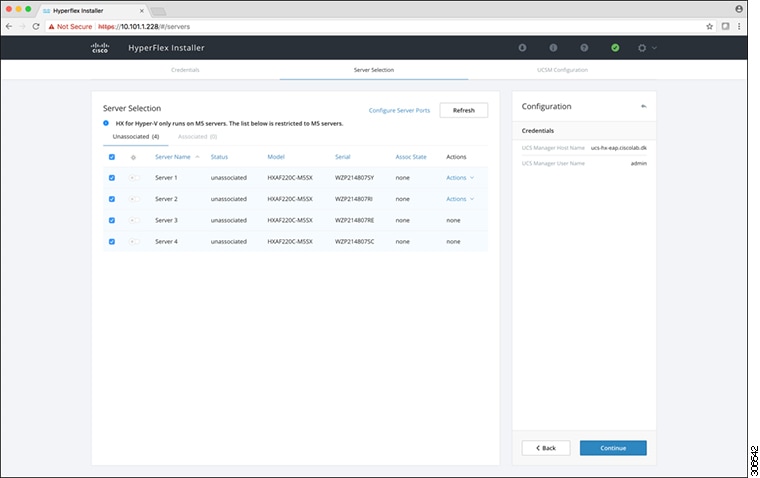
|
|||||||||||||||||||
| Step 6 |
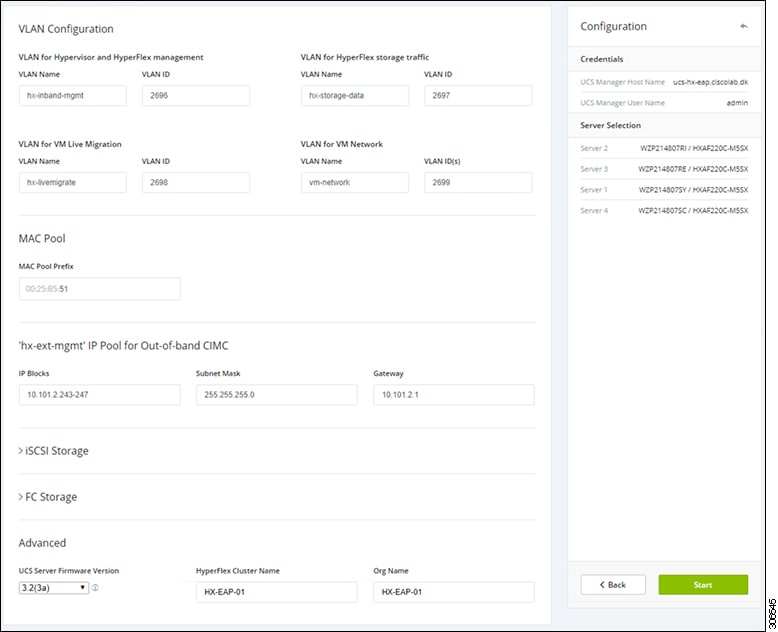
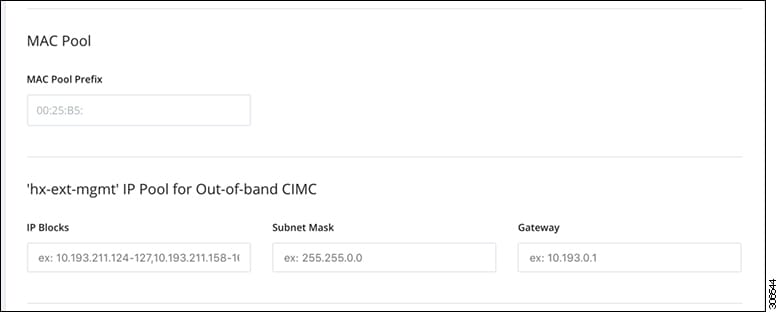
VLAN Configuration HyperFlex needs to have at least 4 VLANs to function, each needs to be on different IP subnets and extended from the fabric interconnects to the connecting uplink switches, to ensure that traffic can flow from the Primary Fabric Interconnect (Fabric A) to the Subordinate Fabric Interconnect (Fabric B).
Use the following illustration as a reference for entering values in this screen. 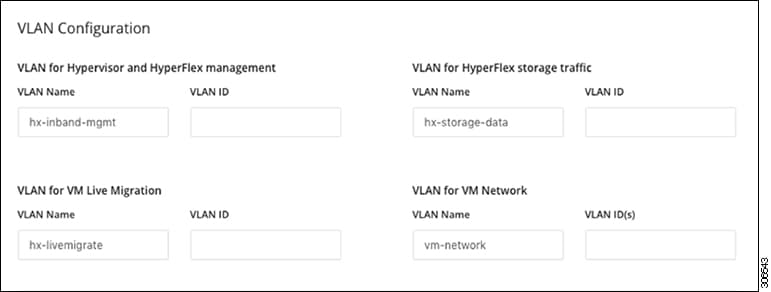
|
|||||||||||||||||||
| Step 7 |
Enter the remaining network configuration.
|
|||||||||||||||||||
| Step 8 |
Advanced Section
 |
|||||||||||||||||||
| Step 9 |
When you click Start, the installer validates your input and then begins configuring the UCS Manager. |
|||||||||||||||||||
| Step 10 |
When the HX Data Platform Installer is finished, then you are ready to proceed to next step, Step 3 - Microsoft OS Installation.  |
Step 3 - Microsoft OS Installation
-
Customer provided Windows 2016 Datacenter edition ISO, and
-
Cisco provided Cisco HyperFlex Driver image.
These image files must be placed on a share that is reachable from Cisco UCS Manager and the Out-of-band subnet that was used in the previous installation step. If you do not have a location to serve the files from, then you can use the installer to host the files. Please see the section: How to upload the ISO and img file to the installer VM using WinSCP.
 Note |
Ensure network connectivity exists between the fileshare and all server management IP addresses. |
Procedure
| Step 1 |
Launch Cisco UCS Manager::
|
|||||||||||||||||||||||||||||||||||||||||||
| Step 2 |
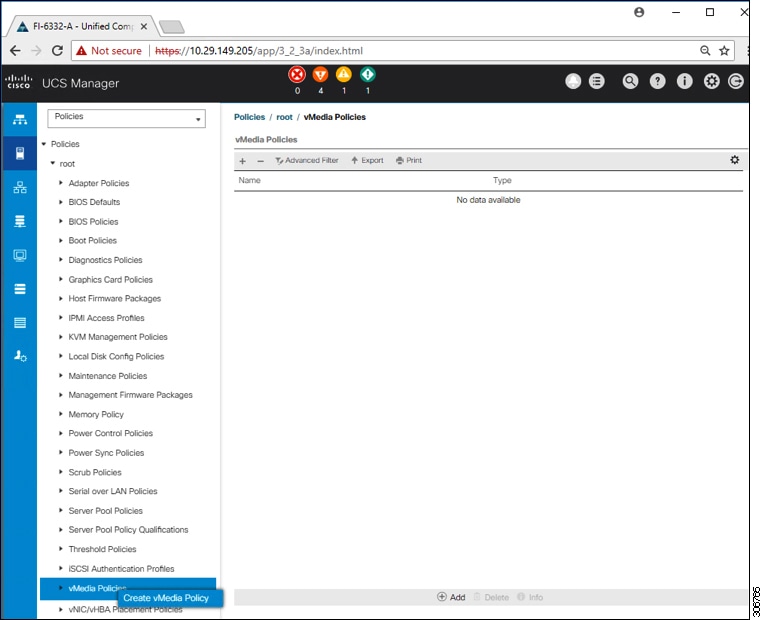
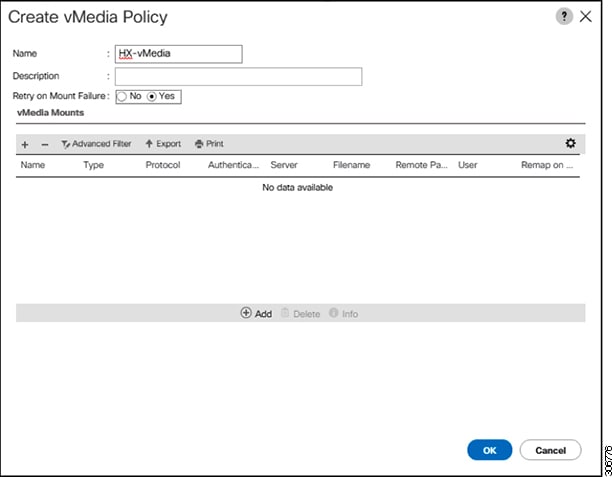
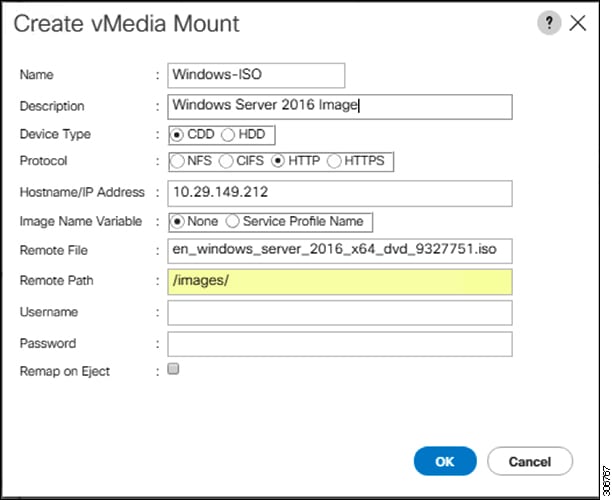
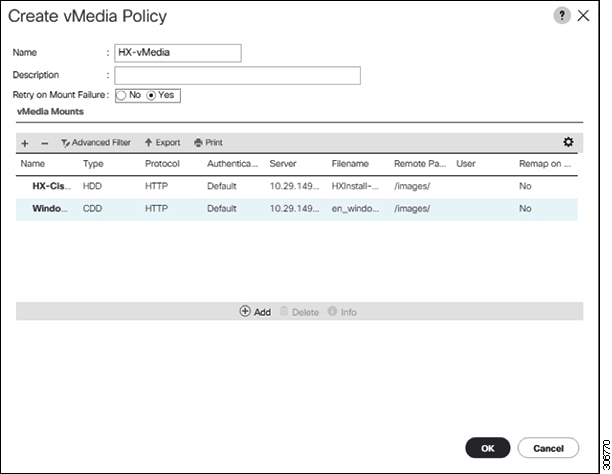
Create a vMedia policy for the Windows OS and Cisco driver images:
|
|||||||||||||||||||||||||||||||||||||||||||
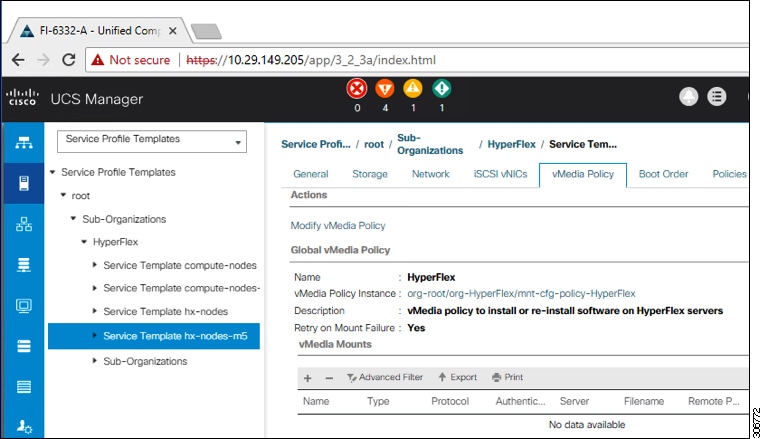
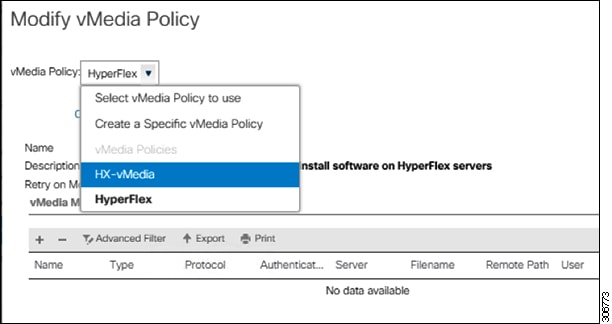
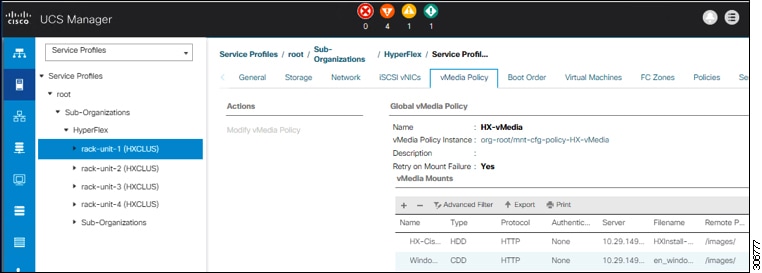
| Step 3 |
Associate the vMedia Policy to a Service Profile:
|
|||||||||||||||||||||||||||||||||||||||||||
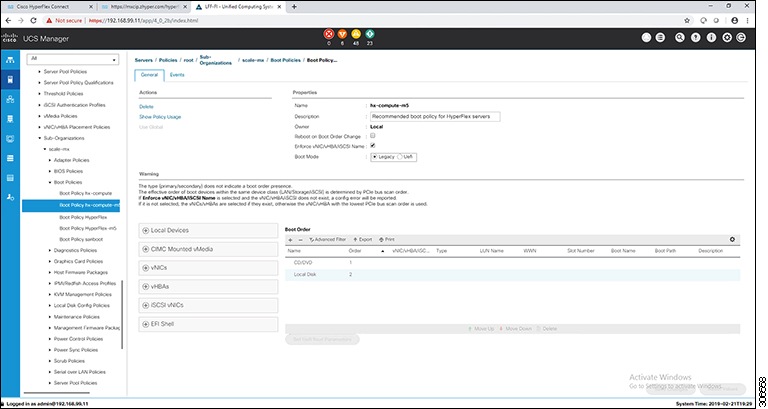
| Step 4 |
Modify Boot Policy and set the boot order to have CIMC CD/DVD to the list:
|
|||||||||||||||||||||||||||||||||||||||||||
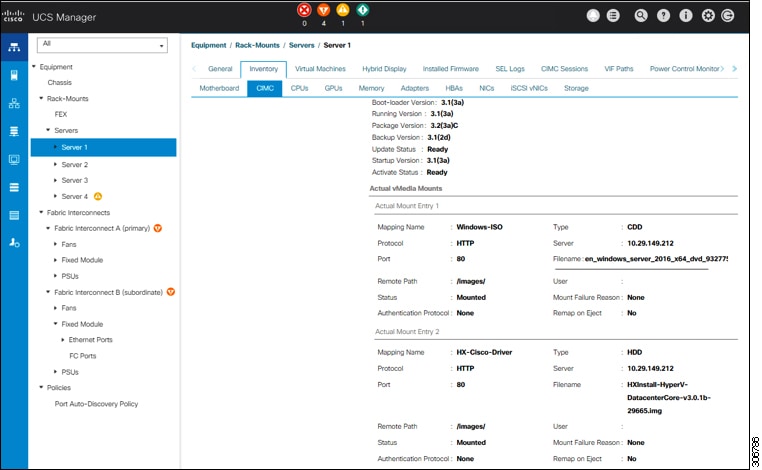
| Step 5 |
Verify successful vMedia mounting:
|
|||||||||||||||||||||||||||||||||||||||||||
| Step 6 |
Remove the vMedia policy from the service profile:
|
|||||||||||||||||||||||||||||||||||||||||||
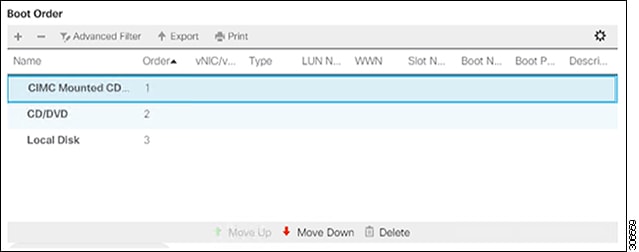
| Step 7 |
Restore the boot order to the one before installation:
|

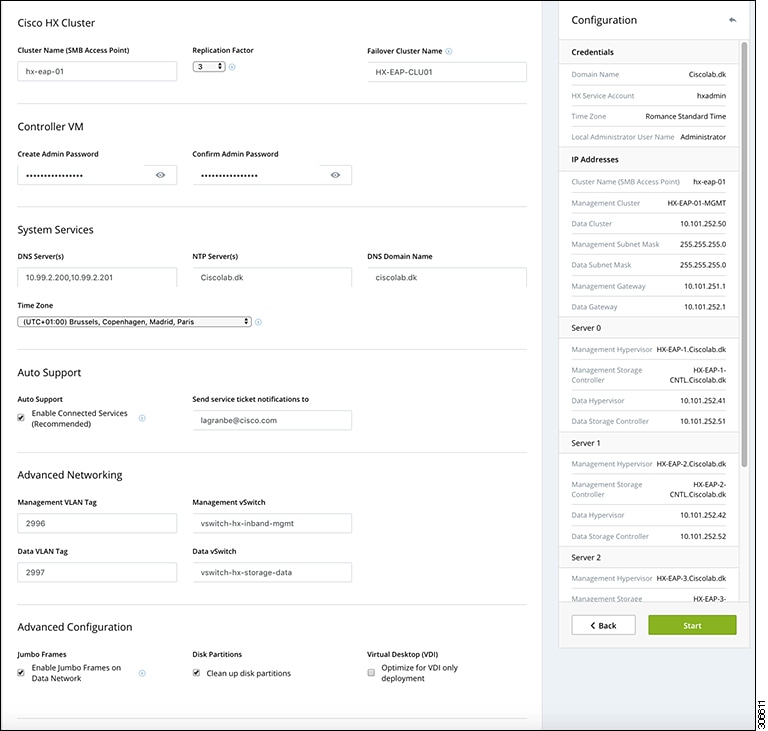
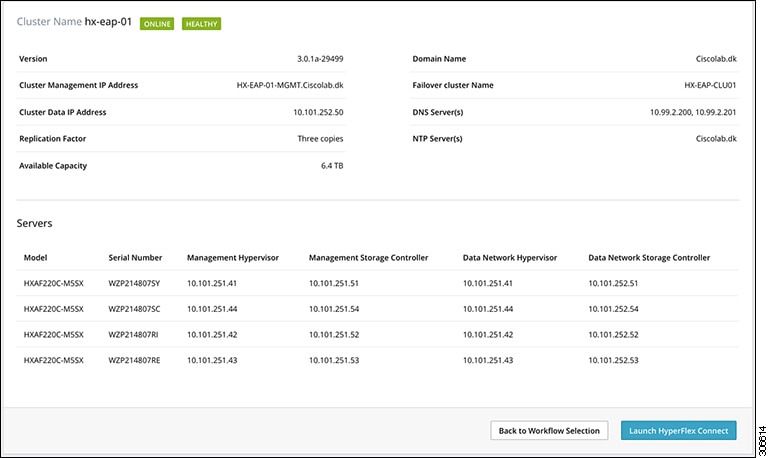
Step 4 - Hypervisor Configuration, HX Data Platform and Cluster Deployment
After the installation of the OS is completed, perform the following steps to configure the hypervisor, install the HX Data Platform Software and configure the cluster.
Procedure
| Step 1 |
Hypervisor configuration |
||||||||||||||||||||||||||||||||||||||||||||||||||||||||||||||||||||||||||||||||
| Step 2 |
HX Data Platform Deployment |
||||||||||||||||||||||||||||||||||||||||||||||||||||||||||||||||||||||||||||||||
| Step 3 |
Cluster Configuration
|
||||||||||||||||||||||||||||||||||||||||||||||||||||||||||||||||||||||||||||||||

Configuring a Static IP Address on HX Data Platform Installer
During a default installation of the VM, the HX Installer will try and automatically obtain an IP address using DHCP. To ensure that you have the same IP address at every boot, you can assign a static IP address on the VM
Use the following commands to configure your network interface (/etc/network/interfaces) with a static IP address. Make sure you change the relevant settings to suit your network.
Procedure
| Command or Action | Purpose | |||
|---|---|---|---|---|
| Step 1 |
Run the following command: ifdown eth0. |
|
||
| Step 2 |
Using your favorite editor, edit the /etc/network/eth0.interface file to match your environment. For example, add the following lines in the file: |
|
||
| Step 3 |
Save the file so that the changes take effect. |
|||
| Step 4 |
Run the following command: ifup eth0 |
|||
| Step 5 |
Reboot the installer VM. |
 Feedback