Cisco Modeling Labs 1.0 Corporate Edition System Administrator Installation Guide
Bias-Free Language
The documentation set for this product strives to use bias-free language. For the purposes of this documentation set, bias-free is defined as language that does not imply discrimination based on age, disability, gender, racial identity, ethnic identity, sexual orientation, socioeconomic status, and intersectionality. Exceptions may be present in the documentation due to language that is hardcoded in the user interfaces of the product software, language used based on RFP documentation, or language that is used by a referenced third-party product. Learn more about how Cisco is using Inclusive Language.
- Updated:
- August 4, 2014
Chapter: User Workspace Management
User Workspace Management
Accessing the User Workspace Management Interface
After you have started the Cisco Modeling Labs server, you can access the User Workspace Management interface to manage user accounts, projects, licenses, and virtual machine images on the Cisco Modeling Labs server.
To access the User Workspace Management interface, complete the following steps:
| Step 1 | In the Cisco Modeling Labs server, retrieve the IP address of the VM using the command ifconfig eth0. | ||
| Step 2 | In a web browser, enter the retrieved IP address or hostname in the format, http://<IP address | hostname>/user/login. | ||
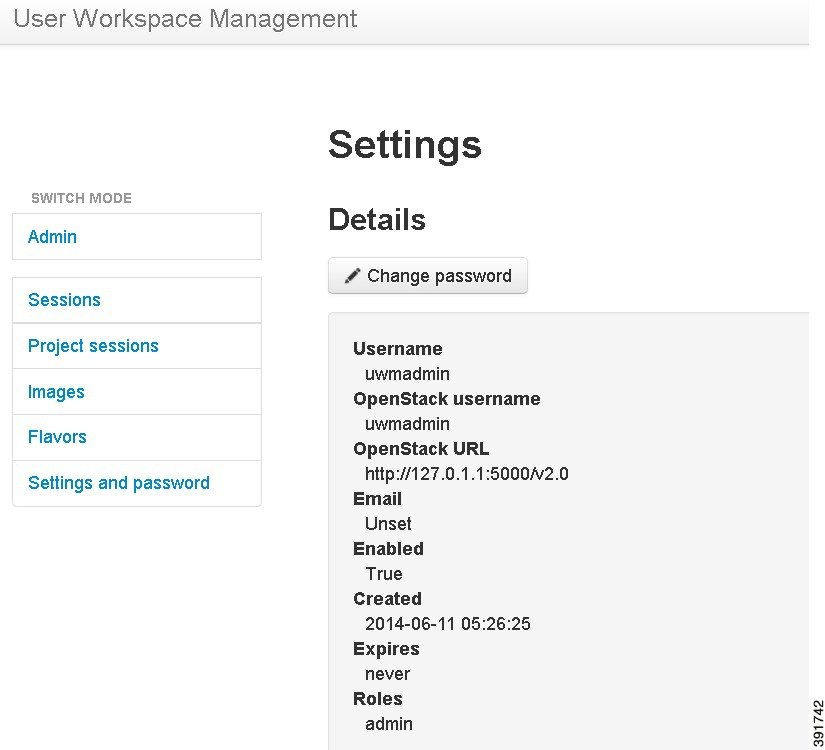
| Step 3 | Log in to the
User Workspace Management interface using the username uwmadmin and the
password password.
| ||
| Step 4 | To change to
admin mode, click
Admin under the
Switch Mode section. An overview of the current system-usage statistics for all
the active simulations is displayed.

|
Changing the Password for the uwmadmin Account
The uwmadmin account is used to manage server resources and user access. Therefore, to reduce the risk of unauthorized access, we recommend that you change the default password for the uwmadmin account to a more secure password on initial login.
Managing Projects
Within the User Workspace Management interface, a Project represents a set of resources that are available to each project. It has the following characteristics:
- By default, a project user account is created for each project.
- To add a user as a standalone user, a project must be assigned to the user. Also, the username will be the project name.
- Additional users can be assigned to a project, as required.
- If a user is added to a project, the username of the user is prefixed with the project name.
- Deleting a user account does not delete a project that the user is assigned to.
- Deleting a project deletes only the associated default user; nondefault user accounts are not deleted.
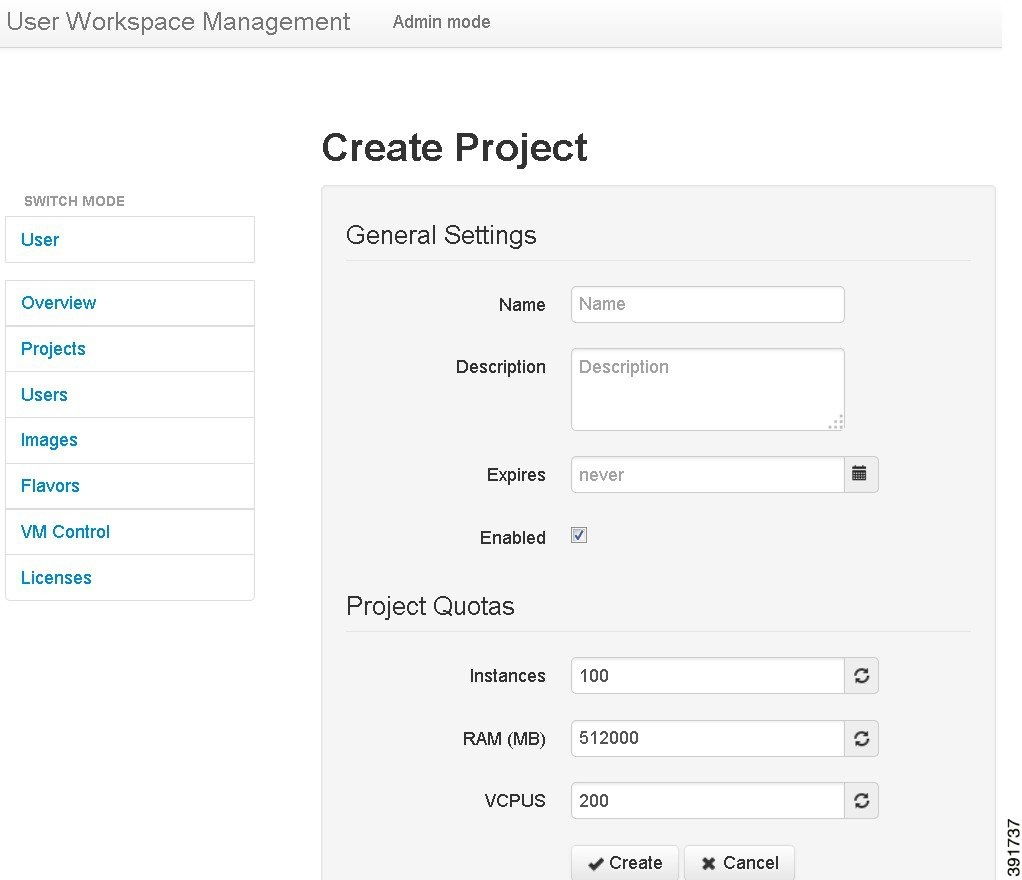
Creating a Project
To create a new project, and by default, a user for the project complete the following steps:
Managing Users
Within the User Workspace Management interface, you can manage user accounts, allowing you to create new users, modify existing user details, and delete users from the system. User accounts permit access to the Cisco Modeling Cisco Modeling Labs server from the Cisco Modeling Labs client.
Creating a User
To create a new user, complete the following steps:
| Step 1 | In the User Workspace Management interface, under Admin mode, click Users. The Users page appears, listing all the default users. | ||
| Step 2 | Click
Add to
create a new user.
The Create User page appears. 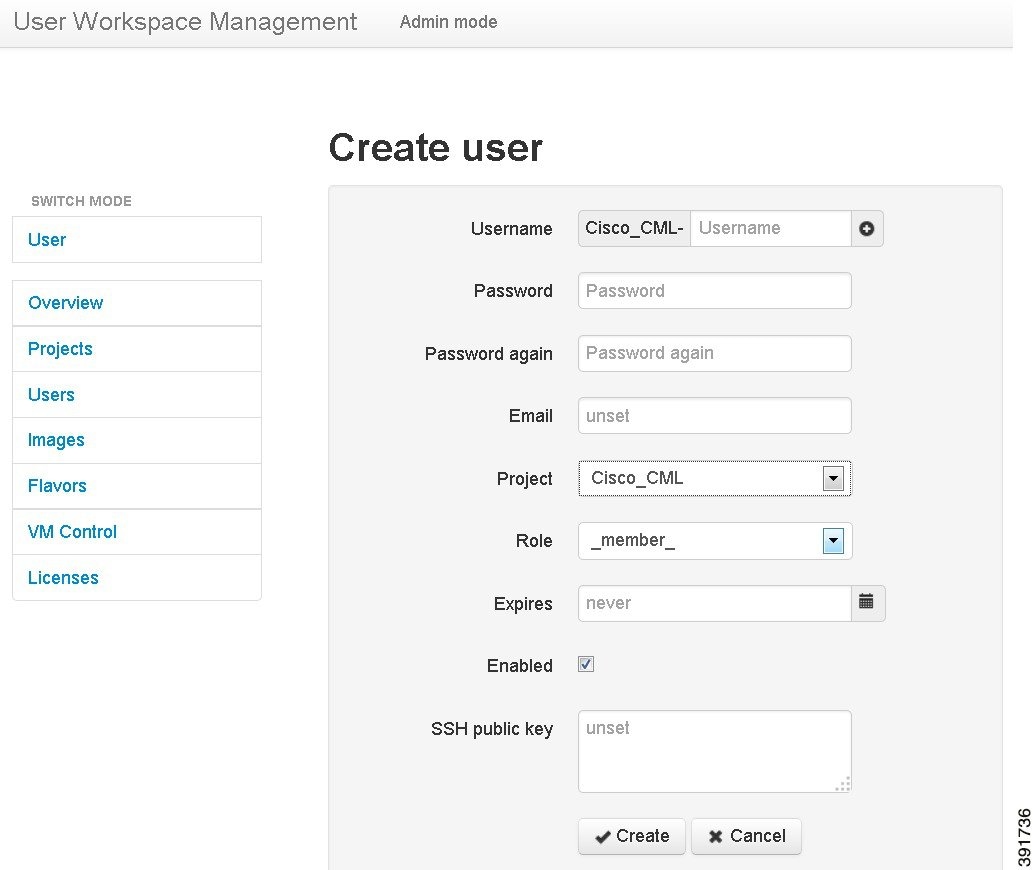 | ||
| Step 3 | In the
Username
field, enter a username for the new user.
| ||
| Step 4 | In the Password and Password again fields, enter a password for the new user. | ||
| Step 5 | In the Email field, enter a valid email address for the user. | ||
| Step 6 | From the Projects drop-down list, select the applicable project for the user. | ||
| Step 7 | From the
Role
drop-down list, select the applicable role for the user.
| ||
| Step 8 | In the Expires field, you can either add an expiry date for the user, or accept the default Never. | ||
| Step 9 | Leave the Enabled check box checked. | ||
| Step 10 | Click
Create.
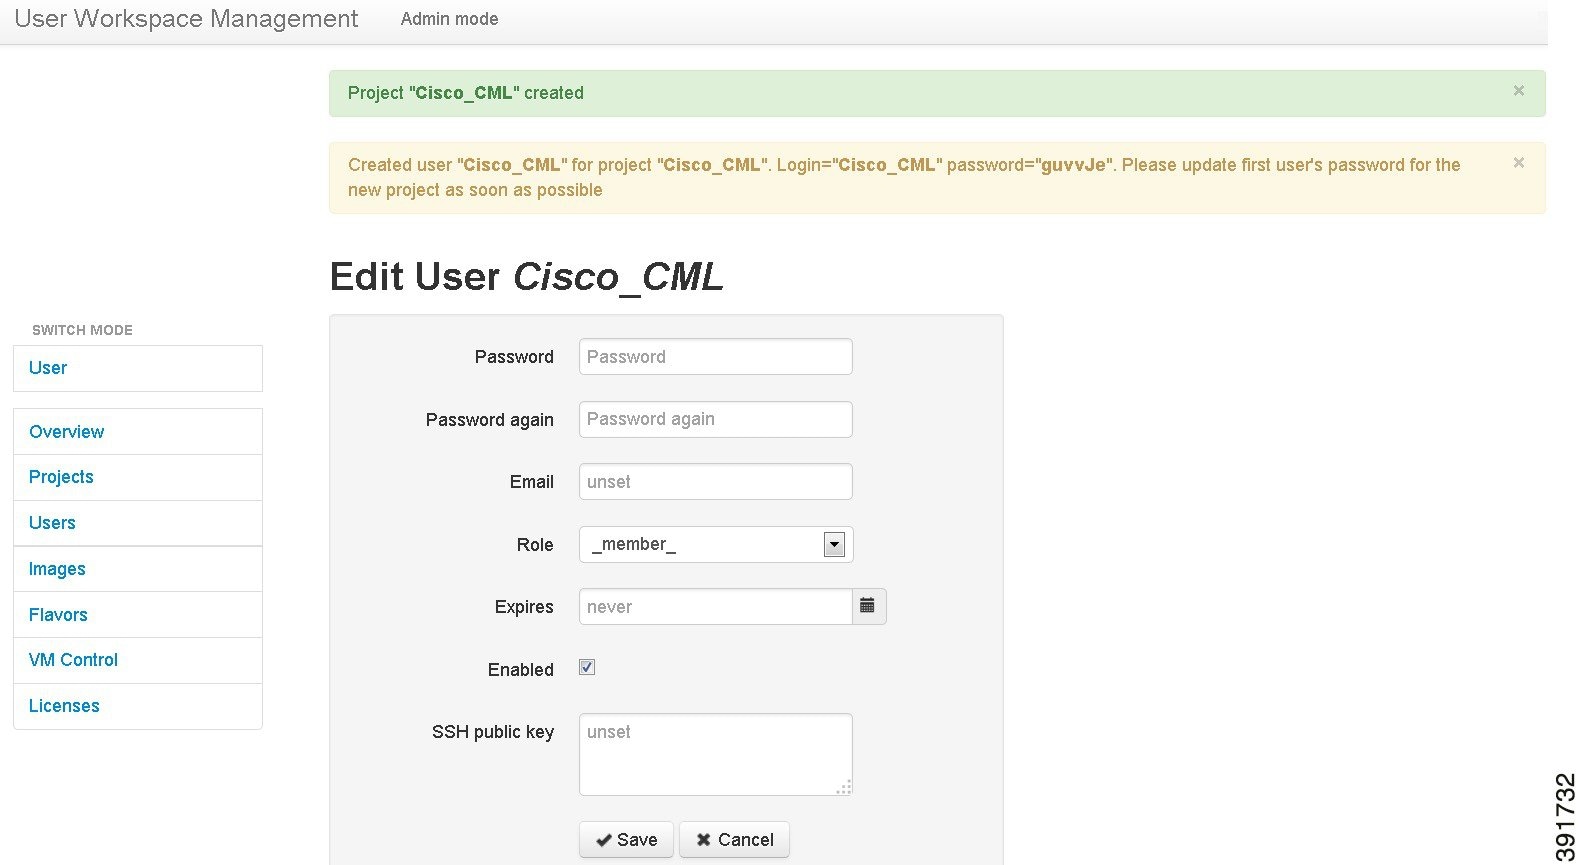
The User <Project-Name>-<Username> page appears. This page presents details and project quotas for the user. | ||
| Step 11 | (Optional) Select Modify user to amend the details for a user, or select Delete user to delete a user respectively. | ||
| Step 12 | Click Users to view the newly created user. |
Managing Virtual Machine Images
 Note | A Cisco IOSv image is automatically installed as part of the installation process. Additional Cisco virtual images are available for use; however, they must be installed separately. For the most up-to-date list of virtual images, see the Release Notes for Cisco Modeling Labs 1.0. As a system administrator, you must notify the Cisco Modeling Labs client users when new virtual images become available. |
Creating a Virtual Machine Image
To create a new virtual machine image, complete the following steps:
| Step 1 | In the User
Workspace Management interface, under
Admin mode,
click
Images.
The Images page listing all the available registered images appears.
| ||
| Step 2 | Click
Add to
create a new image.
The Create Shared VM Image page appears. 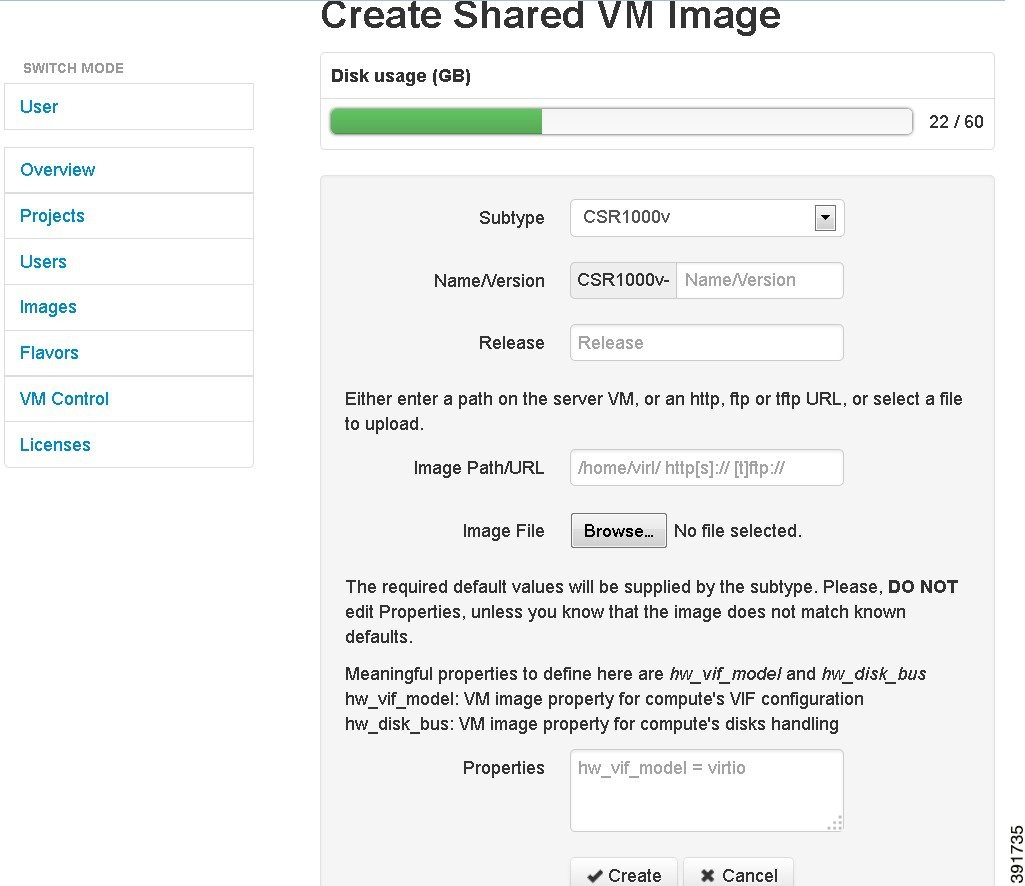 | ||
| Step 3 | From the Subtype drop-down list, select the appropriate subtype for the new image. | ||
| Step 4 | In the Name/Version field, enter a name or version number for the image. | ||
| Step 5 | In the Image Path/URL field, enter a path on the Server/VM, an HTTP, FTP or TFTP URL, or select a file to upload. | ||
| Step 6 | To upload an image from your own device, click Browse to navigate to the image file. | ||
| Step 7 | Leave the Properties field blank because by default, appropriate properties are automatically set based on the selected subtype. | ||
| Step 8 | Click
Create to
create your virtual machine image.
The Image <Image-Name> page with details and properties about the virtual machine image appears. | ||
| Step 9 | Click Images to view the newly added image. | ||
| Step 10 | Under the Options column, use the Modify and Delete options to amend the details for the virtual machine or to delete a virtual machine image. After it is installed, the image is available for users to select for their topology simulation. |
Managing Virtual Machine Flavors
Within the User Workspace Management interface, as part of the creation process for virtual machine images, a virtual machine flavor is created. Flavors are used to define the CPU, memory (RAM) allocation, disk space, the number of cores, and so on, for each virtual image.
Creating a Virtual Machine Flavor
To create a new virtual machine flavor, complete the following steps:
| Step 1 | In the User
Workspace Management interface, under
Admin mode,
click
Flavors.
The Flavors page listing all the available flavors appears. |
| Step 2 | Click
Add to
create a new flavor.
The Create Flavor page appears. 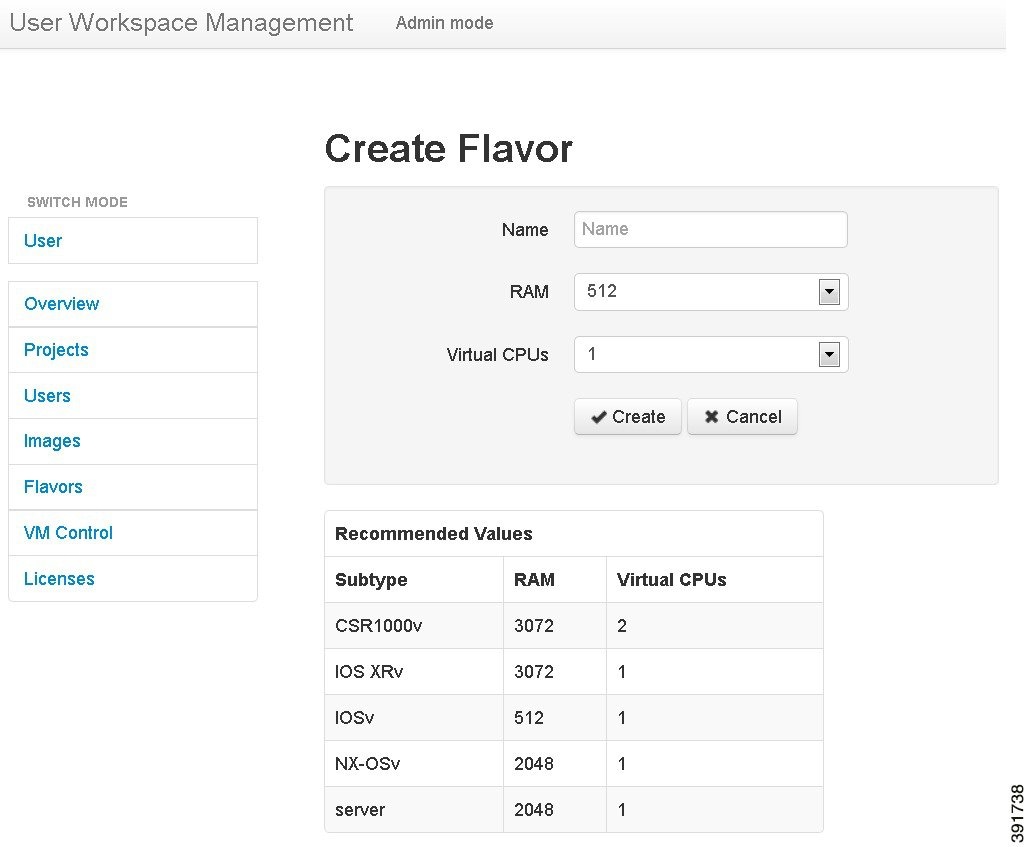 |
| Step 3 | In the Name field, enter a name for the flavor. |
| Step 4 | From the RAM drop-down list, select the amount of memory allocation for the flavor. |
| Step 5 | From the Virtual CPUs drop-down list, select the number of virtual CPUs for the flavor. |
| Step 6 | Click
Create to
create your virtual machine flavor.
The Flavor page appears with the newly created flavor listed. |
| Step 7 | Under the Options column, use the Delete option to delete a virtual machine flavor. |
Using the VM Control Tool
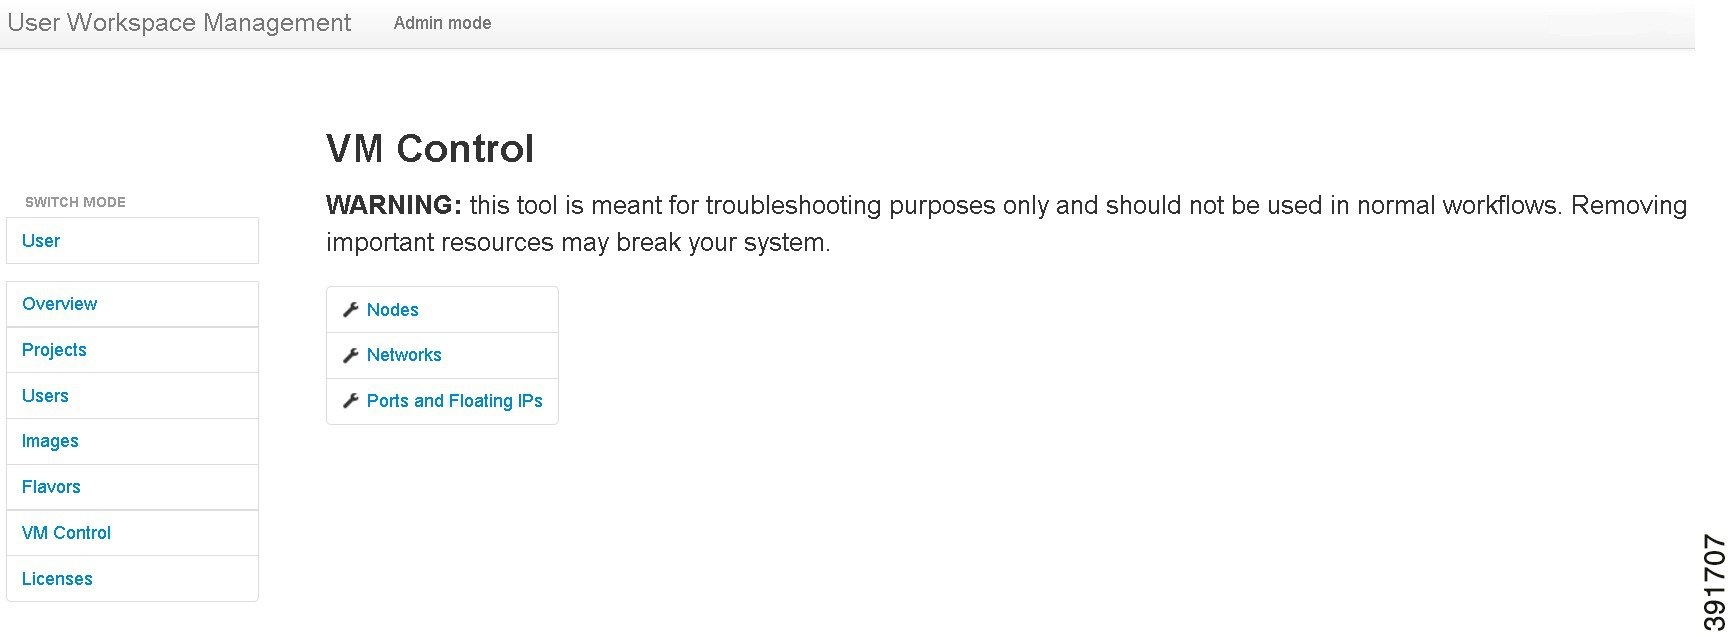
The applicable components are:
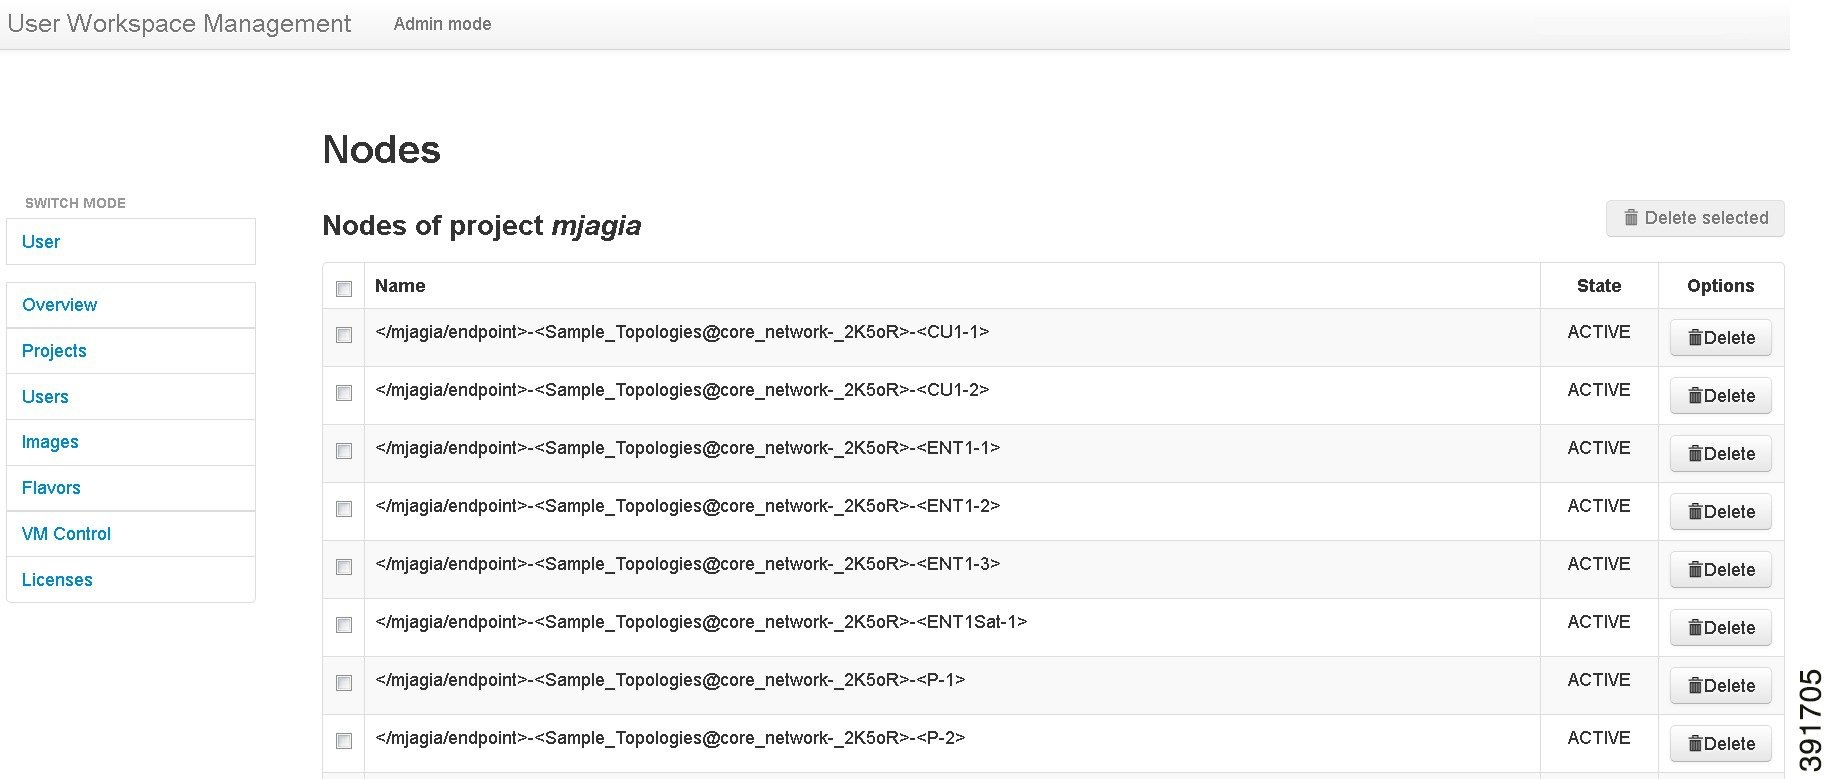
VM Control Nodes
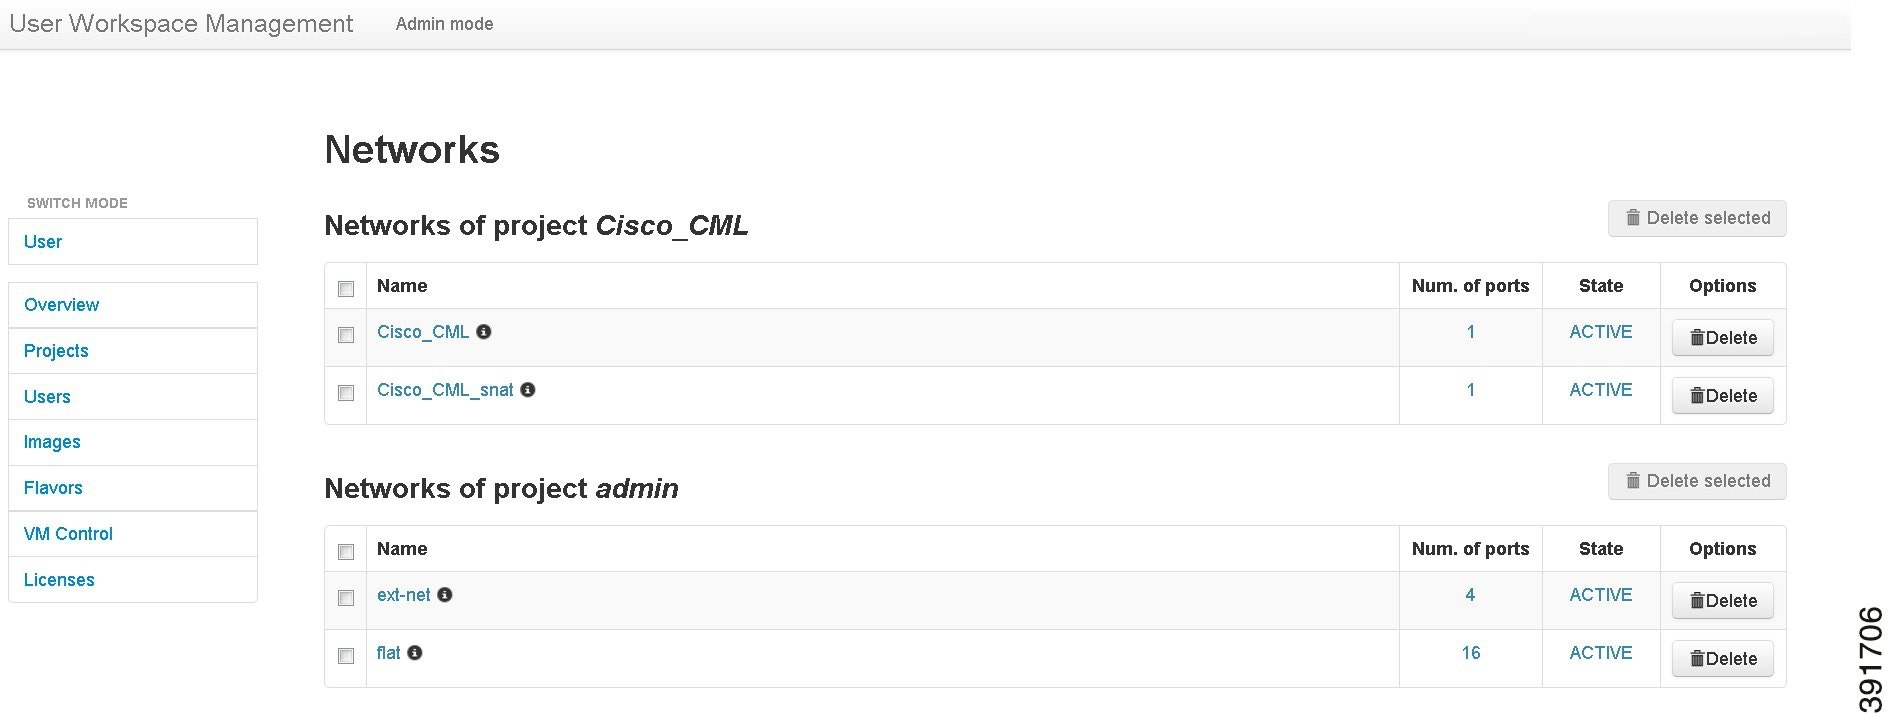
VM Control Networks
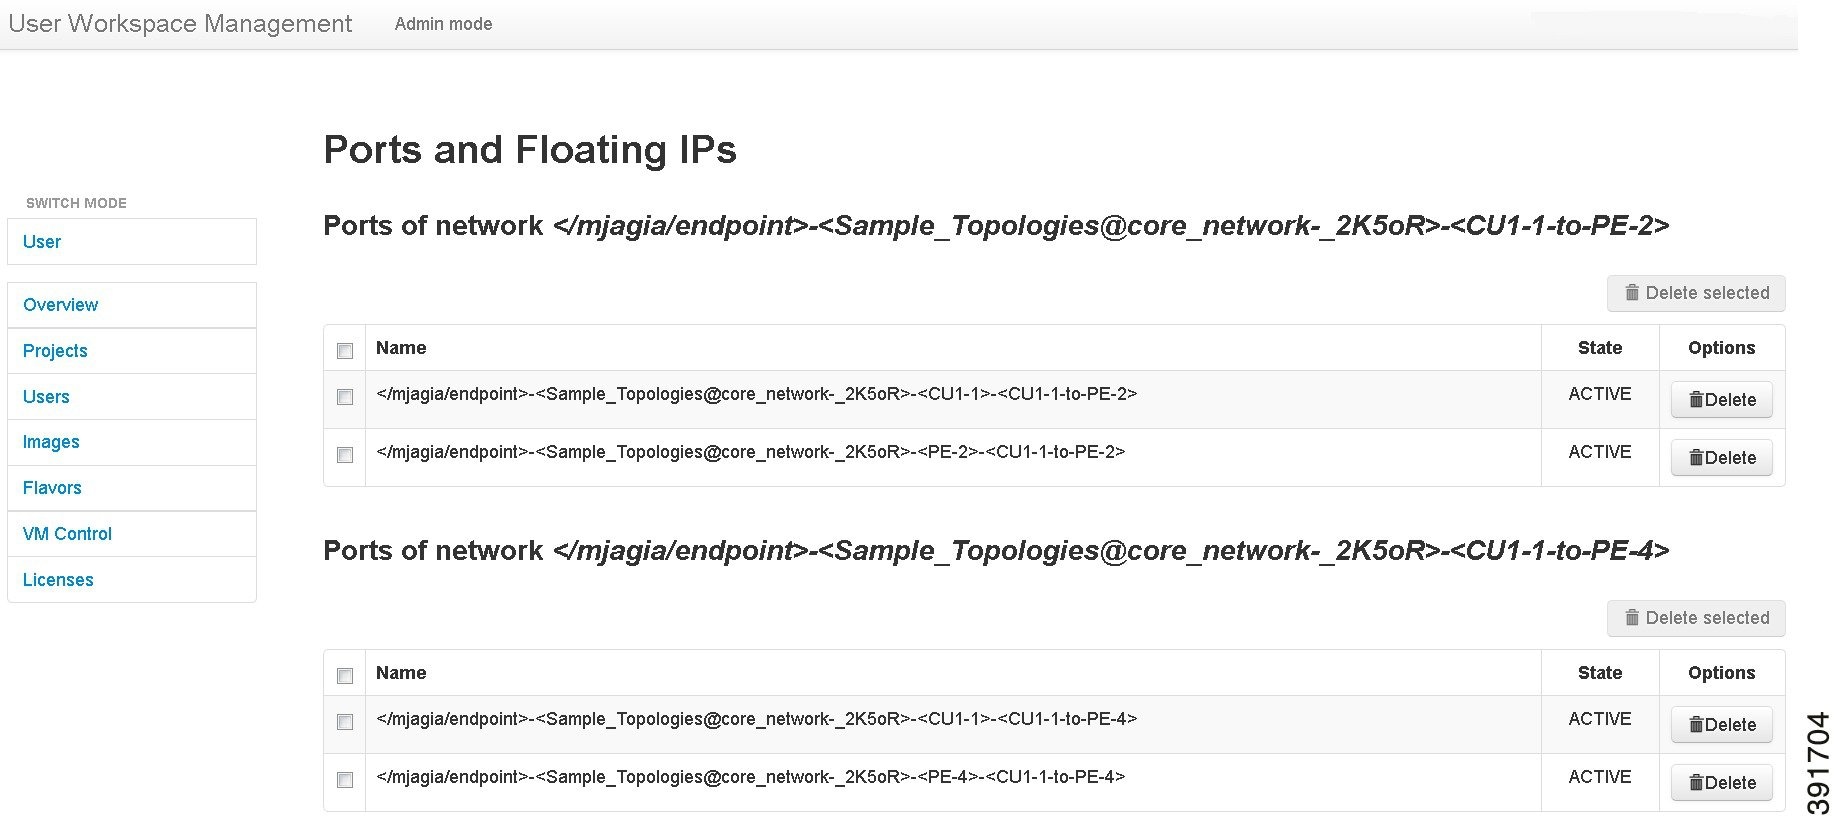
VM Control Ports and Floating IPs
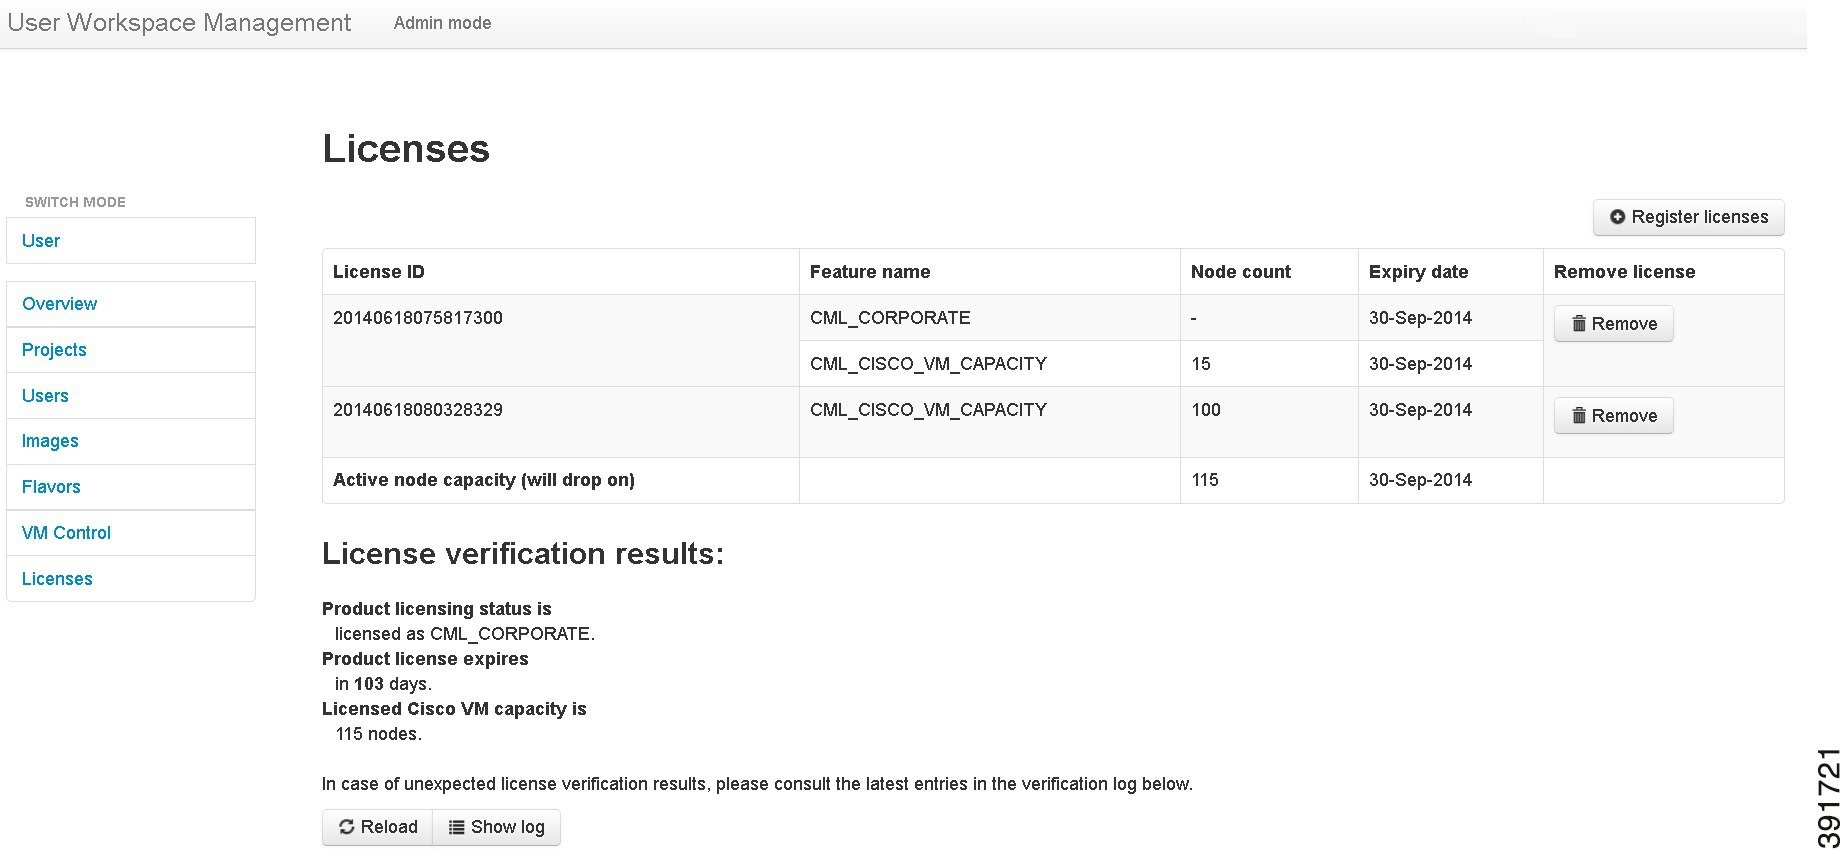
Managing Cisco Modeling Labs Licenses
Within the User Workspace Management interface, you can manage Cisco Modeling Labs licenses. A license specifies the options that are enabled for Cisco Modeling Labs.
Registering a License
| Step 1 | Open the email containing your Cisco Modeling Labs license key. |
| Step 2 | Using a text editor, open the attached .lic file. |
| Step 3 | In the User Workspace Management interface, under Admin mode, click Licenses. The Licenses page appears, listing all valid licenses. |
| Step 4 | Click Register License to
register a valid license.
The
Register
licenses page appears.
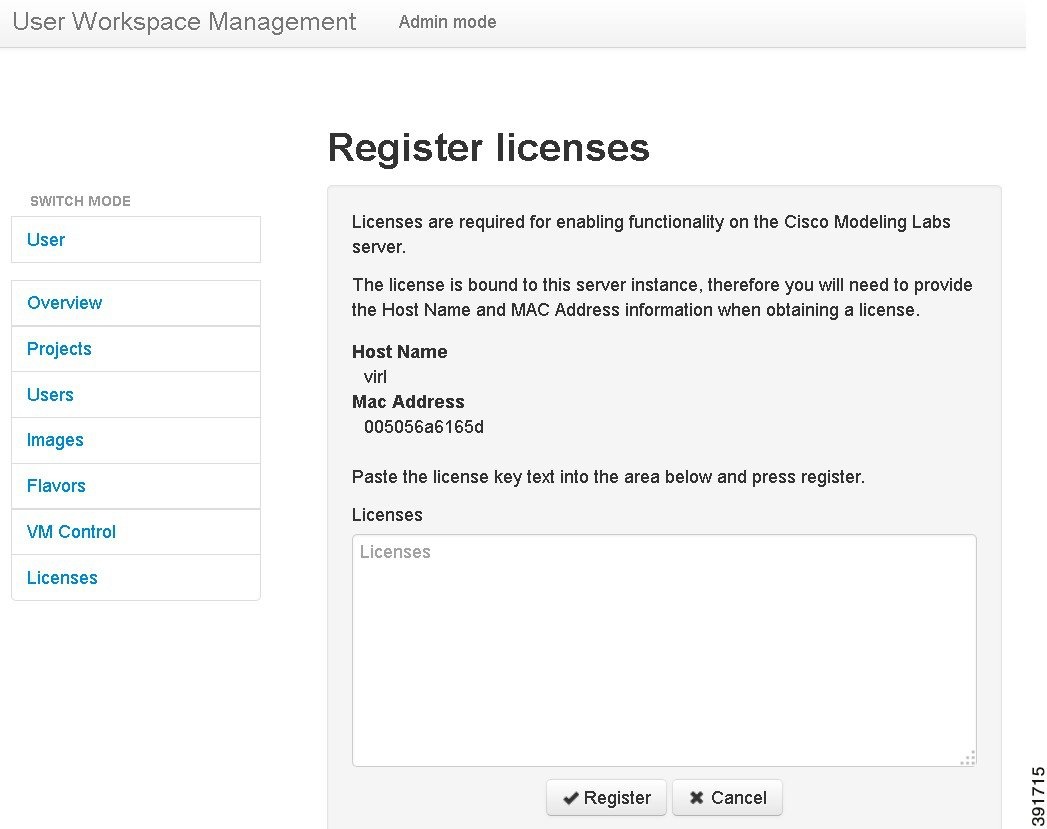 |
| Step 5 | Copy and paste the license key from the .lic file into the Licenses text area. |
| Step 6 | Click Register. The license is applied. |
| Step 7 | Return to the Licenses page to view the newly registered license. |
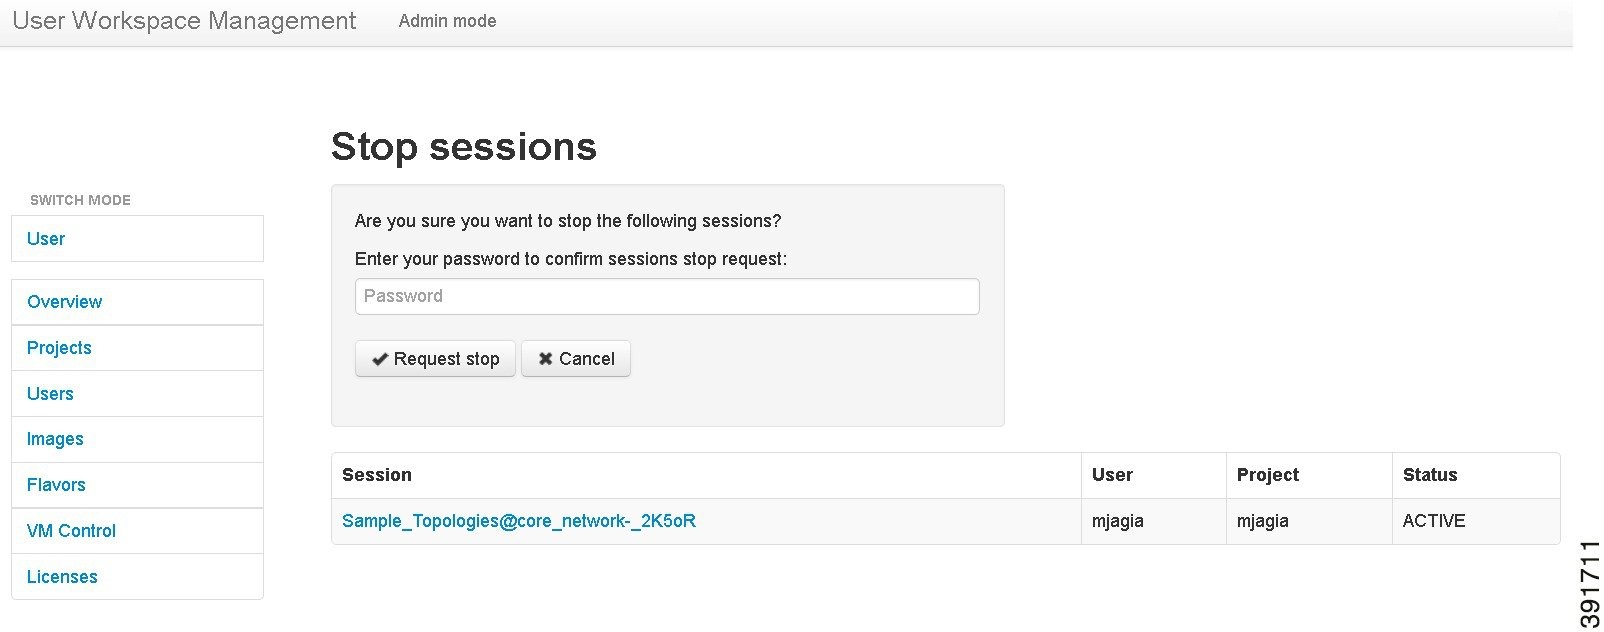
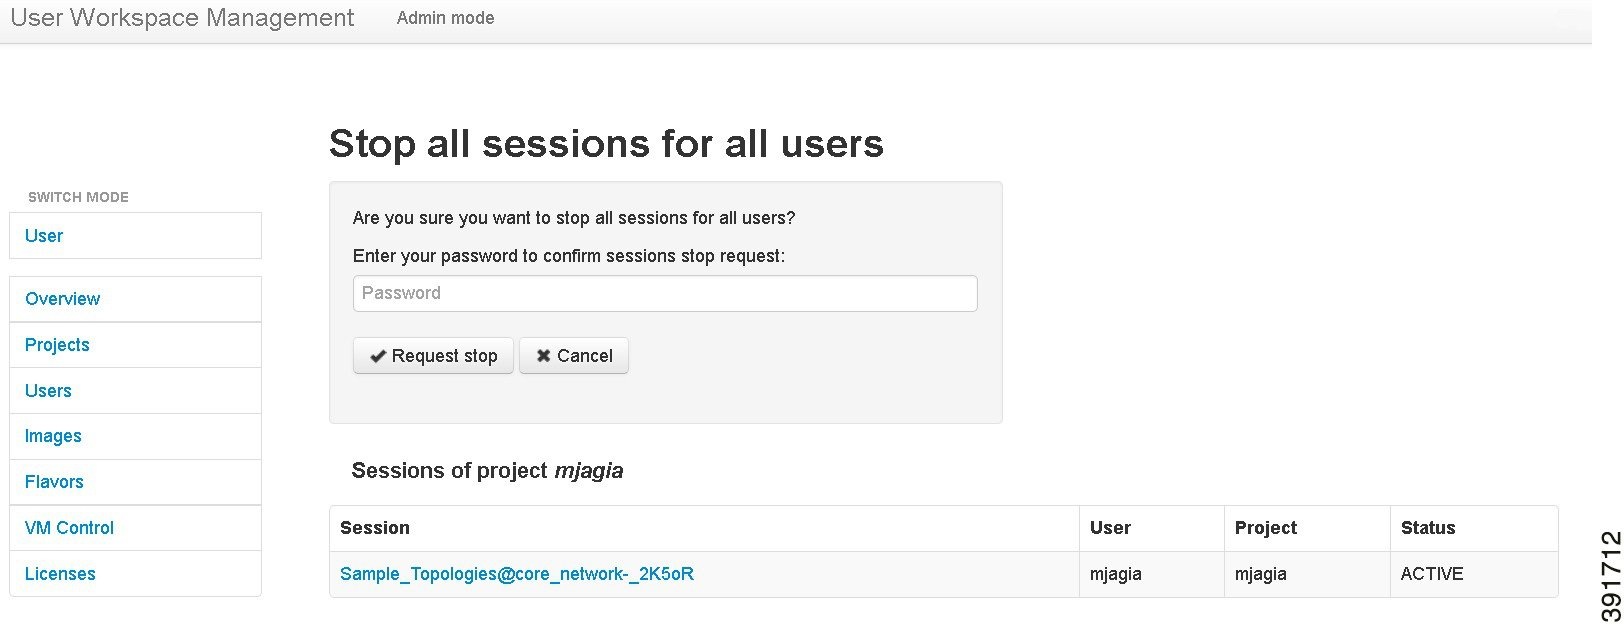
Stopping Active Sessions in the User Workspace Management Interface
If you are a system administrator, you can terminate active sessions from within the User Workspace Management interface. You can select one or more sessions to terminate, including sessions started by other users.
If you are a client user, you can only terminate a session from within the User Workspace Management interface that you started.
Details on stopping a single session or stopping all sessions for a particular project are discussed in the following section:
Stopping an Active Session
 Feedback