Cisco Service Control Mobile Solution Guide, Release 3.7.x
Bias-Free Language
The documentation set for this product strives to use bias-free language. For the purposes of this documentation set, bias-free is defined as language that does not imply discrimination based on age, disability, gender, racial identity, ethnic identity, sexual orientation, socioeconomic status, and intersectionality. Exceptions may be present in the documentation due to language that is hardcoded in the user interfaces of the product software, language used based on RFP documentation, or language that is used by a referenced third-party product. Learn more about how Cisco is using Inclusive Language.
- Updated:
- August 28, 2011
Chapter: Gx RLS9 Interface Support
Gx RLS9 Interface Support
Introduction
The Gx RLS9 interface uses only the Gx interface (no Gy interface) to provide support to the following scenarios:
• Fair usage at bearer level; requires reporting usage volume per subscriber session
•Fair usage at flow level; requires reporting usage volume per subscriber flow
Support for Gx RLS9 provides Gx enhancements that extend the Gx interface to support the new usage monitoring events. The Gx RLS9 interface supports a number of new events and AVPs. The new events are in 3GPP TS 29.212 V9.1.0 (Dec. 2009).

Note Although the Gx RLS9 enhancements are in conformance with 3GPP TS 29.212, the SCE platform is not fully compliant with the 3GPP TS 29.212 standard.
Usage Monitoring and Reporting
Figure 5-1 shows an example of usage monitoring—fair usage at bearer or flow level.
Usage monitoring events require a monitoring key to refer to the instance accounted. The monitoring key is set by the PCRF by using the Monitoring-Key AVP as part of the Usage-Monitoring-Information AVP. The SCE bucket ID is used as the monitoring key and is specified per package.
You can map an SCE bucket to:
•A single service
•A set of services
•All the traffic of a specific subscriber
Figure 5-1 Usage Monitoring and Reporting
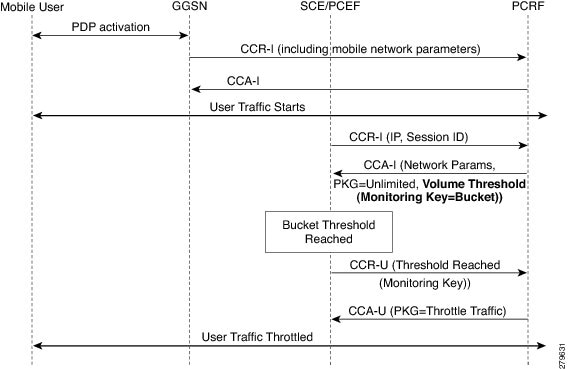
In this example, the events are as follows:
1. The SCE monitors user traffic reports to the PCRF.
2. The PCRF selects the traffic to be monitored by using the monitoring-key and a threshold.
3. The PCRF sends a reporting event to be notified when the threshold is crossed.
Configuring Usage Monitoring in the SCA BB Console
In the SCA BB GUI, you can create quota profiles that define the limits and action of each monitoring key (bucket) and assign specific services to that monitoring key. You must then attach the quota profile to a package and define a quota rule for the package for the relevant service.
Note For more information on configuring and managing quotas, see the Cisco Service Control Application for Broadband User Guide.
To configure a Gx usage monitoring quota profile, complete the following steps. The steps are described in detail in the referenced sections.
Step 1 Select Gx Usage Monitoring as the External Quota Type (Configuring the External Quota Type).
Step 2 Create the Gx Usage Monitoring Quota Profile (Adding a Quota Profile).
Step 3 Assign services to the profile (Editing a Gx Usage Monitoring Quota Profile).
Step 4 Assign the profile to the appropriate package (Attaching the Quota Profile to a Package).
Step 5 Configure a rule for the package defining the action of the bucket for the relevant service in that package (Defining a Rule Using the Quota Profile).
Accessing the Quota Profile Editor
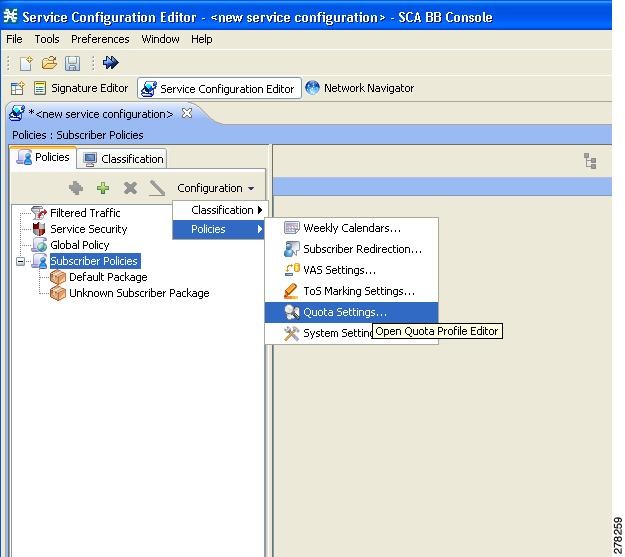
You can access the Quota Profile Editor from the Configuration menu:
Choose Service Configuration > Configuration > Policies > Quota Settings.
Figure 5-2 Accessing the Quota Profile Editor
Configuring the External Quota Type
The external quota type options are displayed in the upper part of the Quota Profile Editor, as shown in Figure 5-3. The default quota type is Gy.
Figure 5-3 Quota Profile Editor Screen
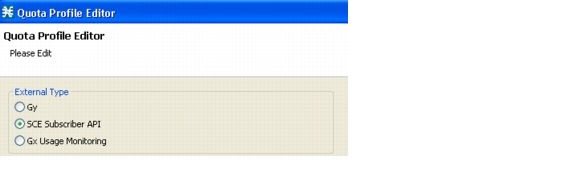
When Gx Usage Monitoring is selected, you cannot configure the settings in the General Settings tab, because they are set to the following preconfigured values:
•Grace Period = 2 sec
•Error Handling = Grant
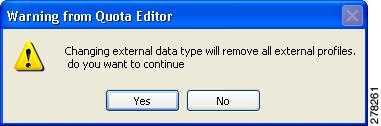
Changing the external quota type may result in the loss of the existing user-defined quota profile data. Therefore, if you change the quota type after creating any quota profiles, the system issues a warning and asks for confirmation, as shown in Figure 5-4.
Figure 5-4 Warning from Quota Editor Message
Adding a Quota Profile
Step 1 In the Profile Edit tab, click New.
Step 2 Type in the profile name (or you can simply accept the default name suggested by the system) and select the profile type:
Figure 5-5 Adding a Quota Profile
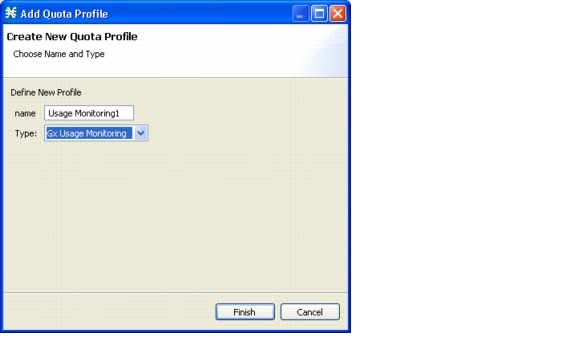
Step 3 Click Finish.
Editing a Gx Usage Monitoring Quota Profile
After creating a quota profile, you can configure each monitoring key separately. For Gx Usage Monitoring quota profiles, you can map services to each monitoring key.
To configure a Gx Usage Monitoring quota profile, complete the following steps:
Step 1 Click on the profile name in the left pane of the Quota Profile Editor.
The profile name and the individual monitoring keys appear in the right pane. 127 monitoring keys are supported.
Figure 5-6 Quota Profile Editor - Quota Profile Edit Tab
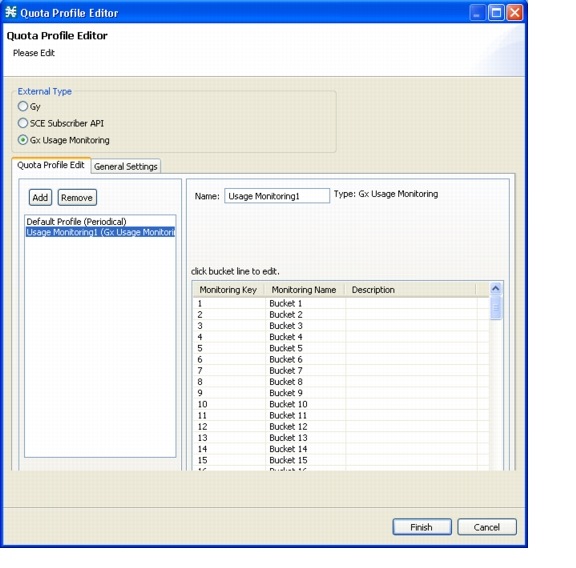
Step 2 Double-click the desired monitoring key to assign services.
The Quota Bucket Editor opens. The Bucket tab simply displays the monitoring key number and the bucket number.
Figure 5-7 Quota Bucket Editor - Bucket Tab
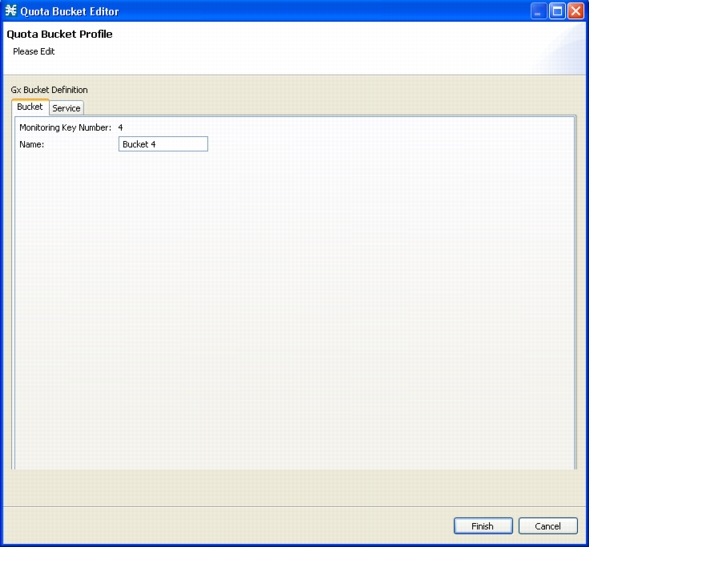
Step 3 Click the Service tab.
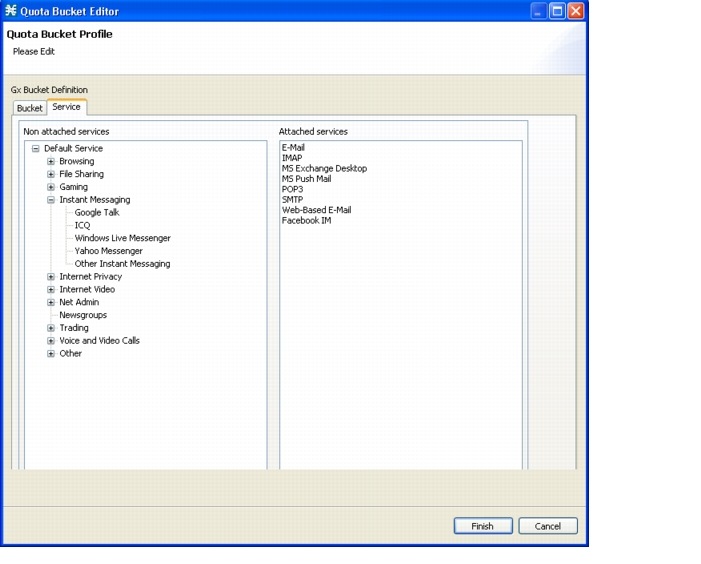
Step 4 Drag the service name from the left pane and drop it under Attached services.
The services on the left pane are organized according to the service tree.
If you drag a service then all its sub-services in the tree are dragged as well.
Figure 5-8 Quota Bucket Editor-Service Tab
Step 5 Click Finish.
Step 6 Click Finish again.
 Feedback