Cisco Secure Services Client with Novell Client Authentication Configuration Example
Available Languages
Contents
Introduction
This document provides an example of how to configure authentication for Cisco Secure Services Client with Novell Client on Windows 2000 and Windows XP.
Background Information
Components Used
This section lists the software versions used in this document.
-
Cisco Secure Services Client version 4.0
The Cisco Secure Services Client is available for download from Cisco.com Software Center (registered customers only) .
-
Novell Client version 4.91 SP1 (with Hotfix TID2972711)
Note: In order to ensure that version 4.91 SP1 of the Novell Client is compatible with the SSC application, you must download and install a patch kit. For detailed information about the patch kit, refer to Novell Client Post-4.91 SP1 Patch Kit "A" - TID2973054
 .
. -
Novell Server version 6.0 SP5 or later
Supported Features
This section lists the features supported in this document.
-
Novell Client Normal Login (context and tree specified)
-
Novell Client LDAP Contextless Login
Unsupported Features
This section lists the features that are not supported in this document.
-
Novell Client Treeless Login
-
Novell Client DSCAT Contextless Login
Installation Note
You can install the Novell Client prior to or after the installation of the Cisco Secure Services Client. However, if Novell Client is removed from the computer and then installed again, you must remove the Cisco Secure Services Client, reboot your machine, and install again the Cisco Secure Services Client. This process is necessary for the Cisco Secure Services Client to set the appropriate registry values.
Conventions
For more information about document conventions, refer to Cisco Technical Tips Conventions.
Novell Contextless and Treeless Login
Within a Novell network, authentication requires a user name and password, as well as the Novell directory tree and context to which the user belongs. When changes are made to the tree or context structure, users are required to change their context information in the Novel Login dialog box. This process results in higher IT costs in order to manage and support the change.
Larger Novell customers use LDAP Contextless Login, which allows several trees to merge into one global tree. Contextless login does not require users to manage changes to their context or placement in the directory hierarchy. The context can be changed on the back-end without the high costs associated with the management and support of these changes.
In addition to contextless login, the Novell Client supports treeless login. With treeless login, users are not required to specify the Novell directory tree in which they belong. This facilitates the movement of users between different trees in the same way contextless allows the movement of users between contexts to be transparent to the user.
Cisco Secure Services Client Authentication with Novell Client
When you use Cisco Secure Services Client pre-logon connection capabilities with single sign-on (SSO), users may log in to the Novell network with contextless login. However, users must enter their tree and server information. For full functionality, the system must be configured with a separate authentication process with either Cisco Secure Services Client machine authentication or pre-logon authentication on Cisco Secure Services Client that prompts the user to enter their IEEE 802.1X credentials. When you use 802.1X in conjunction with the contextless capabilities of the Novell environment, Cisco Secure Services Client assumes the context lookup function; therefore, how the Novell Client is configured can impact the amount of time Cisco Secure Services Client requires to connect to the network.
Note: When the context is specified by the user as part of the Novell login process, there are no special settings required in the Novell Client.
By default, the Novell Client saves information from the last successful login. You can configure the login fields to display some or none of the default values. That is, fields can be left blank for security reasons, or they can be populated with default values for convenience.
Note: With contextless login, the context does not appear in the Novell Login dialog box because the context lookup is suppressed until after the user has entered their user name and password and the Cisco Secure Services Client has authenticated to the network.
The Cisco Secure Services Client uses the information configured in the Novell Client to perform the context lookup. You must configure the Novell Client to authenticate to the Novell network as if the context is always specified. If the context lookup is saved from the previous successful login, the login time required by the Cisco Secure Services Client is cut by up to one minute.
Note: If the Novell Client is configured to save profiles and the context for a user changes, it must be deleted from the Novell Client login screen in order to force the Cisco Secure Services Client to perform a context lookup.
When the context is saved on a public machine or a machine with multiple users that require different contexts, security is compromised. To ensure security is not compromised, you can disable the Novell Client default setting that saves user profiles.
To disable the Novell Client default setting to save user profiles, complete these steps:
-
Right-click the Novell system tray icon, and select Properties.
-
Click the Location Profiles tab.
-
Select the default profile, and click the Properties button.
-
Choose Login Service from the drop-down menu.
-
Verify that the Service Instance is set to default, and click on the Properties tab.
A mockup of the Novell Login dialog box appears. The various tabs control access to the functional areas of the dialog box. For example, the Credentials tab contains only a User Name field. The Password field is not allowed to contain a default.
-
Uncheck the Save profile after successful login check box that is located above the tabs.
Note: If you want the contents of the User Name field to appear blank, delete the contents of the field
-
Click the NDS tab, and then check the Active Authenticator check box.
-
From the drop-down menus, choose the desired options for tree, context, and server.
The Cisco Secure Services Client uses these values in order to locate the context information. Typically, you configure either tree and server for a contextless logon or all three fields if you know the context. If you want the field to appear blank, you must select the blank field from the pull-down list. You cannot backspace over the field contents.
-
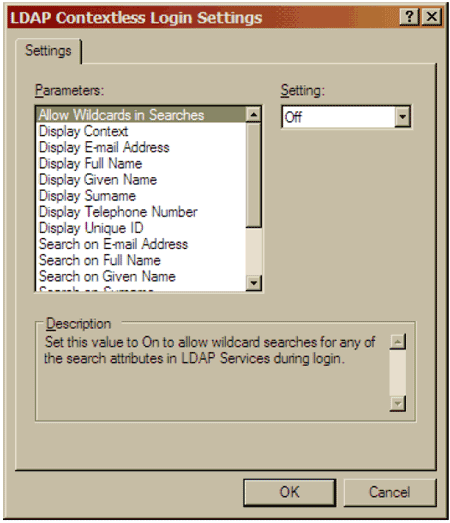
Click the LDAP Contextless Login tab, and verify that the Enable LDAP Treeless Login and the Enable LDAP Contextless Login check boxes are not checked.
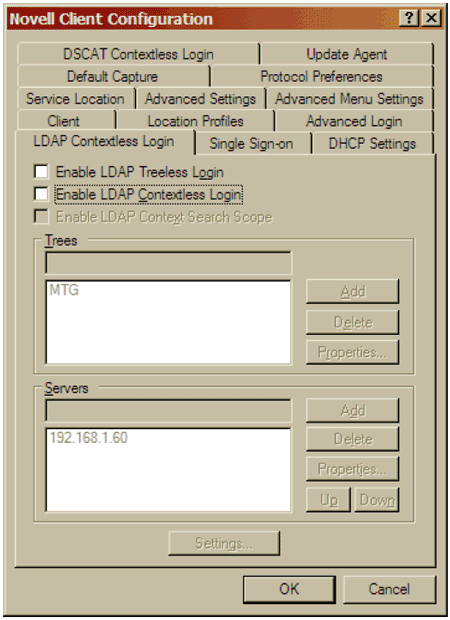
Note: Because LDAP Contextless Login is disabled in the Novell Client and supported through Cisco Secure Services Client, the individual parameters as shown in this image cannot be individually set.
-
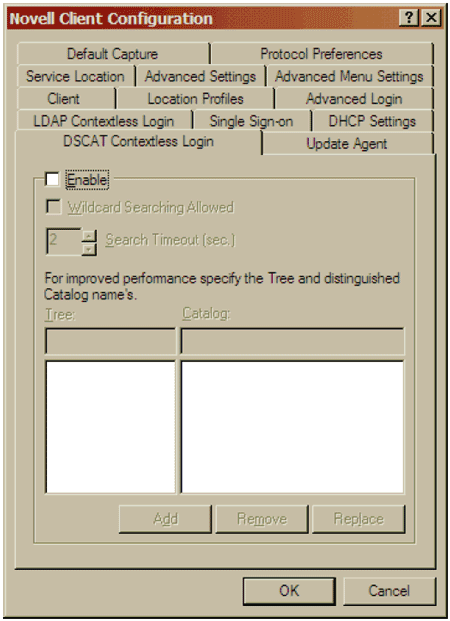
Click DSCAT Contextless Login tab, and verify that the Enable check box is not checked.
-
Click OK to save changes and exit the Novell Client application.


These changes appear in the Novell Login dialog box the next time you log in. This image provides an example of the Novell Login dialog box.
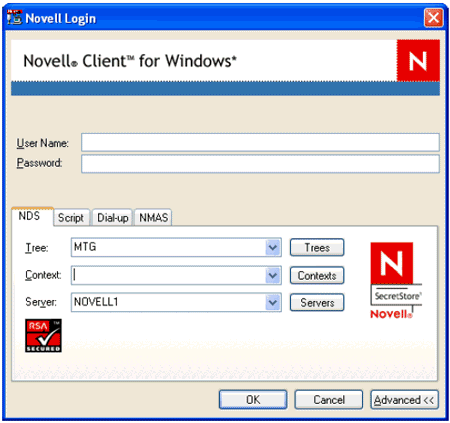
Note: Until an 802.1X environment is available and authentication is established, some functionality on the Novell Login dialog box is not available. For example, the Trees, Contexts, and Servers buttons are not functional without network connectivity.
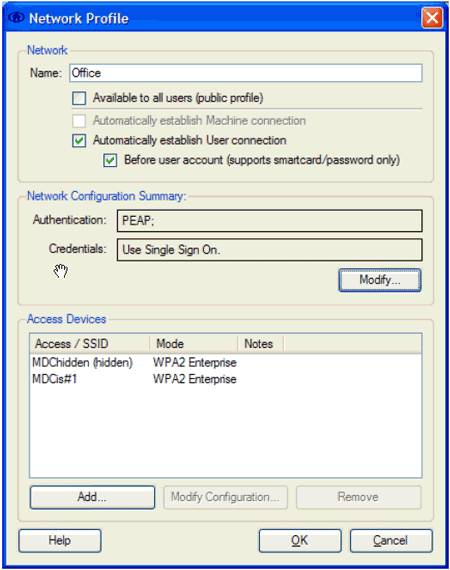
You can configure Cisco Secure Services Client to allow 802.1X to authenticate a user before Novell. In the Network Profile dialog box, check Automatically establish User Connection and Before User Account. In addition, verify the Automatically establish Machine connection check box is not checked.
Cisco Secure Services Client Configuration
This section describes the key Cisco Secure Services Client settings to use with the Novell Client. The configuration settings for the Cisco Secure Services Client remain the same whether or not the context is specified at the time of login. For other configuration settings appropriate to your network, refer to the Cisco Cisco Secure Services Client help system.
-
In the Network Profile dialog box, check the Automatically establish User connection check box and the Before user account (supports smartcard/password only) check box.
-
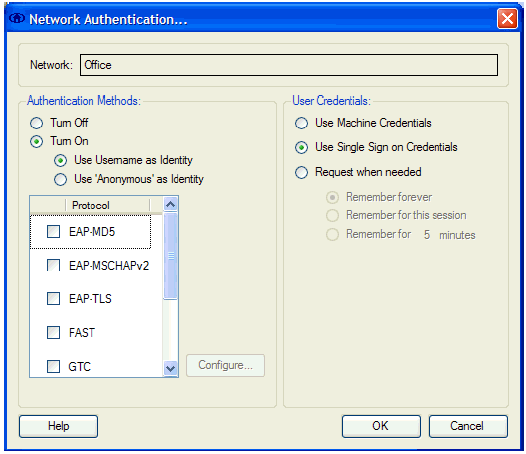
In the Network Authentication dialog box, check the desired option within the Authentication Methods area, and then click the Use Single Sign on Credentials radio button.


Related Information
Revision History
| Revision | Publish Date | Comments |
|---|---|---|
1.0 |
14-Sep-2006 |
Initial Release |
 Feedback