Feedback
Table Of Contents
Pharmacy Interactive Voice Response Script Example
Pharmacy Sample Script Overview
Configuring the Pharmacy IVR Sample Script
Configure Steps in the Design Pane
Configuring Prompt Customizer Windows
Pharmacy Interactive Voice Response Script Example
This chapter provides an example of how to configure a Pharmacy Interactive Voice Response (IVR) script. To implement the functionality of the Pharmacy IVR script, the purchase an add-on IVR software license is required. The Pharmacy IVR sample script uses the sample script Pharmacy.aef, which is included with the Cisco Unity Express Script Editor, to illustrate basic procedures for configuring pharmacy scripts.
Note
The terms patient and caller are used interchangeably throughout this chapter.
This document contains the following sections:
•
•
Pharmacy Sample Script Overview
The pharmacy.aef file is a script that answers a call, asks for the name or extension of the person to whom the caller would like to be connected, and transfers the call.
Note
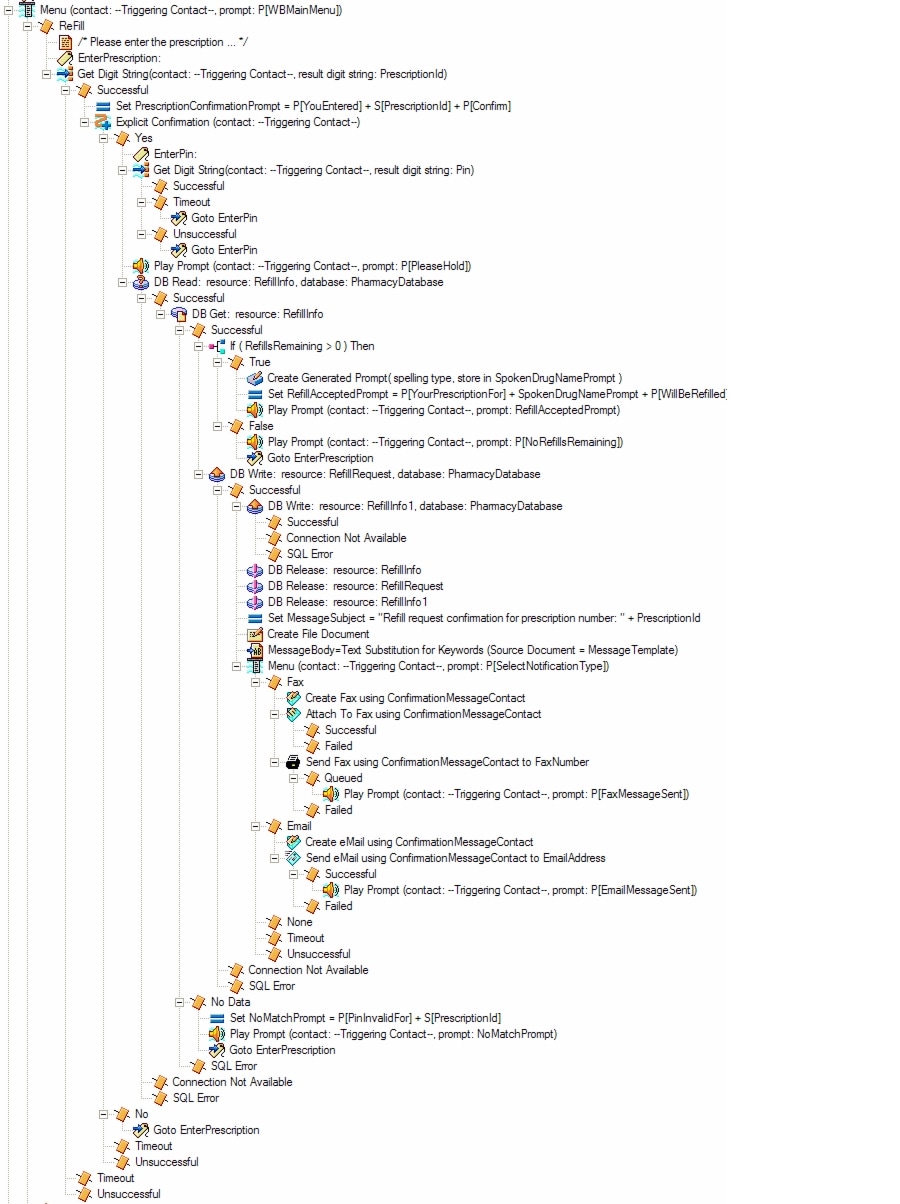
Figure 49 shows the pharmacy.aef script as it appears in the Design pane of the Cisco Unity Express Script Editor window.
Figure 49 pharmacy.aef Script
The pharmacy.aef script performs the following tasks:
1.
2.
Note
3.
a.
Caller enters a string of digits to identify the prescription number. If the prescription refill process is successful, the caller selects a preferred method of confirmation and notification.
b.
If the destination is busy, the caller hears the system prompt, "The phone number you are trying to reach is currently busy."
If the destination is out of service, the caller hears the system prompt, "The phone number you are trying to reach is currently out of service."
c.
d.
If the destination is busy, the caller hears the system prompt, "The phone number you are trying to reach is currently busy."
If the destination is out of service, the caller hears the system prompt, "The phone number you are trying to reach is currently out of service."
e.
f.
4.
5.
Pharmacy System Prompts
The pharmacy.aef script uses system prompts stored as .wav files, which are installed automatically with the Cisco Unity Express Pharmacy IVR software. These audio prompts include the following:
•
•
–
–
–
–
–
–
•
•
•
•
•
•
–
–
•
•
Note
Configuring the Pharmacy IVR Sample Script
The steps necessary to configure the sample Pharmacy IVR script are described in this section. Complete the following tasks:
•
Define the Script Variables
Using the Variable pane of the Cisco Unity Express Script Editor, define the script variables as shown in Figure 50.
Figure 50 Variables Pane of the pharmacy.aef Script
Table 7 describes the variables used in the pharmacy.aef script.
Configure Steps in the Design Pane
In the Design pane, complete the following steps:
Step 1
Step 2
Step 3
To view the Play Prompt customizer window for the Welcome Prompt, expand the script tree and right-click the P[Welcome] prompt in the Design pane and select Properties in the popup menu. You can then select one of three tabs (General, Prompt, and Input) to modify the Welcome Prompt step using the customizer window (see Figure 51 and Configuring Prompt Customizer Windows for the typical prompt configuration).
Figure 51 Welcome Prompt Customizer Window—Prompt Tab
Step 4
Step 5
To view the Play Prompt customizer window for the Thank You Prompt, expand the script tree and right-click the P[ThankYou] prompt in the Design pane and select Properties in the popup menu. You can then select one of three tabs (General, Prompt, and Input) to modify the ThankYou prompt step options using the Play Prompt customizer window (see Figure 52 and Configuring Prompt Customizer Windows for the typical prompt configuration).
Figure 52
ThankYou Customizer Window—Prompt Tab
Configuring Prompt Customizer Windows
Typically, you can configure the fields in the tabs of the prompt customizer windows as follows:
•
–
–
•
–
–
–
•
–
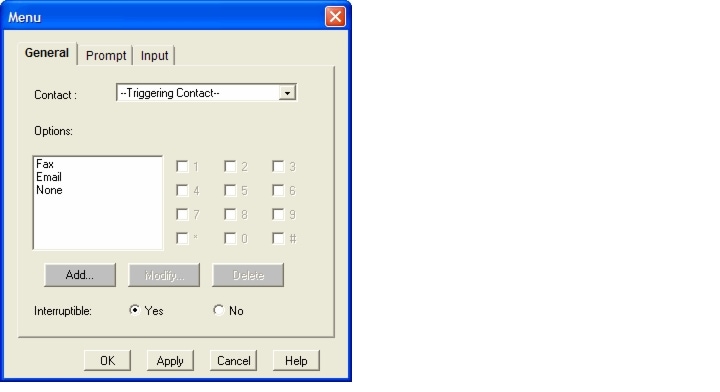
Main Menu Step
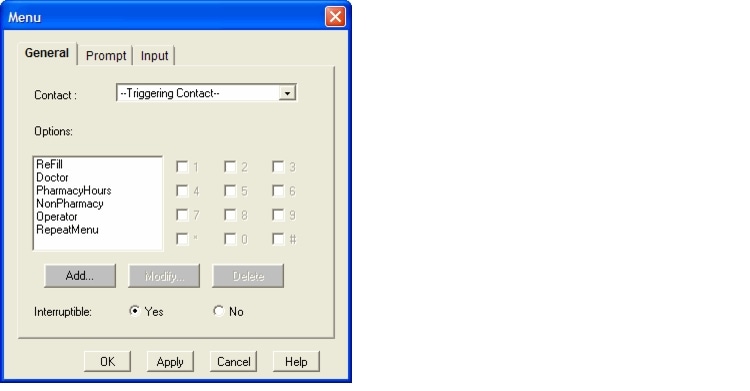
The Main Menu step sets the prompt to P[WBMainMenu], which is the system prompt that asks the caller to enter one of the six Main Menu choices. expand the script tree and right-click the P[WBMainMenu] prompt in the Design pane and select Properties in the popup menu. Figure 63 summarizes the expanded step output branches of the Main Menu choices of the script.
Figure 53
Main Menu Step Output Branches
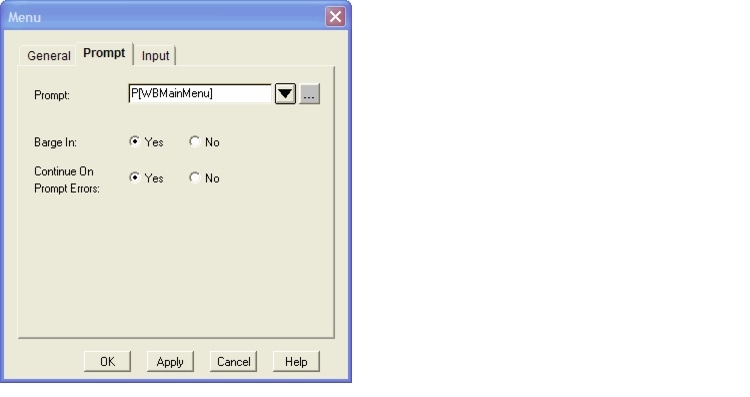
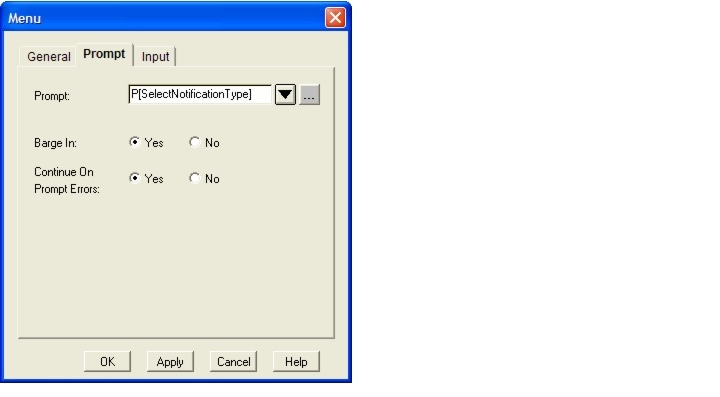
To view the Menu customizer window, right-click the P[WBMainMenu] prompt and select Properties in the popup menu. You can then select one of three tabs (General, Prompt, and Input) to modify the Main Menu step options using the Menu customizer windows. Use the General tab (see Figure 54) check boxes to change the step sequence of the Main Menu choices from the default sequence. See Figure 55 and Configuring Prompt Customizer Windows for the typical prompt configuration.
Figure 54
Main Menu—General Tab
Figure 55
Main Menu—Prompt Tab
Complete the following steps to configure the Main Menu options:
Step 1
Figure 56
Refill Step Output Branches
Step 2
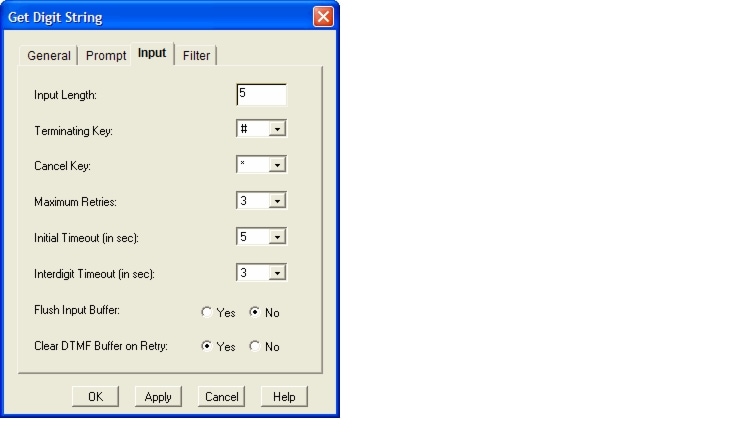
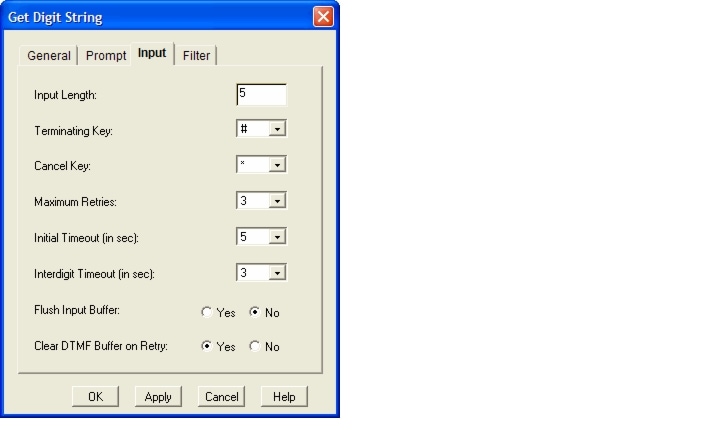
You can modify the input restrictions using the Input tab of the Get Digital String customizer window (see Figure 57). For example, you can restrict the length of the input, select the key used to terminate the call, select the cancel key, set the maximum retries allowed, and so on.
Figure 57
PrescriptionId Get Digital String Customizer Window—Input Tab
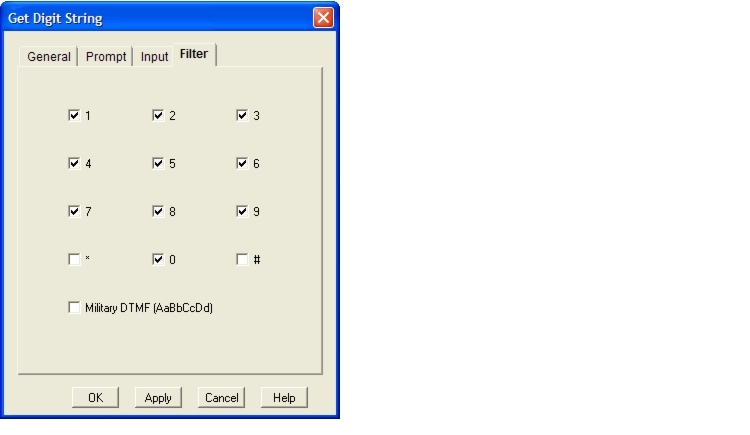
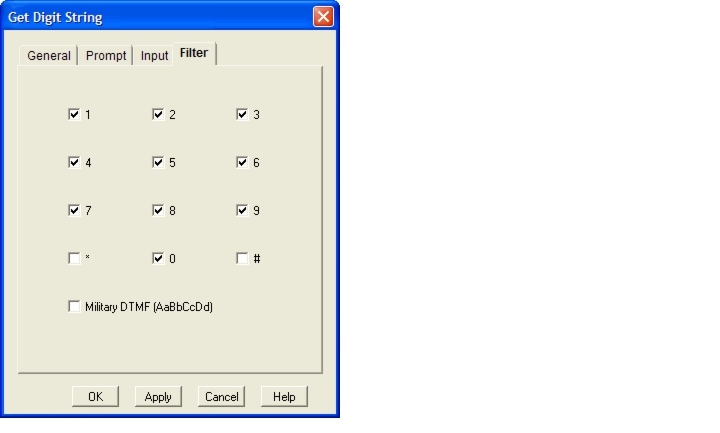
You can also filter the keys used to enter a PrescriptionId variable using Filter tab of the Get Digit String customizer window (see and Figure 58). Select the General and Prompt tabs to modify the step options (see Configuring Prompt Customizer Windows).
Figure 58
PrescriptionId Get Digital String Customizer Window—Filter Tab
•
•
As with the PrescriptionId variable, you can modify the input restrictions using the Input tab of the Get Digital String customizer window (see Figure 59).
Figure 59
EnterPin Get Digital String Customizer Window—Input Tab
You can also filter the keys used to enter a PIN using Filter tab of the Get Digit String customizer window (see and Figure 60). Select the General and Prompt tabs to modify the step options (see Configuring Prompt Customizer Windows).
Figure 60
EnterPin Get Digital String Customizer Window—Filter Tab
•
To view the Play Prompt customizer window, right-click the P[PleaseHold] prompt and select Properties in the popup menu. You can then select one of three tabs (General, Prompt, and Input) to modify the PleaseHold step options using the Play Prompt customizer windows. See Configuring Prompt Customizer Windows for the typical prompt configuration.
•
•
•
•
–
–
–
Figure 61
SelectNotificationType Customizer Window—General Tab
Figure 62
SelectNotificationType Customizer Window—Prompt Tab
Figure 63
Refill Step Output Branches
Step 3
Step 4
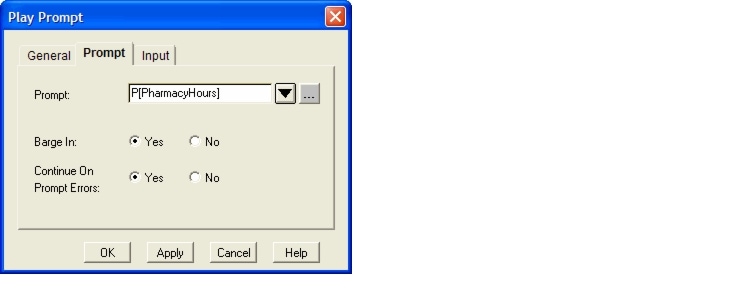
Figure 64
PharmacyHours Customizer Window—Prompt Tab
Step 5
Step 6
Step 7