- New and Changed Information
- Preface
- Documentation Roadmap
- Introduction
- Getting Started
- Licensing Requirements
- Using configTOOL
- Using perfectHOST
- Ports and Protocols
- KNX Deployment
- Getting Started with Mediator Web Client
- Managing Events
- Managing Security
- Managing Trends
- Managing Schedules
- Customizing HTML Pages with Web Express
- Energywise Manager
- Using Enterprise Navigation Tree
- Global Setpoints
- ADR Client
- Creating New Files
- Creating Widgets
- Adding an Embedded Graph Widget
- Adding a Generic Color Status Overlay Widget
- Adding a Generic Label Widget
- Adding a Generic Image Widget
- Adding a PHAnimation Widget
- Adding a PHVirtualPoint Widget
- Adding a Checkbox Widget
- Adding a Generic Switch Widget
- Adding a Generic Alarm Widget
- Additional Widgets
- Configuring the Refresh Rate of Web Pages
- Viewing Web Pages
- Editing Web Pages
- Deleting Web Pages
- Copying Multiple Web Pages
- Deleting Multiple Files
- Uploading Files
Customizing HTML Pages Using Web Express
The Mediator Web Express feature is a web-page authoring tool that allows you to create HTML monitor drawings using customizable widgets and graphics. Web Express incorporates live data points, from the Mediator, in the drawings.
This chapter includes the following sections:
•![]() Configuring the Refresh Rate of Web Pages
Configuring the Refresh Rate of Web Pages
Creating New Files
You can enhance and customize the web pages stored in the Mediator by adding widgets using Web Express.
To create a new web page, perform the following steps:
Step 1 ![]() In the Mediator web client, click Web Express.
In the Mediator web client, click Web Express.
The Web Express pane appears as shown in Figure 13-1.
Figure 13-1 Web Express Pane

Step 2 ![]() Choose the web page you want to modify from the drop-down list.
Choose the web page you want to modify from the drop-down list.

Note ![]() The hierarchy of the HTML pages appearing in the drop-down list is logically tied to the Enterprise Navigation feature. The pages are displayed in the same sequence as they are specified during the entity root configuration in the configTOOL. For more information, see Understanding Enterprise Navigation.
The hierarchy of the HTML pages appearing in the drop-down list is logically tied to the Enterprise Navigation feature. The pages are displayed in the same sequence as they are specified during the entity root configuration in the configTOOL. For more information, see Understanding Enterprise Navigation.
Step 3 ![]() Click Create New File.
Click Create New File.
A blank Web Express drawing pane appears as shown in Figure 13-2.
Figure 13-2 Create New File Pane

Table 13-1 describes the Web Express drawing pane and the associated elements.
Creating Widgets
Using Web Express, you can create widgets by specifying parameters like graph settings, font, color, axes and configure them to appear in any web page of the Mediator. You can create new widgets, edit existing widgets, copy widgets to other web pages, and delete widgets.
This section includes the following commonly used widgets and the list of additional widgets:
•![]() Adding an Embedded Graph Widget
Adding an Embedded Graph Widget
•![]() Adding a Generic Color Status Overlay Widget
Adding a Generic Color Status Overlay Widget
•![]() Adding a Generic Label Widget
Adding a Generic Label Widget
•![]() Adding a Generic Image Widget
Adding a Generic Image Widget
•![]() Adding a PHVirtualPoint Widget
Adding a PHVirtualPoint Widget
Adding an Embedded Graph Widget
The embedded graph widget allows you to create graphs of preconfigured trends in your web page. The graph allows you to view data over a period of time and also export the information to MS Excel.
For example, if you want to view the temperature changes occurring in an RTU, apply the Trends function to create a trend and measure the temperature variations. Use the embedded graph widget to create a graph for the temperature trend and to view the temperature variations over time.
To learn more about creating a trend, see Creating Trends.
To add an embedded graph widget, perform the following steps:
Step 1 ![]() In the Web Express pane, click Create New File.
In the Web Express pane, click Create New File.
A new HTML drawing pane appears.
Step 2 ![]() Choose EmbeddedGraph from the Add or Delete Widgets drop-down list.
Choose EmbeddedGraph from the Add or Delete Widgets drop-down list.
Step 3 ![]() Click Create.
Click Create.
The EmbeddedGraph widget pane appears.
Step 4 ![]() Click the widget.
Click the widget.
The border of the widget turns red and the Configure Widget dialog box appears.
Table 13-2 describes the values you can enter in the Configure Widget dialog box.
Step 5 ![]() Enter the configuration values in the appropriate text boxes.
Enter the configuration values in the appropriate text boxes.
Step 6 ![]() Click Save.
Click Save.
The Configure Widget dialog box closes.
Step 7 ![]() Click Save File.
Click Save File.
The File Selector dialog box appears.
Step 8 ![]() In the File name text box, enter a name for the widget.
In the File name text box, enter a name for the widget.
Step 9 ![]() Select the Open File after Save check box.
Select the Open File after Save check box.
Step 10 ![]() Click SAVE.
Click SAVE.
A dialog box appears prompting you to save or cancel.
Step 11 ![]() Click OK.
Click OK.
An HTML page with the newly created graph appears as shown in Figure 13-3.
Figure 13-3 EmbeddedGraph in an HTML Page

Note ![]() You can use the controls at the bottom of the graph to adjust the view.
You can use the controls at the bottom of the graph to adjust the view.
Adding a Generic Color Status Overlay Widget
The generic color status overlay widget is similar to the generic color status box widget and is the most commonly used overlay tool in Web Express. You can use the generic color status overlay widget to signify changes in the control points being monitored by setting color status boxes to the control points. Changes in the control points would result in the change in color of the status boxes.
For example, you can use the generic color status overlay widget to monitor the temperature of a building. You can create an overlay to see whether the points in the building stays within a predefined range. When the temperature exceeds or drops beyond the specified limits, the color of the overlay changes color and warnings and alarms are generated.
The generic color status overlay widget allows you to add five warning color status boxes in contrast to the generic color status box widget, which allows you to add one warning color status box.
To add a generic color status overlay widget, perform the following steps:
Step 1 ![]() In the Web Express pane, click Create New File.
In the Web Express pane, click Create New File.
A new HTML drawing pane appears.
Step 2 ![]() Choose GenericColorStatusOverlay from the Add or Delete Widgets drop-down list.
Choose GenericColorStatusOverlay from the Add or Delete Widgets drop-down list.
Step 3 ![]() Click Create.
Click Create.
The GenericColorStatusOverlay widget pane appears.
Step 4 ![]() Click the widget.
Click the widget.
The border of the widget turns red and the Configure Widget dialog box appears.
Table 13-3 describes the values you can enter in the Configure Widget dialog box.
Step 5 ![]() Enter the configuration values in the appropriate text boxes.
Enter the configuration values in the appropriate text boxes.
Step 6 ![]() Click Save.
Click Save.
The Configure Widget dialog box closes.
Step 7 ![]() Click Save File.
Click Save File.
The File Selector dialog box appears.
Step 8 ![]() In the File name text box, enter a name for the widget.
In the File name text box, enter a name for the widget.
Step 9 ![]() Select the Open File after Save check box.
Select the Open File after Save check box.
Step 10 ![]() Click SAVE.
Click SAVE.
A dialog box appears prompting you to save or cancel.
Step 11 ![]() Click OK.
Click OK.
An HTML page with the newly created color status overlay appears.
Adding a Generic Label Widget
A generic label allows you attach information to the elements in the web pages. For example, if you have many images in your web page, you can use the generic label widget to create labels and place specific labels to the images to identify them.
To add a generic label widget, perform the following steps:
Step 1 ![]() In the Web Express pane, click Create New File.
In the Web Express pane, click Create New File.
A new HTML drawing pane appears.
Step 2 ![]() Choose GenericLabel from the Add or Delete Widgets drop-down list.
Choose GenericLabel from the Add or Delete Widgets drop-down list.
Step 3 ![]() Click Create.
Click Create.
The GenericLabel widget pane appears.
Step 4 ![]() Click the widget.
Click the widget.
The border of the widget turns red and the Configure Widget dialog box appears.
Table 13-4 describes the values you can enter in the Configure Widget dialog box.
Step 5 ![]() Enter the configuration values in the appropriate text boxes.
Enter the configuration values in the appropriate text boxes.
Step 6 ![]() Click Save.
Click Save.
The Configure Widget dialog box closes.
Step 7 ![]() Click Save File.
Click Save File.
The File Selector dialog box appears.
In the File name text box, enter a name for the widget.
Step 8 ![]() Select the Open File after Save check box.
Select the Open File after Save check box.
Step 9 ![]() Click SAVE.
Click SAVE.
A dialog box appears prompting you to save or cancel.
Step 10 ![]() Click OK.
Click OK.
An HTML page with the newly created label appears.
Adding a Generic Image Widget
You can populate your web pages with different types of images using the generic image widget.
To add a generic image widget, perform the following steps:
Step 1 ![]() In the Web Express pane, click Create New File.
In the Web Express pane, click Create New File.
A new HTML drawing pane appears.
Step 2 ![]() Choose GenericImage from the Add or Delete Widgets drop-down list.
Choose GenericImage from the Add or Delete Widgets drop-down list.
Step 3 ![]() Click Create.
Click Create.
The GenericImage widget pane appears.
Step 4 ![]() Click the widget.
Click the widget.
The border of the widget turns red and the Configure Widget dialog box appears.
Table 13-5 describes the values you can enter in the Configure Widget dialog box.
Step 5 ![]() Enter the configuration values in the appropriate text boxes.
Enter the configuration values in the appropriate text boxes.
Step 6 ![]() Click Save.
Click Save.
The Configure Widget dialog box closes.
Step 7 ![]() Click Save File.
Click Save File.
The File Selector dialog box appears.
Step 8 ![]() In the File name text box, enter a name for the widget.
In the File name text box, enter a name for the widget.
Step 9 ![]() Select the Open File after Save check box.
Select the Open File after Save check box.
Step 10 ![]() Click SAVE.
Click SAVE.
A dialog box appears prompting you to save or cancel.
Step 11 ![]() Click OK.
Click OK.
An HTML page with the newly created image appears.
Adding a PHAnimation Widget
The PHAnimation widget allows you to include animated graphics, for example, fans, lights, damper position, and so on in your web pages.
You can create static or dynamic animations using this widget. A dynamic animation is activated by a data point and the application cycles through a stack of images with intervals between animations. For a static animation, the application calls images out of a stack depending on the number of images.
For example, you can use the PHAnimation widget to view a damper position and upload 100 animation frames of the damper going from 0 to 100. For example, when the damper returns a value of 42, the application would upload the 42nd image.
To add a PHAnimation widget, perform the following steps:
Step 1 ![]() In the Web Express pane, click Create New File.
In the Web Express pane, click Create New File.
A new HTML drawing pane appears.
Step 2 ![]() Choose PHAnimation from the Add or Delete Widgets drop-down list.
Choose PHAnimation from the Add or Delete Widgets drop-down list.
Step 3 ![]() Click Create.
Click Create.
The PHAnimation widget pane appears.
Step 4 ![]() Click the widget.
Click the widget.
The border of the widget turns red and the Configure Widget dialog box appears.
Table 13-6 describes the values you can enter in the Configure Widget dialog box.
Note ![]() You must enter the animation scale manually. If you are loading a static and a dynamic image for the same data point, it is important that you ensure that the width and the height of the images are the same prior to loading them to maintain uniformity.
You must enter the animation scale manually. If you are loading a static and a dynamic image for the same data point, it is important that you ensure that the width and the height of the images are the same prior to loading them to maintain uniformity.
Step 5 ![]() Enter the configuration values in the appropriate text boxes.
Enter the configuration values in the appropriate text boxes.
Step 6 ![]() Click Save.
Click Save.
The Configure Widget dialog box closes.
Step 7 ![]() Click Save File.
Click Save File.
The File Selector dialog box appears.
Step 8 ![]() In the File name text box, enter a name for the widget.
In the File name text box, enter a name for the widget.
Step 9 ![]() Select the Open File after Save check box.
Select the Open File after Save check box.
Step 10 ![]() Click SAVE.
Click SAVE.
A dialog box appears prompting you to save or cancel.
Step 11 ![]() Click OK.
Click OK.
An HTML page with the newly created animation appears as shown in Figure 13-4.
Figure 13-4 PHAnimation Widget in an HTML Page
Adding a PHVirtualPoint Widget
The PHVirtualPoint widget is commonly used to show a configured data point. You can display a data point as a numerical value, for example, 50 or as a string, for example, off and on. You can also use the widget to signify changes in the data point and the changes in the values can be displayed as changes in colors.
For example, you can configure a node that changes values from 50 to 80 units. You can use the PH virtual widget to show changes in the value of the node. When the node reaches a value of 80, you can set up the node to display red and when it reaches the warning threshold value, you can set the color to change to yellow.
To add a PHVirtualPoint widget, perform the following steps:
Step 1 ![]() In the Web Express pane, click Create New File.
In the Web Express pane, click Create New File.
A new HTML drawing pane appears.
Step 2 ![]() Choose PHVirtualPoint from the Add or Delete Widgets drop-down list.
Choose PHVirtualPoint from the Add or Delete Widgets drop-down list.
Step 3 ![]() Click Create.
Click Create.
The PHVirtualPoint widget pane appears.
Step 4 ![]() Click the widget.
Click the widget.
The border of the widget turns red and the Configure Widget dialog box appears.
Table 13-7 describes the values you can enter in the Configure Widget dialog box.
Step 5 ![]() Enter the configuration values in the appropriate text boxes.
Enter the configuration values in the appropriate text boxes.
Step 6 ![]() Click Save.
Click Save.
The Configure Widget dialog box closes.
Step 7 ![]() Click Save File.
Click Save File.
The File Selector dialog box appears.
Step 8 ![]() In the File name text box, enter a name for the widget.
In the File name text box, enter a name for the widget.
Step 9 ![]() Select the Open File after Save check box.
Select the Open File after Save check box.
Step 10 ![]() Click SAVE.
Click SAVE.
A dialog box appears prompting you to save or cancel.
Step 11 ![]() Click OK.
Click OK.
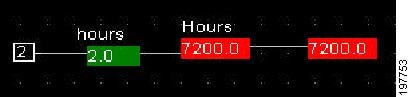
An HTML page with the newly created PHVirtualPoint appears as shown in Figure 13-5.
Figure 13-5 PHVirtualPoint in an HTML Page

You can change the values that you assigned to the node using the Override option.
To override the value of the node, perform the following steps:
Step 1 ![]() Double-click the node.
Double-click the node.
A value appears in the Override text box.
Step 2 ![]() Enter a new value.
Enter a new value.
Step 3 ![]() Click Override.
Click Override.
The value changes in the web page.
Adding a Checkbox Widget
A checkbox is a specific type of two-states button that can be either selected or unselected. The checkbox widget creates checkboxes in HTML pages that can be used to select or unselect specific actions.
To add a checkbox widget, perform the following steps:
Step 1 ![]() In the Web Express pane, click Create New File.
In the Web Express pane, click Create New File.
A new HTML drawing pane appears.
Step 2 ![]() Choose Checkbox from the Add or Delete Widgets drop-down list.
Choose Checkbox from the Add or Delete Widgets drop-down list.
Step 3 ![]() Click Create.
Click Create.
The Checkbox widget pane appears.
Step 4 ![]() Click the widget.
Click the widget.
The border of the widget turns red and the Configure Widget dialog box appears.
Table 13-8 describes the values you can enter in the Configure Widget dialog box.
Step 5 ![]() Enter the configuration values in the appropriate text boxes.
Enter the configuration values in the appropriate text boxes.
Step 6 ![]() Click Save.
Click Save.
The Configure Widget dialog box closes.
Step 7 ![]() Click Save File.
Click Save File.
The File Selector dialog box appears.
Step 8 ![]() In the File name text box, enter a name for the widget.
In the File name text box, enter a name for the widget.
Step 9 ![]() Select the Open File after Save check box.
Select the Open File after Save check box.
Step 10 ![]() Click SAVE.
Click SAVE.
A dialog box appears prompting you to save or cancel.
Step 11 ![]() Click OK.
Click OK.
An HTML page with the newly created URL appears.
Adding a Generic Switch Widget
You can use widgets to create switches in your web pages. The switches can be made to change states depending on the changes in the values being monitored.
For example, if the generic switch widget is tied to the air conditioning unit, you can switch the unit on or off by using the toggle functionality of the widget.
The generic switch is similar to checkbox except the image of the button can be changed in the switch widget.
To add a generic switch widget, perform the following steps:
Step 1 ![]() In the Web Express pane, click Create New File.
In the Web Express pane, click Create New File.
A new HTML drawing pane appears.
Step 2 ![]() Choose GenericSwitch from the Add or Delete Widgets drop-down list.
Choose GenericSwitch from the Add or Delete Widgets drop-down list.
Step 3 ![]() Click Create.
Click Create.
The Generic Switch widget pane appears.
Step 4 ![]() Click the widget.
Click the widget.
The border of the widget turns red and the Configure Widget dialog box appears.
Table 13-5 describes the values you can enter in the Configure Widget dialog box.
Step 5 ![]() Enter the configuration values in the appropriate text boxes.
Enter the configuration values in the appropriate text boxes.
Step 6 ![]() Click Save.
Click Save.
The Configure Widget dialog box closes.
Step 7 ![]() Click Save File.
Click Save File.
The File Selector dialog box appears.
Step 8 ![]() In the File name text box, enter a name for the widget.
In the File name text box, enter a name for the widget.
Step 9 ![]() Select the Open File after Save check box.
Select the Open File after Save check box.
Step 10 ![]() Click SAVE.
Click SAVE.
A dialog box appears prompting you to save or cancel.
Step 11 ![]() Click OK.
Click OK.
An HTML page with the newly created image appears.
Adding a Generic Alarm Widget
You can use widgets to create visual or audio alarms in your HTML pages.
For example, if you are monitoring the temperature in a room and the temperature exceeds the predefined limits, the alarm widgets can be used to produce visual alarms (where color changes are displayed) or audio alarms (where a sound file is played).
To add a generic alarm widget, perform the following steps:
Step 1 ![]() In the Web Express pane, click Create New File.
In the Web Express pane, click Create New File.
A new HTML drawing pane appears.
Step 2 ![]() Choose GenericAlarm from the Add or Delete Widgets drop-down list.
Choose GenericAlarm from the Add or Delete Widgets drop-down list.
Step 3 ![]() Click Create.
Click Create.
The GenericAlarm widget pane appears.
Step 4 ![]() Click the widget.
Click the widget.
The border of the widget turns red and the Configure Widget dialog box appears.
Table 13-10 describes the values you can enter in the Configure Widget dialog box.
Step 5 ![]() Enter the configuration values in the appropriate text boxes.
Enter the configuration values in the appropriate text boxes.
Step 6 ![]() Click Save.
Click Save.
The Configure Widget dialog box closes.
Step 7 ![]() Click Save File.
Click Save File.
The File Selector dialog box appears.
Step 8 ![]() In the File name text box, enter a name for the widget.
In the File name text box, enter a name for the widget.
Step 9 ![]() Select the Open File after Save check box.
Select the Open File after Save check box.
Step 10 ![]() Click SAVE.
Click SAVE.
A dialog box appears prompting you to save or cancel.
Step 11 ![]() Click OK.
Click OK.
An HTML page with the newly created image appears.
Additional Widgets
Table 13-11 describes the additional widgets and their functionality.
Configuring the Refresh Rate of Web Pages
Configuring the refresh rate of web pages ensures the latest data is available on the browser. You can choose to control whether the page refreshes automatically and how often the page gets refreshed automatically. The refresh settings that you specify in the drawing pane affects the refresh mode of the web pages.
To configure the refresh rate of a web page, perform the following steps:
Step 1 ![]() In the Mediator web client, click Web Express.
In the Mediator web client, click Web Express.
The Web Express pane appears.
Step 2 ![]() Choose the web page you want to modify from the drop-down list.
Choose the web page you want to modify from the drop-down list.
Step 3 ![]() Click Create New File.
Click Create New File.
A blank Web Express drawing pane appears.
Step 4 ![]() Click Configure.
Click Configure.
The Configure Page dialog box.
Step 5 ![]() In the Configure Page dialog box, perform the following steps:
In the Configure Page dialog box, perform the following steps:
a. ![]() From the refresh rate drop-down list, choose the web page refresh rate. The default is 2 seconds.
From the refresh rate drop-down list, choose the web page refresh rate. The default is 2 seconds.
b. ![]() In the user name text box, enter the username.
In the user name text box, enter the username.
c. ![]() In the user password text box, enter the password.
In the user password text box, enter the password.
d. ![]() In the html title text box, enter the name of the HTML page you want to refresh.
In the html title text box, enter the name of the HTML page you want to refresh.
e. ![]() Click the color box next to the html body background color text box.
Click the color box next to the html body background color text box.
The Select Color dialog box appears.
f. ![]() Double-click a color to choose it.
Double-click a color to choose it.
The Select Color dialog box closes and returns you to the Configure Page dialog box. You will see that the color box depicts the color you chose and the html body background color text box contains the corresponding hexadecimal value.
g. ![]() Click Save to save the changes.
Click Save to save the changes.
Viewing Web Pages
The web pages created in each of the Mediators in the network are loaded into the directory of the Mediator. These HTML pages can be viewed in the Mediator using the Web Express pane.
To view a web page, perform the following steps:
Step 1 ![]() In the Mediator web client, click Web Express.
In the Mediator web client, click Web Express.
The Web Express pane appears.
Step 2 ![]() Choose the web page you want to view from the drop-down list.
Choose the web page you want to view from the drop-down list.
Step 3 ![]() Click View Selected File.
Click View Selected File.
The selected web page is displayed.
Editing Web Pages
To edit an existing drawing, perform the following steps:
Step 1 ![]() In the Mediator web client, click Web Express.
In the Mediator web client, click Web Express.
The Web Express pane appears.
Step 2 ![]() Choose the web page you want to modify from the drop-down list.
Choose the web page you want to modify from the drop-down list.
Step 3 ![]() Click Edit Selected File.
Click Edit Selected File.
The web page to be edited appears as the drawing pane.
Deleting Web Pages
You can use Web Express to delete the web pages stored in the Mediator default directory.
To delete a web page, perform the following steps:
Step 1 ![]() In the Mediator web client, click Web Express.
In the Mediator web client, click Web Express.
The Web Express pane appears.
Step 2 ![]() Choose the web page you want to delete from the drop-down list.
Choose the web page you want to delete from the drop-down list.
Step 3 ![]() Click Delete Selected File.
Click Delete Selected File.
A dialog box appears prompting you to confirm the operation.
Step 4 ![]() Click OK.
Click OK.
The web page is deleted and a dialog box appears confirming that the operation was successful.
Copying Multiple Web Pages
You can use Web Express to make multiple copies of a web page. The copies will be stored in the Mediator directory.
The Copy Multiple feature is used to make copies of VAV monitor drawings.
To copy multiple web pages, perform the following steps:
Step 1 ![]() In the Mediator web client, click Web Express.
In the Mediator web client, click Web Express.
The Web Express pane appears.
Step 2 ![]() Choose the web page you want to copy from the drop-down list.
Choose the web page you want to copy from the drop-down list.
Step 3 ![]() Click Copy Multiple Files.
Click Copy Multiple Files.
The Web Express Copy Multiple files pane appears.
Step 4 ![]() Choose the template file from the drop-down list.
Choose the template file from the drop-down list.
The template file name appears in the File Base Name text box. The file name appears with a tilde ( ~ ) in the name.
Step 5 ![]() In the Number of Copies text box, enter the desired of the copy files.
In the Number of Copies text box, enter the desired of the copy files.
Step 6 ![]() Click Copy Multiple.
Click Copy Multiple.
A message appears indicating that the operation is completed successfully.
Step 7 ![]() Click Web Express.
Click Web Express.
The Web Express pane reappears. The web pages are available in the drop-down list.
Deleting Multiple Files
To delete multiple web pages, perform the following steps:
Step 1 ![]() In the Mediator web client, click Web Express.
In the Mediator web client, click Web Express.
The Web Express pane appears.
Step 2 ![]() Click Delete Multiple Files.
Click Delete Multiple Files.
The Web Express Delete Multiple Files pane appears.
Step 3 ![]() Choose the files that you want to delete from the drop-down list.
Choose the files that you want to delete from the drop-down list.
Press Shift+Click to select a contiguous range or press Ctrl+Click to select multiple items.
Step 4 ![]() Click Delete.
Click Delete.
The Confirm Delete dialog box appears.
Step 5 ![]() Click Yes to All.
Click Yes to All.
The list of web pages is updated and the web pages that were not deleted remain in the list.
Uploading Files
You can upload files, for example, custom artwork, PDF files of cut sheets or Operations and Maintenance manuals, text files, and spreadsheets from your PC to the Mediator. The files can then be incorporated into web page drawings that you create with Web Express.
The graphics files (gif, png, or jpg) are uploaded to the /images folder of the Mediator and the HTML files are uploaded to the root folder. Any other files that you upload (pdf, zip, doc, and so on) are routed to the /webexpressuploads folder.
To upload a file, perform the following steps:
Step 1 ![]() In the Mediator web client, click Web Express.
In the Mediator web client, click Web Express.
The Web Express pane appears.
Step 2 ![]() Click Upload A File.
Click Upload A File.
The Web Express Upload pane appears.
Step 3 ![]() Click Browse.
Click Browse.
Step 4 ![]() Navigate to and choose an image file to upload.
Navigate to and choose an image file to upload.
Step 5 ![]() Click Upload File.
Click Upload File.
A message appears indicating that the file has been uploaded successfully.
Step 6 ![]() Click Continue.
Click Continue.
The Web Express homepage appears.
 Feedback