Feedback
Table Of Contents
Configuring Client Provisioning Policies
Agent and Client Machine Operating System Compatibility
Adding and Removing Agents and Other Resources
Viewing and Displaying Client Provisioning Resources
Adding Client Provisioning Resources to Cisco ISE
Adding Client Provisioning Resources from a Remote Source
Adding Client Provisioning Resources from a Local Machine
Specifying Proxy Settings in Cisco ISE
Creating Windows Agent Profiles in Cisco ISE
Creating Mac OS X Agent Profiles in Cisco ISE
Modifying Windows and Mac OS X Agent Profiles in Cisco ISE
Agent Profile Parameters and Applicable Values
Deleting Client Provisioning Resources
Setting Up Global Client Provisioning Functions
Enabling and Disabling the Client Provisioning Service
Downloading Client Provisioning Resources Automatically
Configuring Client Provisioning Resource Policies
Client-side Installation and Log-In
Viewing Client Provisioning Reports and Events
Viewing Client Provisioning Reports in Cisco ISE
Viewing Client Provisioning Event Logs in Cisco ISE
Configuring Client Provisioning Policies
This chapter describes how to manage client provisioning resources and create client provisioning policies for your network.
•
Adding and Removing Agents and Other Resources
•
•
•
Client Provisioning Overview
Cisco Identity Services Engine (ISE) looks at various elements when classifying the type of login session through which users access the internal network, including:
•
•
•
•
After Cisco ISE classifies a client machine, it uses client provisioning resource policies to ensure that the client machine is set up with an appropriate agent version, up-to-date compliance modules for antivirus and antispyware vendor support, and correct agent customization packages and profiles, if necessary.
Cisco ISE Agents
NAC Agent for Windows Clients
The Cisco NAC Agent provides the posture assessment and remediation for client machines.
Users can download and install the Cisco NAC Agent (read-only client software), which can check the host registry, processes, applications, and services. The Cisco NAC Agent can be used to perform Windows updates or antivirus and antispyware definition updates, launch qualified remediation programs, distribute files uploaded to the Cisco ISE server, distribute web site links to web sites in order for users to download files to fix their system, or simply distribute information and instructions.
Warning
NAC Agent for Macintosh Clients
The Macintosh NAC Agent provides the posture assessment and remediation for client machines.
Users can download and install the Cisco NAC Agent (read-only client software), which can check antivirus and antispyware definition updates.
After users log into the Cisco NAC Agent, the Agent gets the requirements that are configured for the user role and the operating system from the Cisco ISE server, checks for required packages and sends a report back to the Cisco ISE server. If requirements are met on the client, the user is allowed network access. If requirements are not met, the Agent presents a dialog to the user for each requirement that is not satisfied. The dialog provides the user with instructions and the action to take for the client machine to meet the requirement. Alternatively, if the specified requirements are not met, users can choose to accept the restricted network access while they try to remediate the client system so that it meets requirements for the user login role.
NAC Web Agent
The Cisco NAC Web Agent provides temporal posture assessment for client machines.
Users can launch the Cisco NAC Web Agent executable, which installs the Web Agent files in a temporary directory on the client machine via ActiveX control or Java applet.
After users log into the Cisco NAC Web Agent, the Web Agent gets the requirements that are configured for the user role and the operating system from the Cisco ISE server, checks the host registry, processes, applications, and services for required packages and sends a report back to the Cisco ISE server. If requirements are met on the client, the user is allowed network access. If requirements are not met, the Web Agent presents a dialog to the user for each requirement that is not satisfied. The dialog provides the user with instructions and the action to take for the client machine to meet the requirement. Alternatively, if the specified requirements are not met, users can choose to accept the restricted network access while they try to remediate the client system so that it meets requirements for the user login role.
Note
Agent and Client Machine Operating System Compatibility
For a complete list of supported client machine operating systems and agents, see Cisco Identity Services Engine Network Component Compatibility.
Adding and Removing Agents and Other Resources
•
•
•
Viewing and Displaying Client Provisioning Resources
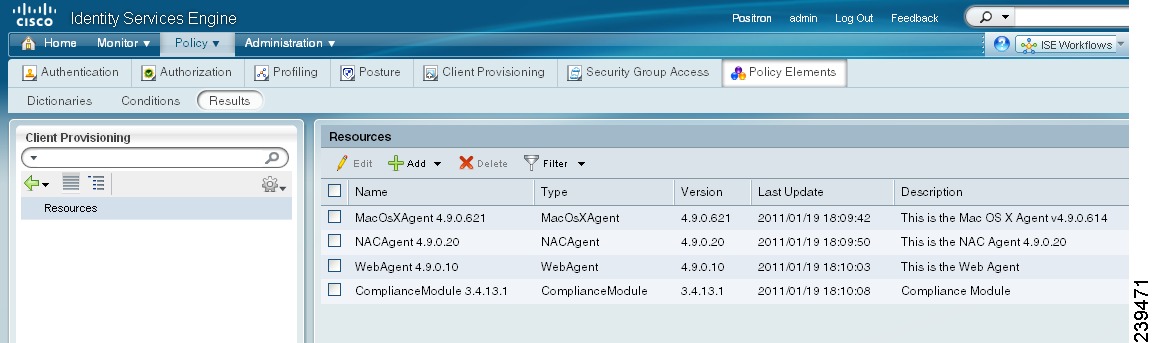
To display the list of existing resources that are available to configure client provisioning resource policies, open the Cisco ISE web console user interface and choose Policy > Policy Elements > Results > Client Provisioning > Resources. The Client Provisioning Resources List page displays the following types of resources:
•
–
–
•
•
•
Figure 18-1 shows the Client Provisioning Resources List page.
Figure 18-1 Policy > Policy Elements > Results > Client Provisioning > Resources
If this display is empty (that is, if there are no client provisioning resources that are available on Cisco ISE), you can add resources using the procedures in Adding and Removing Agents and Other Resources.
Adding Client Provisioning Resources to Cisco ISE
Before you can configure client provisioning resource policies that enable users to download and install resources on client machines, you must ensure that those resources are already present on the Cisco ISE appliance. You can use the resource download and creation functions described here to ensure the following Cisco ISE resources are available in Cisco ISE:
•
•
•
•
Note
The following topics describe how to add client provisioning resources from a remote source or from a local machine:
•
•
Note
Adding Client Provisioning Resources from a Remote Source
Prerequisites
To ensure you are able to access the appropriate remote location from which you can download client provisioning resources to Cisco ISE, you may need to verify that you have the correct proxy settings configured for your network as described in Specifying Proxy Settings in Cisco ISE.
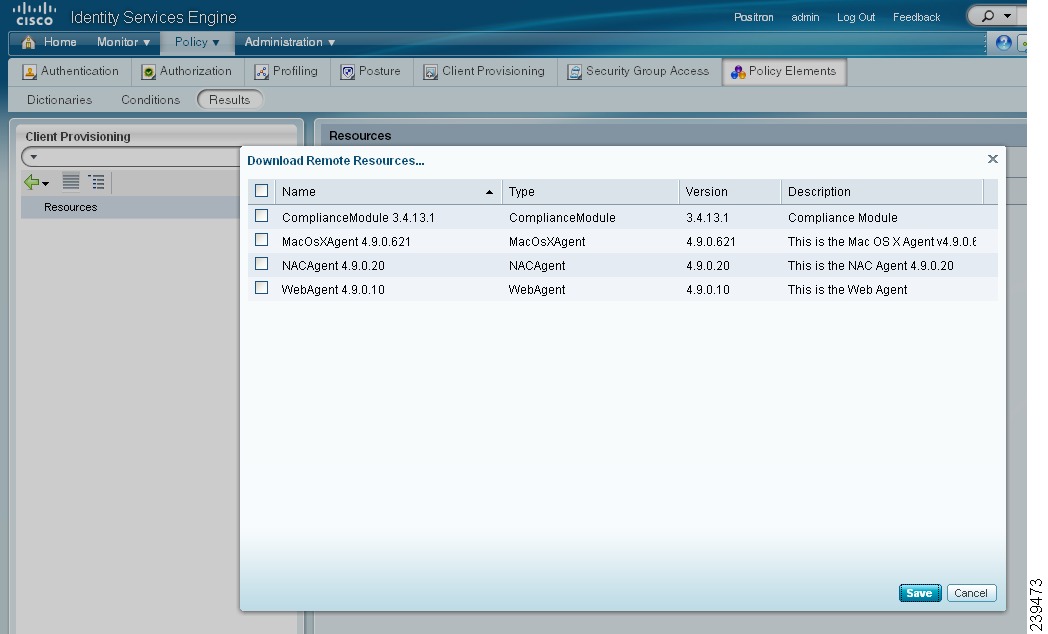
To add client provisioning resources from a remote source like Cisco.com, complete the following steps:
Step 1
Step 2
Figure 18-2 Add resources from Cisco site
Step 3
Step 4
Depending on the type and number of resources that you select, and available network bandwidth, Cisco ISE can take a few seconds (or even a few minutes, depending on the size and type of resource) to download the new resources and display them in its list of available client provisioning resources.
Next Steps
After you have successfully added client provisioning resources to Cisco ISE, you can begin to configure resource policies, as described in Configuring Client Provisioning Resource Policies.
Troubleshooting Topics
•
Adding Client Provisioning Resources from a Local Machine
Caution
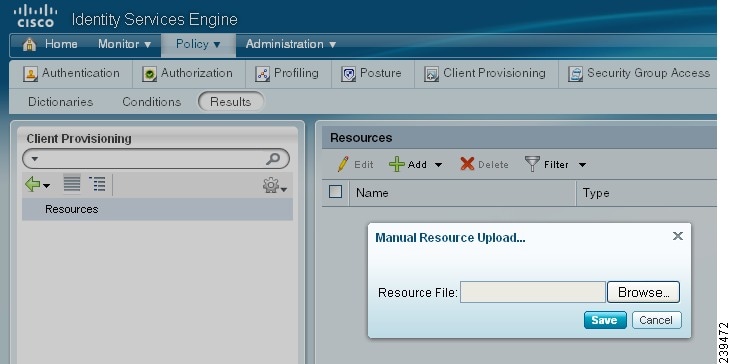
To add existing client provisioning resources from a local machine (for example, files that you may have already downloaded from CCO to your laptop), complete the following steps:
Step 1
Step 2
Figure 18-3 Add resources from local disk
Step 3
Step 4
Depending on the type of resource file that you select, and the available network bandwidth between Cisco ISE and your local machine, Cisco ISE can take a few seconds to a few minutes to download the new resource file and display it in its list of available client provisioning resources.
Next Steps
After you have successfully added client provisioning resources to Cisco ISE, you can begin to configure resource policies, as described in Configuring Client Provisioning Resource Policies.
Specifying Proxy Settings in Cisco ISE
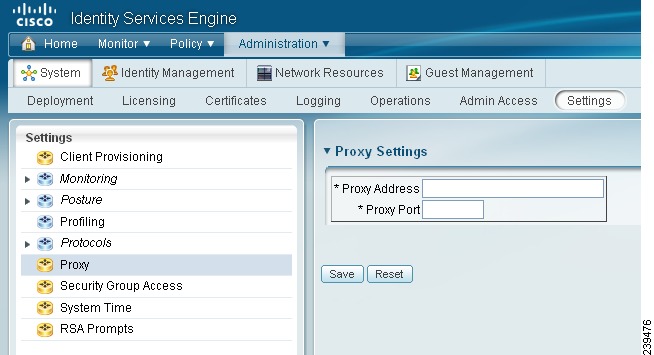
If your existing network topology requires you to use a proxy for Cisco ISE to access external resources (like the remote download site where you can find client provisioning and posture-related resources), you can use the Cisco ISE user interface to specify proxy properties.
To specify proxy settings for Cisco ISE, complete the following steps:
Step 1
Figure 18-4 Administration > System > Settings > Proxy
Step 2
Step 3
Next Steps
Once you have specified your proxy settings, you can optionally enable the following system-wide client provisioning functions:
•
•
Troubleshooting Topics
•
Creating Agent Profiles
•
•
•
•
Cisco recommends configuring agent profiles to control remediation timers, network transition delay timers, and the timer used to control the login success screen on client machines so that these settings are policy based. However, when there are no agent profiles configured to match client provisioning policies, you can use the settings in the Administration > System > Settings > Posture > General Settings configuration page to accomplish the same goal. See Posture General Settings, page 19-10 for more details.
Note
Creating Windows Agent Profiles in Cisco ISE
Prerequisites
Before you create a Windows agent profile, Cisco recommends you upload agent software to Cisco ISE per the guidelines at:
•
•
To create a Windows agent profile, complete the following steps:
Step 1
Step 2
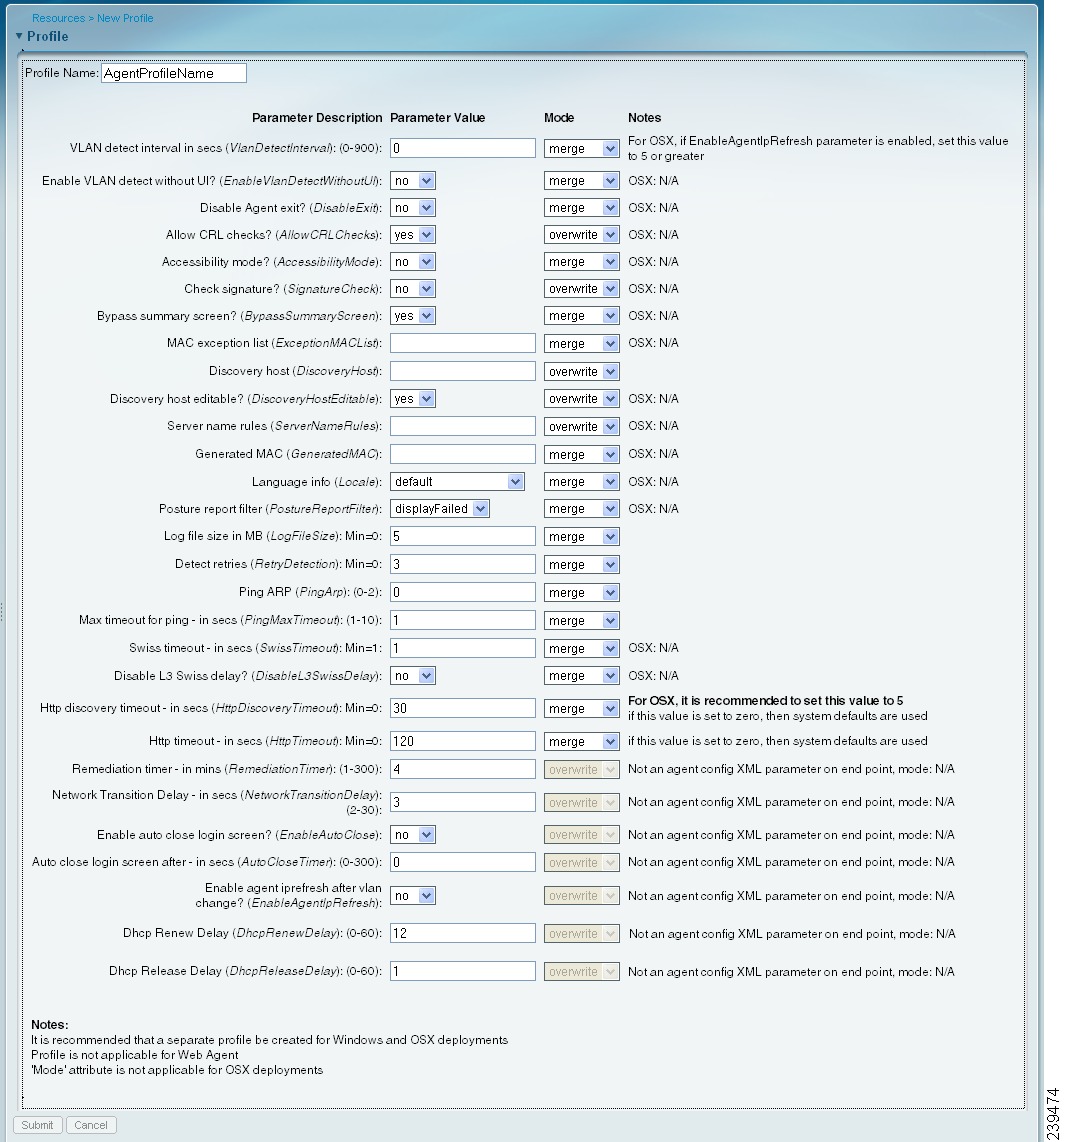
Figure 18-5 ISE Posture Agent Profile
Step 3
Step 4
When you set one or more of the parameters to merge with any existing agent profile, new (previously undefined) parameters are set according to the merged value, but existing parameter settings in an agent profile are maintained. For details regarding the various parameters and their settings, see Agent Profile Parameters and Applicable Values.
Step 5
Next Steps
After you have successfully added client provisioning resources to Cisco ISE and configured one or more optional agent profiles, you can begin to configure resource policies, as described in Configuring Client Provisioning Resource Policies.
Example XML File Generated Using the Create Profile Function
<?xml version="1.0" ?><cfg><VlanDetectInterval>0</VlanDetectInterval><RetryDetection>3</RetryDetection><PingArp>0</PingArp><PingMaxTimeout>1</PingMaxTimeout><EnableVlanDetectWithoutUI>0</EnableVlanDetectWithoutUI><SignatureCheck>0</SignatureCheck><DisableExit>0</DisableExit><PostureReportFilter>displayFailed</PostureReportFilter><BypassSummaryScreen>1</BypassSummaryScreen><LogFileSize>5</LogFileSize><DiscoveryHost></DiscoveryHost><DiscoveryHostEditable>1</DiscoveryHostEditable><Locale>default</Locale><AccessibilityMode>0</AccessibilityMode><SwissTimeout>1</SwissTimeout><HttpDiscoveryTimeout>30</HttpDiscoveryTimeout><HttpTimeout>120</HttpTimeout><ExceptionMACList></ExceptionMACList><GeneratedMAC></GeneratedMAC><AllowCRLChecks>1</AllowCRLChecks><DisableL3SwissDelay>0</DisableL3SwissDelay><ServerNameRules></ServerNameRules></cfg>
Note
Creating Mac OS X Agent Profiles in Cisco ISE
The parameters available to configure for Mac OS X client machines are only a subset of those available for Windows client machines. Cisco recommends you avoid specifying settings for any parameters that feature a note reading "Mac platform: N/A," as these settings have no effect on agent behavior on Mac OS X client machines.
Prerequisites
Before you create a Mac OS X agent profile, Cisco recommends you upload agent software to Cisco ISE per the guidelines at:
•
•
To create a Mac OS X agent profile, complete the following steps:
Step 1
Step 2
Step 3
Step 4
When you set one or more of the parameters to merge with any existing agent profile, new (previously undefined) parameters are set according to the merged value, but existing parameter settings in an agent profile are maintained. For details regarding the various parameters and their settings, see Agent Profile Parameters and Applicable Values.
Step 5
Next Steps
After you have successfully added client provisioning resources to Cisco ISE and configured one or more optional agent profiles, you can begin to configure resource policies, as described in Configuring Client Provisioning Resource Policies.
Modifying Windows and Mac OS X Agent Profiles in Cisco ISE
Prerequisites
To modify a Windows or Mac OS X agent profile, you must have already manually created one or more agent profiles according to the guidelines in:
•
•
To modify an existing Windows or Mac OS X agent profile, complete the following steps:
Step 1
Step 2
Step 3
Note
Next Steps
After you have successfully added client provisioning resources to Cisco ISE and configured or modified one or more existing optional agent profiles, you can begin to configure resource policies, as described in Configuring Client Provisioning Resource Policies.
Agent Profile Parameters and Applicable Values
This section provides descriptions, default values, and allowable ranges for the agent profile parameters used to customize login, operational, and logout behavior for agents that are installed on a client machine. Agent configuration parameters are grouped by function and appear in the following tables:
•
•
•
•
•
•
•
•
•
•
1 For the Cisco NAC Windows Agent, the default value is 0. By default, the Access to Authentication VLAN change feature is disabled for Windows.
2 For the Mac OS X Agent, the default value is 5. By default, the Access to Authentication VLAN change feature is enabled with VlanDetectInterval as 5 seconds for Mac OS X.
Table 18-2 Customize Agent Login/Logout Dialog Behavior
Disable Agent Exit?
no
yes or no
If this parameter is set to yes, users cannot exit the agent via the system tray icon.
Note
Allow CRL Checks?
yes
yes or no
Setting this parameter to no turns off certificate revocation list (CRL) checking for the agent during discovery and negotiation with the Cisco ISE node.
Note
Accessibility mode?
no
yes or no
•
•
Note
Note
Check signature?
no
yes or no
The Check signature setting looks for a digital signature that the agent uses to determine whether Windows can trust the executable before launching. For more information, see Adding, Duplicating, Editing, and Deleting a Launch Program Remediation, page 19-122.
Note
Bypass summary screen?
yes
yes or no
If you are employing autoremediation for agent requirements, this setting enables you to make the agent session dialog more automated by skipping the agent posture assessment summary screen and proceeding directly to the first autoremediation function. Avoidance of this step reduces or eliminates user interaction during the agent login and remediation session.
Note
Table 18-5 Report and Log Display Settings
Posture Report Filter
displayFailed
—
This parameter controls the level and type of results that appear to the user when the client machine undergoes posture assessment.
•
•
Note
Log file size in MB
5
0 and above
This setting specifies the file size (in megabytes) for agent log files on the client machine.
•
•
1 Agent log files are recorded and stored in a directory on the client machine. After the first agent login session, two files reside in this directory: one backup file from the previous login session, and one new file containing login and operation information from the current session. If the log file for the current agent session grows beyond the specified file size, the first segment of agent login and operation information automatically becomes the backup file in the directory, and the agent continues to record the latest entries in the current session file.
Note
Deleting Client Provisioning Resources
Caution
To remove an existing client provisioning resource from Cisco ISE, complete the following steps:
Step 1
Figure 18-6 Policy > Policy Elements > Results > Client Provisioning > Resources
Step 2
Step 3
Troubleshooting Topics
•
Setting Up Global Client Provisioning Functions
•
•
Enabling and Disabling the Client Provisioning Service
Prerequisites
To ensure you are able to access the appropriate remote location from which you can download client provisioning resources to Cisco ISE, you may be required to verify that you have the correct proxy settings configured for your network as described in Specifying Proxy Settings in Cisco ISE.
To configure Cisco ISE to automatically discover and download client provisioning resources, complete the following steps:
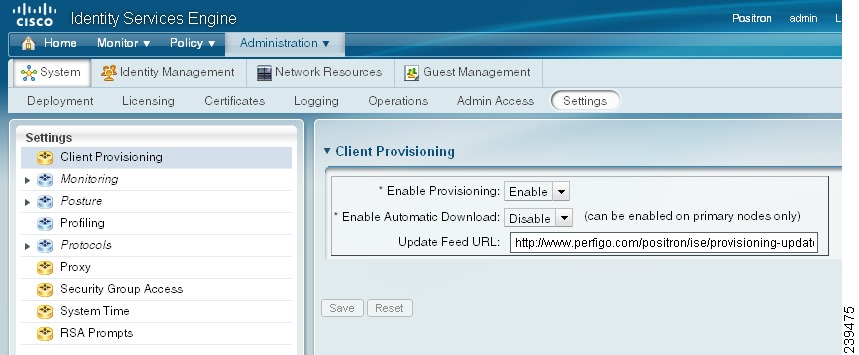
Step 1
Figure 18-7 Administration > System > Settings > Client Provisioning
Step 2
Step 3
When you choose to disable this function of Cisco ISE, users who attempt to access the network will receive a warning message indicating that they are not able to download client provisioning resources.
Next Steps
Set up system-wide client provisioning functions according to the guidelines in:
•
•
Troubleshooting Topics
•
Downloading Client Provisioning Resources Automatically
Note
Prerequisites
To ensure you are able to access the appropriate remote location from which you can download client provisioning resources to Cisco ISE, you may be required to verify that you have the correct proxy settings configured for your network as described in Specifying Proxy Settings in Cisco ISE.
To configure Cisco ISE to automatically discover and download all known available client provisioning resources, complete the following steps:
Step 1
Figure 18-8 Administration > System > Settings > Client Provisioning
Step 2
Step 3
If you choose not to use the Enable Automatic Download function, you can also access this URL and manually download the client provisioning resource files to a local system before importing them into Cisco ISE via the guidelines described in Adding Client Provisioning Resources from a Local Machine.
Step 4
Next Steps
Set up system-wide client provisioning functions according to the guidelines in:
•
•
Troubleshooting Topics
•
Configuring Client Provisioning Resource Policies
Client provisioning resource policies determine which users receive which version (or versions) of resources (agents, agent compliance modules, and/or agent customization packages/profiles) from Cisco ISE upon login and user session initiation.
Prerequisites
Before you can create effective client provisioning resource policies, ensure that you have set up system-wide client provisioning functions according to the following topics:
•
•
•
To configure a client provisioning resource policy, complete the following steps:
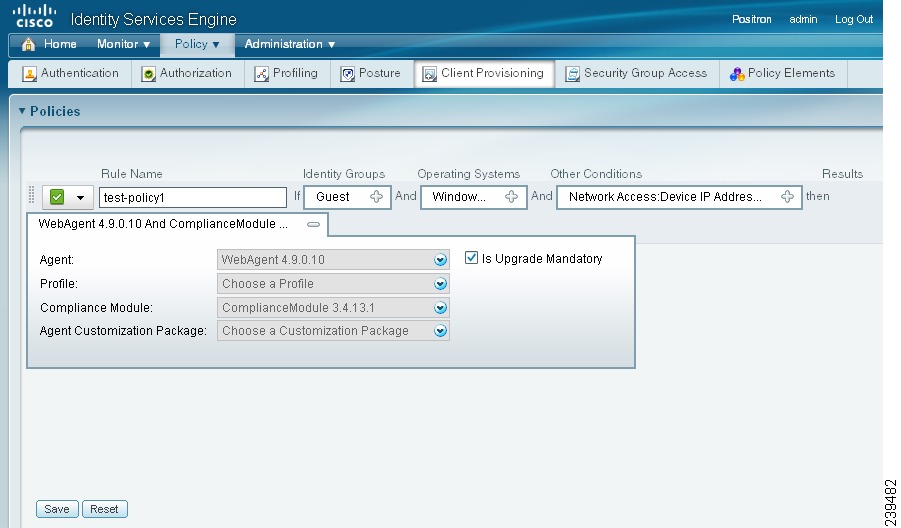
Step 1
Figure 18-9 Policy > Client Provisioning
Enable or Disable the Resource Policy
Step 2
•
•
•
Define the Resource Policy
Step 3
Categorize the Client Machine
Step 4
You can choose to specify the Any identity group type, or choose one or more groups from a list of existing Identity Groups you have configured (for example, "Guest," sponsor-created, or administrator-created groups) at Configuring User Identity Groups, page 4-39.
Step 5
You can choose to specify a single operating system like "Mac OS X," or an umbrella operating system designation that addresses a number of client machine operating systems like "Windows XP (All)" or "Windows 7 (All)." For a complete list of supported client machine operating systems, see Cisco Identity Services Engine Component Compatibility.
Step 6
Define Which Resources to Distribute
Step 7
a.
Note
b.
c.
d.
Note
e.
Step 8
Next Steps
Once you have successfully configured one or more client provisioning resource policies, you can start to configure Cisco ISE to perform posture assessment on client machines during login according to the topics in Chapter 19, "Configuring Client Posture Policies."
Client-side Installation and Log-In
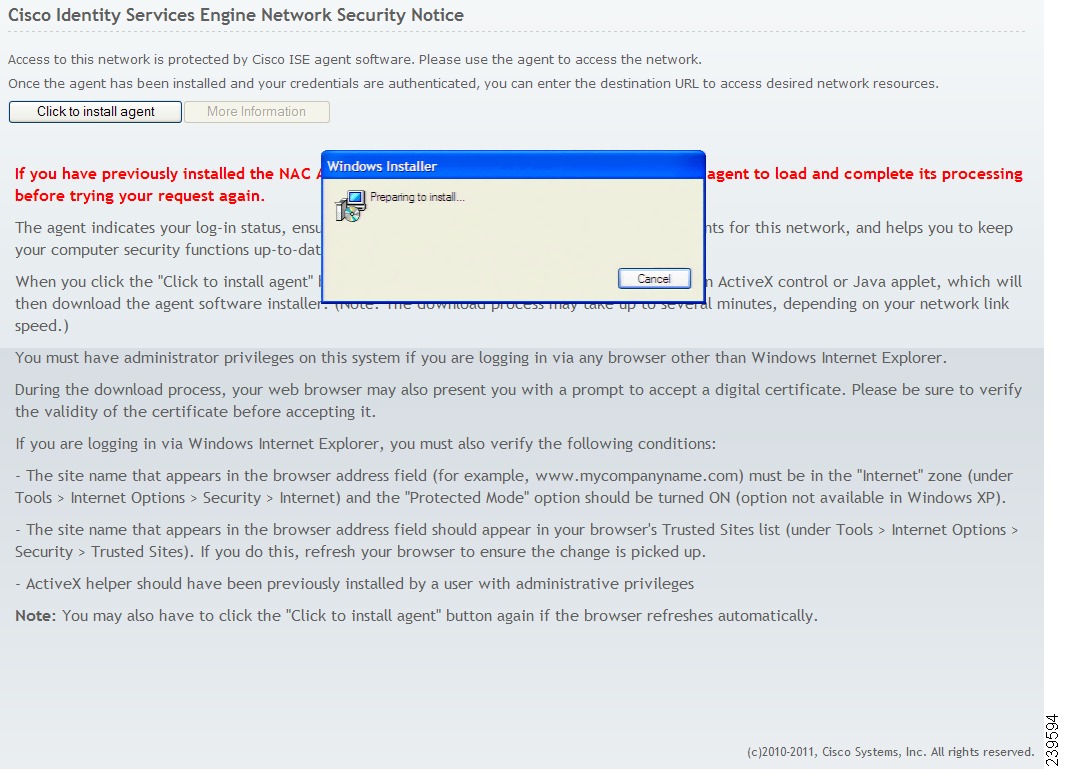
When users first log into a network that is managed by Cisco ISE and requires access via an agent, they are prompted to install temporal or persistent agents (as well as possible associated client provisioning resources) on the client machine to facilitate network access, client posture assessment, and other Cisco ISE network services.
To download agents and other client provisioning resources, users must have administrator privileges on their client machines and the browser session through which they are attempting to log into Cisco ISE. In addition, to successfully install the agent, users will likely need to explicitly accept ActiveX or Java applet installer functions.
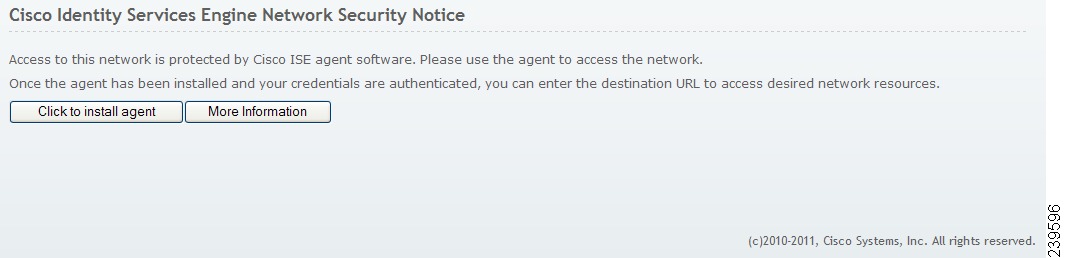
Once the browser session from that client machine reaches the specified access portal, Cisco ISE prompts the user to download and install a persistent agent (like the Cisco NAC Agent or Mac OS X Agent) or temporal agent (like the Cisco NAC Web Agent).
Note
Figure 18-10 shows a Cisco ISE welcome screen, prompting the user to download and install the Cisco NAC Agent on the client machine.
Figure 18-10 Cisco ISE Agent Download and Installation
Note
Once the user validates and accepts any certificate (or certificates) required to facilitate agent download and installation on the client machine, the ActiveX or Java applet installer process launches and provisions the agent installation package on the client machine.
Figure 18-11 shows an example of the user Cisco ISE browser session when the agent installation files have been downloaded, and the installer is preparing to install the Cisco NAC Agent application files on the client machine.
Figure 18-11 Preparing to Install Cisco NAC Agent
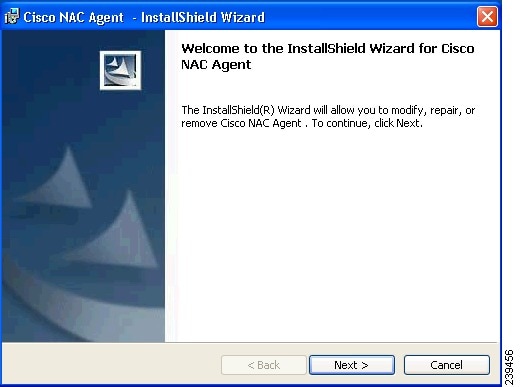
The agent InstallShield Wizard dialog appears (Figure 18-12).
Figure 18-12 Cisco NAC Agent InstallShield Wizard—Welcome
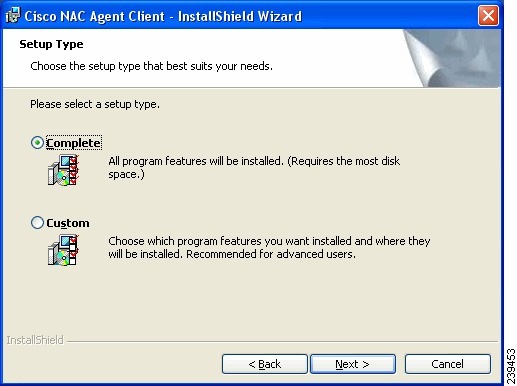
The user has the option to install the complete collection of agent files or specify one or more items by choosing the Custom option and clicking Next (Figure 18-13).
Figure 18-13 Cisco NAC Agent Installation—Setup Type
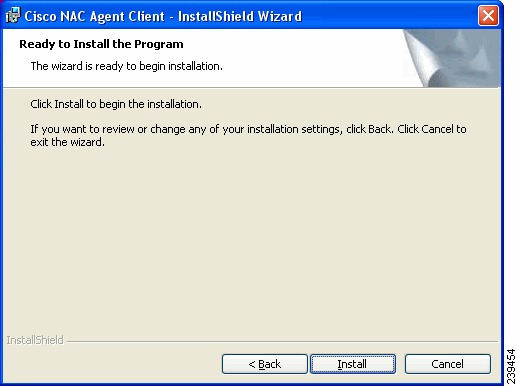
The agent InstallShield Wizard dialog appears (Figure 18-14).
Figure 18-14 Cisco NAC Agent InstallShield Wizard—Ready to Install
The setup wizard prompts the user through the short installation steps to install the agent to the C:\Program Files\Cisco\Cisco NAC Agent directory on the client machine.
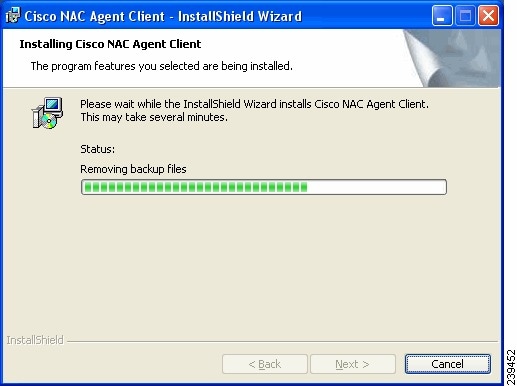
Figure 18-15 Cisco NAC Agent Installation In Progress
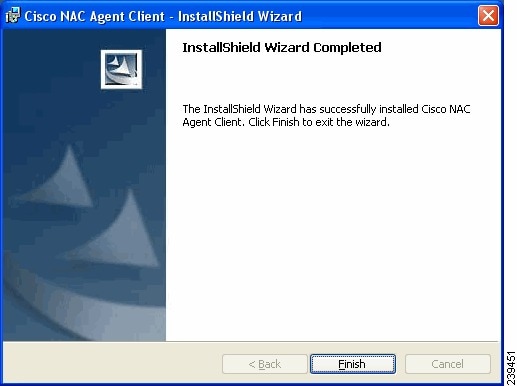
Figure 18-16 Cisco NAC Agent Installation Complete
When the InstallShield Wizard completes and the user clicks Finish, the agent automatically transmits the native operating system login credentials of the user to Cisco ISE for authentication and access to the internal network.
Note
If you have associated any posture assessment or profiling policies with the user role to which the user in question is assigned, those services initiate at this time. Users accessing the network via Cisco ISE (except for registered "guests") must also agree to the Acceptable Use Policy each time they log in. Additionally, these other client provisioning resources that you may have specified for the user role are now downloaded to the client machine to help facilitate network access:
•
•
•
Figure 18-17 displays an example of an agent compliance module update (which is always mandatory) at the time of agent installation on the client machine.
Figure 18-17 Cisco NAC Agent—Updating Agent Compliance Module
If you have not enabled the Is Upgrade Mandatory setting in the client provisioning resource policy, then the agent upgrade dialog would display a Cancel button as well as the OK button. This allows end users the option to cancel an agent upgrade if a more current version is available.
For details, see Configuring Client Provisioning Resource Policies.
Following successful agent installation, client posture assessment, and remediation, the agent notifies the user that their login session is complete and they are granted access to the network based on the assigned user role.
Note
Viewing Client Provisioning Reports and Events
•
•
Viewing Client Provisioning Reports in Cisco ISE
As a network administrator, you may need to access the Cisco ISE monitoring and troubleshooting functions to check on overall trends for successful or unsuccessful user login sessions, gather statistics about the number and types of client machines logging into the network during a specified time period, or check on any recent configuration changes in client provisioning resources.
The following examples provide a couple of common scenarios, however you should see Chapter 22, "Monitoring and Troubleshooting" for more details on using the Cisco ISE monitoring and troubleshooting capabilities to maximize the tools within your network deployment.
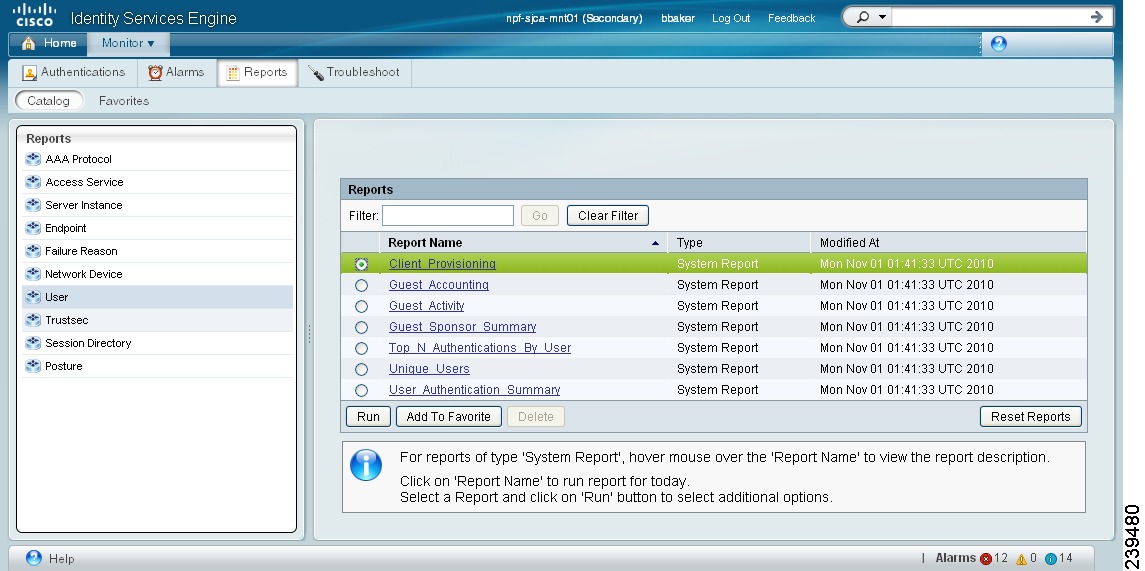
The Monitor > Reports > Catalog > User > Client Provisioning window displays statistics about successful and unsuccessful client provisioning requests (Figure 18-18).
Figure 18-18 Monitor > Reports > Catalog > User > Client Provisioning
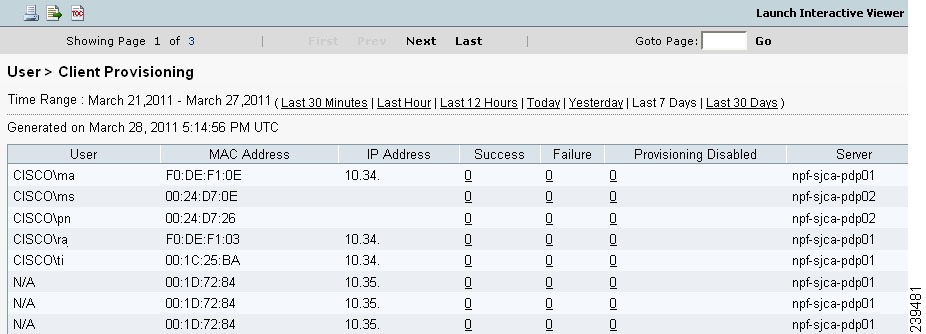
When you choose Run and specify one of the preset time periods, Cisco ISE combs the database and displays the resulting client provisioning data (Figure 18-19).
Figure 18-19 Client Provisioning Report Results
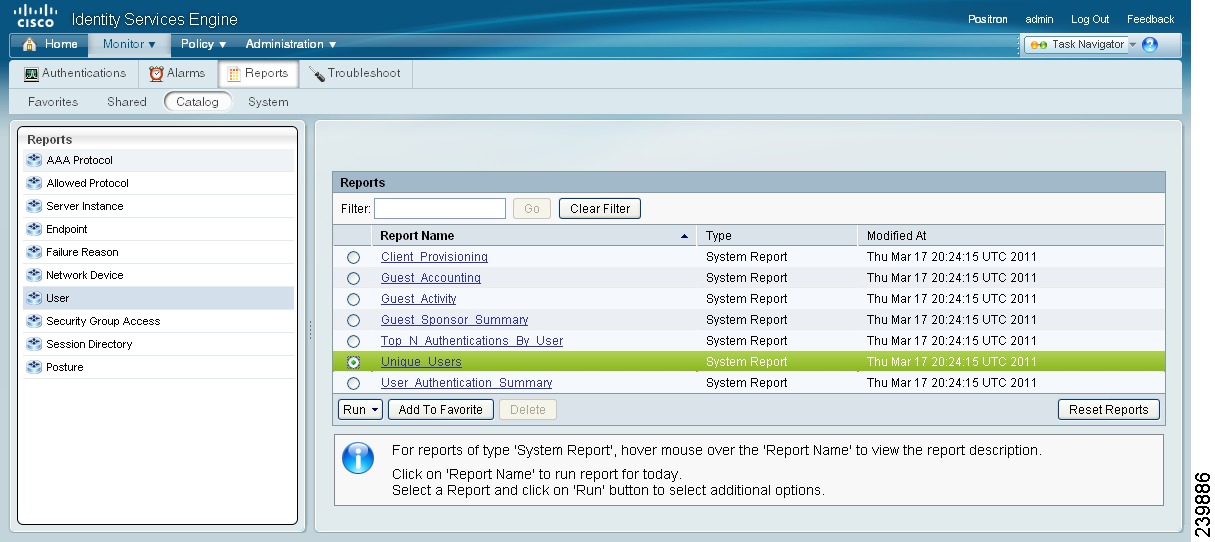
The Monitor > Reports > Catalog > User > Unique Users window displays statistics about known specific client access sessions initiated during the specified time period (Figure 18-20).
Figure 18-20 Monitor > Reports > Catalog > User > Unique Users
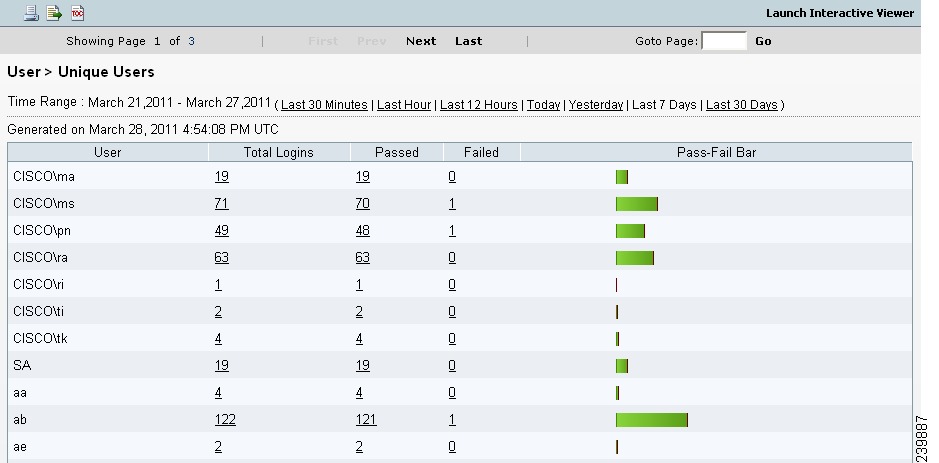
When you choose Run and specify one of the preset time periods, Cisco ISE combs the database and displays the resulting client provisioning data (Figure 18-21).
Figure 18-21 Unique Users Report Results
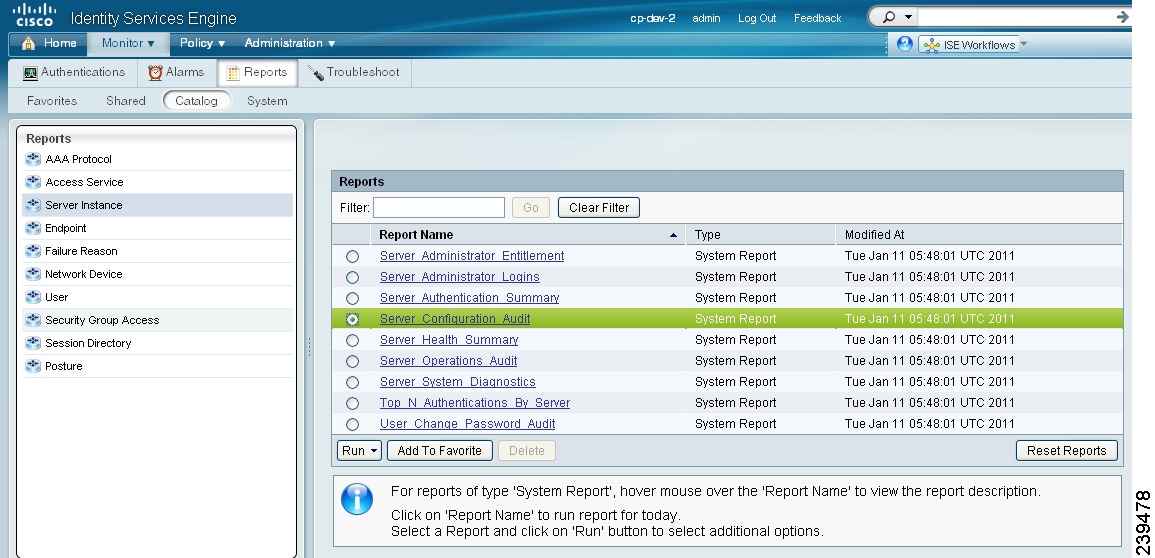
The Monitor > Reports > Catalog > Server Instance > Server Configuration Audit window displays information about recent client provisioning resource configuration changes (Figure 18-22).
Figure 18-22 Monitor > Reports > Catalog > Server Instance > Server Configuration Audit
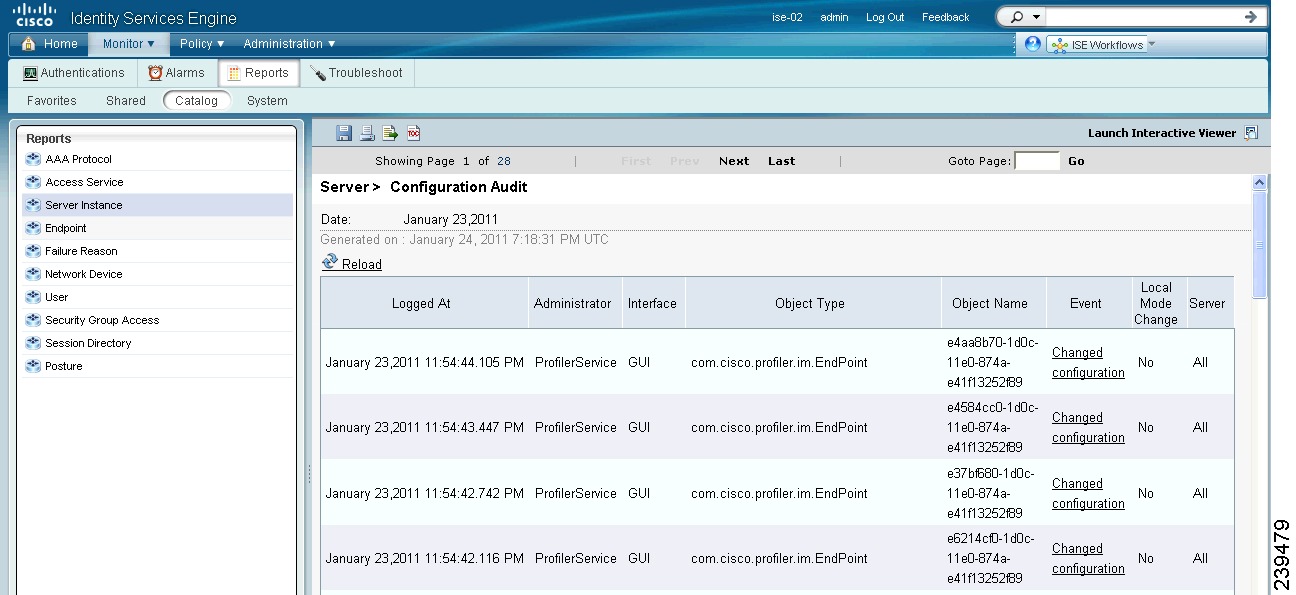
Choosing Run and specifying one of the preset time periods displays any configuration changes to client provisioning resources in Cisco ISE (for example, a newly uploaded agent version) within the time period specified (Figure 18-23).
Figure 18-23 Server Configuration Audit Report Results
Viewing Client Provisioning Event Logs in Cisco ISE
During Cisco ISE operation, you may need to search event log entries in order to help diagnose a possible problem with client login behavior. For example, you may need to determine the source of an issue where client machines on your network are not able to get client provisioning resource updates upon login.
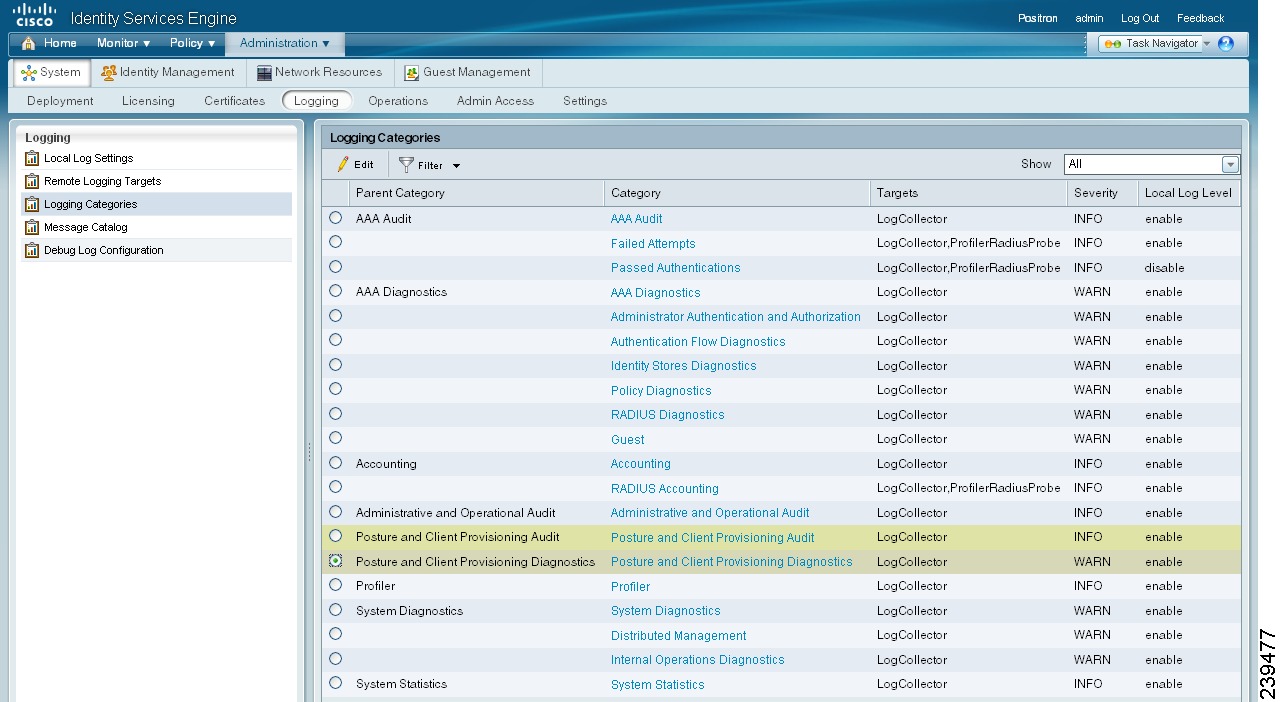
You can compile and view logging entries for Client Provisioning and Posture audit messages as well as diagnostics. See Chapter 13, "Logging" for more specific information on using the Cisco ISE log compilation capabilities to maximize the tools within your network deployment.
Figure 18-24 Administration > System > Logging > Categories > Posture and Client Provisioning Diagnostics