Release Notes for Cisco Aironet 802.11a/b/g Client Adapters (CB21AG and PI21AG) Install Wizard 4.0
Available Languages
Table Of Contents
Release Notes for Cisco Aironet 802.11a/b/g Client Adapters (CB21AG and PI21AG)
Install Wizard 4.0Transmit Power of Transmitted Packets Not Intended Power
PMKID Caching Not Working with CB21AG
Conflict between Cisco Security Agent 5.0 and the Install Wizard for the CB21AG or PI21AG
Mismatch between HP DC5 100 PCI Bus Controller and PCI Key Cache Register on PI21AG Chip
Installing the CB21AG Intermediate Driver Manually
Incompatibility between PACs Created by ACS 3.x.xx and ACS Version 4.0.xx
Conflict with Third-Party Supplicants
Customized Installation Images (Notice to IT Professionals)
Client Adapter Software Compatibility
Enabling CCKM Fast Secure Roaming
Access Point Setting for LEAP or EAP-FAST Authentication
EAP-FAST Fails When Access Point Configured as Local RADIUS Server
Reboot Required When Uninstalling ACU and ADU
Uninstalling Software Components
Auto Profile Selection Enables Scan of Wireless Modes in Auto-Selected Profiles
Windows Wireless Network Connection Icon Shows Unavailable Connection (Windows XP Only)
Installing or Upgrading Client Adapter Software
Installing the Client Adapter Software
Upgrading the Client Adapter Software
Installing a Microsoft Hot Fix for Group Policy Delay
Finding the ADU Version and Other Software Components
Getting Bug Information on Cisco.com
Obtaining Documentation, Obtaining Support, and Security Guidelines
Release Notes for Cisco Aironet 802.11a/b/g Client Adapters (CB21AG and PI21AG)
Install Wizard 4.0
Contents
This document contains the following sections:
•
Installing or Upgrading Client Adapter Software
•
•
Introduction
This document describes system requirements, important notes, new and changed information, installation and upgrade procedures, caveats for CB21AG and PI21AG client adapter Install Wizard release 4.0, and the following software included in the Install Wizard file:
•
•
•
System Requirements
You need the following items in order to install Install Wizard 4.0 and use its software components:
•
–
–
•

Note
•
•
•
•
•
–
–
•
•
•
–
–
–
–
–
–
–
•
•
Important Notes
Transmit Power of Transmitted Packets Not Intended Power
After a change in channel, the transmit power of transmitted packets might be lower or higher than the intended transmit power.
PMKID Caching Not Working with CB21AG
With a 4400 controller, a wireless LAN is configured with WPA2 and with 802.1X selected as the key management method. A client sends a PMKID in the association request, but the PMKID does not match the controller PMKID cache.
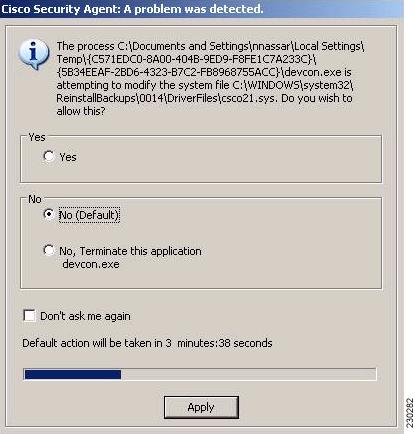
Conflict between Cisco Security Agent 5.0 and the Install Wizard for the CB21AG or PI21AG
If you have Cisco Security Agent (CSA) 5.0 installed on your computer and you attempt to run Install Wizard 4.0 (setup.exe) for the Cisco Aironet CB21AG or PI21AG wireless client, you might encounter one of two conditions that prevents the completion of software installation:
•
•
When you run setup.exe, the CSA opens the following dialog box (see Figure 1).
Figure 1 Cisco Security Agent Dialog Box
Mismatch between HP DC5 100 PCI Bus Controller and PCI Key Cache Register on PI21AG Chip
A mismatch exists between the HP DC5100 PCI bus controller and the PCI key cache register on the chip of the PI21AG. The key cache uses a 48-bit register in which the PI21AG sends out two write cycles on the PCI bus consecutively (DWORD and WORD). The controller on the device cannot handle two consecutive write cycles on the bus, which causes a fatal error on the PCI bus.
You should slow down the write operations to the key cache by performing a register read cycle before and after a register write cycle. To slow down the write operations, install registry key singleWriteKC=1. The path of the singleWriteKC=1 registry key is the following:
HKEY_LOCAL_MACHINE\SYSTEM\CurrentControlSet\Control\Class\{4D36E972-E325-11CE-BFC1-08002bE10318}
You should not see any system performance degradation because the key cache is only changed every few minutes. An additional read cycle before the second write cycle only lasts a few micro seconds in the PCI space.
Installing the CB21AG Intermediate Driver Manually
In some instances, the installation of the CB21AG software might not work as expected because the intermediate driver might not have installed correctly. In this situation, the installer might not detect this condition, and the rest of the software will not function correctly.
The CB21AG intermediate driver must be installed manually. To install the intermediate driver manually, follow these steps:
Step 1
Step 2
Step 3
Step 4
Step 5
Step 6
Step 7
Incompatibility between PACs Created by ACS 3.x.xx and ACS Version 4.0.xx
PACs that are created by ACS 3.x.xx are not compatible with ACS 4.0.xx. Client stations must import new PACs. If you select auto-provisioning, new PACs are automatically generated and used. However, if you select manual provisioning, you must manually export new PACs to the client stations.
If a user wants to authenticate to ACS 4.0.xx and 3.x.xx at different times, both PACs must remain on the client station. The ADU is capable of automatically selecting the appropriate PAC.
However, if you experience authentication failures after upgrading the software, delete all the PACs provisioned from the 3.x.xx server.
Conflict with Third-Party Supplicants
When using CB21AG and PI21AG release 4.0, you might encounter a conflict with third-party supplicants (such as the Juniper Odyssey) that causes the Cisco client adapter to lose connection. If you encounter such a conflict, disable third-party supplicants.
Customized Installation Images (Notice to IT Professionals)

Caution
Client Adapter Software Compatibility
Caution
Installing the Novell Client
If you are going to use the Novell Client, be sure to install it on your computer prior to installing the client adapter software.
Enabling CCKM Fast Secure Roaming
If you want to enable CCKM on the client adapter, you must choose the WPA/WPA2/CCKM security option, regardless of whether you want the adapter to use WPA or WPA2. The configuration of the access point to which your client adapter associates determines whether CCKM is used with 802.1x, WPA, or WPA2.
Access Point Setting for LEAP or EAP-FAST Authentication
Access points must be set for both Network-EAP and open authentication in order to associate to CB21AG and PI21AG client adapters running LEAP with WPA/WPA2/CCKM or EAP-FAST.
EAP-FAST Fails When Access Point Configured as Local RADIUS Server
The client adapter fails to authenticate using EAP-FAST when the access point is running Cisco IOS Release 12.3(2)JA2 and is configured as a local RADIUS server. The following message appears: "Unable to EAP-FAST authenticate the wireless user in the specified amount of time. Network infrastructure might be down."
GINA Error on Bootup
If your computer ever experiences a GINA error on bootup, boot to the safe mode command prompt. Then copy the msgina.dll file in the WinNT\System32 directory (Windows 2000) or Windows\System32 directory (Windows XP) to a file named cscogina.dll. The copy command enables you to copy a source file (msgina.dll) to a destination file (cscogina.dll) within the same directory.
Reboot Required When Uninstalling ACU and ADU
Caution
Uninstalling Software Components
All profiles and stored PAC files are deleted if you use the Uninstall the previous installation option on the Previous Installation Detected Install Wizard window to uninstall the client adapter software. Cisco recommends that you use the Profile Manager's export feature to save your profiles before uninstalling the software.
Profiles for PC-Cardbus Cards
The profiles for PC-Cardbus cards are tied to the slot in which the card is inserted. Therefore, you must always insert your PC-Cardbus card into the same slot, create profiles for both slots, or export the profiles for one slot and import them for the other slot.
Auto Profile Selection Enables Scan of Wireless Modes in Auto-Selected Profiles
When you enable auto profile selection, the client adapter ignores the selected profile's wireless mode setting and scans the wireless modes specified by all the profiles in the auto profile selection list for an available network. With this method, the client does not need to disassociate or to change the current profile while looking for networks in other profiles.
ASTU Exit Option
The Exit option on the Aironet System Tray Utility (ASTU) pop-up menu closes both ASTU and ADU.
Windows Wireless Network Connection Icon Shows Unavailable Connection (Windows XP Only)
If your computer is running Windows XP and you configured your client adapter using ADU, the Windows Wireless Network Connection icon in the Windows system tray may be marked with a red X and show an unavailable connection even though a wireless connection exists. This condition is caused by a conflict between ADU and Windows XP wireless network settings. Simply ignore the Windows icon and use the ASTU icon to verify the status of your client adapter's wireless connection.
Supporting Documentation
The Cisco Aironet 802.11a/b/g Wireless LAN Client Adapters (CB21AG and PI21AG) Installation and Configuration Guide (OL-4211-06) pertains specifically to CB21AG and PI21AG client adapters. If you are using a Cisco Aironet 340, 350, or CB20A client adapter, refer to the installation and configuration guide for that client adapter and your computer's operating system.
New and Changed Information
Management Frame Protection
CB21AG and PI21AG release 4.0 supports Management Frame Protection (MFP) when available and enabled on the wireless infrastructure. The CB21AG and PI21AG have MFP automatically enabled.
Installing or Upgrading Client Adapter Software
This section describes how to initially install or upgrade to CB21AG and PI21AG Install Wizard 4.0 on a computer running Windows 2000 or XP. If the client adapter software is not installed on your computer, follow the instructions in the "Installing or Upgrading Client Adapter Software" section below. If you are upgrading your client adapter software to release 4.0, follow the instructions in the "Upgrading the Client Adapter Software" section.
Installing the Client Adapter Software
This section describes how to install Cisco Aironet CB21AG or PI21AG client adapter driver and utilities from a single executable file named WinClient-802.11a-b-g-Ins-Wizard-vx.exe, where x represents the release number. Follow these steps to install these client adapter software components on a computer running Windows 2000 or XP.
Caution
Caution
Note
Note
Step 1
Step 2
Step 3
Step 4
http://www.cisco.com/public/sw-center/
Step 5
Step 6
Step 7
Step 8
Step 9
•
•
Step 10
Step 11
Step 12
Step 13
Step 14
Step 15
Step 16
Step 17
Step 18
Figure 2 Preparing Setup Window
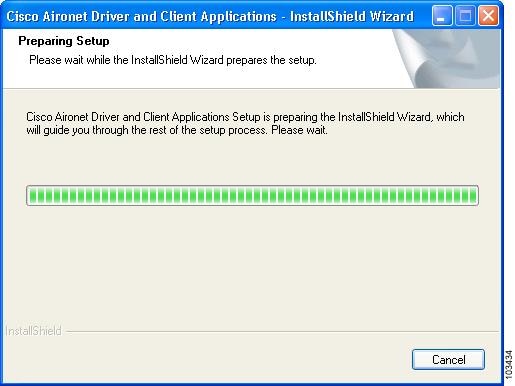
Figure 3 Cisco Aironet Installation Program Window

Step 19
Figure 4 Setup Type Window

Step 20
Note
•
•
•
Note
Step 21
Figure 5 Install Cisco Aironet Site Survey Utility Window

Note
Step 22
Note
The Choose Destination Location window appears (see Figure 6).
Figure 6 Choose Destination Location Window
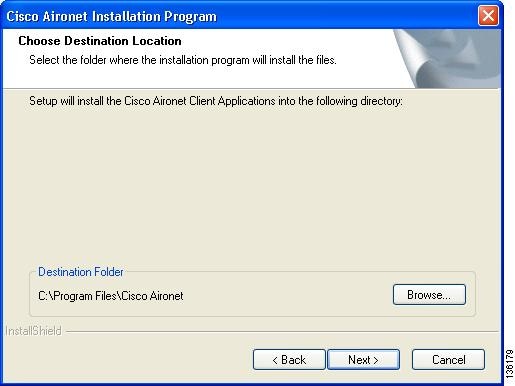
Step 23
•
Note
•
Note
Step 24
Figure 7 Select Program Folder Window

Step 25
Note
Step 26
Figure 8 IMPORTANT: Please Read! Window

Step 27
Figure 9 Choose Configuration Tool Window

Step 28
•
•
Table 1 compares Windows XP and ADU client adapter features.
Note
Step 29
Step 30
Figure 10 Enable Tray Icon Window
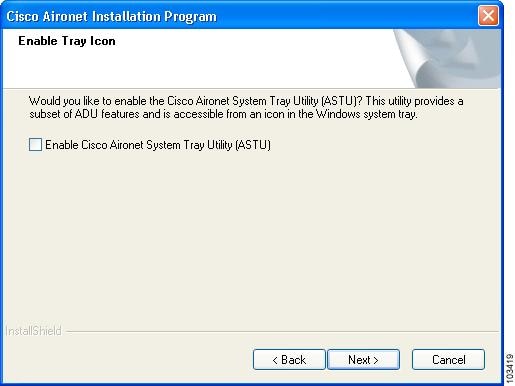
Step 31
Step 32
Figure 11 Setup Status Window
The installation process begins, and you are notified as each software component is installed.
Step 33
Step 34
Step 35
•
a.
b.
c.
d.
e.
f.
•
a.
b.
c.
d.
e.
f.
Step 36
Step 37
•
•
•
Note
Note
Upgrading the Client Adapter Software
Follow these steps to upgrade your CB21AG or PI21AG client adapter software to release 4.0 using the settings that were selected during the last installation.
Note
Step 1
Step 2
Step 3
Step 4
http://www.cisco.com/public/sw-center/
Step 5
Step 6
Step 7
Step 8
Step 9
•
•
Step 10
Step 11
Step 12
Step 13
Step 14
Step 15
Step 16
Step 17
Step 18
Figure 12 Preparing Setup Window
Figure 13 Previous Installation Detected Window
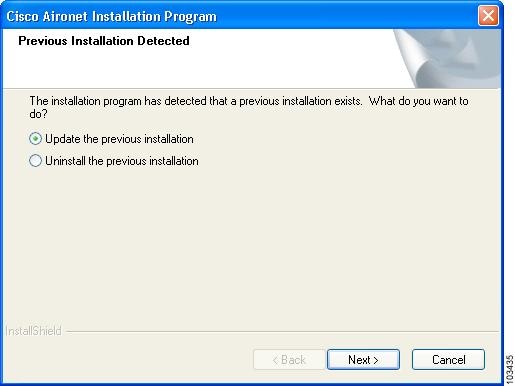
Step 19
Step 20
Note
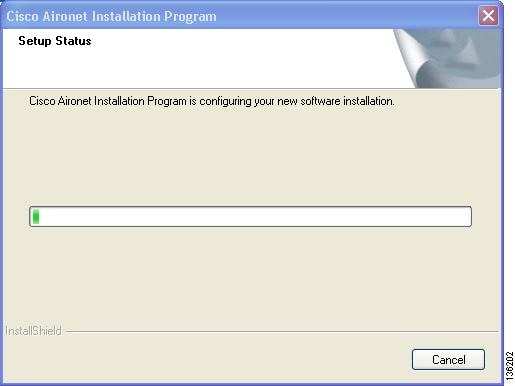
The Setup Status window appears (see Figure 14).
Figure 14 Setup Status Window
The upgrade process begins, and you are notified as each software component is installed.
Step 21
Installing a Microsoft Hot Fix for Group Policy Delay
If you want to use the Group Policy Delay parameter on the Profile Management (Security) window in ADU, you must install a Microsoft hot fix on computers running Windows 2000. The hot fix is incorporated into Windows XP Service Pack 2 and later.
The Group Policy Delay parameter enables you to specify how much time elapses before the Windows logon process starts Group Policy, a Windows feature used by administrators to specify configuration options for groups of users. The objective is to delay the start of Group Policy until wireless network authentication occurs. Follow the steps below to obtain and install the hot fix.
Note
http://support.microsoft.com/default.aspx?scid=fh;EN-US;win2000
Step 1
http://www.cisco.com/cgi-bin/tablebuild.pl/aironet_hotfix
Step 2
Note
Step 3
Step 4
Step 5
Step 6
Step 7
Step 8
Step 9
Note
Step 10
Step 11
Step 12
Finding Version Numbers
Follow the instructions in this section to find the version numbers of your client adapter's software components.
Finding the Driver Version
To find the driver version that is currently installed for your client adapter, open ADU, click the Diagnostics tab, and click Adapter Information. The Driver Version field on the Adapter Information window shows the current driver version.
Finding the ADU Version and Other Software Components
To find the version of ADU and other software components installed for your client adapter, open ADU and choose the About Aironet Desktop Utility option from the Help drop-down menu. The About window shows the current version of the following software components: ADU, ACAU, the authentication supplicant, the protocol driver, and the Windows NDIS miniport driver.
Caveats
This section describes the open and resolved caveats for the software components in this release.
Open Caveats
•
Profiles are created for the PCM350 client adapter. These profiles are added to the list of auto-selected profiles. The PCM350 is then unplugged. The CB21AG client adapter is inserted, and the ADU is installed. After rebooting the system, the Profile Migration Tool (PMT) is executed. All profiles are converted successfully, but the auto-selected profiles do not function correctly. The active profile in the ADU is still the default profile.
Workaround: None.
•
An ADU associated to an access point is configured with open WEP 128-bit encryption. The CB21AG is selected as the local area connection. In the local area connection Properties window, QoS Packet Scheduler is disabled. In the Windows Task Manager, the ADU is dimmed.
Workaround: None.
•
PEAP machine authentication is enabled on the ACS server, and the client gets a machine certificate via a Group Policy Object. The client uses a profile that is configured to use PEAP (EAP-GTC) or PEAP (MSCHAPv2) with Single Sign-On. The Use Machine Information for Domain Logon option is checked, and Use Windows User name and Password is checked for the profile. The Cached Logons value is set from 10 to 0 in the client registry editor.
After the system is rebooted, the ADU cannot log onto the Windows domain. The failed machine information logon record cannot be found in the ACS server log.
Workaround: None.
•
The installation of the ADU with PI21AG stalls on the Acer 6900 Veriton desktop with Windows XP SP2.
Workaround:
a.
b.
c.
d.
•
After the controller is configured to use a RADAR-detecting channel, a client is associated with WPA version 2 AES-CCMP with 802.1X. On an 802.11h access point, a RADAR-detection event is triggered. A valid 802.11h channel change frame is captured with a sniffer. The access point has client MFP enabled from the controller.
When the channel change frame is replayed to the client, the ADU disconnects the client adapter. The client adapter then reassociates with the controller access point.
Workaround: None.
•
The signal strength quality percentage in the CASSU interface is not the same in the ADU interface. When the device is taken out of access point range, the current signal quality is still 100% in the ADU, but signal quality is 0% in the CASSU.
Workaround: None.
•
When client MFP is disabled on the controller for a particular WLAN, beacons and probe responses that originate from APs in this WLAN have the SFA IE bit 0 set to 0. When a client associates with WPA version 2(MFP) EAP, the SFA IE bit 0 is 0, not 1. When a client associates with WPA version 2 (MFP) EAP with CCKM, the SFA IE bit 0 is 0, not 1.
Workaround: None.
•
The ADU interface is dimmed even though the CB21AG client adapter is not configured to use Windows Zero Configuration (WZC).
Workaround: Uninstall and reinstall the ADU software.
•
Wireless clients with CB21AG adapters sometimes run at 100% CPU for extended periods of time, which causes slow wireless connections and disconnections. The process monitor spikes to 100% CPU utilization because CPU is consumed by Deferred Procedure Calls (DPCs) and ISRs.
Workaround: None.
•
The client uses LEAP security with the automatic prompt option and WPA data encryption. When the device is booted up, the user logs onto the domain. LEAP shows the progress of the authentication and gets an IP address to log in. After login, LEAP asks for authentication data again.
Workaround: None.
•
A network has two access points with local RADIUS servers for EAP-FAST authentication. Even if the PAC has no expiration date, the PAC expires a few days after the initial authentication.
Workaround: None.
•
After the client is configured with at least one valid WLAN profile, the client is associated to the diagnostic channel. When the client initiates the send message portion of diagnostic channel mode testing, the WLC shows a parsing error.
Workaround: None.
•
PC-MY18A computer (NEC MateNX) with PI21AG stalls with ADU installation and must be rebooted.
Workaround: None.
•
After you connect CCXv5 client to the infrastructure device, start the DNS ping test from the Diagnostics tab and wait for the test results. The MAC address is invalid.
Workaround: None.
•
The client is configured with at least one valid WLAN profile, and diagnostic channel mode testing is initiated from the client. The client is associated to the diagnostic channel on the controller. If the you disable the internal DHCP server on the controller and enter the command show client ccx last-test-status on the WLC console, the WLC shows an invalid test status.
Workaround: None.
•
Security settings are changed on the controller. When the security settings are also changed on the client adapter, the adapter does not reassociate to the controller unless the adapter is disabled and then re-enabled.
Workaround: None.
•
A client adapter is associated to an access point that is set to -65 dBm. A neighboring access point is enabled and set to -87 dBm. The first access point is disabled, and the client adapter roams to the second access point. After 15 seconds, the first access point is re-enabled, but the client does not roam to it, even though it has a stronger signal. When the power level of the second access point is lowered to -95 dBm, the client adapter remains associated with it. When the power level for the second access point is reduced further so that there is no signal strength, the client adapter roams to the first access point.
The client adapter can also be made to roam by disabling and re-enabling its radio.
Workaround: None.
•
The power level of an access point is set to -65dBm, which is above the configured MRSP and the adaptive scan threshold (AST). The client associates to the access point. A neighboring access point is set to -85 dBm, which is below the configured MRSP and AST. The attenuation of the first access point is increased to -88 dBm. The client roams to the second access point even though the RSSI of this access point is below the MRSP.
Workaround: None.
•
The ADU is opened, and the CB21AG is associated to an access point. The device is then set to hibernate mode. When the device comes out of hibernate mode, the ADU switches to WZC approximately 10 percent of the time. This behavior is most often seen when the hibernate period is long (overnight).
Workaround: None.
•
Clients experience roaming delays of between 1 and 7 seconds with various configurations.
Workaround: None.
•
An access point sends an operating parameters request frame to a client. A wireless sniffer verifies that the access point sends the packet and that the client sends a response frame. The WLC Power Save Mode is in Normal Power Save Mode even if the wireless adapter Power Save Mode is set to Maximum Power Save Mode or Constantly Awake Mode.
Workaround: None.
Resolved Caveats
The following caveats are resolved in release 4.0:
•
Network bridging on a PC with the CB21AG client and a wired NIC initially allows traffic to pass from end to end. However, if the PC is rebooted, the network bridge does not start because the CB21AG does not associate to the access point.
•
The ADU sends an EAPOL-start message after 30 seconds. However, the login window does not appear. The ADU sends a second EAPOL-start message after 30 seconds. After this second message, the login window appears. It takes 60 seconds for the login window to appear, even when the Authentication Timeout Value is set to 30 seconds.
•
The CB21AG client does not follow the data-rate setting on the WLC. The client uses the 1-Mbps and 2-Mbps data rate for 802.11 data packets even though these rates were disabled on the WLC. This caveat was changed to an enhancement request.
•
CB21AG and PI21AG fail to associate at extended channels for 802.11A other than channels 149, 153, 157, and 161 in (-KE) country code setting for 4404 controller.
•
When the client first authenticates to AP1 and then to AP2 in roaming, there is packet loss when pinging. User credentials are not cached.
•
When the access point scan list logging timer is set to 0 seconds in the CASSU AP Scan List Logging Configuration window, the CASSU stops responding and CPU usage reaches 100 percent.
•
Wireless clients in Australia cannot associate with 802.11a access points. The 802.11a mid-band (5.4-5.725) is not working. The other two bands are working with the CB21AG and other vendors. Wireless clients can connect on channels 36, 40, 44, 48, 149, 153, 157, 161, and 165 but cannot connect on channels 52, 56, 60, and 64.
•
Getting Bug Information on Cisco.com
If you are a Cisco registered user, you can use the Cisco TAC Software Bug Toolkit, which consists of three tools (Bug Navigator, Bug Watcher, and Search by Bug ID Number) that help you to identify existing bugs (or caveats) in Cisco software products.
Access the TAC Software Bug Toolkit at the following URL:
http://www.cisco.com/pcgi-bin/Support/Bugtool/launch_bugtool.pl
Troubleshooting
For the most up-to-date, detailed troubleshooting information, refer to the Cisco TAC website at
http://www.cisco.com/en/US/support/index.html
Click Product Support > Wireless. Then choose your product and Troubleshooting to find information on the problem you are experiencing.
Related Documentation
For more information about ACAU and the Cisco Aironet CB21AG and PI21AG client adapters, refer to the following documents:
•
http://www.cisco.com/en/US/products/hw/wireless/ps4555/prod_maintenance_guides_list.html
•
•
http://www.cisco.com/en/US/products/hw/wireless/ps4555/prod_release_notes_list.html
Obtaining Documentation, Obtaining Support, and Security Guidelines
For information on obtaining documentation, obtaining support, providing documentation feedback, security guidelines, and also recommended aliases and general Cisco documents, see the monthly What's New in Cisco Product Documentation, which also lists all new and revised Cisco technical documentation, at:
http://www.cisco.com/en/US/docs/general/whatsnew/whatsnew.html
This document is to be used in conjunction with the documents listed in the "Related Documentation" section.
CCVP, the Cisco logo, and the Cisco Square Bridge logo are trademarks of Cisco Systems, Inc.; Changing the Way We Work, Live, Play, and Learn is a service mark of Cisco Systems, Inc.; and Access Registrar, Aironet, BPX, Catalyst, CCDA, CCDP, CCIE, CCIP, CCNA, CCNP, CCSP, Cisco, the Cisco Certified Internetwork Expert logo, Cisco IOS, Cisco Press, Cisco Systems, Cisco Systems Capital, the Cisco Systems logo, Cisco Unity, Enterprise/Solver, EtherChannel, EtherFast, EtherSwitch, Fast Step, Follow Me Browsing, FormShare, GigaDrive, HomeLink, Internet Quotient, IOS, iPhone, IP/TV, iQ Expertise, the iQ logo, iQ Net Readiness Scorecard, iQuick Study, LightStream, Linksys, MeetingPlace, MGX, Networking Academy, Network Registrar, PIX, ProConnect, ScriptShare, SMARTnet, StackWise, The Fastest Way to Increase Your Internet Quotient, and TransPath are registered trademarks of Cisco Systems, Inc. and/or its affiliates in the United States and certain other countries.
All other trademarks mentioned in this document or Website are the property of their respective owners. The use of the word partner does not imply a partnership relationship between Cisco and any other company. (0709R)
Copyright © 2007 Cisco Systems, Inc.
All rights reserved.
 Feedback
Contact Cisco
- Open a Support Case

- (Requires a Cisco Service Contract)