Release Notes for Cisco Aironet 802.11a/b/g Client Adapters (CB21AG and PI21AG) Install Wizard 3.0
Available Languages
Table Of Contents
Release Notes for Cisco Aironet 802.11a/b/g Client Adapters (CB21AG and PI21AG)
Install Wizard 3.0Mismatch between HP DC5 100 PCI Bus Controller and PCI Key Cache Register on PI21AG Chip
Installing the CB21AG Intermediate Driver Manually
Incompatibility between PACs Created by ACS Version 3.x.xx and ACS Version 4.0.xx
Conflict with Third-Party Supplicants
Customized Installation Images (Notice to IT Professionals)
Client Adapter Software Compatibility
Enabling CCKM Fast Secure Roaming
Access Point Setting for LEAP or EAP-FAST Authentication
EAP-FAST Fails When Access Point Configured as Local RADIUS Server
Reboot Required When Uninstalling ACU and ADU
Uninstalling Software Components
Auto Profile Selection Enables Scan of Wireless Modes in Auto-Selected Profiles
Windows Wireless Network Connection Icon Shows Unavailable Connection (Windows XP Only)
Installing or Upgrading Client Adapter Software
Installing the Client Adapter Software
Upgrading the Client Adapter Software
Installing a Microsoft Hot Fix for Group Policy Delay
Finding the Version of ADU and Other Software Components
Getting Bug Information on Cisco.com
Cisco Product Security Overview
Reporting Security Problems in Cisco Products
Obtaining Technical Assistance
Cisco Technical Support & Documentation Website
Definitions of Service Request Severity
Obtaining Additional Publications and Information
Release Notes for Cisco Aironet 802.11a/b/g Client Adapters (CB21AG and PI21AG)
Install Wizard 3.0
Contents
This document contains the following sections:
•
Installing or Upgrading Client Adapter Software
•
•
•
•
Introduction
This document describes system requirements, important notes, new and changed information, installation and upgrade procedures, and caveats for CB21AG and PI21AG client adapter Install Wizard release 3.0 and the following software included in the Install Wizard file:
•
•
•
System Requirements
You need the following items in order to install Install Wizard 3.0 and use its software components:
•
–
–
•

Note
•
•
•
•
•
–
–
•
•
•
–
–
–
–
–
–
–
Important Notes
Mismatch between HP DC5 100 PCI Bus Controller and PCI Key Cache Register on PI21AG Chip
A mismatch exists between the HP DC5100 PCI bus controller and the PCI key cache register on the chip of the PI21AG. The key cache uses a 48-bit register in which the PI21AG sends out two writes on the PCI bus back to back (DWORD and WORD). The controller on the device cannot handle two consecutive write cycles on the bus, which causes a fatal error on the PCI bus.
You should slow down the write operations to the key cache by performing a register read before and after a register write. To slow down the write operations, install registry key "singleWriteKC=1." The path of the "singleWriteKC=1" registry key is the following:
HKEY_LOCAL_MACHINE\SYSTEM\CurrentControlSet\Control\Class\{4D36E972-E325-11CE-BFC1-08002bE10318}
You should not see any system degradation or performance hits, as the key cache is only changed every few minutes. An additional read before the second write cycle only lasts a few micro seconds in the PCI space.
Installing the CB21AG Intermediate Driver Manually
In some instances, the installation of the CB21AG software might not work as expected because the intermediate driver might not have installed correctly. In this situation, the installer might not detect this condition, and the rest of the software will not function correctly.
The CB21AG intermediate driver must be installed manually. To install the intermediate driver manually, follow these steps:
Step 1
Step 2
Step 3
Step 4
Step 5
Step 6
Step 7
Incompatibility between PACs Created by ACS Version 3.x.xx and ACS Version 4.0.xx
PACs that are created by ACS version 3.x.xx are not compatible with ACS version 4.0.xx. Client stations must import new PACs. If you select auto-provisioning, new PACs will automatically be generated and used. However, if you select manual provisioning, you must manually export new PACs to the client stations.
If a user wants to authenticate to ACS version 4.0.xx and version 3.x.xx at different times, both PACs must remain on the client station. The ADU is capable of automatically selecting the appropriate PAC.
However, if you experiences authentication failures after upgrading the software, delete all the PACs provisioned from the 3.x.xx server.
Conflict with Third-Party Supplicants
When using release 3.0, you might encounter a conflict with third-party supplicants (such as the Meetinghouse Aegis or the Juniper Odyssey) that causes the Cisco client adapter to lose connection. If you encounter such a conflict, disable third-party supplicants.
Customized Installation Images (Notice to IT Professionals)

Caution
Client Adapter Software Compatibility
Caution
Installing the Novell Client
If you are going to use the Novell Client, be sure to install it on your computer prior to installing the client adapter software.
Enabling CCKM Fast Secure Roaming
If you want to enable CCKM on the client adapter, you must choose the WPA/WPA2/CCKM security option, regardless of whether you want the adapter to use WPA or WPA2. The configuration of the access point to which your client adapter associates determines whether CCKM will be used with 802.1x, WPA, or WPA2.
Access Point Setting for LEAP or EAP-FAST Authentication
Access points must be set for both Network-EAP and open authentication in order to associate to CB21AG and PI21AG client adapters running LEAP with WPA/WPA2/CCKM or EAP-FAST.
EAP-FAST Fails When Access Point Configured as Local RADIUS Server
The client adapter fails to authenticate using EAP-FAST when the access point is running Cisco IOS Release 12.3(2)JA2 and is configured as a local RADIUS server. The following message appears: "Unable to EAP-FAST authenticate the wireless user in the specified amount of time. Network infrastructure might be down."
GINA Error on Bootup
If your computer ever experiences a GINA error on bootup, boot to the safe mode command prompt. Then copy the msgina.dll file in the WinNT\System32 directory (Windows 2000) or Windows\System32 directory (Windows XP) over to a file named cscogina.dll. The copy command enables you to copy a source file (msgina.dll) to a destination file (cscogina.dll) within the same directory.
Reboot Required When Uninstalling ACU and ADU
Caution
Uninstalling Software Components
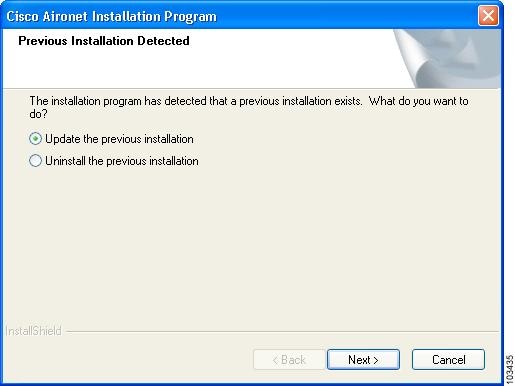
All profiles and stored PAC files are deleted if you use the Uninstall the previous installation option on the Previous Installation Detected Install Wizard window to uninstall the client adapter software. Cisco recommends that you use the Profile Manager's export feature to save your profiles before uninstalling the software.
Profiles for PC-Cardbus Cards
The profiles for PC-Cardbus cards are tied to the slot in which the card is inserted. Therefore, you must always insert your PC-Cardbus card into the same slot, create profiles for both slots, or export the profiles for one slot and import them for the other slot.
Auto Profile Selection Enables Scan of Wireless Modes in Auto-Selected Profiles
When you enable auto profile selection, the client adapter ignores the selected profile's wireless mode setting and scans the wireless modes specified by all the profiles in the auto profile selection list for an available network. Using this method, the client does not need to disassociate nor change the current profile while looking for networks in other profiles.
ASTU Exit Option
The Exit option on the Aironet System Tray Utility (ASTU) pop-up menu closes both ASTU and ADU.
Windows Wireless Network Connection Icon Shows Unavailable Connection (Windows XP Only)
If your computer is running Windows XP and you configured your client adapter using ADU, the Windows Wireless Network Connection icon in the Windows system tray may be marked with a red X and show an unavailable connection even though a wireless connection exists. This condition is caused by a conflict between ADU and Windows XP's wireless network settings. Simply ignore the Windows icon and use the ASTU icon to check the status of your client adapter's wireless connection.
Supporting Documentation
The Cisco Aironet 802.11a/b/g Wireless LAN Client Adapters (CB21AG and PI21AG) Installation and Configuration Guide (OL-4211-05) pertains specifically to CB21AG and PI21AG client adapters. If you are using a Cisco Aironet 340, 350, or CB20A client adapter, refer to the Installation and Configuration Guide for that client adapter and your computer's operating system.
New and Changed Information
EAP-FAST Enhancements
The following is a list of EAP-FAST enhancements, which are accessible through the ADU user interface:
•
Version 3.0 of ADU supports three EAP methods in both the PAC auto provisioning phase and the EAP-FAST authentication phase. These methods are:
–
–
–
•
Version 3.0 of ADU has updated PAC configuration screens.
•
For more information about the new updates, refer to chapters 6 and 5 of the Cisco Aironet 802.11a/b/g Wireless LAN Client Adapters (CB21AG and PI21AG) Installation and Configuration Guide, OL-4211-05.
PAC Export
In the previous version, when an EAP-FAST profile is exported or imported, the PAC data linked with the profile was getting ignored. To solve this problem, version 3.0 of ADU supports the exporting of PAC data using .PAC files.
Installing or Upgrading Client Adapter Software
This section describes how to initially install or upgrade to CB21AG and PI21AG Install Wizard 3.0 on a computer running Windows 2000 or XP. If the client adapter software is not installed on your computer, follow the instructions in the "Installing or Upgrading Client Adapter Software" section below. If you are upgrading your client adapter software to release 3.0, follow the instructions in the "Upgrading the Client Adapter Software" section.
Installing the Client Adapter Software
This section describes how to install Cisco Aironet CB21AG or PI21AG client adapter driver and utilities from a single executable file named WinClient-802.11a-b-g-Ins-Wizard-vx.exe, where x represents the release number. Follow these steps to install these client adapter software components on a computer running Windows 2000 or XP.
Caution
Caution
Note
Note
Step 1
Step 2
Step 3
Step 4
http://www.cisco.com/public/sw-center/
Step 5
Step 6
Step 7
Step 8
Step 9
•
•
Step 10
Step 11
Step 12
Step 13
Step 14
Step 15
Step 16
Step 17
Step 18
Figure 1 Preparing Setup Window
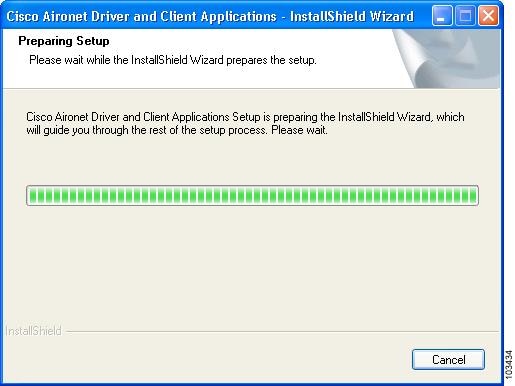
Figure 2 Cisco Aironet Installation Program Window

Step 19
Figure 3 Setup Type Window

Step 20
Note
•
•
•
Note
Step 21
Figure 4 Install Cisco Aironet Site Survey Utility Window

Note
Step 22
Note
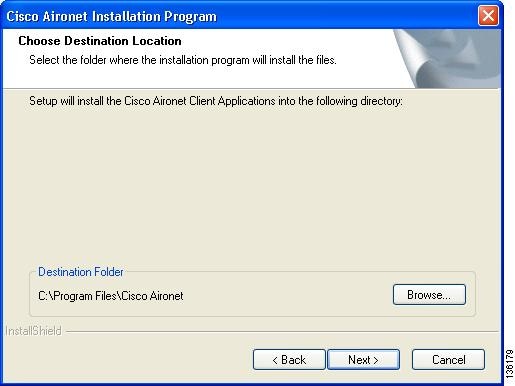
The Choose Destination Location window appears (see Figure 5).
Figure 5 Choose Destination Location Window
Step 23
•
Note
•
Note
Step 24
Figure 6 Select Program Folder Window

Step 25
Note
Step 26
Figure 7 IMPORTANT: Please Read! Window

Step 27
Figure 8 Choose Configuration Tool Window

Step 28
•
•
Table 1 compares Windows XP and ADU client adapter features.
Note
Step 29
Step 30
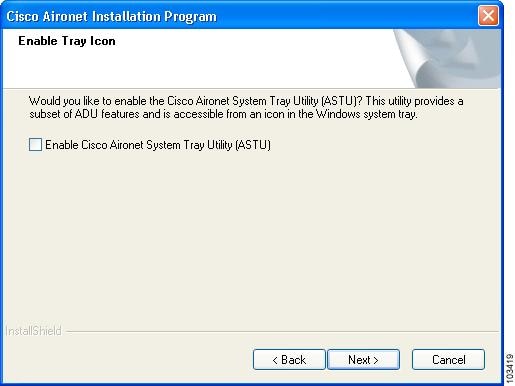
Figure 9 Enable Tray Icon Window
Step 31
Step 32
Figure 10 Setup Status Window
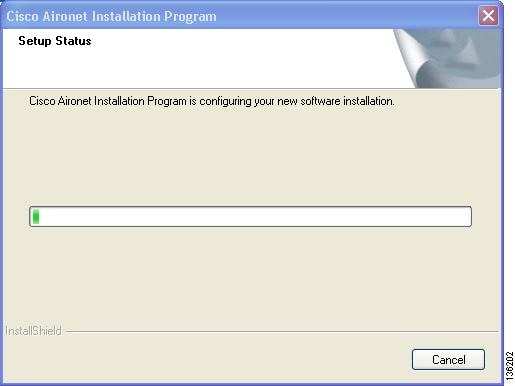
The installation process begins, and you are notified as each software component is installed.
Step 33
Step 34
Step 35
•
a.
b.
c.
d.
e.
f.
•
a.
b.
c.
d.
e.
f.
Step 36
Step 37
•
•
•
Note
Note
Upgrading the Client Adapter Software
Follow these steps to upgrade your CB21AG or PI21AG client adapter software to release 3.0 using the settings that were selected during the last installation.
Note
Step 1
Step 2
Step 3
Step 4
http://www.cisco.com/public/sw-center/
Step 5
Step 6
Step 7
Step 8
Step 9
•
•
Step 10
Step 11
Step 12
Step 13
Step 14
Step 15
Step 16
Step 17
Step 18
Figure 11 Preparing Setup Window
Figure 12 Previous Installation Detected Window
Step 19
Step 20
Note
The Setup Status window appears (see Figure 13).
Figure 13 Setup Status Window
The upgrade process begins, and you are notified as each software component is installed.
Step 21
Installing a Microsoft Hot Fix for Group Policy Delay
If you want to use the Group Policy Delay parameter on the Profile Management (Security) window in ADU, you must install a Microsoft hot fix on computers running Windows 2000. The hot fix is incorporated into Windows XP Service Pack 2 and later.
The Group Policy Delay parameter enables you to specify how much time elapses before the Windows logon process starts Group Policy, a Windows feature used by administrators to specify configuration options for groups of users. The objective is to delay the start of Group Policy until wireless network authentication occurs. Follow the steps below to obtain and install the hot fix.
Note
http://support.microsoft.com/default.aspx?scid=fh;EN-US;win2000
Step 1
http://www.cisco.com/cgi-bin/tablebuild.pl/aironet_hotfix
Step 2
Note
Step 3
Step 4
Step 5
Step 6
Step 7
Step 8
Step 9
Note
Step 10
Step 11
Step 12
Finding Version Numbers
Follow the instructions in this section to find the version numbers of your client adapter's software components.
Finding the Driver Version
To find the driver version that is currently installed for your client adapter, open ADU, click the Diagnostics tab, and click Adapter Information. The Driver Version field on the Adapter Information window shows the current driver version.
Finding the Version of ADU and Other Software Components
To find the version of ADU and other software components installed for your client adapter, open ADU and choose the About Aironet Desktop Utility option from the Help drop-down menu. The About window shows the current version of the following software components: ADU, ACAU, the authentication supplicant, the protocol driver, and the Windows NDIS miniport driver.
Caveats
This section describes the open, resolved, and closed caveats for the software components in this release.
Open Caveats
The following caveats are not resolved in CB21AG and PI21AG client adapter software release 3.0:
•
•
When using the Cisco AIR-CB21AG-A-K9 802.11/a/b/g client adapters and running ADU 2.6.0.1, if you try to select ADU clients using EAP-TLS authentication, you see a message stating that no machine certificates were found on your computer, even though the application automatically finds the machine certificates. Also, if you select Use machine Information for Domain Logon under EAP-TLS configuration, you get the same error message. This message will not cause any problem and should only be seen once.
•
This behavior is by design. The ACS server does not log an EAP failure because it gives the user a chance to reauthenticate.
•
This only occurs on a machine with the Traditional Chinese language pack and a 2-byte username. When configuring the EAP-FAST authentication with Machine PAC, the STAUT failed to roam between access points.
•
In the ADU application, if you click Current Status and Advanced, you will notice that the Network Name (SSID) field displays only the first two characters of the SSID in the Advanced Status window. This happens when the SSID is a long string of characters with white spaces in between. The window wraps the string around into multiple lines and shows only one line.
•
Workaround: Uncheck the session resume check box in the ACS 4.0 RADIUS server.
•
With a PI21AG card, long software installations over the network might fail. If error reporting is enabled in the BIOS, this failure might appear as a BIOS-level blue screen error. If error reporting is not enabled, this failure appears as a loss of network connectivity even though the card appears to be associated.
This condition occurs when the PI21AG card is used in a HP DC5100 and is associtated to an AP1200 with an 802.11b radio. This condition does not occur with an AP with an 802.11g radio.
•
A CB21AG client that is operating in an LWAPP infrastructure loses connection for small periods of time. When the AP is performing radio resource management (RRM), the AP goes off channel. During these periods, the AP cannot hear and answer ACK and RTS frames from the client. The client card initiates a scan for another AP, and network traffic for the client is affected.
Workaround: Increase the HwTxRetries value from 4 to 14 (registry entry) so that the client card continues to retry for the 20 to 30 milliseconds that the AP is off channel.
Resolved Caveats
The following caveat has been resolved in release 3.0:
•
The client adapter may be unable to find a domain controller when attempting to LEAP authenticate. This state can be a normal condition due to network unavailability.
•
The client adapter may take up to 40 seconds to switch from one profile to another.
•
The CB21AG and PI21AG client adapters are unable to successfully EAP-FAST authenticate with an ACS server when the username contains multi-byte characters.
•
The LEAP and EAP-FAST Authentication Status windows show a successful status even if an IPX frame type is not detected or a domain controller is not found on the network.
•
When an IOS access point is configured with an SSID mapped to a VLAN and the SSID is secured with EAP and WPA-TKIP, then in the site survey utility's AP scan list, the access point may toggle between "Open" and "Secure." In this mode, the access point sends out the network configuration information in the beacon and probe responses. Certain fields may differ between beacons and probe responses when VLANs are enabled. The client adapter driver may report the fields from the beacon frame or probe response frame, whichever is received last.
•
When using MAC address authentication, the client adapter fails to authenticate due to a timing error. To work around this problem, do not use MAC address authentication.
•
A LEAP-authenticated CB21AG using WEP mandatory encryption might lose connectivity after some time and be unable to find an AP. This condition has been observed for an IBM T42 laptop running Windows XP, service pack 1 or 2.
•
PEAP-GTC/AES authentications passes when "any" is chosen under the trusted root certificate authorities. PEAP-GTC/AES authentications also passes with any vendor certificate chosen under the trusted root certificate authorities.
•
After the first installation and reboot, all areas are grayed out after clicking on the ADU icon in Profile Management. The user cannot create or modify the profile. After reinstallation and reboot, the user can configure the SSID and associate to an access point.
•
A CB21AG client configured for WPA, WPA2, CCKM, or EAP is unable to associate on an SSID that is configured for AES+CCKM.
•
The Site Survey Utility bundled with the CB21AG card is slow to recognize changes to the RF environment.
•
The link status on the ADU is showing "authenticating...." even though the client is already authenticated and is able to pass traffic.
•
While importing PAC files, the error message "Unable to save imported PAC data. Access denied." may appear. This problem affects versions 2.1 and 2.5 of ADU.
•
A CB21AG/PI21AG client, when roaming twice in rapid succession, might undergo a link-layer media disconnect event, which will cause upper layer applications to lose connectivity for 30-40 seconds.
•
The ADU client does display the password window under these circumstances:
–
–
•
CB21AG clients authenticate using EAP-FAST and receive a PAC through auto-provisioning from a local RADIUS server (access point), but between one hour and a few days later, clients do not have a valid PAC when booted. 350 Clients do not see this issue.
•
The EAP-FAST PAC file that is exported by the CSUtil utility on ACS 4.0 cannot be imported to ADU manually.
Getting Bug Information on Cisco.com
If you are a Cisco registered user, you can use the Cisco TAC Software Bug Toolkit, which consists of three tools (Bug Navigator, Bug Watcher, and Search by Bug ID Number) that help you to identify existing bugs (or caveats) in Cisco software products.
Access the TAC Software Bug Toolkit at the following URL:
http://www.cisco.com/pcgi-bin/Support/Bugtool/launch_bugtool.pl
Troubleshooting
For the most up-to-date, detailed troubleshooting information, refer to the Cisco TAC website at
http://www.cisco.com/en/US/support/index.html
Click Product Support > Wireless. Then choose your product and Troubleshooting to find information on the problem you are experiencing.
Related Documentation
For more information about ACAU and the Cisco Aironet CB21AG and PI21AG client adapters, refer to the following documents:
•
http://www.cisco.com/en/US/products/hw/wireless/ps4555/prod_maintenance_guides_list.html
•
•
http://www.cisco.com/en/US/products/hw/wireless/ps4555/prod_release_notes_list.html
Obtaining Documentation
Cisco documentation and additional literature are available on Cisco.com. Cisco also provides several ways to obtain technical assistance and other technical resources. These sections explain how to obtain technical information from Cisco Systems.
Cisco.com
You can access the most current Cisco documentation at this URL:
http://www.cisco.com/techsupport
You can access the Cisco website at this URL:
You can access international Cisco websites at this URL:
http://www.cisco.com/public/countries_languages.shtml
Product Documentation DVD
The Product Documentation DVD is a comprehensive library of technical product documentation on a portable medium. The DVD enables you to access multiple versions of installation, configuration, and command guides for Cisco hardware and software products. With the DVD, you have access to the same HTML documentation that is found on the Cisco website without being connected to the Internet. Certain products also have .PDF versions of the documentation available.
The Product Documentation DVD is available as a single unit or as a subscription. Registered Cisco.com users (Cisco direct customers) can order a Product Documentation DVD (product number DOC-DOCDVD= or DOC-DOCDVD=SUB) from Cisco Marketplace at this URL:
http://www.cisco.com/go/marketplace/
Ordering Documentation
Registered Cisco.com users may order Cisco documentation at the Product Documentation Store in the Cisco Marketplace at this URL:
http://www.cisco.com/go/marketplace/
Nonregistered Cisco.com users can order technical documentation from 8:00 a.m. to 5:00 p.m. (0800 to 1700) PDT by calling 1 866 463-3487 in the United States and Canada, or elsewhere by calling 011 408 519-5055. You can also order documentation by e-mail at tech-doc-store-mkpl@external.cisco.com or by fax at 1 408 519-5001 in the United States and Canada, or elsewhere at 011 408 519-5001.
Documentation Feedback
You can rate and provide feedback about Cisco technical documents by completing the online feedback form that appears with the technical documents on Cisco.com.
You can submit comments about Cisco documentation by using the response card (if present) behind the front cover of your document or by writing to the following address:
Cisco Systems
Attn: Customer Document Ordering
170 West Tasman Drive
San Jose, CA 95134-9883We appreciate your comments.
Cisco Product Security Overview
Cisco provides a free online Security Vulnerability Policy portal at this URL:
http://www.cisco.com/en/US/products/products_security_vulnerability_policy.html
From this site, you will find information about how to:
•
•
•
A current list of security advisories, security notices, and security responses for Cisco products is available at this URL:
To see security advisories, security notices, and security responses as they are updated in real time, you can subscribe to the Product Security Incident Response Team Really Simple Syndication (PSIRT RSS) feed. Information about how to subscribe to the PSIRT RSS feed is found at this URL:
http://www.cisco.com/en/US/products/products_psirt_rss_feed.html
Reporting Security Problems in Cisco Products
Cisco is committed to delivering secure products. We test our products internally before we release them, and we strive to correct all vulnerabilities quickly. If you think that you have identified a vulnerability in a Cisco product, contact PSIRT:
•
An emergency is either a condition in which a system is under active attack or a condition for which a severe and urgent security vulnerability should be reported. All other conditions are considered nonemergencies.
•
In an emergency, you can also reach PSIRT by telephone:
•
•

Tip
Never use a revoked or an expired encryption key. The correct public key to use in your correspondence with PSIRT is the one linked in the Contact Summary section of the Security Vulnerability Policy page at this URL:
http://www.cisco.com/en/US/products/products_security_vulnerability_policy.html
The link on this page has the current PGP key ID in use.
If you do not have or use PGP, contact PSIRT at the aforementioned e-mail addresses or phone numbers before sending any sensitive material to find other means of encrypting the data.
Obtaining Technical Assistance
Cisco Technical Support provides 24-hour-a-day award-winning technical assistance. The Cisco Technical Support & Documentation website on Cisco.com features extensive online support resources. In addition, if you have a valid Cisco service contract, Cisco Technical Assistance Center (TAC) engineers provide telephone support. If you do not have a valid Cisco service contract, contact your reseller.
Cisco Technical Support & Documentation Website
The Cisco Technical Support & Documentation website provides online documents and tools for troubleshooting and resolving technical issues with Cisco products and technologies. The website is available 24 hours a day, at this URL:
http://www.cisco.com/techsupport
Access to all tools on the Cisco Technical Support & Documentation website requires a Cisco.com user ID and password. If you have a valid service contract but do not have a user ID or password, you can register at this URL:
http://tools.cisco.com/RPF/register/register.do
Note
Submitting a Service Request
Using the online TAC Service Request Tool is the fastest way to open S3 and S4 service requests. (S3 and S4 service requests are those in which your network is minimally impaired or for which you require product information.) After you describe your situation, the TAC Service Request Tool provides recommended solutions. If your issue is not resolved using the recommended resources, your service request is assigned to a Cisco engineer. The TAC Service Request Tool is located at this URL:
http://www.cisco.com/techsupport/servicerequest
For S1 or S2 service requests, or if you do not have Internet access, contact the Cisco TAC by telephone. (S1 or S2 service requests are those in which your production network is down or severely degraded.) Cisco engineers are assigned immediately to S1 and S2 service requests to help keep your business operations running smoothly.
To open a service request by telephone, use one of the following numbers:
Asia-Pacific: +61 2 8446 7411 (Australia: 1 800 805 227)
EMEA: +32 2 704 55 55
USA: 1 800 553-2447For a complete list of Cisco TAC contacts, go to this URL:
http://www.cisco.com/techsupport/contacts
Definitions of Service Request Severity
To ensure that all service requests are reported in a standard format, Cisco has established severity definitions.
Severity 1 (S1)—An existing network is down, or there is a critical impact to your business operations. You and Cisco will commit all necessary resources around the clock to resolve the situation.
Severity 2 (S2)—Operation of an existing network is severely degraded, or significant aspects of your business operations are negatively affected by inadequate performance of Cisco products. You and Cisco will commit full-time resources during normal business hours to resolve the situation.
Severity 3 (S3)—Operational performance of the network is impaired, while most business operations remain functional. You and Cisco will commit resources during normal business hours to restore service to satisfactory levels.
Severity 4 (S4)—You require information or assistance with Cisco product capabilities, installation, or configuration. There is little or no effect on your business operations.
Obtaining Additional Publications and Information
Information about Cisco products, technologies, and network solutions is available from various online and printed sources.
•
•
http://www.cisco.com/go/marketplace/
•
•
•
http://www.cisco.com/go/iqmagazine
or view the digital edition at this URL:
http://ciscoiq.texterity.com/ciscoiq/sample/
•
•
http://www.cisco.com/en/US/products/index.html
•
http://www.cisco.com/discuss/networking
•
http://www.cisco.com/en/US/learning/index.html
This document is to be used in conjunction with the documents listed in the "Related Documentation" section.
CCSP, CCVP, the Cisco Square Bridge logo, Follow Me Browsing, and StackWise are trademarks of Cisco Systems, Inc.; Changing the Way We Work, Live, Play, and Learn, and iQuick Study are service marks of Cisco Systems, Inc.; and Access Registrar, Aironet, BPX, Catalyst, CCDA, CCDP, CCIE, CCIP, CCNA, CCNP, Cisco, the Cisco Certified Internetwork Expert logo, Cisco IOS, Cisco Press, Cisco Systems, Cisco Systems Capital, the Cisco Systems logo, Cisco Unity, Enterprise/Solver, EtherChannel, EtherFast, EtherSwitch, Fast Step, FormShare, GigaDrive, GigaStack, HomeLink, Internet Quotient, IOS, IP/TV, iQ Expertise, the iQ logo, iQ Net Readiness Scorecard, LightStream, Linksys, MeetingPlace, MGX, the Networkers logo, Networking Academy, Network Registrar, Packet, PIX, Post-Routing, Pre-Routing, ProConnect, RateMUX, ScriptShare, SlideCast, SMARTnet, The Fastest Way to Increase Your Internet Quotient, and TransPath are registered trademarks of Cisco Systems, Inc. and/or its affiliates in the United States and certain other countries.
All other trademarks mentioned in this document or Website are the property of their respective owners. The use of the word partner does not imply a partnership relationship between Cisco and any other company. (0601R)
Copyright © 2006 Cisco Systems, Inc.
All rights reserved.
 Feedback
Contact Cisco
- Open a Support Case

- (Requires a Cisco Service Contract)