- Preface
- Chapter 1 - Overview
- Chapter 2 - Preparing for Installation
- Chapter 3 - Installing and Configuring the Client Adapter
- Chapter 4 - Enabling Security Features
- Chapter 5 - Advanced Configuration
- Chapter 6 - Performing Diagnostics
- Chapter 7 - Routine Procedures
- Chapter 8 - Troubleshooting
- Appendix A - Technical Specifications
- Appendix B - Channels
- Appendix C - Translated Safety Warnings
- Appendix D - Declarations of Conformity and Regulatory Information
- Glossary
Cisco Aironet Wireless LAN Adapters Installation and Configuration Guide for Linux
Bias-Free Language
The documentation set for this product strives to use bias-free language. For the purposes of this documentation set, bias-free is defined as language that does not imply discrimination based on age, disability, gender, racial identity, ethnic identity, sexual orientation, socioeconomic status, and intersectionality. Exceptions may be present in the documentation due to language that is hardcoded in the user interfaces of the product software, language used based on RFP documentation, or language that is used by a referenced third-party product. Learn more about how Cisco is using Inclusive Language.
- Updated:
- May 4, 2007
Chapter: Chapter 4 - Enabling Security Features
Enabling Security Features
This chapter provides instructions for enabling and configuring your client adapter's security features.
The following topics are covered in this chapter:
•![]() Using the Client Encryption Manager
Using the Client Encryption Manager
•![]() WEP
WEP
•![]() Selecting an Existing WEP Key
Selecting an Existing WEP Key
Using the Client Encryption Manager
This section explains how to use the Client Encryption Manager (CEM) portion of the ACU to use static Wired Equivalent Privacy (WEP) keys for your client adapter or to use server-based authentication and dynamic WEP keys.
WEP
The ACU enables you to set up to four encryption keys, called WEP keys, for your client adapter. WEP is an optional IEEE 802.11 feature that provides your client adapter and other devices on your wireless network with data confidentiality. Using WEP involves packet-by-packet data encryption by the transmitting device and decryption by the receiving device.
Server-Based Authentication
Server-based authentication through IEEE 802.1x is ideal for organizations with a large user base. To use server-based authentication, your access point must communicate with a RADIUS server, such as Cisco Secure ACS 2.6, with support for an 802.1x for an 802.11 authentication type like LEAP.
You can enable server-based authentication for your client adapter through its firmware and Cisco software (referred to as LEAP). This method provides authentication service to client adapters whose host devices are not running an operating system with built-in EAP support. The term LEAP is used to distinguish authentication provided by the client firmware from authentication provided by a host and its operating system.
LEAP is enabled through the Set LEAP Username and Password screen in the ACU. The username and password entered in this screen are used by the client adapter to authenticate to the RADIUS server and must be re-entered at the start of each new session.
Getting Started
You can access client encryption functions from the ACU main screen by clicking the CEM tab. The CEM pull-down menu appears, providing the following options:
•![]() Change Password
Change Password
•![]() Enter WEP key(s)
Enter WEP key(s)
The Change CEM Password option allows you to change the current password.
If your client adapter supports WEP, the Enter WEP keys option allows you to enter up to four WEP keys.
Changing the Password
Follow these steps to change the current CEM password.

Note ![]() Passwords are case-sensitive and can contain up to 256 characters. The default password is Cisco (uppercase C followed by lowercase isco).
Passwords are case-sensitive and can contain up to 256 characters. The default password is Cisco (uppercase C followed by lowercase isco).
Step 1 ![]() Select Change Password from the CEM pull-down menu. The Change CEM Password screen appears (Figure 4-1).
Select Change Password from the CEM pull-down menu. The Change CEM Password screen appears (Figure 4-1).
Figure 4-1 Change CEM Password Screen
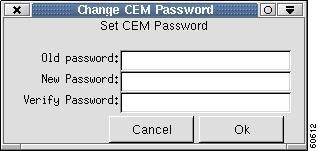
Step 2 ![]() Enter the current password in the Existing Password field.
Enter the current password in the Existing Password field.
Step 3 ![]() Enter a new password in the New Password field.
Enter a new password in the New Password field.

Tip ![]() If you want to disable the CEM password function, type a space for your new password. You are not prompted to enter a password whenever you select the CEM option.
If you want to disable the CEM password function, type a space for your new password. You are not prompted to enter a password whenever you select the CEM option.
Step 4 ![]() Re-enter the new password in the Verify New Password field.
Re-enter the new password in the Verify New Password field.
Step 5 ![]() Click OK.
Click OK.
Entering a New WEP Key
Follow these steps to enter a new WEP key for your client adapter. If you wish to select an existing WEP key, go to the "Selecting an Existing WEP Key" section.
Step 1 ![]() From the Commands pull-down menu, select Enter WEP key. If you did not disable the CEM password function, you are prompted to enter your CEM password in the following screen (Figure 4-2).
From the Commands pull-down menu, select Enter WEP key. If you did not disable the CEM password function, you are prompted to enter your CEM password in the following screen (Figure 4-2).
Figure 4-2 Enter CEM Password Screen
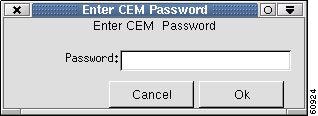
Step 2 ![]() Enter your CEM password and click OK. The Enter WEP keys screen appears (Figure 4-3).
Enter your CEM password and click OK. The Enter WEP keys screen appears (Figure 4-3).
Figure 4-3 Enter WEP keys Screen
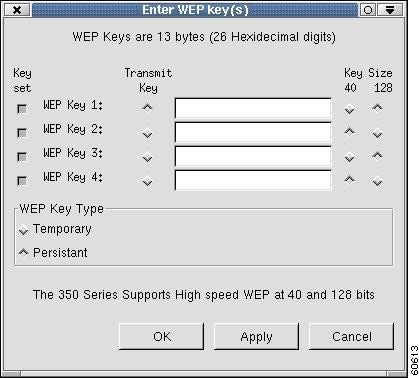
Note ![]() You can create up to four WEP keys. If a WEP key is set, the Key set box is highlighted, and the key length is shown in the right column.
You can create up to four WEP keys. If a WEP key is set, the Key set box is highlighted, and the key length is shown in the right column.
Step 3 ![]() For the WEP key that you are creating (1, 2, 3, or 4), select a WEP Key Size of 40 or 128 on the right side of the screen. 128-bit client adapters can use 40- or 128-bit keys, but 40-bit adapters can use only 40-bit keys.
For the WEP key that you are creating (1, 2, 3, or 4), select a WEP Key Size of 40 or 128 on the right side of the screen. 128-bit client adapters can use 40- or 128-bit keys, but 40-bit adapters can use only 40-bit keys.
Note ![]() Use of 128-bit WEP is subject to U.S. export restrictions.
Use of 128-bit WEP is subject to U.S. export restrictions.
Step 4 ![]() Decide on a WEP key, and enter it in the blank field for the key you are creating. Follow these guidelines to create a new WEP key:
Decide on a WEP key, and enter it in the blank field for the key you are creating. Follow these guidelines to create a new WEP key:
•![]() Your client adapter's WEP key must match the WEP key used by the access point or clients with which you are planning to communicate.
Your client adapter's WEP key must match the WEP key used by the access point or clients with which you are planning to communicate.
•![]() When you are setting more than one WEP key, the WEP keys must be assigned to the same WEP key numbers for all devices.
When you are setting more than one WEP key, the WEP keys must be assigned to the same WEP key numbers for all devices.
•![]() Home networking WEP keys can be comprised of ASCII text.
Home networking WEP keys can be comprised of ASCII text.
•![]() General purpose WEP keys are hexadecimal only and can consist of these hexadecimal characters: 0-9, A-F, and a-f.
General purpose WEP keys are hexadecimal only and can consist of these hexadecimal characters: 0-9, A-F, and a-f.
•![]() WEP keys must contain the following number of characters:
WEP keys must contain the following number of characters:
–![]() 10 characters for 40-bit WEP keys
10 characters for 40-bit WEP keys
–![]() 26 characters for 128-bit WEP keys
26 characters for 128-bit WEP keys
Note ![]() After you create a WEP key, you can write over it, but you cannot edit or
After you create a WEP key, you can write over it, but you cannot edit or
delete it.
Step 5 ![]() Click Transmit Key next to the key that you created to show that this is the key you want to use to transmit packets.
Click Transmit Key next to the key that you created to show that this is the key you want to use to transmit packets.
Step 6 ![]() Click Persistent under WEP Key Type to allow your client adapter to retain this WEP key even when power to the adapter is removed or the computer in which it is installed is rebooted.
Click Persistent under WEP Key Type to allow your client adapter to retain this WEP key even when power to the adapter is removed or the computer in which it is installed is rebooted.
Note ![]() If you select Temporary, the WEP key is lost when power is removed from your client adapter.
If you select Temporary, the WEP key is lost when power is removed from your client adapter.
Step 7 ![]() Click Apply or OK.
Click Apply or OK.
Selecting an Existing WEP Key
If you want an existing WEP key to be used with your client adapter, follow these instructions.
Step 1 ![]() From the Commands pull-down menu, select Enter WEP key. The Enter WEP Key(s) screen appears.
From the Commands pull-down menu, select Enter WEP key. The Enter WEP Key(s) screen appears.
The Key set box is highlighted for all existing WEP keys.
Note ![]() To protect WEP key security, the codes for existing WEP keys do not appear on the screen. Also, you can write over existing keys, but you cannot edit or delete them.
To protect WEP key security, the codes for existing WEP keys do not appear on the screen. Also, you can write over existing keys, but you cannot edit or delete them.
Step 2 ![]() Click Transmit Key next to the key you want to use to transmit packets.
Click Transmit Key next to the key you want to use to transmit packets.
Step 3 ![]() Click Apply or OK.
Click Apply or OK.
Enabling WEP
Note ![]() Entering a WEP key does not enable WEP.
Entering a WEP key does not enable WEP.
After you have selected a WEP key, you must access the Aironet Client Utility (ACU) to enable WEP. Follow these steps to enable WEP.
Step 1 ![]() Click the Commands tab on the ACU main screen. The Commands drop-down menu appears.
Click the Commands tab on the ACU main screen. The Commands drop-down menu appears.
Step 2 ![]() Click the Edit Properties option. The Properties screen appears.
Click the Edit Properties option. The Properties screen appears.
Step 3 ![]() Click the Network Security tab. The Network Security screen appears (Figure 4-4).
Click the Network Security tab. The Network Security screen appears (Figure 4-4).
Figure 4-4 Network Security Screen
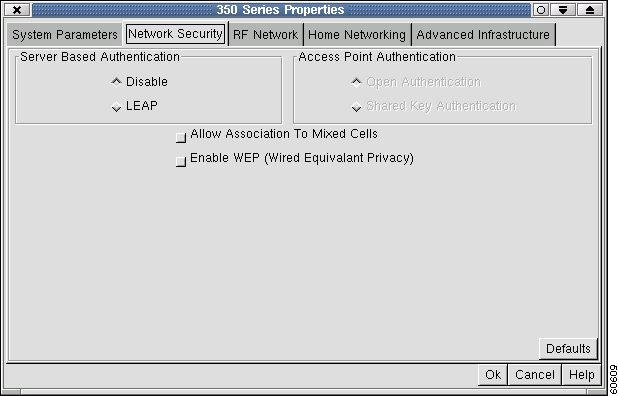
Step 4 ![]() Click the Enable WEP (Wired Equivalent Privacy) box.
Click the Enable WEP (Wired Equivalent Privacy) box.
Step 5 ![]() Click OK to save the setting and return to the ACU main screen.
Click OK to save the setting and return to the ACU main screen.
Note ![]() See the "Setting Network Security Parameters" section for a complete list of all network security parameters.
See the "Setting Network Security Parameters" section for a complete list of all network security parameters.
Additional WEP Key Security Features
Client adapter firmware version 4.25.23 and greater support three new security features designed to prevent sophisticated attacks on your wireless network's WEP keys. These features (MIC, TKIP, and broadcast key rotation) do not need to be enabled on the client adapter; they are supported automatically in the driver and firmware version listed above. However, they must be enabled on the access point.
Note ![]() Access point firmware version 11.10T or later is required to enable these security features. Refer to the Cisco Aironet Access Point Software Configuration Guide for instructions on enabling these security features on the access point.
Access point firmware version 11.10T or later is required to enable these security features. Refer to the Cisco Aironet Access Point Software Configuration Guide for instructions on enabling these security features on the access point.
Message Integrity Check (MIC)
MIC prevents bit-flip attacks on encrypted packets. During a bit-flip attack, an intruder intercepts an encrypted message, alters it slightly, and retransmits it, and the receiver accepts the retransmitted message as legitimate. The MIC adds a few bytes to each packet to make the packets tamper-proof.
The ACU screen displays the word "(MIC)" next to the current status if MIC is supported by the client adapter's driver and firmware and is enabled on the access point.
Note ![]() If you enable MIC on the access point, your client driver must be version 2.0 or greater and client firmware must be version 4.25.2x or greater to support these features; otherwise, the client cannot associate.
If you enable MIC on the access point, your client driver must be version 2.0 or greater and client firmware must be version 4.25.2x or greater to support these features; otherwise, the client cannot associate.
Enabling LEAP
Follow these steps to enable LEAP for your client adapter.
Step 1 ![]() From the ACU's Command drop-down menu, click Edit Properties.
From the ACU's Command drop-down menu, click Edit Properties.
Step 2 ![]() Open the Network Security screen.
Open the Network Security screen.
Step 3 ![]() Click the LEAP button.
Click the LEAP button.
Step 4 ![]() Click OK to save the setting to return to the ACU main screen.
Click OK to save the setting to return to the ACU main screen.
Step 5 ![]() Click the Commands tab. The Commands drop-down menu appears. Note that the Set Leap Information option is now accessible.
Click the Commands tab. The Commands drop-down menu appears. Note that the Set Leap Information option is now accessible.
Step 6 ![]() Click the Set Leap Information option. The Set Leap Password screen appears (Figure 4-5).
Click the Set Leap Information option. The Set Leap Password screen appears (Figure 4-5).
Figure 4-5 Set Leap Password Screen
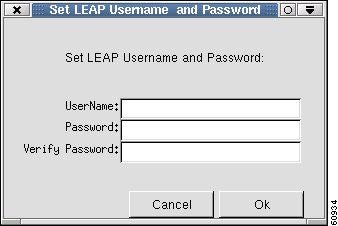
Note ![]() Usernames and passwords are case sensitive and can contain up to 32 characters.
Usernames and passwords are case sensitive and can contain up to 32 characters.
Step 7 ![]() Enter your username in the Username field.
Enter your username in the Username field.
Step 8 ![]() Enter your LEAP password in the Password field.
Enter your LEAP password in the Password field.
Step 9 ![]() Re-enter the password in the Verify Password field.
Re-enter the password in the Verify Password field.
Step 10 ![]() Click OK to return to the ACU main screen. The following parameters in the Network Security screen are changed automatically:
Click OK to return to the ACU main screen. The following parameters in the Network Security screen are changed automatically:
•![]() The Server Based Authentication parameter is set to LEAP enabled.
The Server Based Authentication parameter is set to LEAP enabled.
•![]() The access point Authentication parameter is set to Open Authentication.
The access point Authentication parameter is set to Open Authentication.
•![]() The Enable WEP parameter is set to enabled if the LEAP access point uses WEP.
The Enable WEP parameter is set to enabled if the LEAP access point uses WEP.
Your client adapter authenticates to the RADIUS server by using your username and password and receives a session-based WEP key.
Note ![]() After LEAP is enabled, the Server Based Authentication parameter can be used to disable or enable LEAP as desired.
After LEAP is enabled, the Server Based Authentication parameter can be used to disable or enable LEAP as desired.
Note ![]() See the "Setting Network Security Parameters" section for a comprehensive listing of all network security parameters.
See the "Setting Network Security Parameters" section for a comprehensive listing of all network security parameters.
Synchronizing Security Features
In order to use any of the security features discussed in this section, both your client adapter and the access point to which it associates must be set appropriately. Table 4-1 indicates the client and access point settings required for each security feature. This chapter provides specific instructions for enabling security features on your client adapter. Refer to the Cisco Aironet Access Point Software Configuration Guide for instructions on enabling the features on the access point.
 Feedback