WLC 3504 Release 8.5 Deployment Guide
Available Languages
Contents
Introduction
With release 8.4 and above, we are introducing vWLC support for Microsoft Hyper-V. The focus of this deployment guide is to provide guidance on deploying vWLC on Hyper-V.
Prior to release 7.4, Wireless LAN (WLAN) controller software ran on dedicated hardware you were expected to purchase. The Virtual Wireless LAN Controller (vWLC) runs on general hardware under an industry standard virtualization infrastructure. The vWLC is ideal for small and mid-size deployments with a virtual infrastructure and require an on-premises controller. Distributed branch environments can also benefit with a centralized virtual controller with branches requiring up to 3000 access points..
vWLCs are not a replacement of shipping hardware controllers. The function and features of the vWLC offer deployment advantages and benefits of controller services where data centers with virtualization infrastructure exist or are considered.
Advantages of the vWLC
Flexibility in hardware selection based on your requirements.
Reduced cost, space requirements, and other overheads since multiple boxes can be replaced with single hardware running multiple instances of virtual appliances.
Hardware Requirement
Virtual Wireless LAN Controller Version 8.2 and above
Settings Small Large Minimum Number of vCPUs 1 2 Minimum Memory 2 GB 8 GB Required Storage 8 GB 8 GB Minimum Number of VMNICs 2 2 Maximum Access Points 200 3000 Maximum Clients Support 6000 32000 Upgrade to Small* Yes No Upgrade to Large* No Yes * Upgrades are only supported on the same platform.
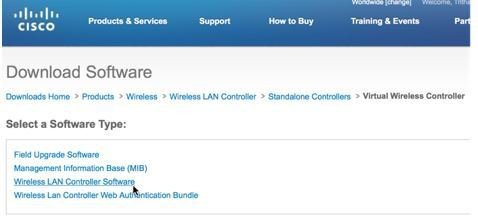
Download Cisco Virtual Wireless LAN Controller
Download the latest 8.x software from:https://software.cisco.com/download/type.html?mdfid=284464214&i=rm
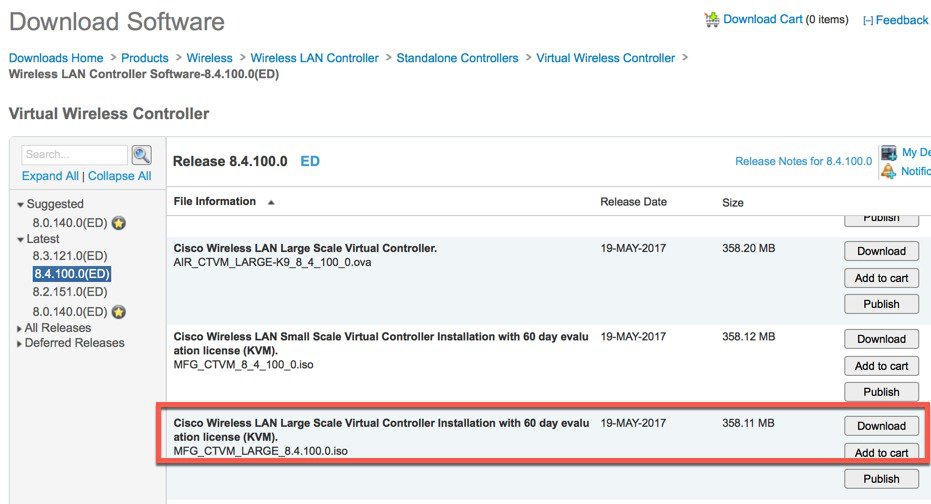
For software release 8.x, virtual wireless controllers will be offered in 2 types of deployment, SMALL or LARGE, in *aes (software upgrade) or *.ova (VMware) or *.iso (KVM/Hyper-V) format. Refer to the HW requirement needed to support the target deployment.
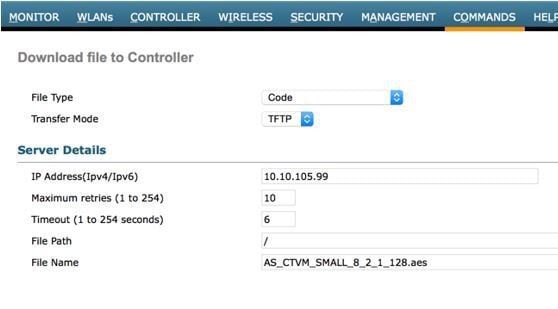
Software upgrade is *.aes format.
To upgrade existing vWLC, use the *.aes software and go through the normal upgrade process of WLCs.
Note
vWLC upgrade supports only of the same type (e.g. Small to Small, Large to Large). Mixed is not supported (e.g. Small to Large, or Large to Small).
For installing NEW virtual wireless controllers on VMware, use *.ova.
For installing NEW virtual wireless controllers on Hyper-V and KVM, use *.iso.
Prerequisite
Before attempting to deploy the Cisco vWLC on HYPER-V, the following prerequisites apply:
You must have Hyper-V running on Microsoft 2012 Servers or higher, with a virtual switch already created.
An SSH client (for example, Putty on Windows or Terminal on Macintosh) is required to access the Cisco vWLC console.
Browsers such as Chrome, Firefox are recommended to access the Cisco vWLC web UI.
Determine the type that you want to deploy for the Cisco vWLC. See the next section for more information.
HYPER-V Requirement
Hyper-V requirement is based on vWLC scale.
The following table lists Microsoft Hyper-V virtual machine requirements.
Requirement Type Minimum Requirements CPU Clock speed: 2.0 GHz or faster
Number of cores:
Small--1 vCPU
Large—2 vCPU
Memory Host—Minimum 8GB or higher
Small—2 GB
Large—8 GB
Hard Disks Host—100GB or higher
vWLC Small or Large—8 GB
NIC 2 GB NIC interfaces required
Hypervisor Hyper-V (Microsoft Servers 2012 and above)
Product Overview
The Cisco Virtual Wireless LAN Controller (vWLC) is available with two types of software images: small scale image (supports up to 200 access points and 6000 clients) and large scale image (supports up to 3000 access points and 32000 clients).
vWLC Data Sheet:
vWLC Deployment Guide:
FlexConnect Feature Matrix:
Enterprise Mobility 8.x Design Guide - FlexConnect:
Information about Microsoft Hyper-V:
https://technet.microsoft.com/en-us/library/mt169373(v=ws.11).aspx
Information about Windows PowerShell:
https://technet.microsoft.com/en-us/library/hh846767(v=ws.11).aspx
Video demonstration of how to deploy vWLC on Hyper-V:
https://cisco.box.com/s/q5idy5mjj2hxt8etvfjrxwdrgfynafhj
Deploying vWLC on Hyper-V
Procedure
Step 1 Download the appropriate ISO image from CCO (or within beta, download from the beta file forum.)
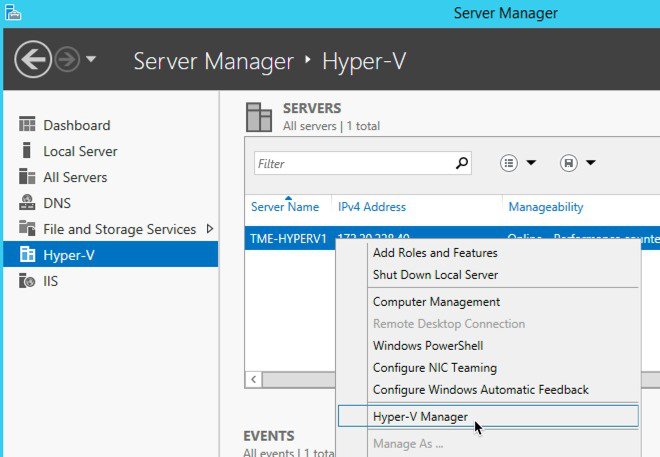
Step 2 Save it to a server’s local file folder. Step 3 Start Hyper-V Manager.
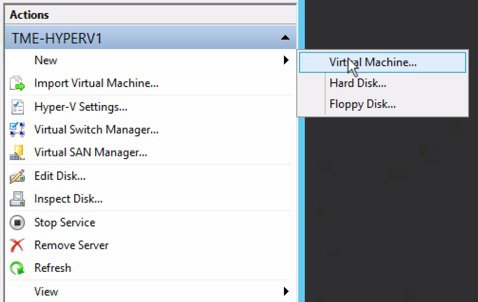
Step 4 In the Actions pane, click New > Virtual Machine.
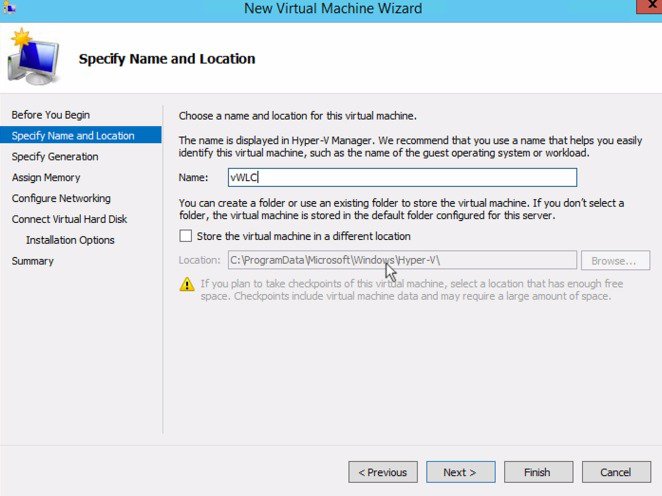
Step 5 Click Next to Specify Name and Location.
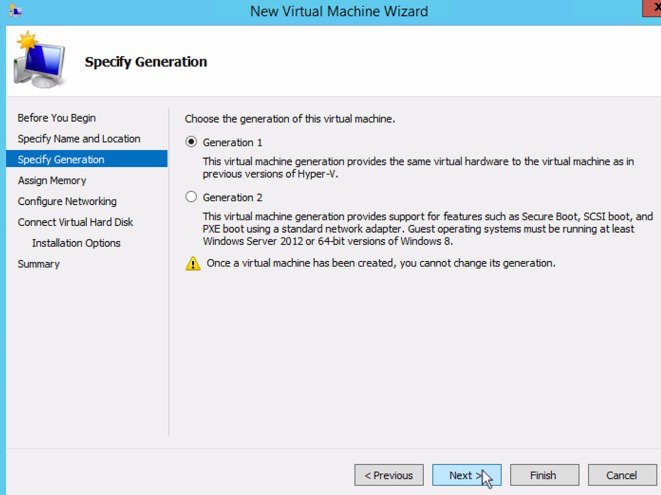
Step 6 For generation of vWLC, accept Generation 1 as default.
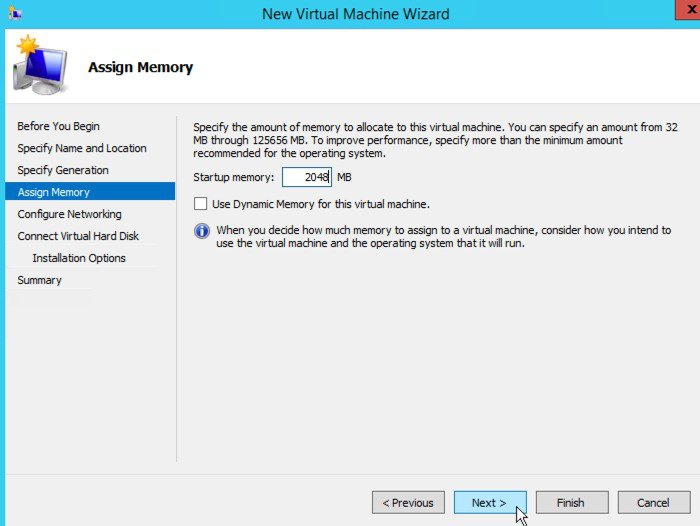
Step 7 Assign proper memory (see small or large requirement).
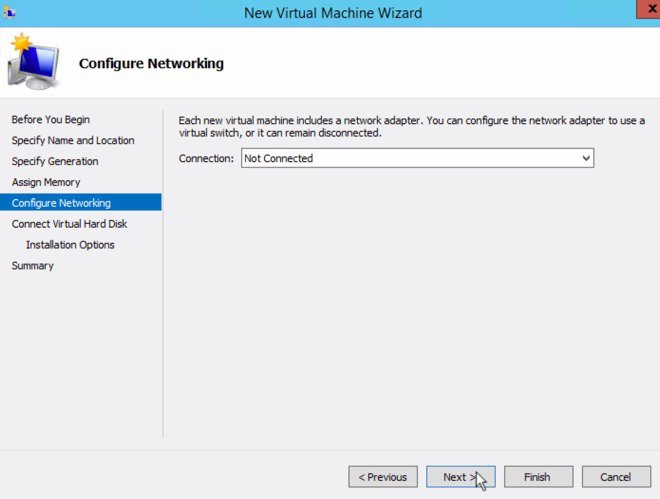
Step 8 We can skip Network connection config for later, as we are required to manually add a second vNIC.
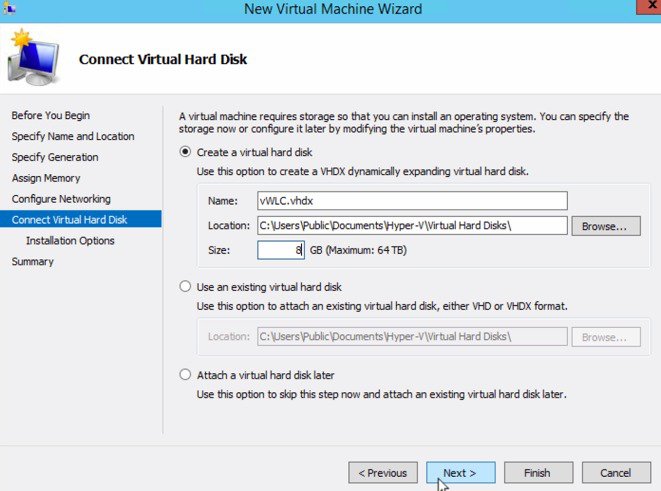
Step 9 Create the virtual disk, assign 8GB as the size for small or large.
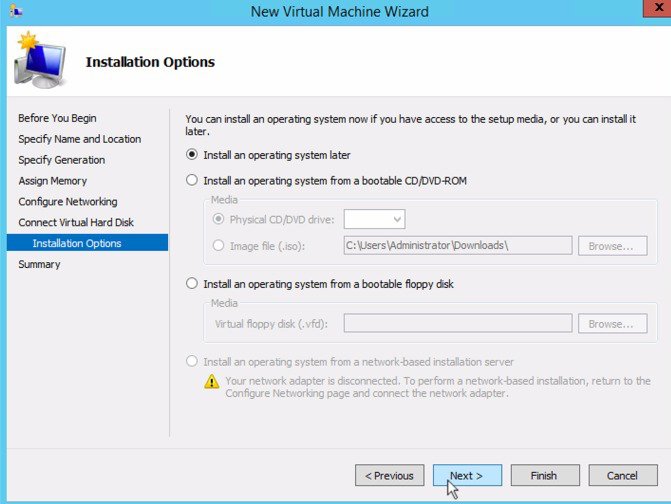
Step 10 At the Installation option, select the default ‘Install an operating system later’.
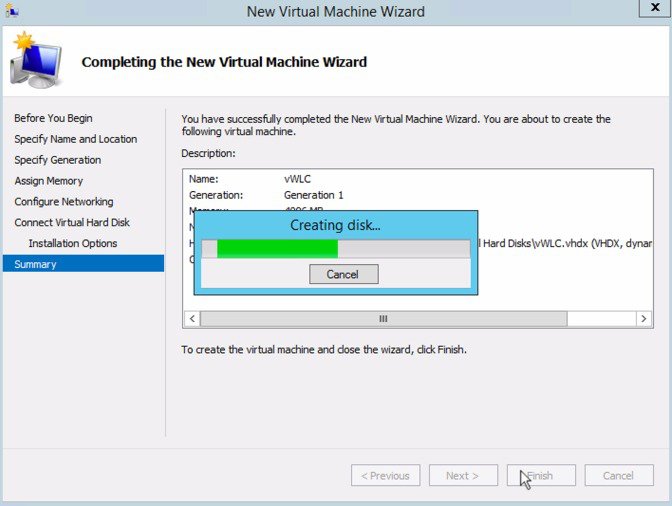
Step 11 Click Finish at the Summary page to create your vWLC.
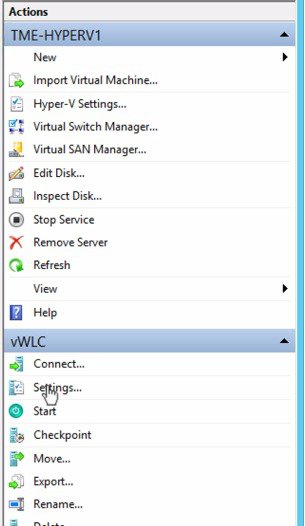
Step 12 Once the vWLC is created, select the vWLC > Actions > Settings.
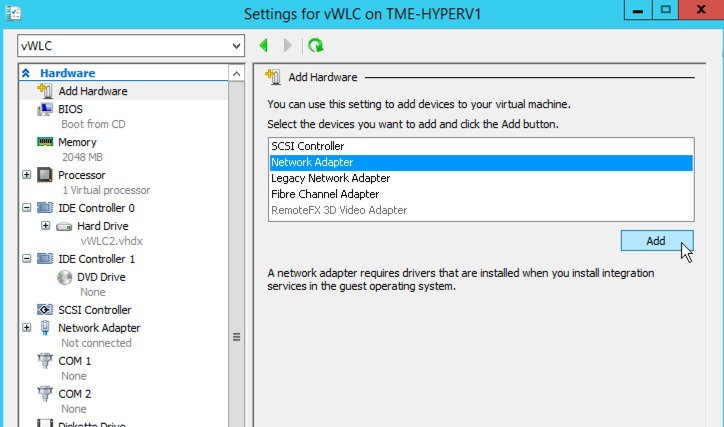
Step 13 Select Add Hardware > Network Adapter > Add. This will create the 2nd vNIC that will be the management interfact of the vWLC.
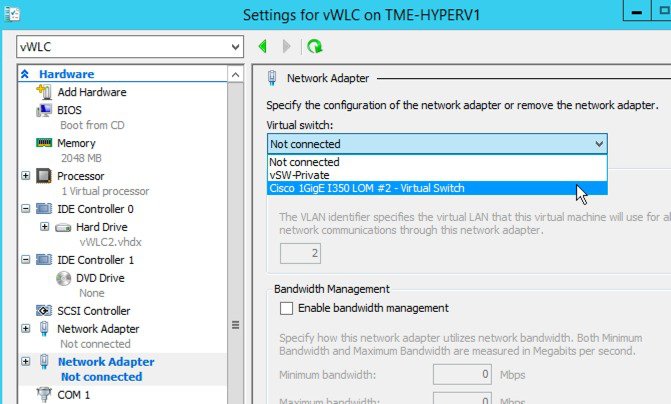
Step 14 Once the 2nd Network Adapter is added, assign this vNIC to the proper vSwitch. In this example, the vSwitch is assigned to the server’s physical connection to our network switch. Confirm selection > click Apply.
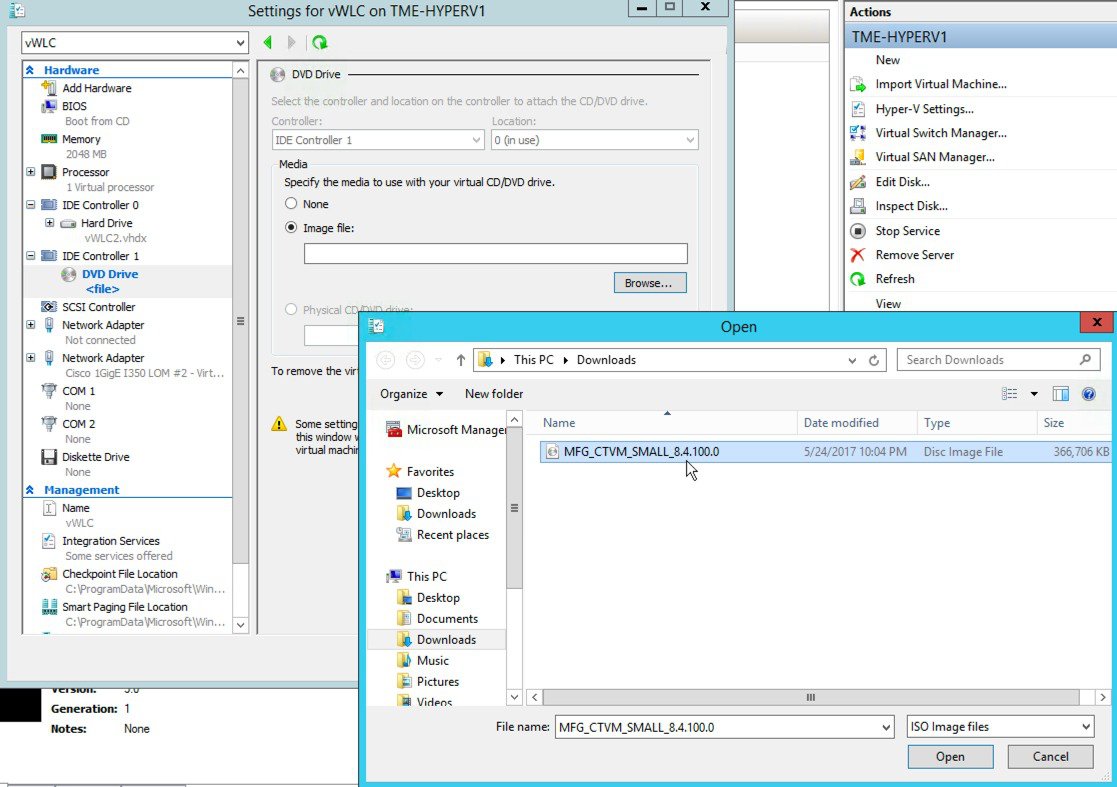
Step 15 Navigate to the DVD Drive within the Hardware pane, select Image file > Browse > locate your ‘vWLC_image.iso’ > click Open.
Step 16 Click OK to commit and save changes to virtual machine configuration.
Step 17 From the Actions pane, click > Connect > Start to power on the vWLC.
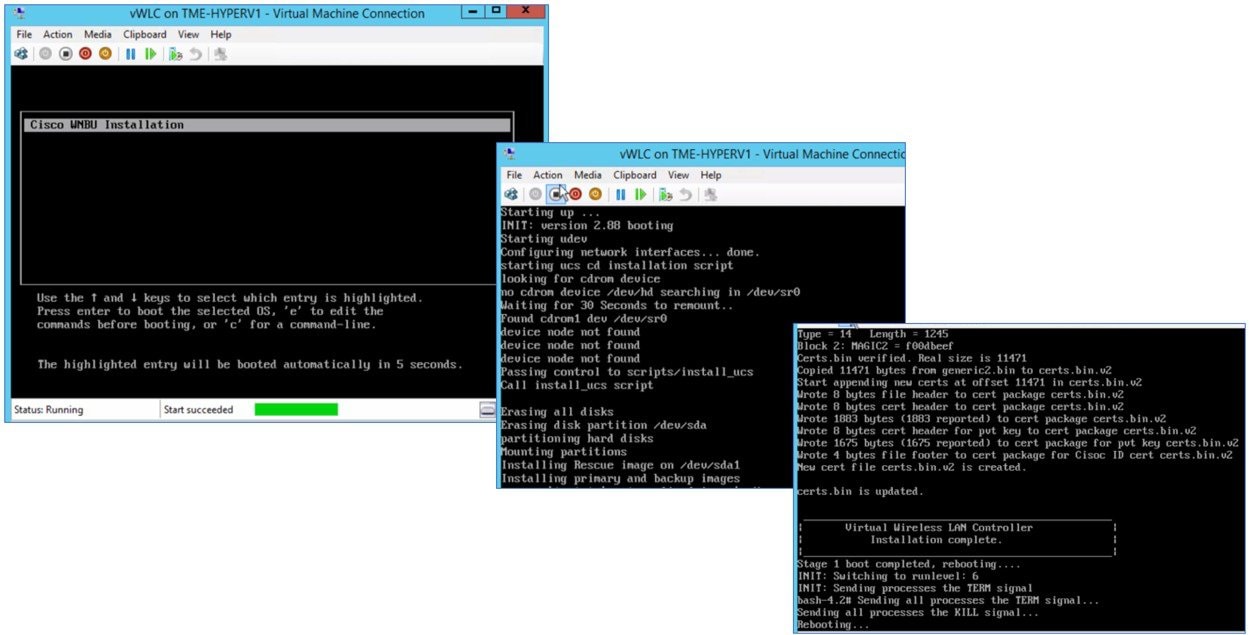
Step 18 Upon power start, you will see the screen ‘Cisco WNBU Installation’. System will automatically go through install process until completion.
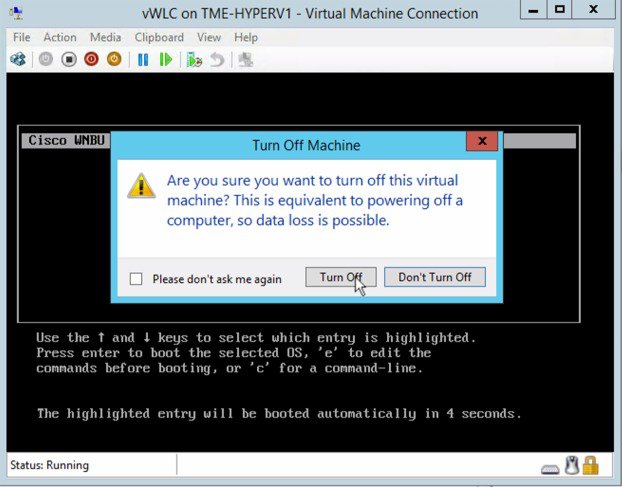
Step 19 Upon completion, vWLC will reboot. Turn off vWLC at this point.
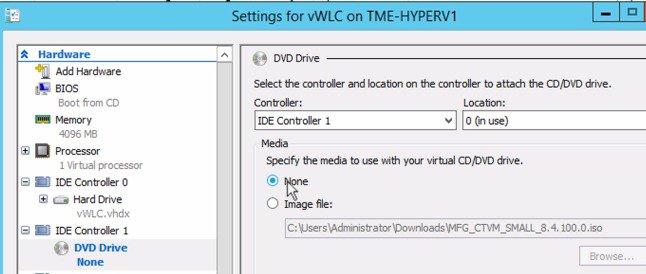
Note vWLC will try to boot with CD iso image, we need to disable CD boot to continue.
Step 20 Go to vWLC settings > CD Drive > select 'None' for Media, so it does not attempt to boot from ISO on power up. Click OK to save.
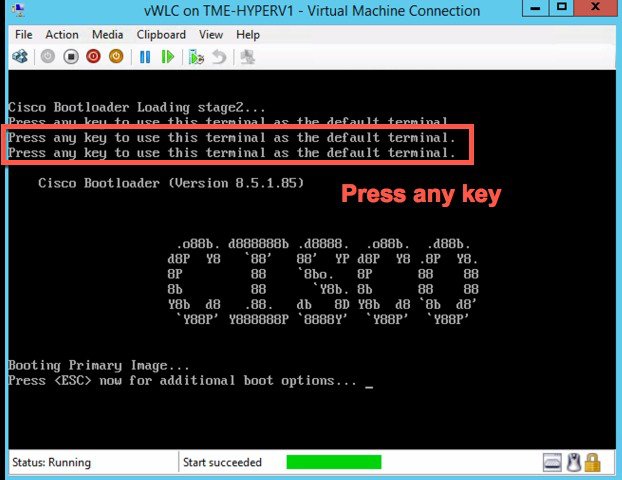
Step 21 Turn on vWLC machine, and press any key at the load prompt to access console to configure for the first time.
Note It is normal behavior of vWLC on power up without direct virtual console (ssh and HTTP/s only) unless an admin manually interrupt at boot to access terminal.
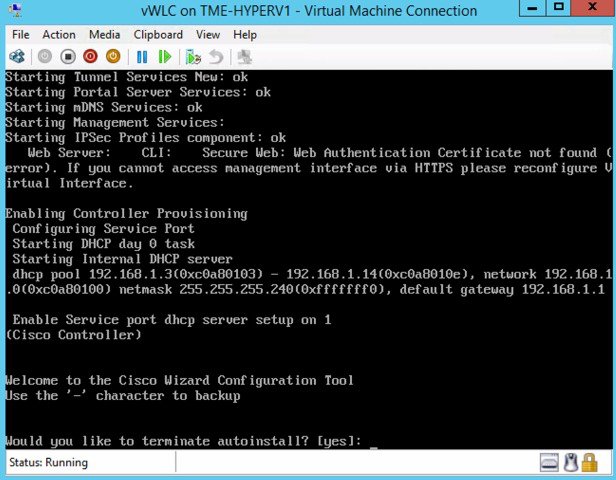
Step 22 Once vWLC fully boots, it will initiate controller provisioning.
Step 23 vWLC will initiate day0 WLAN Express setup, or override for CLI Wizard configuration. Proceed with basic setup (admin user, credentials, Management interface, NTP etc.) before accessing the vWLC.
Note For guidance on using the WLAN Express setup go to http://www.cisco.com/c/en/us/td/docs/wireless/controller/8-0/configuration-guide/b_cg80/b_cg80_chapter_010.html
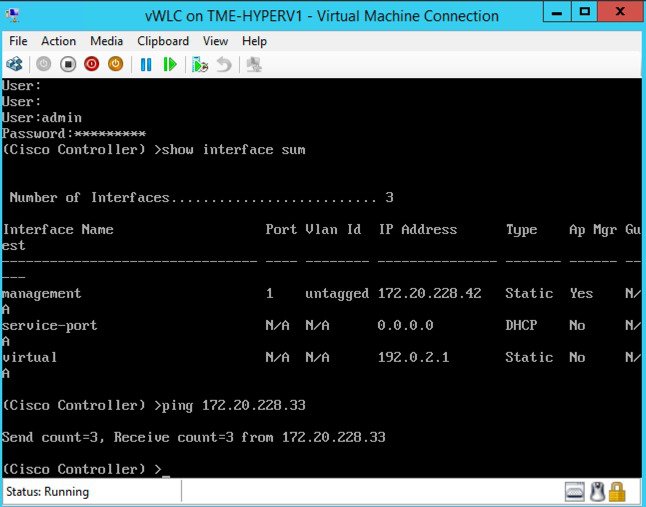
Step 24 Once configured, test network ping for connectivity. You can access the vWLC GUI at this point.
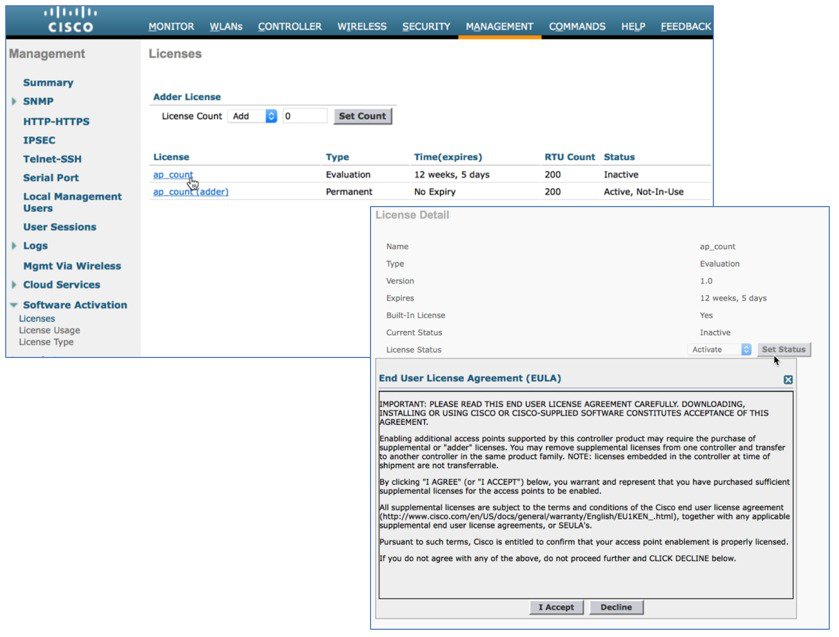
Step 25 Connect to the vWLC web GUI. Go to Management > Software Activation > Licenses > click ap count. Step 26 Set License Status to ‘Active’. Click Set Status. At the EULA prompt, click ‘I Accept’.
Step 27 You have completed a deployment of vWLC on Hyper-V. Step 28 Proceed to join access points, creating WLAN and connect wireless clients.
Using Windows PowerShell
The Hyper-V module for Windows PowerShell includes many Hyper-V cmdlets to help automate Hyper-V management tasks. There are 2 optional use-cases specific to vWLC that requires using PowerShell.
Configure Tagged Ports
C:\Users\Administrator>powershell
Windows PowerShell
Copyright (C) 2014 Microsoft Corporation. All rights reserved.
Show list of adapters and assignment:
Get-VMNetworkAdapter -VMName <vWLC name>Configure Ethernet1 (vWLC data port/management) as Trunk, with Native VLAN id 0
Set-VMNetworkAdapterVlan -VMName “vWLC” -VMNetworkAdapterName Eth1 -Trunk -AllowedVlanIdList “1-4000” -NativeVlanId 0Configure Ethernet0 (vWLC serial port) as access/untagged
Set-VMNetworkAdapterVlan -VMName “vWLC” -VMNetworkAdapterName Eth0 -UntaggedDeploying vWLC on Hyper-V via Script
Create a PowerShell script (*.ps1) using a text editor (e.g. Notepad) and save to a file folder.
Note
A *.ps1 extension is needed to be recognized as a PowerShell script.
param($MPSW="vsw9x",$SPSW="vsw10x",$Name="vWLC",$RAM=2GB,$ISO="NULL")
$VHD=8GB
$VMLocation="C:\HyperV"
""
""
"Input parameters are:"
""
"Management Port Virtual Switch is : $MPSW"
"Service Port virtual Switch is    : $SPSW"
"Name of the VM is                 : $Name"
"Memory requestd is                : $RAM"
"Sotware input ISO is              : $ISO"
"Default media Storage is          : $VHD"

#Create Storage space for VHD files
MD $VMLocation -ErrorAction SilentlyContinune

#Create VM switches if not present
$TestSwitch = Get-VMSwitch -Name $MPSW -ErrorAction SilentlyContinue
if ($TestSwitch.Count -EQ 0){New-VMSwitch -Name $MPSW -SwitchType Private}

$TestSwitch = Get-VMSwitch -Name $SPSW -ErrorAction SilentlyContinue
if ($TestSwitch.Count -EQ 0){New-VMSwitch -Name $SPSW -SwitchType Private}

#remove existing file if any for the current VM
Remove-Item $VMLocation\$Name* -recurse

$NewVM=New-VM -Name $Name -Path $VMLocation -MemoryStartupBytes 8GB -NewVHDPath $VMLocation\$Name.vhdx -NewVHDSizeBytes ${VHD} -SwitchName $SPSW

Rename-VMNetworkAdapter -VMName $Name -Name "Network Adapter" -NewName Eth0
Add-VMNetworkAdapter -VMName $Name -SwitchName $MPSW -Name Eth1

#Set Management port to Trunk
Set-VMNetworkAdapterVlan -VMName $Name -VMNetworkAdapterName Eth1 -Trunk -AllowedVlanIdList "1-4000" -NativeVlanId 0

#Set ISO path
Set-VMDvdDrive -VMName $Name -Path $ISO

#Set boot order
Set-VMBios -VMName $Name -StartupOrder @("IDE","CD","LegacyNetworkAdapter","Floppy")

#Boot the VM
"Your VM is Starting.. Please enter any key within 15secs on VM console to boot”

Start-Sleep 5
Start-VM $Name
"VM Started"
#connect the user to console
vmconnect localhost  $Name
PowerShell cmdlet to invoke script within file location of the script created above.
powershell -f <script> -ISO <location\installer iso> -RAM <size 2GB or 8GB> -Name <vmname> -MPSW <name of vsw for Mgmt> -SPSW <name of service port vsw>Copyright © 2017, Cisco Systems, Inc. All rights reserved.


 Feedback
Contact Cisco
- Open a Support Case

- (Requires a Cisco Service Contract)