Administration Guide for Cisco UC Integration for Microsoft Lync Release 9.2(3)
Bias-Free Language
The documentation set for this product strives to use bias-free language. For the purposes of this documentation set, bias-free is defined as language that does not imply discrimination based on age, disability, gender, racial identity, ethnic identity, sexual orientation, socioeconomic status, and intersectionality. Exceptions may be present in the documentation due to language that is hardcoded in the user interfaces of the product software, language used based on RFP documentation, or language that is used by a referenced third-party product. Learn more about how Cisco is using Inclusive Language.
- Updated:
- July 31, 2013
Chapter: Client Installation
Client Installation
Review the options for installation and learn about different methods for installing Cisco UC Integration for Microsoft Lync. Understand the requirements for successful deployments before you start the installation procedure.
- Installation Overview
- Cisco Virtualization Experience Media Engine
- Use the Command Line
- Supported languages
- Repackage the MSI
- Deploy with Group Policy
- Custom Presence Status
- Cisco Media Services Interface
- Uninstall Cisco UC Integration for Microsoft Lync
Installation Overview
 Note | Cisco UC Integration for Microsoft Lync does not require the Microsoft .NET Framework or any Java modules. |
For more information about installation requirements, see the Hardware Requirements and Software Requirements topics.
Note | Restart Microsoft Outlook after installing Cisco UC Integration for Microsoft Lync to ensure Click to Call functionality initializes properly. |
Installation Options
- Install through the Command Line
-
You can install Cisco UC Integration for Microsoft Lync in a command line window using arguments to specify installation properties.
Choose this option if you plan to install multiple instances across an organization.
For more information, see Use the Command Line.
- Repackage the MSI
-
You can use a program such as Microsoft Orca to customize the Cisco UC Integration for Microsoft Lync installation package. Repackaging the MSI lets you open the default installation package, specify the required installation properties, and then save a custom installation package.
Choose this option if you plan to distribute an installation package with the same installation properties.
For more information, see Transform the Installer.
- Run the MSI Manually
-
You can run the MSI manually on the file system of the client computer and then specify connection properties when you start Cisco UC Integration for Microsoft Lync for the first time.
Choose this option if you plan to install a single instance for testing or evaluation purposes.
For more information, see Run the MSI Manually.
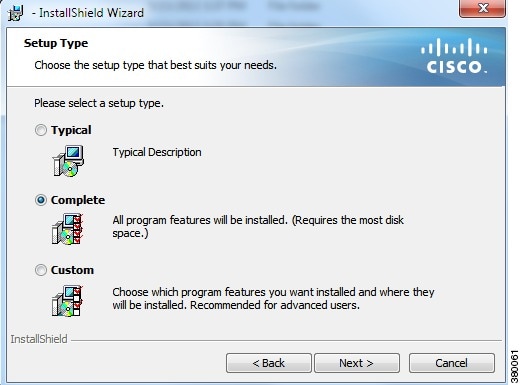
Click to Call Installation
Ensure the application is installed using the Complete installer option to install Click to Call functionality. The Typical option does not include Click to Call functionality. The Custom option provides the ability to include or exclude Click to Call.
Cisco Virtualization Experience Media Engine
The Cisco UC Integration for Microsoft Lync installer comes bundled with Cisco Virtualization Experience Media Engine (VXME) software called VXME Utilities. This software supports Cisco Unified Communications in virtual environments. These utilities include the Device Selector. Virtual users can manage their audio and video devices with the Device Selector.
See the Cisco Virtual Experience Media Engine documentation for additional information. This documentation is located here: http://www.cisco.com/en/US/products/ps12862/tsd_products_support_series_home.html.
Note | Desktop sharing is not supported when Cisco UC Integration for Microsoft Lync is running in a virtual environment using Cisco VXME. |
Use the Command Line
You can specify command line arguments to apply properties to Cisco UC Integration for Microsoft Lync during installation.
Prepare Cisco UC Integration for Microsoft Lync for deployment with your software configuration management program.
Command Line Arguments
| Argument | Value | Description | ||
|---|---|---|---|---|
| TFTP | IP address Hostname FQDN |
|
||
| CTI | IP address Hostname FQDN |
Specifies the address of your CTI server. This argument is required only if the address of your CTI server is not the same as the address of your TFTP server. If both server addresses are the same, you do not need to specify this argument. |
||
| CCMCIP | IP address Hostname FQDN |
Specifies the address of your CCMCIP server. This argument is required only if the address of your CCMCIP server is not the same as the address of your TFTP server. If both server addresses are the same, you do not need to specify this argument. |
||
| LANGUAGE | Defines the Locale ID (LCID), in decimal, of the language that Cisco UC Integration for Microsoft Lync uses. The value must be an LCID in decimal that corresponds to a supported language. This argument is optional. If you do not specify a value, Cisco UC Integration for Microsoft Lync uses the system locale language as the default. See the Supported Languages topic for a full list of the languages you can specify. |
|||
| LOG_DIRECTORY | Directory path | Specifies a custom directory location for log files. The directory location is specified using the template LOG_DIRECTORY=<directory_location>. Directory paths containing spaces must be placed in double quotes. The following is an example of using this parameter: msiexec /i CUCILyncSetup.msi LOG_DIRECTORY=C:\CUCILyncCustomLogDirectory This following is an example of using this parameter for a silent installation: msiexec /i CUCILyncSetup.msi LOG_DIRECTORY=C:\CUCILyncCustomLogDirectory /quiet An environment variable can be used in place of an absolute directory location. The following is an example of using an environment variable for this purpose: msiexec /i CUCILyncSetup.msi LOG_DIRECTORY=%LOG_LOCATION% The environment variable %LOG_LOCATION% in this example must first be configured on the client computer before it can be used in the command line argument. |
||
| FORGOT_PASSWORD_URL | Specifies the URL to which users are directed if they forget, or need to reset, their passwords. You do not need to specify this argument to enable the functionality. However, you should provide a valid URL to ensure users can obtain new passwords. |
|||
| TFTP_FILE_NAME | Specifies a unique name for the global configuration file on your TFTP server. You should specify a value for this argument if your global configuration file does not use the default name of jabber-config.xml. You can specify either an unqualified or fully qualified filename as the value. The name you specify as the value for this argument overrides any other global configuration files on your TFTP server. |
|||
| CLEAR | 1 | Specifies if Cisco UC Integration for Microsoft Lync overrides any existing bootstrap file from previous installations. Cisco UC Integration for Microsoft Lync saves the arguments and values you set during installation to the bootstrap file, jabber-bootstrap.properties. Cisco UC Integration for Microsoft Lync then loads settings from the bootstrap file at startup.
|
||
msiexec.exe /i CUCILyncSetup.msi CLEAR=1 |
Supported languages
The following table lists the languages that Cisco UC Integration for Microsoft Lync supports:
- Arabic
- Chinese - China
- Chinese - Taiwan
- Czech
- Danish
- Dutch
- English
- French
- Finnish
- German
- Greek
- Hebrew
- Italian
- Japanese
- Korean
- Norwegian
- Polish
- Portuguese - Brazil
- Portuguese - Portugal
- Russian
- Swedish
- Spanish
- Turkish
Note | Cisco UC Integration for Microsoft Lync does not support Locale IDs for all sub-languages. For example, if you specify French - Canada, Cisco UC Integration for Microsoft Lync uses French - France. As of this release, Cisco UC Integration for Microsoft Lync supports the Locale IDs for Chinese - China and Chinese - Taiwan only. Cisco UC Integration for Microsoft Lync does not support any other Locale IDs for Chinese sub-languages. For example, if you specify Chinese - Singapore, Cisco UC Integration for Microsoft Lync uses English. |
Repackage the MSI
You can repackage CUCILyncSetup.msi to create a custom MSI that contains the installation properties you require.
Use Custom Installers
You use the CUCILyncProperties.mst transform file to modify CUCILyncSetup.msi and create custom installers.
You must remove all language codes from the custom installer except for 1033 (English).
Microsoft Orca does not retain any language files in custom installers except for the default, which is 1033. If you do not remove all language codes from the custom installer, you cannot run the installer on any operating system where the language is other than English.
Note | Applying transform files does not alter the digital signatures of CUCILyncSetup.msi. |
- Download the Cisco UC Integration for Microsoft Lync administration package from Cisco.com.
- Copy CUCILyncProperties.mst from the administration package to your file system.
Download and install Microsoft Windows SDK for Windows 7 and .NET Framework 4 from the Microsoft website.
You use Microsoft Orca to create custom versions of CUCILyncSetup.msi. Microsoft Orca is available as part of the Microsoft Windows SDK for Windows 7 and .NET Framework 4.
| Step 1 | Start Microsoft Orca. |
| Step 2 | Open CUCILyncSetup.msi in Microsoft Orca.
CUCILyncSetup.msi opens in Microsoft Orca. The list of tables for the installer opens in the Tables pane. |
| Step 3 | Remove all language codes except for 1033 (English). English is set as the language for your custom installer. |
| Step 4 | Apply CUCILyncProperties.mst. |
| Step 5 | Select Property from the list of tables in the Tables pane. The list of properties for CUCILyncSetup.msi opens in the right panel of the application window. These properties correspond to the command line arguments and have the same values. See Command Line Arguments for descriptions of each property and the values you can specify. |
| Step 6 | Specify values for the properties as appropriate or drop any properties you do not require. |
| Step 7 | Enable your custom installer to save embedded streams. |
| Step 8 | Save your custom installer. |
What to Do Next
Prepare your custom installer for deployment with your software configuration management program.
Create Custom Transform Files
Custom transform files contain properties and values that you can apply to installers. For example, you can create one transform file that sets the default language of Cisco UC Integration for Microsoft Lync to French during installation and another transform file that sets the default language to Spanish. You can then apply each transform file to CUCILyncSetup.msi and create two installers, one for each language.
The transform file you created is saved as file_name.mst. You can apply this transform file to modify the properties of CUCILyncSetup.msi.
Deploy with Group Policy
Install Cisco UC Integration for Microsoft Lync with Group Policy using the Microsoft Group Policy Management Console (GPMC) on Microsoft Windows Server.
Note | To install Cisco UC Integration for Microsoft Lync with Group Policy, all computers or users to which you plan to deploy Cisco UC Integration for Microsoft Lync must be in the same domain. |
Start Microsoft Orca.
Microsoft Orca is available as part of the Microsoft Windows SDK for Windows 7 and .NET Framework 4 that you can download from the Microsoft website.
Open CUCILyncSetup.msi.
Select .
Locate the Languages field.
Set the Locale ID that corresponds to the installation language.
For example, set 1033 as the Locale ID to specify English as the installation language.
Select OK.
Save the installation package.
You must enable embedded streams if you select to save the installation package.
| Step 1 | Copy the installation package to a software distribution point for deployment. All computers or users to which you plan to deploy Cisco UC Integration for Microsoft Lync must be able to access the installation package on the distribution point. |
| Step 2 | Select and then enter the following command: GPMC.msc The Group Policy Management console opens. |
| Step 3 | Create a new group policy object. |
| Step 4 | Set the scope of your deployment. |
| Step 5 | Specify the installation package. |
Group Policy installs Cisco UC Integration for Microsoft Lync on each computer the next time each computer starts.
Custom Presence Status
Cisco UC Integration for Microsoft Lync includes the custom presence status of On the Phone. This status is stored in the custompresence.xml file. This file is installed with the application. The default file location is C:\Program Files (x86)\Cisco Systems\CUCILync\custompresence.xml.
Microsoft Lync 2010 cannot use this file by default because the registry key which defines the location of the custom presence file is ignored by Microsoft Lync 2010 unless it begins with https://. Therefore, administrators have two options for deploying the custom presence file:
- Deploy the custompresence.xml file to a secure web server such as the instance of Microsoft Internet Information Services that runs on the Microsoft Lync Server and update the registry value HKEY_LOCAL_MACHINE\SOFTWARE\Policies\Microsoft\Communicator\CustomStateURL for Microsoft Lync 2010 or HKEY_LOCAL_MACHINE\SOFTWARE\Policies\Microsoft\Office\15.0\Lync\CustomStateURL for Microsoft Lync 2013 with this location for all Lync users. See these Microsoft sites for more information:
-
Administrators can use the custompresence.xml file installed on the local machine if they currently are not using the Lync SIP High Security Mode or use of the Lync SIP High Security Mode is not necessary. Lync SIP High Security Mode is disabled in the Windows Registry by setting the EnableSIPHighSecurityMode value to zero (0). This value is located in HKEY_LOCAL_MACHINE\SOFTWARE\Policies\Microsoft\Communicator for Microsoft Lync 2010 or HKEY_LOCAL_MACHINE\SOFTWARE\Policies\Microsoft\Office\15.0\Lync for Microsoft Lync 2013.
Cisco Media Services Interface
Cisco Media Services Interface provides a Microsoft Windows service that works with Cisco Prime Collaboration Manager and Cisco Medianet-enabled routers to ensure that Cisco UC Integration for Microsoft Lync can send audio media and video media on your network with minimum latency or packet loss. This section contains information on Cisco Media Services Interface and using it for traffic marking and desktop phone video.
Traffic Marking
Cisco UC Integration for Microsoft Lync can use Cisco Media Services Interface to provide flow information. Cisco UC Integration for Microsoft Lync checks for Cisco Media Services Interface before sending audio media or video media.
If the service exists on the computer, Cisco UC Integration for Microsoft Lync provides flow information to Cisco Media Services Interface.
The service then signals the network so that routers classify the flow and provide priority to the Cisco UC Integration for Microsoft Lync traffic.
If the service does not exist, Cisco UC Integration for Microsoft Lync does not use it and sends audio media and video media as normal.
Note | Cisco UC Integration for Microsoft Lync checks for Cisco Media Services Interface for each audio call or video call. |
Desk Phone Video Capabilities
You must install Cisco Media Services Interface to enable desk phone video capabilities. Cisco Media Services Interface provides a driver that enables Cisco UC Integration for Microsoft Lync to do the following:
Install Cisco Prime Collaboration Manager.
Install routers or switches enabled for Cisco Medianet where appropriate.
Configure your network to handle the metadata attributes that Cisco Media Services Interface applies to applications.
Note that not all devices on your network must support Cisco Medianet. The first hop should prioritize traffic based on the metadata attributes from Cisco Media Services Interface. As the traffic traverses the network, all other devices should also prioritize that traffic unless you configure policies on those devices to handle the traffic differently. See the Medianet Knowledge Base Portal for detailed information on configuring your network.
| Step 1 | Download the Cisco Media Services Interface installation program from the Cisco UC Integration for
Microsoft Lync download site on Cisco.com. |
| Step 2 | Install Cisco Media Services
Interface on each computer on which you install Cisco UC Integration for
Microsoft Lync. See the appropriate Cisco Medianet documentation for installing Cisco Media Services Interface. |
Uninstall Cisco UC Integration for Microsoft Lync
You can uninstall Cisco UC Integration for Microsoft Lync using either the command line or the Microsoft Windows control panel. This topic describes how to uninstall Cisco UC Integration for Microsoft Lync using the command line.
To uninstall Cisco UC Integration for Microsoft Lync with the command line, you can use the MSI or the product code. You should use the MSI if it is available on the file system. However, if the MSI is not available on the file system, you should use the product code.
| Step 1 | Open a command line window. | ||||||||
| Step 2 | Enter one of the following commands to uninstall Cisco UC Integration for
Microsoft Lync:
|
The command removes Cisco UC Integration for Microsoft Lync from the computer.
 Feedback