- Preface
- Introduction to Cisco EnergyWise Orchestrator
- Managing Administrative Groups
- Security and Permissions in the Orchestrator System
- Managing and Viewing Devices
- Managing Policies
- Waking Computers
- Viewing Reports
- Getting Diagnostic Information from Event Logs
- Sustainability Dashboard
- Troubleshooting
- Important Notice
Cisco EnergyWise Orchestrator Administrator Guide
Bias-Free Language
The documentation set for this product strives to use bias-free language. For the purposes of this documentation set, bias-free is defined as language that does not imply discrimination based on age, disability, gender, racial identity, ethnic identity, sexual orientation, socioeconomic status, and intersectionality. Exceptions may be present in the documentation due to language that is hardcoded in the user interfaces of the product software, language used based on RFP documentation, or language that is used by a referenced third-party product. Learn more about how Cisco is using Inclusive Language.
- Updated:
- April 9, 2014
Chapter: Waking Computers
- Waking Clients Through the Server
- How End Users Wake Their Computers
- Determining Whether a Computer Can Wake from Standby
- Changing Wake Settings
- Using Wake on WAN to Wake Clients Across the Network
Waking Computers
The method used to wake computers depends on the circumstances. For example, if you want to set a patch management schedule, you might want to wake computers once per week at a specific time of day and for a specific length of time. If you want to wake computers on demand, you can use a Orchestrator Wake on LAN magic packet.
•![]() Waking Clients Through the Server
Waking Clients Through the Server
•![]() How End Users Wake Their Computers
How End Users Wake Their Computers
•![]() Determining Whether a Computer Can Wake from Standby
Determining Whether a Computer Can Wake from Standby
•![]() Using Wake on WAN to Wake Clients Across the Network
Using Wake on WAN to Wake Clients Across the Network
•![]() Waking Clients on a Regular Schedule
Waking Clients on a Regular Schedule
Waking Clients Through the Server
You can set the server to wake clients as part of power management policies, to prepare them to receive patch updates, or to troubleshoot issues.
•![]() Schedule a wake event in a policy.
Schedule a wake event in a policy.
For example, wake PC clients at 0600 every morning before users come in.
•![]() Schedule a Wake on WAN event in a policy to send a Wake on LAN magic packet to proxy computers, after which proxies wake the clients on their subnets.
Schedule a Wake on WAN event in a policy to send a Wake on LAN magic packet to proxy computers, after which proxies wake the clients on their subnets.
A standard scheduled wake event can wake computers from the sleep state but cannot wake computers that have been turned off. To reach as many clients as possible for a system update, set a Wake on WAN event to run shortly after a standard wake operation.

Note ![]() Most computers manufactured within the past couple of years are enabled for Wake on LAN by default. However, if you have older computers or network cards, you might need to enable Wake on LAN on those computers. For information see the Configuring Client Computers for Wake on LAN.
Most computers manufactured within the past couple of years are enabled for Wake on LAN by default. However, if you have older computers or network cards, you might need to enable Wake on LAN on those computers. For information see the Configuring Client Computers for Wake on LAN.
•![]() Select a set of clients in the Administrator console, and choose the Wake command.
Select a set of clients in the Administrator console, and choose the Wake command.
You do this if you need to apply an urgent patch update before the next scheduled maintenance window.
How End Users Wake Their Computers
End users can wake their computers to use them during a time when the computers are normally in the sleep state.
•![]() End users who are at their computers can use the keyboard, mouse, or tap the power button.
End users who are at their computers can use the keyboard, mouse, or tap the power button.
•![]() If users need to access their client computer from a remote location, you can use Orchestrator Wake for Remote Access so that they can wake the computer through a web browser.
If users need to access their client computer from a remote location, you can use Orchestrator Wake for Remote Access so that they can wake the computer through a web browser.
Note ![]() To reduce the impact of centralized power management on end users, make sure that device drivers on client computers are current and support waking computers.
To reduce the impact of centralized power management on end users, make sure that device drivers on client computers are current and support waking computers.
Determining Whether a Computer Can Wake from Standby
Step 1 ![]() If the computer is on, change it to standby through the Windows Start menu.
If the computer is on, change it to standby through the Windows Start menu.
Step 2 ![]() Test wake capability:
Test wake capability:
•![]() Press a key on the keyboard.
Press a key on the keyboard.
•![]() Move or click the mouse.
Move or click the mouse.
•![]() Press the power button for 1 second. (Holding the button down longer might shut down the computer.)
Press the power button for 1 second. (Holding the button down longer might shut down the computer.)
Step 3 ![]() Repeat the first two steps, so that you can try each method.
Repeat the first two steps, so that you can try each method.
If the computer wakes when you press the power button but not through the keyboard or mouse, you can enable the keyboard and mouse. See the "Configuring the Mouse or Keyboard to Wake the Computer" section.
If the computer does not wake when you press the power button, see the "Pressing Power Button Does Not Wake Computer" section on page 10-2.
Configuring the Mouse or Keyboard to Wake the Computer
If mouse or keyboard actions do not wake a computer from standby, you enable them to do so.
Step 1 ![]() Open the Windows Control panel, and open either the Mouse or Keyboard.
Open the Windows Control panel, and open either the Mouse or Keyboard.
Step 2 ![]() On the Hardware tab in the Properties dialog box, click Properties.
On the Hardware tab in the Properties dialog box, click Properties.
Step 3 ![]() On the Power Management tab (Figure 6-1), select Allow this device to wake the computer.
On the Power Management tab (Figure 6-1), select Allow this device to wake the computer.
Figure 6-1 Power Management Tab

Note ![]() If a Power Management tab does not appear in the Mouse or Keyboard Properties dialog box, the device might not support waking from standby. You might need to upgrade the driver or the device itself.
If a Power Management tab does not appear in the Mouse or Keyboard Properties dialog box, the device might not support waking from standby. You might need to upgrade the driver or the device itself.
Configuring the Mouse or Keyboard to Wake the Computer Using the Administrator Console
If you cannot configure a mouse or keyboard through the Windows Control Panel to wake the connected computer you can enable them both, as well as the network interface card (NIC), through the Administrator console.
You might need to configure support for users waking their computers through the mouse or keyboard. You can simultaneously enable multiple devices through the Administrator console.
Step 1 ![]() On the Policies menu, click Edit Policies, and select a policy name in the list.
On the Policies menu, click Edit Policies, and select a policy name in the list.
You can also change the policy default settings.
Step 2 ![]() Click the Wake Settings tab, and if necessary, clear the Use policy default settings.
Click the Wake Settings tab, and if necessary, clear the Use policy default settings.
Step 3 ![]() Set these values under Basic Settings:
Set these values under Basic Settings:
|
|
|
|---|---|
Wake on mouse movement |
Enable |
Wake on keyboard press |
Enable |
Require password on wake |
As appropriate for your organization |
Step 4 ![]() Under Advanced Settings, enable all settings.
Under Advanced Settings, enable all settings.
Note ![]() If you change these settings in an individual policy, that policy does not inherit future changes that you make to the policy defaults.
If you change these settings in an individual policy, that policy does not inherit future changes that you make to the policy defaults.
For information about the Wake on WAN Settings section, see the "Using Wake on WAN to Wake Clients Across the Network" section.
Changing Wake Settings
These settings affect how you can wake PCs from the Administrator console, as well as how end users can wake their own PCs.
You can change wake settings for a specific policy, or you can set new policy default wake settings.
To access the Wake Settings tab:
Step 1 ![]() On the Policies menu, click Edit Policies.
On the Policies menu, click Edit Policies.
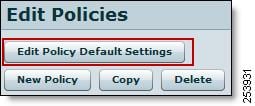
Step 2 ![]() To change the settings that all new policies created inherit, click Edit Policy Default Settings, and click the Wake Settings tab.
To change the settings that all new policies created inherit, click Edit Policy Default Settings, and click the Wake Settings tab.
To change the settings for a specific policy, select that policy in the left navigation pane, click the Wake Settings tab in the main content section, and clear the Use policy default settings check box.
Note ![]() The setting Don't change means to use whatever is set in the operating system or hardware for this action.
The setting Don't change means to use whatever is set in the operating system or hardware for this action.
Using Wake on WAN to Wake Clients Across the Network
•![]() Configuring Client Computers for Wake on LAN
Configuring Client Computers for Wake on LAN
•![]() Enabling Policy Wake on WAN Settings
Enabling Policy Wake on WAN Settings
•![]() Setting a Device As a Preferred Wake on WAN Proxy
Setting a Device As a Preferred Wake on WAN Proxy
•![]() Setting the Wake on WAN Proxies Per Broadcast Domain
Setting the Wake on WAN Proxies Per Broadcast Domain
•![]() How Orchestrator Selects Wake on WAN Proxies
How Orchestrator Selects Wake on WAN Proxies
Wake on WAN Overview
Wake on WAN technology provides a reliable method for waking computers from any low-power state (including off) across the enterprise network. It extends the Wake on LAN functionality present in most modern computers for sending magic packet data.
Orchestrator combines Wake on LAN with IT best practices to prevent packets from routing across subnet boundaries. It elects two proxy computers on each subnet, a primary and a secondary. Wake on WAN proxies are always awake. The one that receives a Wake on LAN magic packet from the server forwards the packet to clients within its subnet.
If the primary proxy has a problem interfering with communication with the server, the server can promote the other proxy to primary. It also selects another computer on the subnet, and wakes it if necessary to be the new secondary proxy.
You can assign as many proxies as you want per subnet. The best practice is to designate at least two.
•![]() Determining Subnet Boundaries
Determining Subnet Boundaries
•![]() Setting the System for Wake on WAN
Setting the System for Wake on WAN
Determining Subnet Boundaries
Orchestrator uses IP network number clustering. Computers within the same IP network number can broadcast Wake on LAN packets to each other.
Figure 6-2 Orchestrator Wake on WAN

1. ![]() The server sends a message to the Wake on WAN proxies on each subnet. The message has a request to wake the target computer.
The server sends a message to the Wake on WAN proxies on each subnet. The message has a request to wake the target computer.
2. ![]() The primary proxy receives the wake message and sends a Wake on LAN packet that contains the target node address over its subnet.
The primary proxy receives the wake message and sends a Wake on LAN packet that contains the target node address over its subnet.
3. ![]() The target computer receives the Wake on LAN packet and wakes.
The target computer receives the Wake on LAN packet and wakes.
The primary Wake on WAN proxy that receives the magic packet broadcasts it to the remaining clients on the subnet using port 7 and the subnet broadcast address.This address is formed by using the subnet's prefix, followed by all 1s. For example for 10.35.0.0/255.255.255.0 the broadcast address would be 10.35.0.255.
Setting the System for Wake on WAN
The Orchestrator server is enabled for Wake on WAN by default. Complete the following tasks:
•![]() Enable policy wake settings.
Enable policy wake settings.
•![]() Confirm that Wake on LAN is enabled on client computers. For information, see the "Configuring Client Computers for Wake on LAN" section.
Confirm that Wake on LAN is enabled on client computers. For information, see the "Configuring Client Computers for Wake on LAN" section.
If power management policies include scheduled wake requests, waking a computer from standby does not require Wake on LAN. Enable it to wake clients for operations that are not on a regular schedule or to wake them from an off state. For information, see the "Waking Clients on a Regular Schedule" section.
Configuring Client Computers for Wake on LAN
To use Wake on WAN, computers must be enabled for Wake on LAN.
Issues that can mean that computers are not enabled for Wake on LAN:
•![]() They can change to standby, but they immediately wake.
They can change to standby, but they immediately wake.
•![]() You have followed the steps for enabling Wake on WAN, and some clients do not respond to wake requests sent by Wake on WAN proxies.
You have followed the steps for enabling Wake on WAN, and some clients do not respond to wake requests sent by Wake on WAN proxies.
Wake on LAN is enabled in the computer BIOS and the network card. Settings vary slightly among hardware manufacturers. If you have specific questions about Wake on LAN support on your systems, refer to the documentation provided by the hardware vendor.
Note ![]() Devices that are not enabled for Wake on LAN still receive wake requests that you schedule in the Administrator console.You can continue to measure power use on those devices.
Devices that are not enabled for Wake on LAN still receive wake requests that you schedule in the Administrator console.You can continue to measure power use on those devices.
Step 1 ![]() In the Windows Control Panel, open Network Connections, right-click the connection that the computer uses, and choose Properties.
In the Windows Control Panel, open Network Connections, right-click the connection that the computer uses, and choose Properties.
Step 2 ![]() On the General tab, click Configure.
On the General tab, click Configure.
Step 3 ![]() On the Power Management tab (or Advanced tab, depending on the driver) of the network card dialog box, look for Wake on LAN settings such as the following
On the Power Management tab (or Advanced tab, depending on the driver) of the network card dialog box, look for Wake on LAN settings such as the following
|
|
|
|---|---|
Wake From Shutdown (or power off state) |
Enable |
Wake-Up Capabilities (or Wake on LAN) |
Set to Magic Packet or enable, depending on the choice |
Step 4 ![]() Also look for and enable settings such as those in Figure 6-3 that allow management systems to initiate power state changes.
Also look for and enable settings such as those in Figure 6-3 that allow management systems to initiate power state changes.
Figure 6-3 Power Management Tab


Tip ![]() When clients do not stay in standby because network traffic wakes them, select Only allow management stations to bring the computer out of standby to resolve the problem.
When clients do not stay in standby because network traffic wakes them, select Only allow management stations to bring the computer out of standby to resolve the problem.
Note ![]() If you update the NIC driver, the settings you change in this procedure might revert to the defaults, which can prevent the client from following Orchestrator power management policies. Be sure to check these settings any time you update the NIC driver.
If you update the NIC driver, the settings you change in this procedure might revert to the defaults, which can prevent the client from following Orchestrator power management policies. Be sure to check these settings any time you update the NIC driver.
Step 5 ![]() To configure the BIOS, restart the computer. During the startup process, press the keyboard key shown to enter the BIOS settings.
To configure the BIOS, restart the computer. During the startup process, press the keyboard key shown to enter the BIOS settings.
This option appears before Windows starts, and the key shown can vary among computer types.
When you have access to the BIOS settings, look for the settings related to devices waking the computer, and enable those. For specific settings, refer to the hardware documentation.
Enabling Policy Wake on WAN Settings
The first step to using Wake on WAN is to create policies in which it is enabled.
Step 1 ![]() On the Policies menu, click Edit Policies, and select a policy name in the list.
On the Policies menu, click Edit Policies, and select a policy name in the list.
You can also change the policy default settings.
Step 2 ![]() Click the Wake Settings tab, and, if necessary, clear the Use policy default settings.
Click the Wake Settings tab, and, if necessary, clear the Use policy default settings.
Step 3 ![]() Under Wake on WAN Settings, select Enable all settings.
Under Wake on WAN Settings, select Enable all settings.
If you want to edit these settings individually, click Customize settings. (The setting Don't change means to keep the default operating system setting.)
The settings correspond to the network card settings that you configure through the Windows Control Panel.
Test a wake operation through Wake on LAN. If some clients do not respond, you might need to configure the network card and BIOS separately on those clients.
Setting a Device As a Preferred Wake on WAN Proxy
If you enable Wake on WAN, you might also want to designate devices that Orchestrator checks first when it needs to select a new Wake on WAN proxy.
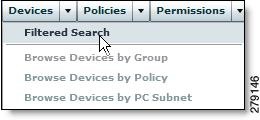
Step 1 ![]() On the Devices menu, click Filtered Search.
On the Devices menu, click Filtered Search.
Step 2 ![]() Configure the search filters to match the attributes of the computers to be set as preferred proxies or that you want to set to never be selected as a proxy.
Configure the search filters to match the attributes of the computers to be set as preferred proxies or that you want to set to never be selected as a proxy.
For tips and more information, see the How Orchestrator Selects Wake on WAN Proxies.
Step 3 ![]() Select one or more computers in the device list, and from the properties and attributes menu, click Edit Device Properties.
Select one or more computers in the device list, and from the properties and attributes menu, click Edit Device Properties.
Figure 6-4 Edit Device Properties Tab

Step 4 ![]() In the Edit Device Properties dialog box, check the Preferred Wake on WAN proxy check box, and select the setting for the computers.
In the Edit Device Properties dialog box, check the Preferred Wake on WAN proxy check box, and select the setting for the computers.
•![]() Preferred increases the ranking of the computers in the proxy-selection criteria.
Preferred increases the ranking of the computers in the proxy-selection criteria.
•![]() Never prevents the computers from being selected as proxies.
Never prevents the computers from being selected as proxies.
•![]() Default means that other computer attributes are used as selection criteria and that these computers are selected only if there are no available preferred proxies.
Default means that other computer attributes are used as selection criteria and that these computers are selected only if there are no available preferred proxies.
Setting the Wake on WAN Proxies Per Broadcast Domain
By default, Orchestrator designates two Wake on WAN proxies per broadcast domain, a primary and secondary. You can use the server settings page to change the number assigned within each broadcast domain.
For more information, see Using Wake on WAN to wake clients across the network.
Step 1 ![]() In the Orchestrator Administrator console, on the Server menu, click Configure Server Settings.
In the Orchestrator Administrator console, on the Server menu, click Configure Server Settings.
Step 2 ![]() Under Server Configuration, use the arrows, or enter a value for Proxies per broadcast domain.
Under Server Configuration, use the arrows, or enter a value for Proxies per broadcast domain.
Figure 6-5 Proxies Per Broadcast Domain

Note ![]() We recommend at least two proxies per broadcast domain. One proxy is always up to forward Wake on LAN packets from the server. If your network includes broadcast domains with fewer than six devices, work with a professional service consultant to determine the proxy settings.
We recommend at least two proxies per broadcast domain. One proxy is always up to forward Wake on LAN packets from the server. If your network includes broadcast domains with fewer than six devices, work with a professional service consultant to determine the proxy settings.
Step 3 ![]() If you increase the number of proxies per broadcast domain, save the new settings. You do not need to complete the remaining steps. Orchestrator selects the additional proxies based on its built-in selection criteria, as well as Preferred Proxy settings that you can set on individual clients.
If you increase the number of proxies per broadcast domain, save the new settings. You do not need to complete the remaining steps. Orchestrator selects the additional proxies based on its built-in selection criteria, as well as Preferred Proxy settings that you can set on individual clients.
If you reduce the number of proxies, complete the remaining steps to change the settings on the clients that you want to clear of proxy status.
Step 4 ![]() On the Devices menu, click Filtered Search.
On the Devices menu, click Filtered Search.
Figure 6-6 Filtered Search
Step 5 ![]() On the Search tab, use the By subnets filter and specify the subnets to display.
On the Search tab, use the By subnets filter and specify the subnets to display.
Step 6 ![]() In the device display, make sure the Wake on WAN Proxy column appears.
In the device display, make sure the Wake on WAN Proxy column appears.
If it is not, click Customize View, and select it on the Default tab. After you display the column, you can drag it to the left.
Step 7 ![]() Click the Wake on WAN Proxy column heading once or twice to sort the display with the proxies listed at the top.
Click the Wake on WAN Proxy column heading once or twice to sort the display with the proxies listed at the top.
Step 8 ![]() Determine which of the proxies you want to run as standard devices (that is, change to low power states according to policies assigned to them). Select them, and on the Edit Devices drop-down menu, click Edit Device Properties.
Determine which of the proxies you want to run as standard devices (that is, change to low power states according to policies assigned to them). Select them, and on the Edit Devices drop-down menu, click Edit Device Properties.
Step 9 ![]() For Preferred Wake on WAN proxy, select Never.
For Preferred Wake on WAN proxy, select Never.
After you change the setting, a polling interval set on proxies can take up to 15 minutes to receive the change from the server.
Step 10 ![]() When all of the devices you selected are cleared of proxy status, you set the Preferred Wake on WAN proxy setting on any of them to Preferred or Default so that they can be returned to the pool of devices that are available for proxy selection.
When all of the devices you selected are cleared of proxy status, you set the Preferred Wake on WAN proxy setting on any of them to Preferred or Default so that they can be returned to the pool of devices that are available for proxy selection.
For information about preferred Wake on WAN proxy settings, see the "Setting a Device As a Preferred Wake on WAN Proxy" section.
How Orchestrator Selects Wake on WAN Proxies
Orchestrator uses a built-in selection criteria for selecting new proxies. This helps you determine which devices to set as preferred proxies or to never be proxies.
Device Ranking For Proxy Selection
In the Administrator console, you can specify Wake on WAN proxy preference for devices in the device properties. Right-click selected devices and choose Device Properties.
When the Orchestrator server needs to select a new Wake on WAN proxy for a broadcast domain, the proxy is selected based on one of these factors and in the order listed:
1. ![]() Devices with the Preferred Wake on WAN proxy setting of Preferred.
Devices with the Preferred Wake on WAN proxy setting of Preferred.
2. ![]() Devices with a Preferred Wake on WAN proxy setting of Default if the device is not a laptop.
Devices with a Preferred Wake on WAN proxy setting of Default if the device is not a laptop.
3. ![]() Laptops with a Preferred Wake on WAN proxy setting of Default.
Laptops with a Preferred Wake on WAN proxy setting of Default.
The server runs other checks to determine whether the computer meets requirements for relaying data packets. For example, it confirms that the device IP address, and subnet mask are set properly for Wake on LAN within its broadcast domain.
Note ![]() If a new device joins a broadcast domain, and it has a higher preference ranking than an existing proxy, Orchestrator removes the existing proxy and assigns the new device in its place.
If a new device joins a broadcast domain, and it has a higher preference ranking than an existing proxy, Orchestrator removes the existing proxy and assigns the new device in its place.
Determining Devices To Set As Preferred Proxies
Wake on WAN proxies remain on at all times. Therefore, some devices are more appropriate than others to serve as proxies. For example, devices that need to be on 24 hours a day, 7 days a week, to serve critical functions are good candidates for preferred proxies.
Laptops tend to be moved around frequently. Set as many laptops as you can to never be preferred proxies, and leave the remaining laptops in the default setting.
The best practice is to leave most devices with the Preferred Wake on WAN proxy setting of Default and to allow Orchestrator to select new proxies as needed.
Waking Selected Devices
You can wake clients by selecting them in the Administrator console and running the Wake command.
You might need to wake clients for a specific reason, such as to apply a security patch. To do this, you can select devices in the Administrator console and manually run a wake request.
If you want to wake devices from the off as well as from the sleep states, you can do so through Wake on WAN. For information about enabling Wake on WAN, see the "Using Wake on WAN to Wake Clients Across the Network" section.
Step 1 ![]() In the Administrator console, on the Devices menu, click Filtered Search.
In the Administrator console, on the Devices menu, click Filtered Search.
Step 2 ![]() In the navigation panel, use the search filters to show the devices that you want to wake up (or use filters on one of the other tabs), and click Search.
In the navigation panel, use the search filters to show the devices that you want to wake up (or use filters on one of the other tabs), and click Search.
For example, use the Policy filter to wake only clients with a particular assigned policy.
Step 3 ![]() On the Devices tab, select the devices that you want to wake up, and on the power-state menu, click Wake.
On the Devices tab, select the devices that you want to wake up, and on the power-state menu, click Wake.
Figure 6-7 Wake Power States
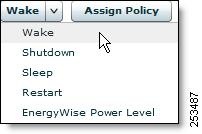
Note ![]() The menu button for setting power states shows the last-selected state. You might need to display the menu to see the state that you want.
The menu button for setting power states shows the last-selected state. You might need to display the menu to see the state that you want.
Waking Clients on a Regular Schedule
You can set clients to wake at a regular specified time through a policy schedule.
For example, if end users start working on their computers at 0700, set a wake request to run at 0650, or set computers to wake in preparation for the scheduled maintenance window.
Wake from Sleep or Wake from Off
You can set a scheduled task to wake computers from sleep (standby) without using Wake on LAN. This option works well for waking computers at the beginning of the work day.
However, if you want to wake computers for maintenance, you might also want to reach the computers that have been turned off. To wake these computers, you need to enable Orchestrator Wake on WAN. After that, include a second wake task in the policy that you set to go through Wake on WAN.
Step 1 ![]() In the Administrator console, from the Policies menu, choose Edit Policies.
In the Administrator console, from the Policies menu, choose Edit Policies.
Step 2 ![]() Create a new policy or select an existing one, and then click the Schedule tab.
Create a new policy or select an existing one, and then click the Schedule tab.
Step 3 ![]() From the power-state menu, choose Insert Wake (Figure 6-8).
From the power-state menu, choose Insert Wake (Figure 6-8).
Figure 6-8 Insert Sleep Power States

Note ![]() The menu button for setting power states shows the last-selected state, so you might need to display the menu to see the state that you want.
The menu button for setting power states shows the last-selected state, so you might need to display the menu to see the state that you want.
Step 4 ![]() In the Insert Power State Change dialog box:
In the Insert Power State Change dialog box:
•![]() Select the days of the week on which you want to wake computers.
Select the days of the week on which you want to wake computers.
•![]() Enter the time of day that you want the change to start.
Enter the time of day that you want the change to start.
•![]() If you want this wake event to reach computers in the off state, select the Wake using Wake on WAN check box.
If you want this wake event to reach computers in the off state, select the Wake using Wake on WAN check box.
Step 5 ![]() Configure any additional policy settings, and save the changes.
Configure any additional policy settings, and save the changes.
For example, if you wake computers at the beginning of the day, you might want to set a work-hours power scheme. For information about creating policies, see the "Overview of Policies and Power Management Settings" section on page 6-1.
Wake Settings
These settings affect how you can wake PCs from the Administrator console, as well as how end users can wake their own PCs.
You can change wake settings for a specific policy, or you can set new policy default wake settings.
To access the Wake Settings tab:
Step 1 ![]() On the Policies menu, click Edit Policies.
On the Policies menu, click Edit Policies.
Step 2 ![]() To change the settings that all new policies created will inherit, click Edit Policy Default Settings, and click the Wake Settings tab.
To change the settings that all new policies created will inherit, click Edit Policy Default Settings, and click the Wake Settings tab.
To change the settings for a specific policy, select that policy in the left navigation pane, click the Wake Settings tab in the main content section, and clear the Use policy default settings check box.
Note ![]() The setting Don't change means to use whatever is set in the operating system or hardware for this action.
The setting Don't change means to use whatever is set in the operating system or hardware for this action.
Basic Settings
•![]() Wake on mouse movement and Wake on keyboard press—Enabled by default so that users can move the mouse or press a key to wake the computers.
Wake on mouse movement and Wake on keyboard press—Enabled by default so that users can move the mouse or press a key to wake the computers.
•![]() Require password on wake—Enable this setting to add a layer of security to waking on mouse movement or key press.
Require password on wake—Enable this setting to add a layer of security to waking on mouse movement or key press.
Advanced Settings
Wake on WAN Settings
The settings in this section correspond to network card settings that you configure through the Windows control panel. All the settings are enabled by default. You can use the Orchestrator Wake on WAN feature, which extends the Wake on LAN technology within your network.
For information, see the "Using Wake on WAN to Wake Clients Across the Network" section.
When you use Wake on WAN, enable all these settings to ensure that the maximum number of client agents can receive wake requests through Wake on LAN.
 Feedback