Introduction
This document describes the procedure of deploying Cisco Secure Firewall Threat Defense Virtual and other network components on AWS using a terraform script. This procedure creates all the required resources in a new VPC on your AWS account. If you want to deploy the Threat Defense Virtual in an existing VPC on AWS, see Deploy Threat Defense Virtual in an Existing VPC on AWS.
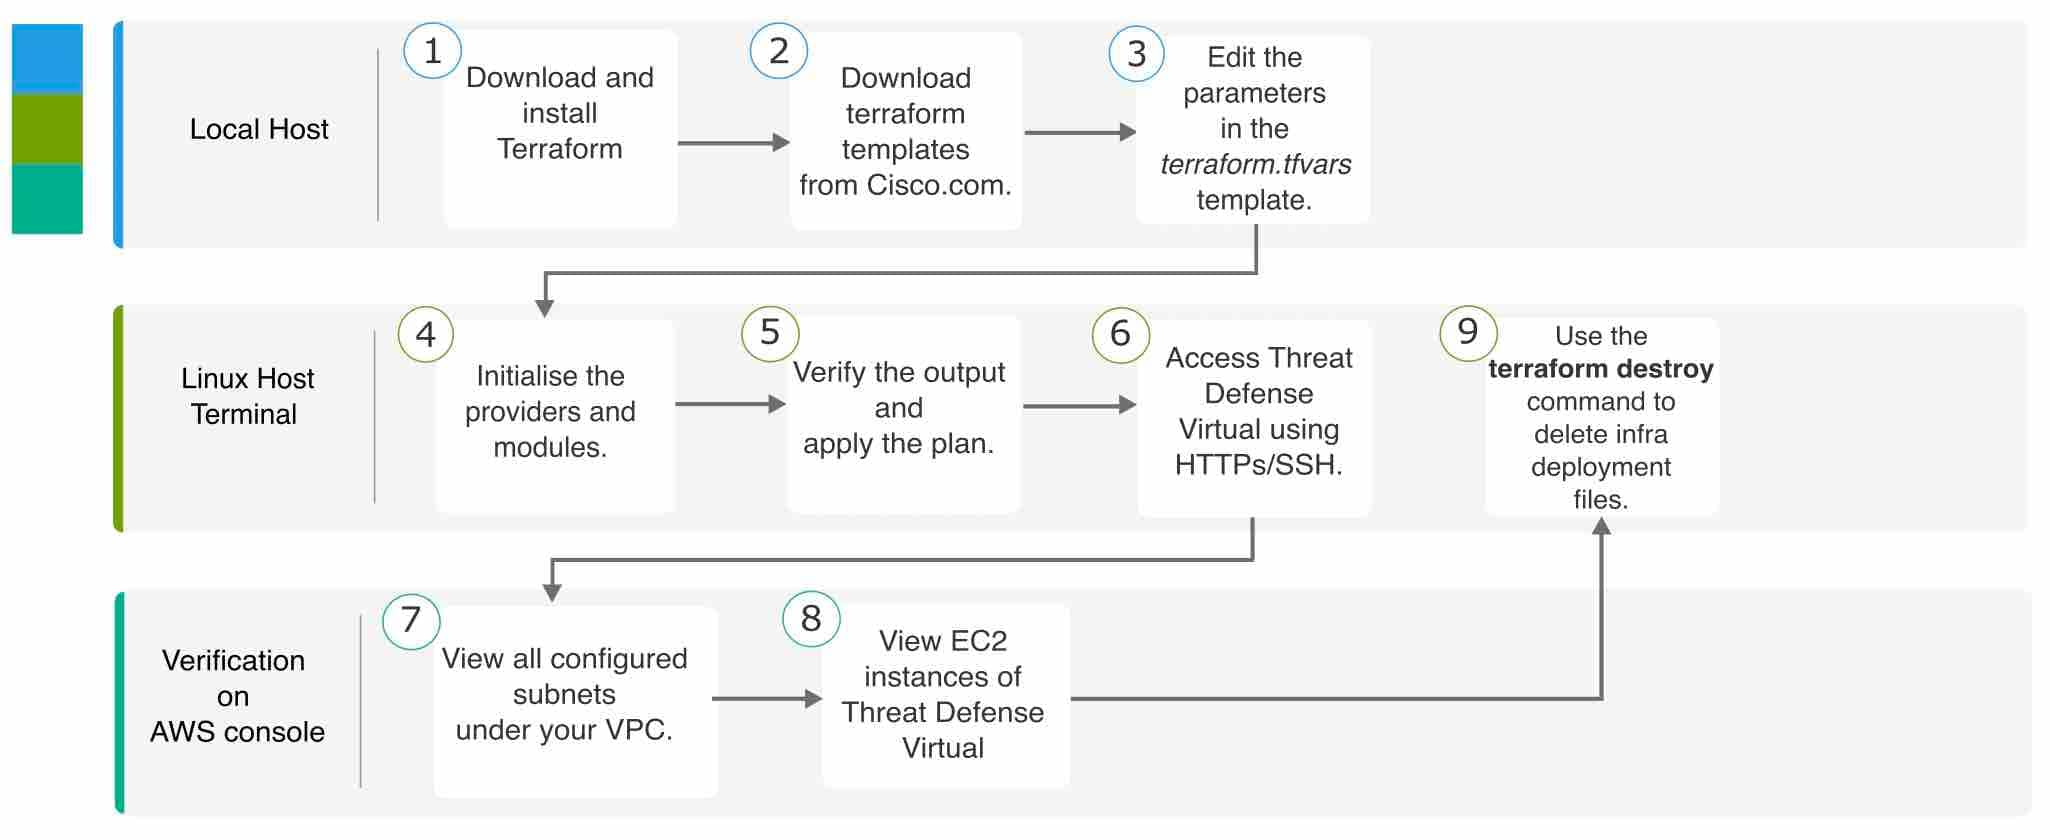
End-to-End Process
The following flowchart illustrates the workflow for deploying Threat Defense Virtual in a new VPC on AWS.
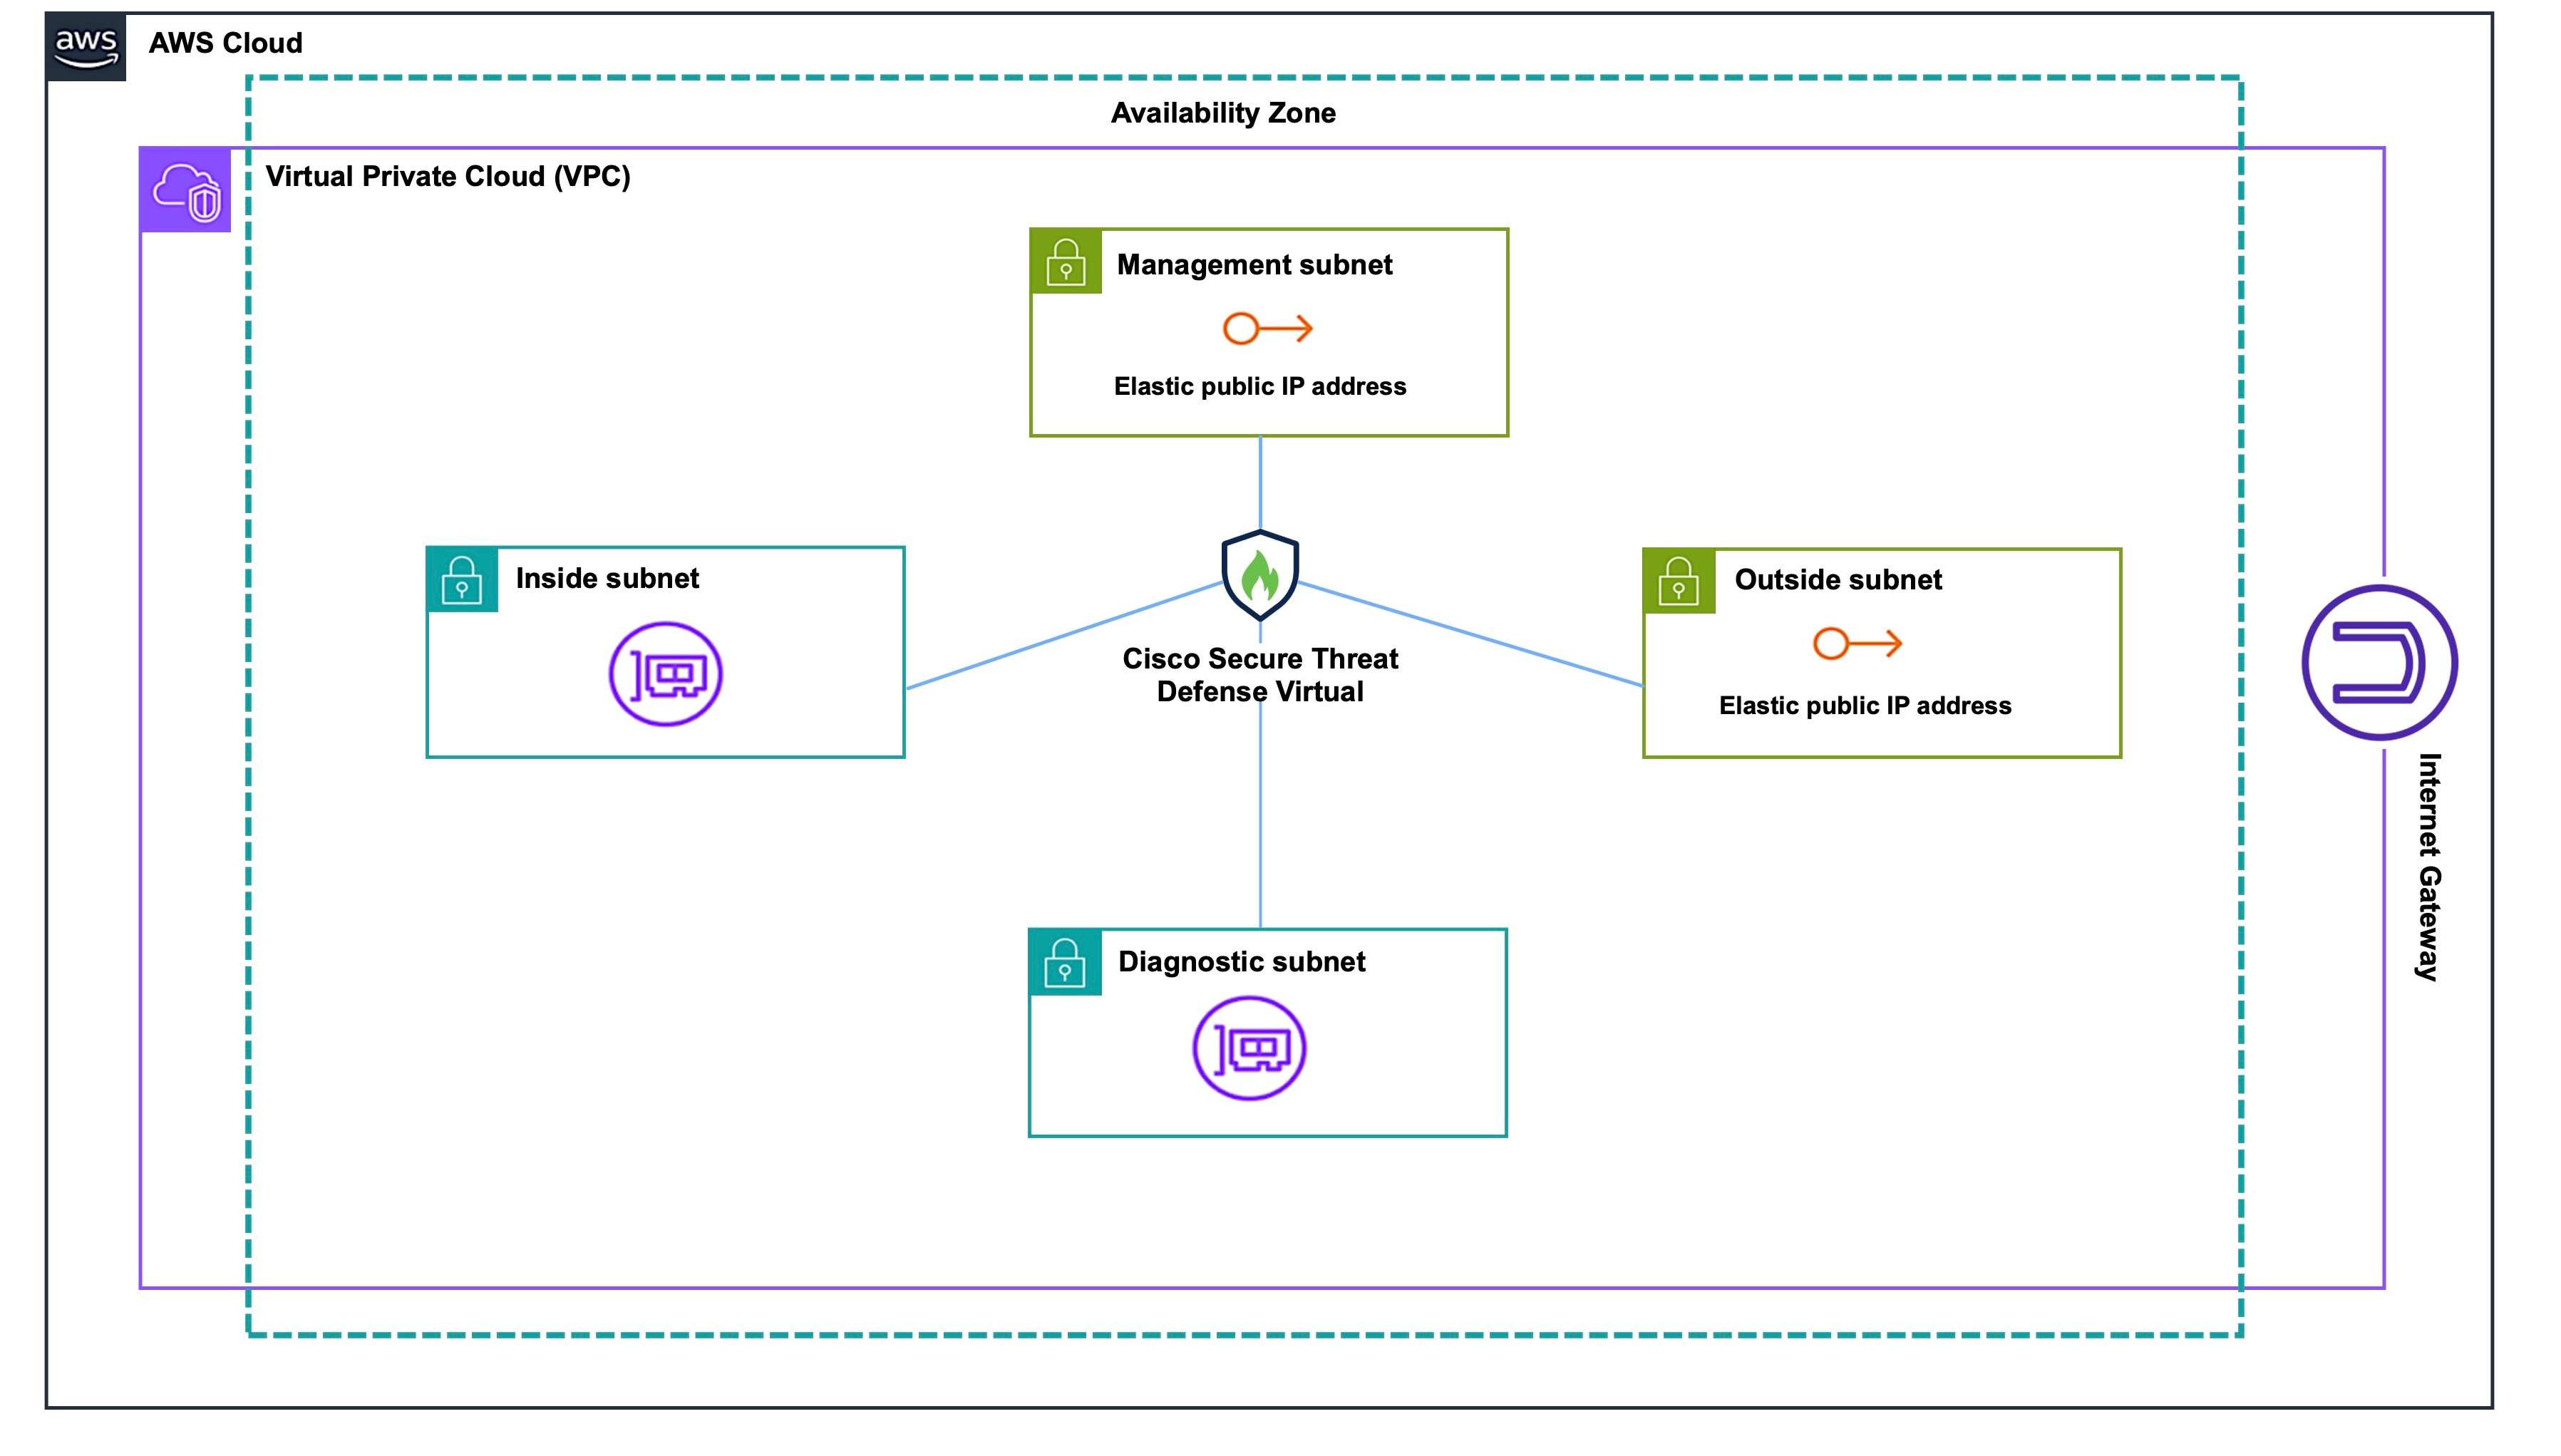
Sample Topology
The following network topology is deployed on AWS.
Prerequisites
-
Download and install Terraform on your local machine. For more information, see Install Terraform.
-
An AWS account with proper permissions for creating VPCs and EC2 instances. For more information, see Amazon VPC policy examples.
Procedure
Perform the following steps to deploy the required infrastructure in a new VPC in your AWS account.
Procedure
|
Step 1 |
Download the terraform scripts from here. |
||
|
Step 2 |
Extract the zip file and open the folder. |
||
|
Step 3 |
Open the terraform.tfvars file by using a code editor or "vim" and provide inputs. |
||
|
Step 4 |
Add your aws_access_key , aws_secret_key and region in the space provided between double quotes. For example, region = “us-east-1” . For information on how to fetch access keys and secret access key for your account, see Managing access keys for IAM users. |
||
|
Step 5 |
Optionally, add a password for admin in the admin_password field. By default, the password is Admin123. |
||
|
Step 6 |
If required, change the version of the Threat Defense Virtual in the "FTD_version" field. |
||
|
Step 7 |
Initialize the providers and modules by using the following command: |
||
|
Step 8 |
Submit the terraform plan by using the following command: |
||
|
Step 9 |
Verify the output of the plan in the terminal and then apply the plan by using the following command: |
||
|
Step 10 |
The terraform output displays the IP address of the management interface and the command to SSH into the firewall. Use these to access the Threat Defense Virtual over HTTPs/SSH. |
||
|
Step 11 |
Open the AWS console after the deployment is complete. Go to your provided region and validate the final configuration.
|
Clean-Up
We recommend that you delete the infrastructure deployment once it's not needed to prevent unnecessary billing on your AWS account.
To delete the infrastructure deployment that was created by terraform, enter the terraform destroy command from the same directory in which you entered the terraform apply command.
terraform destroy
Type "yes" to delete the infrastructure deployment.
Note |
The terraform destroy command does not delete anything that was manually configured on your AWS account. |
After entering the command, verify that all the resources are deleted from your AWS account.
 Feedback