Cisco IoT Field Network Director — Oracle Upgrade from 18c to 19c
This document provides the latest information about upgrading from Oracle 18c to Oracle19c in support of IoT Field Network Director (IoT FND), Release 4.7 installations.
Organization
This guide includes the following sections.
|
Provides details on the use of bold and italic keywords, brackets and parentheses within the document. |
|
|
Summarizes minimum server requirements (RAM, disk space, tmp directory) necessary to support the Oracle 19c database software install. |
|
|
Step-by-step instructions for installing Oracle 19c database software. |
|
|
Step-by-step instructions for upgrading Oracle 18c to Oracle 19c database software. |
|
|
Step-by-step instructions on how to start up the IoT-FND with Oracle 19c Database. |
Conventions
This document uses the following conventions.
| Conventions | Indication |
|---|---|
|
bold font |
Commands and keywords and user-entered text appear in bold font. |
|
italic font |
Document titles, new or emphasized terms, and arguments for which you supply values are in italic font. |
|
[ ] |
Elements in square brackets are optional. |
|
{x | y | z } |
Required alternative keywords are grouped in braces and separated by vertical bars. |
|
[ x | y | z ] |
Optional alternative keywords are grouped in brackets and separated by vertical bars. |
|
string |
A nonquoted set of characters. Do not use quotation marks around the string or the string will include the quotation marks. |
|
courier font |
Terminal sessions and information the system displays appear in courier font. |
|
< > |
Nonprinting characters such as passwords are in angle brackets. |
|
[ ] |
Default responses to system prompts are in square brackets. |
|
!, # |
An exclamation point (!) or a pound sign (#) at the beginning of a line of code indicates a comment line. |
 Note |
Means reader take note. Notes contain helpful suggestions or references to material not covered in the manual. |
Caution: Means reader be careful. In this situation, you might perform an action that could result in equipment damage or loss of data.
Warning: IMPORTANT SAFETY INSTRUCTIONS
Means danger. You are in a situation that could cause bodily injury. Before you work on any equipment, be aware of the hazards involved with electrical circuitry and be familiar with standard practices for preventing accidents. Use the statement number provided at the end of each warning to locate its translation in the translated safety warnings that accompanied this device.
SAVE THESE INSTRUCTIONS
Minimum Hardware Requirements
Ensure that your FND system meets the following physical memory requirements in the below table.
The recommendations in the Minimum Hardware Requirements table below are specified in the Server Configuration Checklist for Oracle Database Installation and Storage Checklist for Oracle Database Installation. Additional RAM and swap space may be required to tune and/or improve the RDBMS performance as provided in Additional Requirements to Support Oracle Install table.
| RAM | Swap Space Allocation Relative to RAM |
|---|---|
|
Between 1GB (minimum) and 2GB (recommended) |
1.5 times the size of RAM |
|
Between 2GB and 16GB |
Equal to the size of RAM |
|
Greater than 16GB |
16GB |
| Item | Requirement |
|---|---|
|
Disk space allocated to the |
At least 1 GB of space in the |
|
Local disk space for Database software files |
7.2 GB |
Installing Oracle 19c Database
Procedure
|
Step 1 |
Verify that IoT FND is running with Oracle 18c database software. |
|
Step 2 |
Stop the FND application by entering service cgms stop. |
|
Step 3 |
Install the Oracle 19c database software on the database server where Oracle 18c is currently running. |
|
Step 4 |
Follow these steps to install the Oracle 19c database: Option 1: Use the “oracle-database-preinstall-19c” package to perform all of your prerequisite setup steps by entering: yum install -y oracle-database-preinstall-19c Option 2: If you are unable to use the yum update, then manually set the following parameters as detailed in the Option 2: Manual Setup of Oracle 19c Database section below. |
Prerequisites for Manual Setup of Oracle 19c Database
If you have not used the 'oracle-database-preinstall-19c' package to perform all the prerequisites, you need to manually perform the following setup tasks:
Procedure
|
Step 1 |
Add the following lines to the /etc/sysctl.conf file, or in a file called /etc/sysctl.d/98-oracle.conf. Example: |
|
Step 2 |
Run one of the following commands to change the current kernel parameters, depending on which file you edited. Example: |
|
Step 3 |
Add the following lines to a file called /etc/security/limits.d/oracle-database-preinstall-19c.conf. Example: |
|
Step 4 |
Set secure Linux to permissive by editing the /etc/selinux/config file (edits are noted in bold type): Example:Once the change is complete, run the following command: |
|
Step 5 |
Disable the Linux firewall by entering: Example: |
|
Step 6 |
Create the following Directories in which the Oracle software will be installed: Example: |
|
Step 7 |
Download Oracle19cSoftware and unzip the file by doing the following: cd /home/oracle/app/oracle/product/product/19.0.0/dbhome_1 unzip -oq /home/oracle/LINUX.X64_193000_db_home.zip |
|
Step 8 |
Run the installer: cd /home/oracle/app/oracle/product/19.0.0/dbhome_1/ ./runInstaller <--Note that there is a period before the forward slash . |
Manual Setup of Oracle 19c Database
 Tip |
For each step in this install procedure, click Next to proceed to the next screen until setup is complete. |
Procedure
|
Step 1 |
Select Configuration Option. Click Set Up Software Only button. 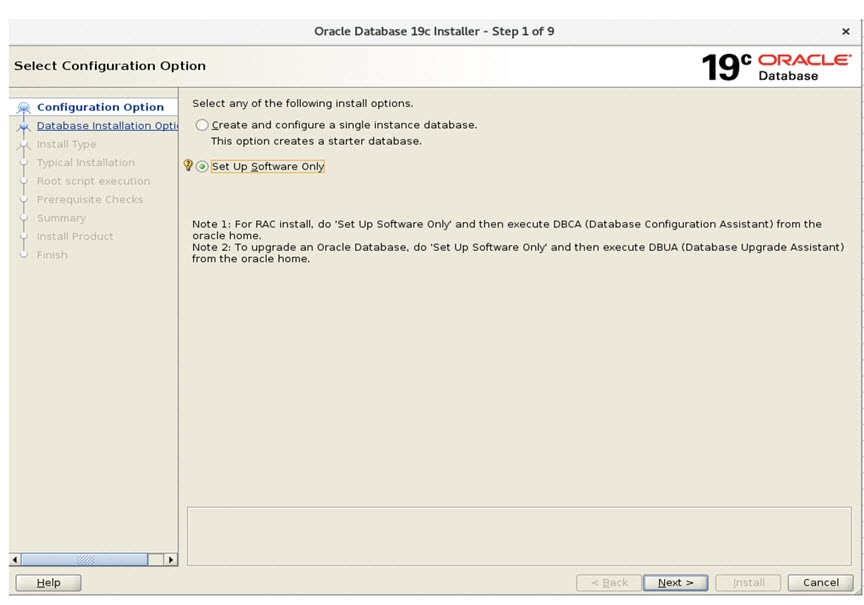 |
||
|
Step 2 |
Select Single instance database installation option in the Database Installation Option menu. 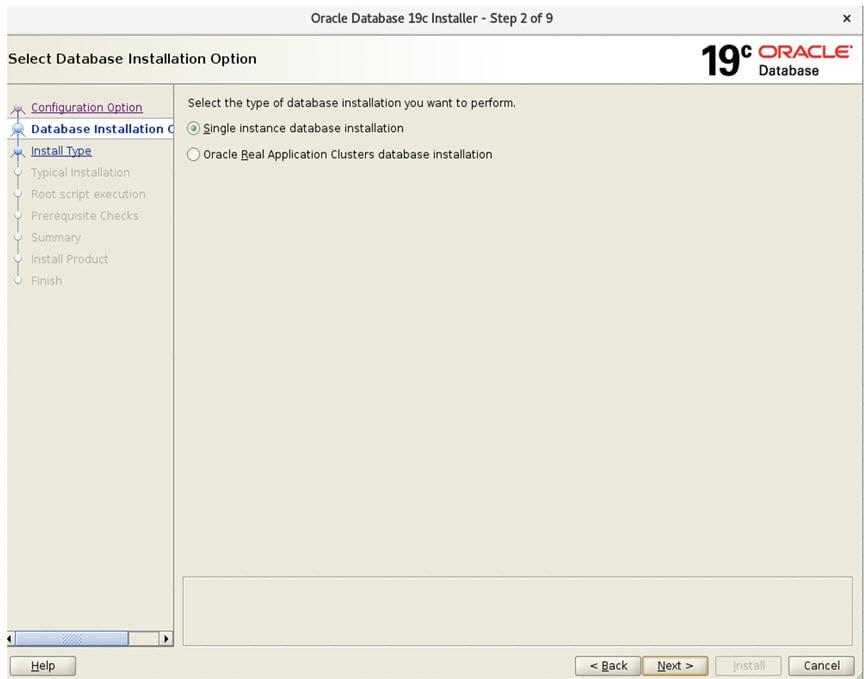 |
||
|
Step 3 |
Select Enterprise Edition option in Database Edition menu. 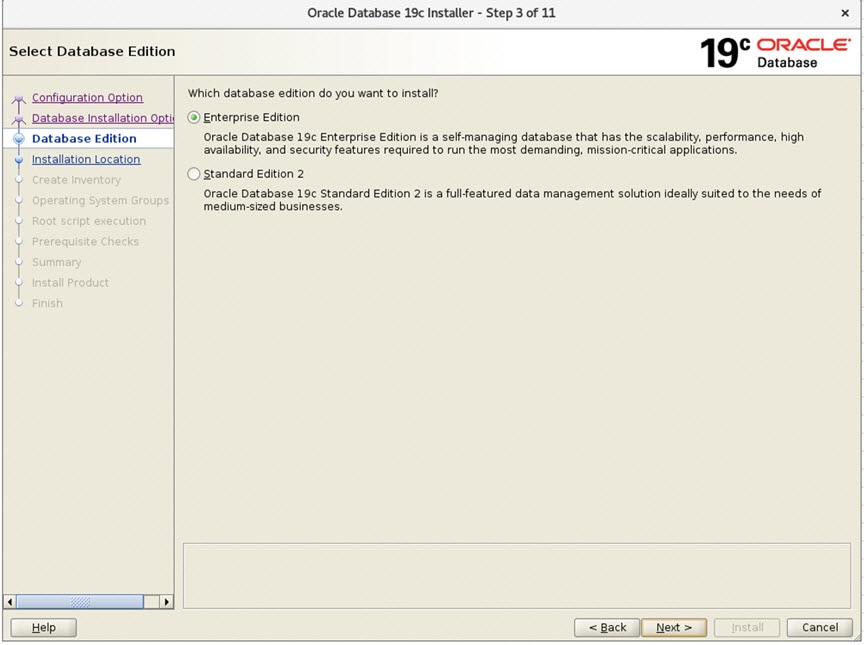 |
||
|
Step 4 |
Select Installation Location and enter /home/oracle/app/oracle (with no parenthesis) in the Oracle base field. 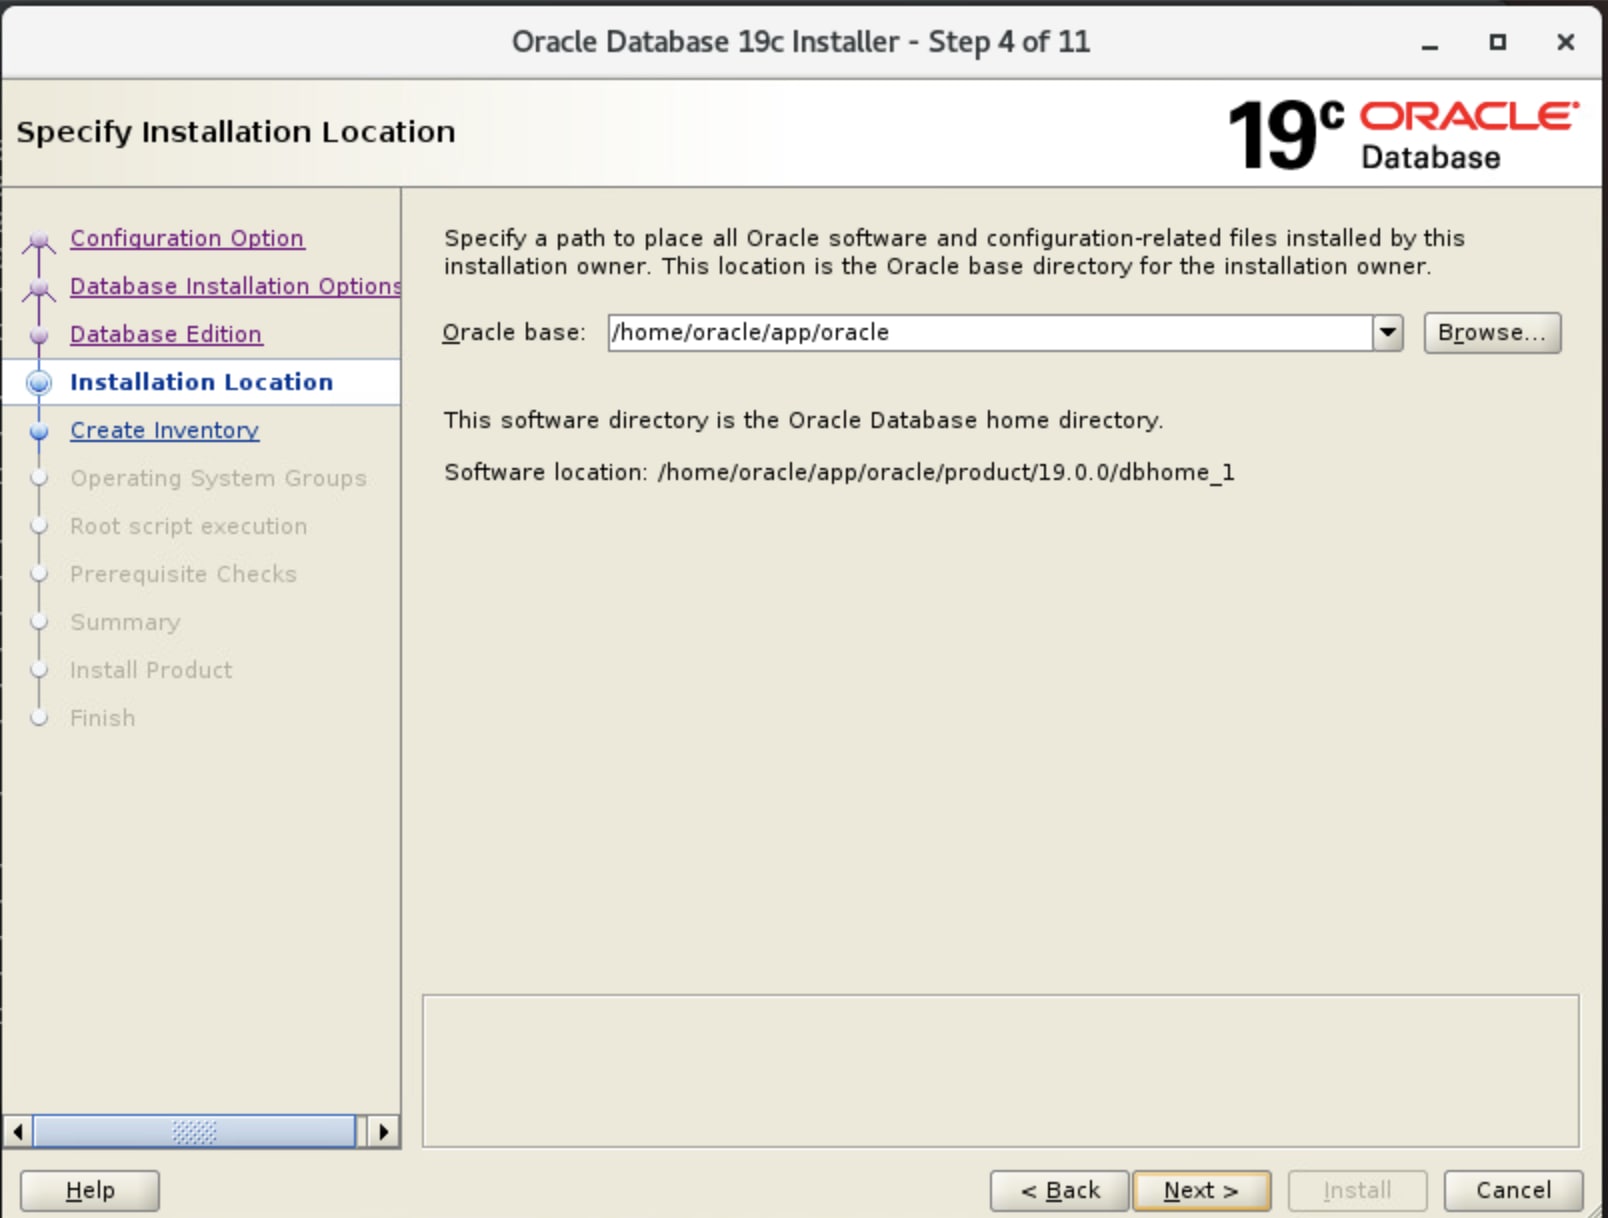 |
||
|
Step 5 |
Select Create Inventory.
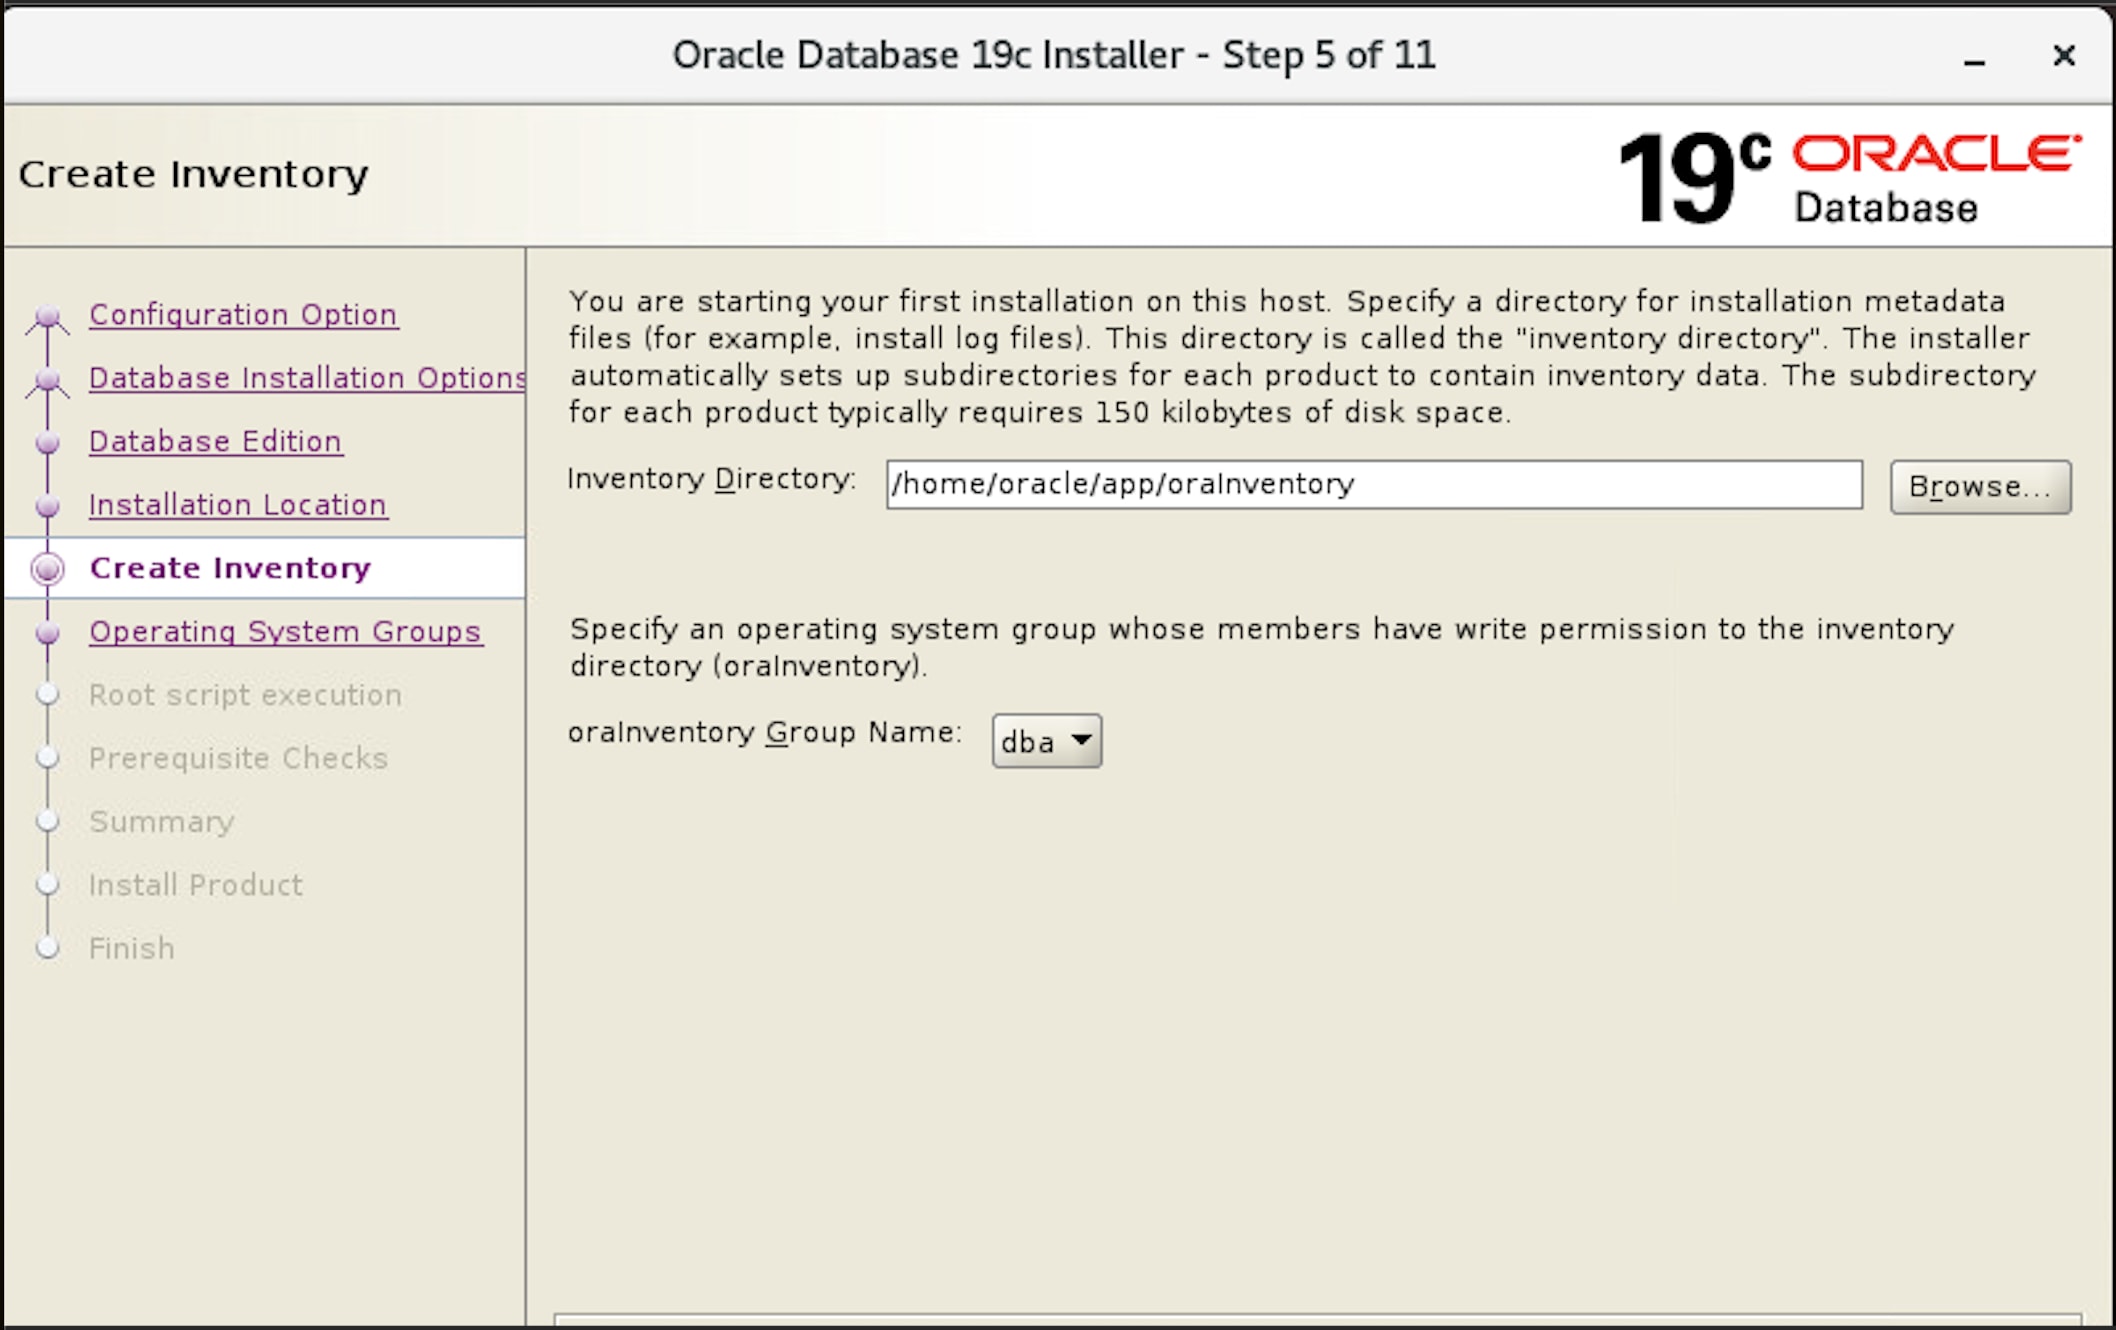 |
||
|
Step 6 |
Select the ‘dba’ option in all drop-down menu for all six groups (Privileges).  |
||
|
Step 7 |
Root script execution menu
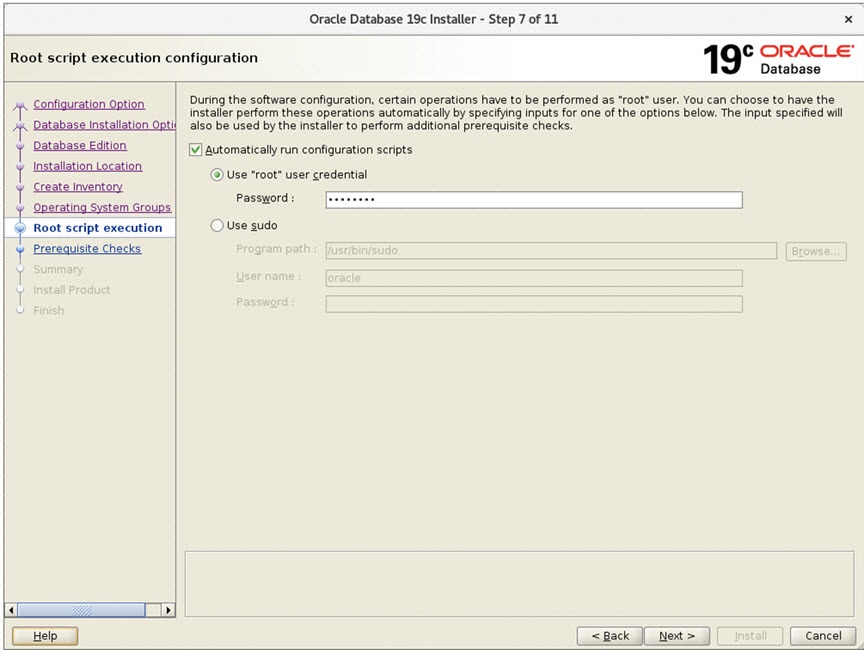 |
||
|
Step 8 |
In the Prerequisite Checks Menu, select the Ignore All check box (top-right hand corner of screen). 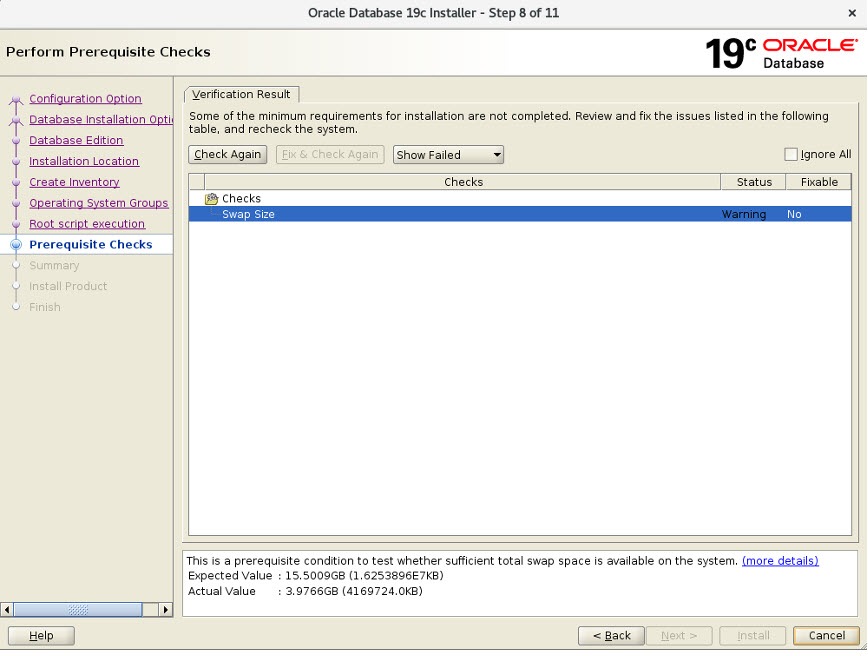 |
||
|
Step 9 |
Prerequisite Checks Menu At the Perform Prerequisite Checks screen, click Next >. The Oracle Database 19c Installer Summary screen confirm that all minimum requirements are met.  |
||
|
Step 10 |
Summary Menu: At the Summary screen, click Install. 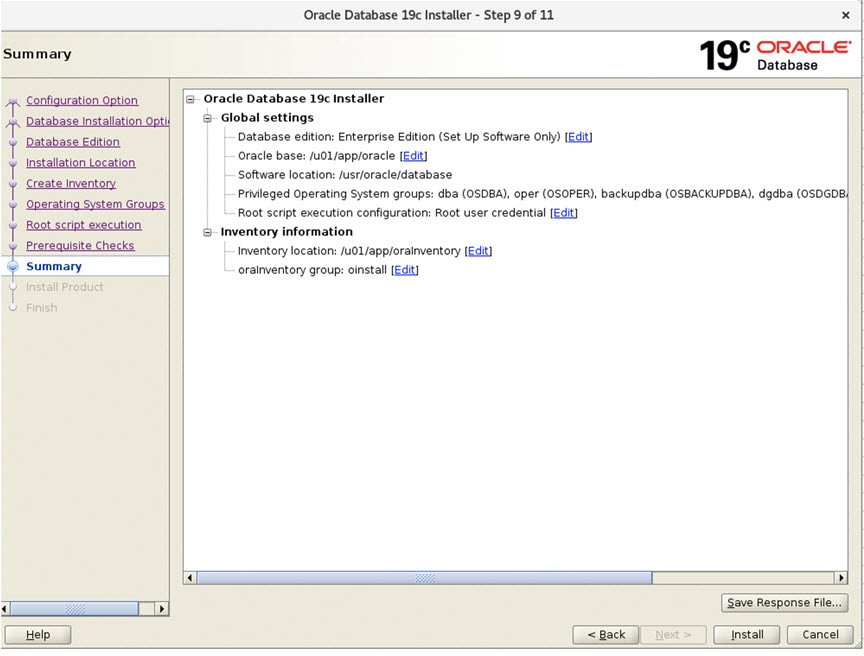 |
||
|
Step 11 |
Database Upgrade Summary Review the Summary panel. Take a screenshot of the page for future reference. Then, click Finish to complete the Oracle 19c database installation and registration.  |
||
|
Step 12 |
The Oracle 19c registration is successful. The Finish screen appears confirming successful registration of the Oracle 19c database. Click Close. 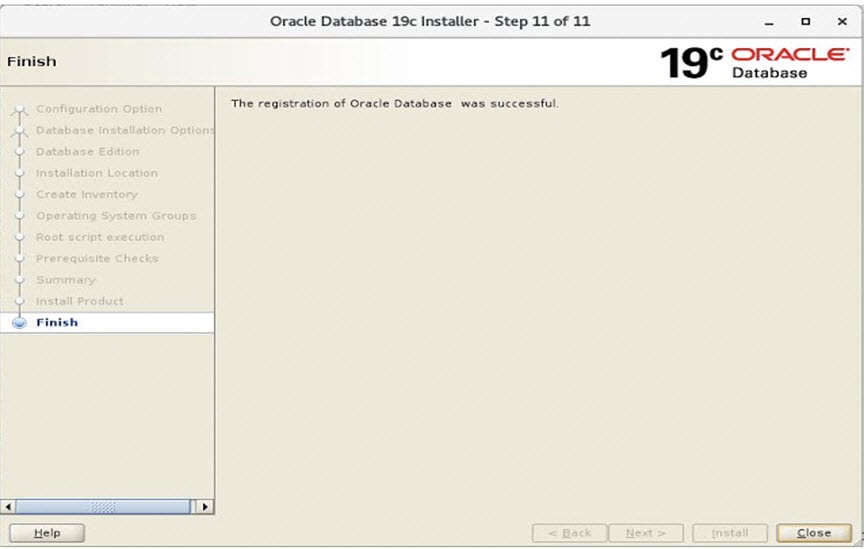 You must now upgrade from Oracle 18c to Oracle 19c by following the steps below. |
Oracle Patch Installation (Optional)
To install the Oracle patch:
Before you begin
Note |
This is an illustration of the Oracle 19c patch installation (from 19.3.0.0.0 to 19.18.0.0.0). |
-
Check the current Oracle version.
[root@iot-fnd-oracle ~]# su - oracle[oracle@iot-fnd-oracle ~]$ sqlplus / as sysdba SQL*Plus: Release 19.0.0.0.0 - Production on Wed Mar 29 20:59:44 2023 Version 19.3.0.0.0 Copyright (c) 1982, 2019, Oracle. All rights reserved. Connected to: Oracle Database 19c Enterprise Edition Release 19.0.0.0.0 - Production Version 19.3.0.0.0 SQL> exit; -
Stop the FND application (if running).
service cgms stop -
Log into Oracle.
su - oracle -
Stop the Oracle service (if running).
cd /opt/cgms-oracle/scripts ./stopOracle.sh -
Apply the patch file: p34765931_190000_Linux-x86-64.zip.
Procedure
|
Step 1 |
Create a patches directory under the /home/oracle folder to place the patch zip files. |
|
Step 2 |
Download the database patch zip file (p34765931_190000_Linux-x86-64.zip) from Oracle Database 19c Release Update & Release Update Revision January 2023 Known Issues. |
|
Step 3 |
Copy the patch zip files to the /home/oracle/patches folder. |
|
Step 4 |
Unzip the patch files (p34765931_190000_Linux-x86-64.zip) in the /home/oracle/patches folder. |
|
Step 5 |
Go to the patch directory The minimum OPatch version required is 12.2.0.1.34. The patch installation FAILS if the OPatch version is below 12.2.0.1.34. For more information on applying the minimum OPatch version, see Upgrading OPatch. |
|
Step 6 |
Run the following command to apply the patch. |
|
Step 7 |
Check if the upgraded patch version is 19.18.0 in the interim patches. |
|
Step 8 |
Confirm the upgraded patch. |
What to do next
su - oracle
cd /opt/cgms-oracle/scripts
./startOracle.sh Upgrading OPatch
[oracle@iot-fnd-oracle 34765931]$
/home/oracle/app/oracle/product/19.0.0/dbhome_1/OPatch/opatch apply
Oracle Interim Patch Installer version 12.2.0.1.17
Copyright (c) 2023, Oracle Corporation. All rights reserved.
Oracle Home : /home/oracle/app/oracle/product/19.0.0/dbhome_1
Central Inventory : /home/oracle/app/oraInventory
from : /home/oracle/app/oracle/product/19.0.0/dbhome_1/oraInst.loc
OPatch version : 12.2.0.1.17
OUI version : 12.2.0.7.0
Log file location :
/home/oracle/app/oracle/product/19.0.0/dbhome_1/cfgtoollogs/opatch/opatch2023-02-10_07-16-05AM_1.log
Verifying environment and performing prerequisite checks...
Prerequisite check "CheckMinimumOPatchVersion" failed.
The details are:
The OPatch being used has version 12.2.0.1.17 while the following patch(es) require higher versions:
Patch 34765931 requires OPatch version 12.2.0.1.34.
Please download latest OPatch from My Oracle Support.
UtilSession failed: Prerequisite check "CheckMinimumOPatchVersion" failed.
Log file location:
/home/oracle/app/oracle/product/19.0.0/dbhome_1/cfgtoollogs/opatch/opatch2023-02-10_07-16-05AM_1.log
OPatch failed with error code 73The steps are an illustration for requesting the minimum OPatch version 12.2.0.1.34 to apply the 19.18 patch on an old OPatch version 12.2.0.1.17.
Procedure
|
Step 1 |
To upgrade the OPatch version, download the 12.2.0.1.36 OPatch version from the Oracle support Patch 6880880 (oracle.com) . |
|
Step 2 |
Place the zip file in the $ORACLE_HOME directory and follow the steps that are given below. The OPatch file is: p6880880_190000_Linux-x86-64.zip |
What to do next
Continue with Step 6 in the Oracle Patch Installation procedure.
Upgrading from Oracle 18c to 19c
After you have successfully installed the Oracle 19c database, you can now upgrade your Oracle 18c software to Oracle 19c software by following the information noted under each step (for example, 1, 2 and 3, etc.) and sub-step (a, b, c, etc.) summarized below:
Procedure
|
Step 1 |
Go to the following directory: /home/oracle/app/oracle/product/19.0.0.0/dbhome_1/bin
|
|
Step 2 |
Before running the upgrade process, run the following queries on the 18c database: /home/oracle/app/oracle/product/18.1.0/dbhome_1/jdk/bin/java-jar /home/oracle/app/oracle/product/19.0.0.0/dbhome_1/rdbms/admin/preupgrade.jar SQL>@/home/oracle/app/oracle/cfgtoollogs/CGMS/preupgrade/preupgrade_fixups.sql SQL>@$ORACLE_HOME/rdbms/admin/utlrp.sql
Once done, start the upgrade process by entering: ./dbua. Follow the screen instructions in the Database Upgrade Assistant. Select the database and click Next >. The Database Upgrade Assistant ensures the database meets the necessary requirements by performing a prerequisite check. 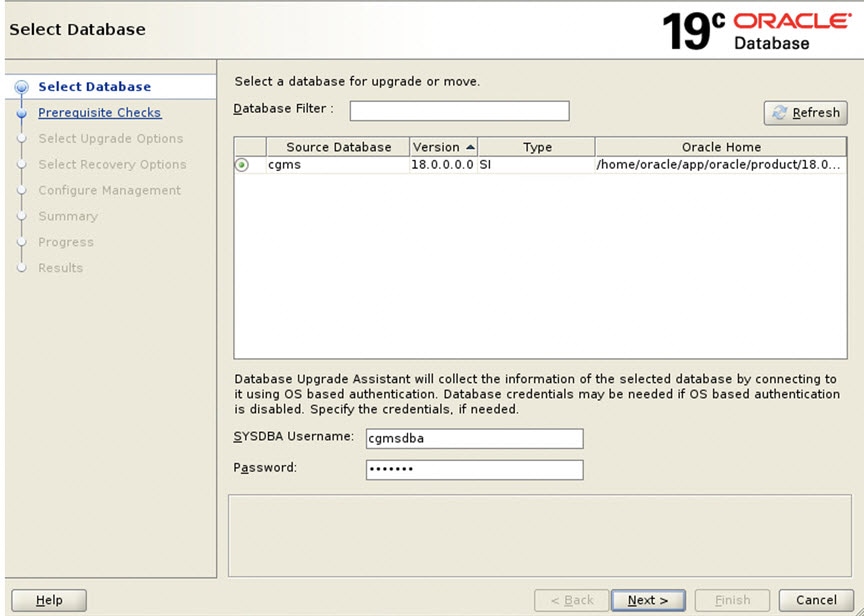
|
|
Step 3 |
Database Upgrade Assistant : Prerequisite Checks Click Next >. The upgrade begins. If there are any issues with the upgrade, a screen displays the issues that need to be resolved. 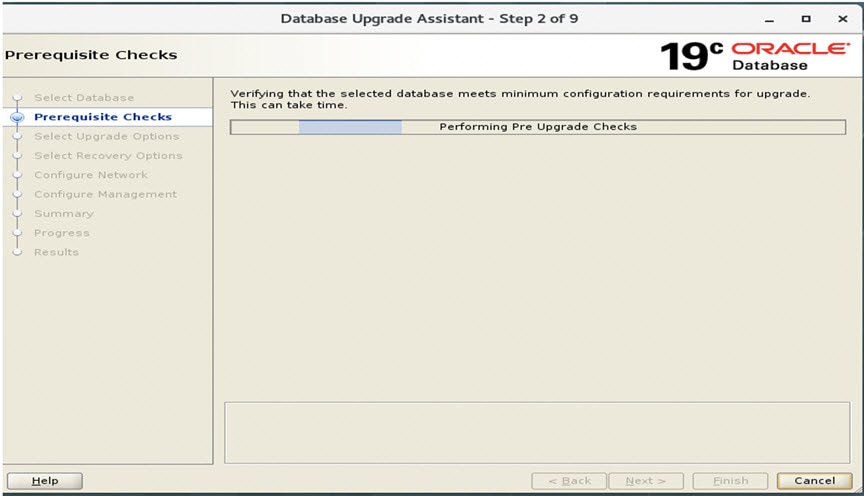
|
|
Step 4 |
Database Upgrade Assistant : Displays Issues to Fix Before and After Upgrade After resolving any outstanding issues noted under Checks to be fixed, click Next >. 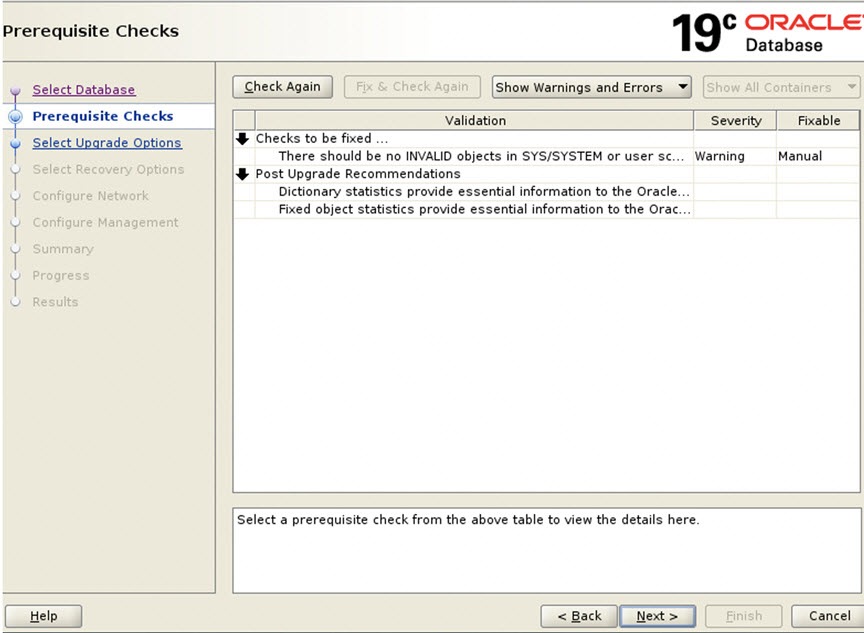
A page displays Recommendations for items that you should address after the upgrade completes (Post Upgrade).
|
|
Step 5 |
Displays Issues to Fix After Upgrade Click Next > to go to the next screen. 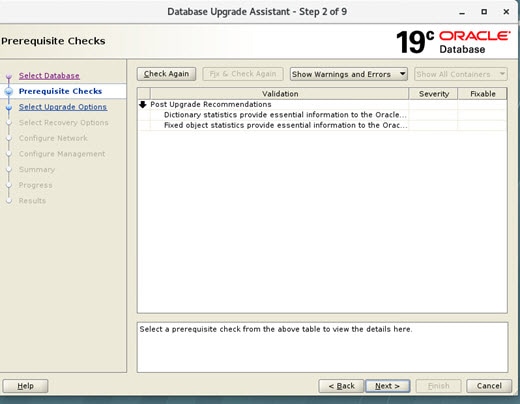 |
|
Step 6 |
Select Upgrade Options. Uncheck the Recompile Invalid Object During Post Upgrade option. Ensure that the Enable Parallel Upgrade and Unable Timezone Data options remain checked. Click Next >. 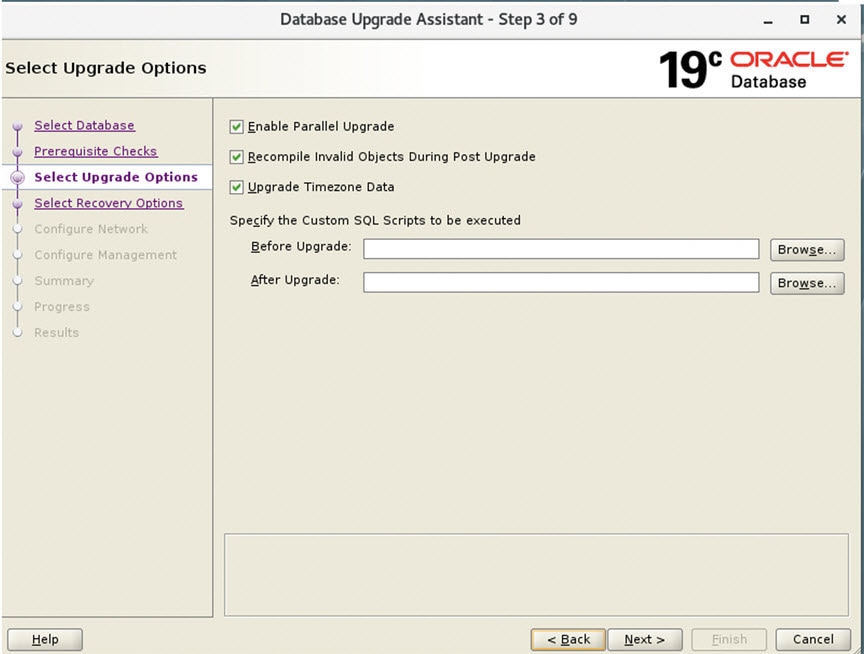 |
|
Step 7 |
Select Recovery Options. Select Use Flashback and Guaranteed Restore Point and Create a New Guaranteed Restore Point. Click Next >. 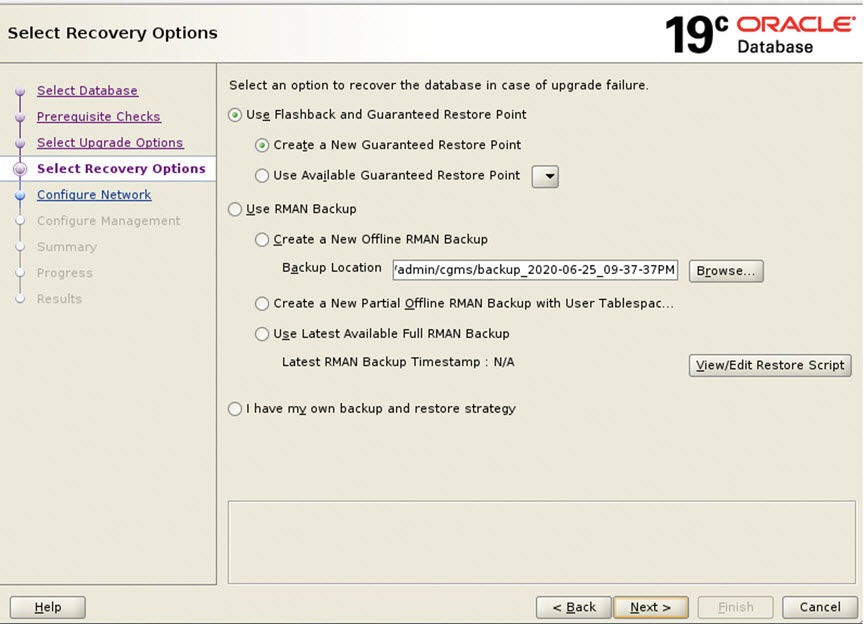
|
|
Step 8 |
Configure Network. In the Listener Selection window, select the check box for ‘CGMSTNS’ (if not already checked). Click Next >. 
|
|
Step 9 |
Configure Management. Ensure that the check box next to Configure Enterprise Manager (EM) database express option is unchecked. Click Next >. 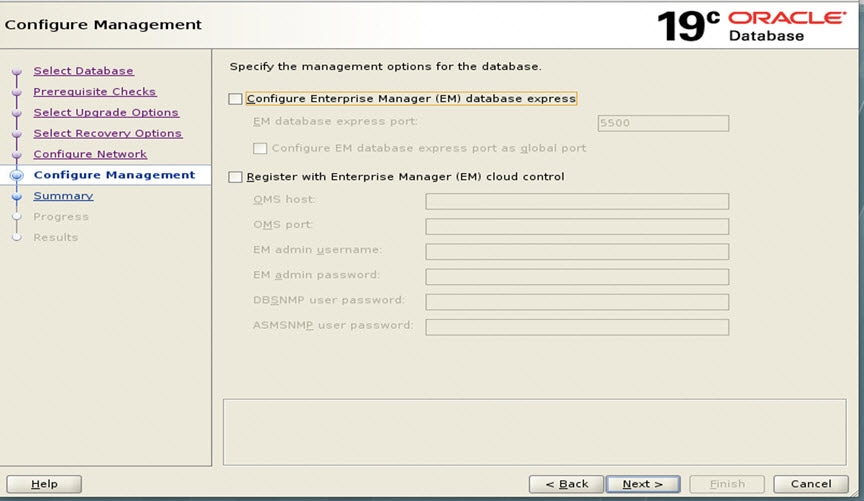
|
|
Step 10 |
Database Upgrade Summary Page At the Database Upgrade Summary page, click Finish. The Database Upgrade Assistant page appears noting that the Oracle 18c to Oracle 19c upgrade was a success. 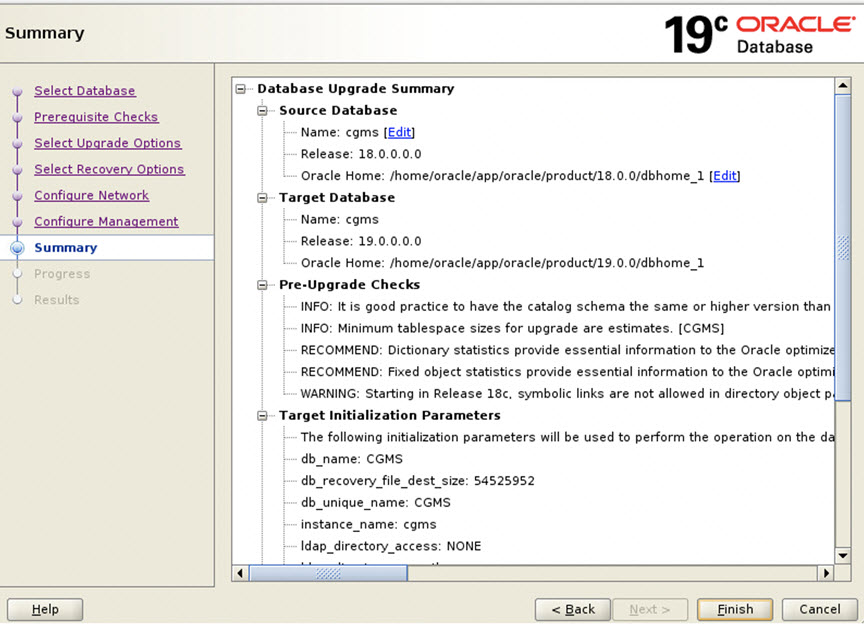
The database upgrade results are displayed. 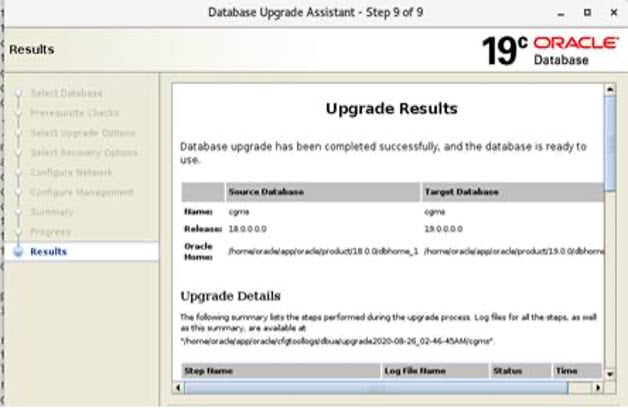
|
Post Upgrade Steps
Procedure
|
Step 1 |
Once the DBUA process is successfully executed, update the /home/oracle/.bashrc file with the Oracle 19.0.0 path by removing the old 18c path. vim /home/oracle/.bashrc |
|
Step 2 |
Restart the Database. su - oracle cd /opt/cgms-oracle/scripts ./stopOracle.sh ./startOracle.sh |
|
Step 3 |
Update Cron job points to Oracle 19.0.0 to auto-start the Oracle for VM reboot. ./deinstallOracleJob.sh ./installOracleJob.sh |
|
Step 4 |
Start FND service by entering: service cgms start
|
|
Step 5 |
Check whether the listener is pointing to 19.0.0.0 database instead of 18c by entering: ps -ef | grep oracle
00:00:02 /home/oracle/app/oracle/product/19.0.0.0/dbhome_1/bin/tnslsnr CGMSTNS -inherit
|
|
Step 6 |
Once FND service is started, log into the FND UI and verify the data. If there is no issue, the Oracle 18c to 19c upgrade process is completed. |
 Feedback