Table Of Contents
Accessing the Profile Manager Window
Using the Profile Manager
The Profile Manager allows you to create, modify, delete, and view, and associate profiles.
Accessing the Profile Manager Window
Step 1 Click Profile Manager in the CCNSC Subscriber Provisioning Control Center window to open the Profile Manager window.
The Profile Manager window appears, as shown in Figure 7-1. Some default profiles, consisting of different profile types (for example, Service, Provision, and Task) and groups (Default and GUI) are provided in this window.
Note By default, both the Default and GUI groups, including their underlying profiles, have read only permissions. Therefore, you cannot add groups, or add, edit, remove, or associate any of the profiles within the Default and GUI groups.
Figure 7-1 Profile Manager Window
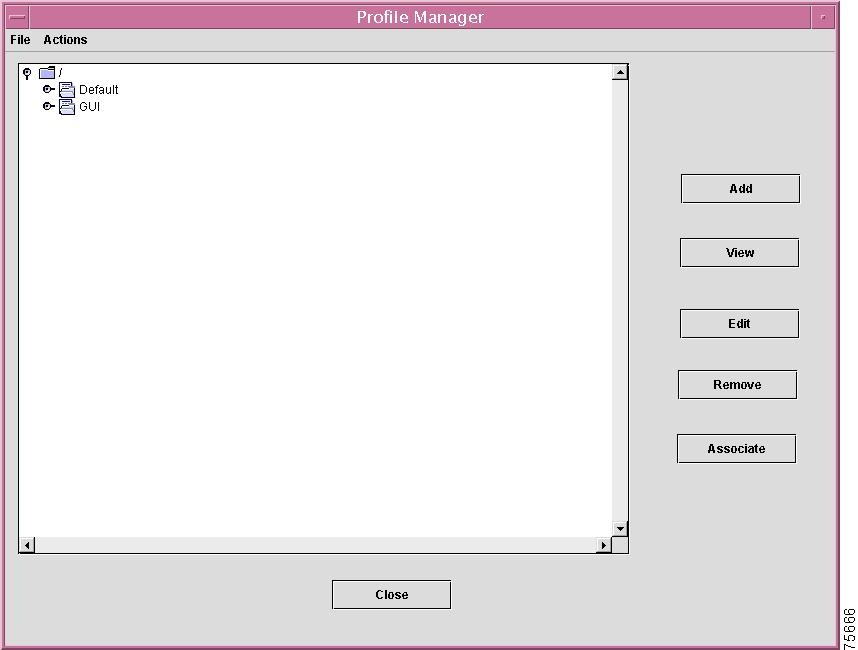
The Profile Manager window provides the following buttons:
•Add—allows you to create a new profile of type (Service, Provision, or Task) under the selected group
•View—allows you to view the selected profile's contents
•Edit—allows you to edit the selected profile's contents
•Remove—allows you to remove either the group or profile object that is currently selected
•Associate—allows you to associate a specific service profile to a list of provision profiles
•Close—closes the Profile Manager window.
Step 2 Click the Default group entry.
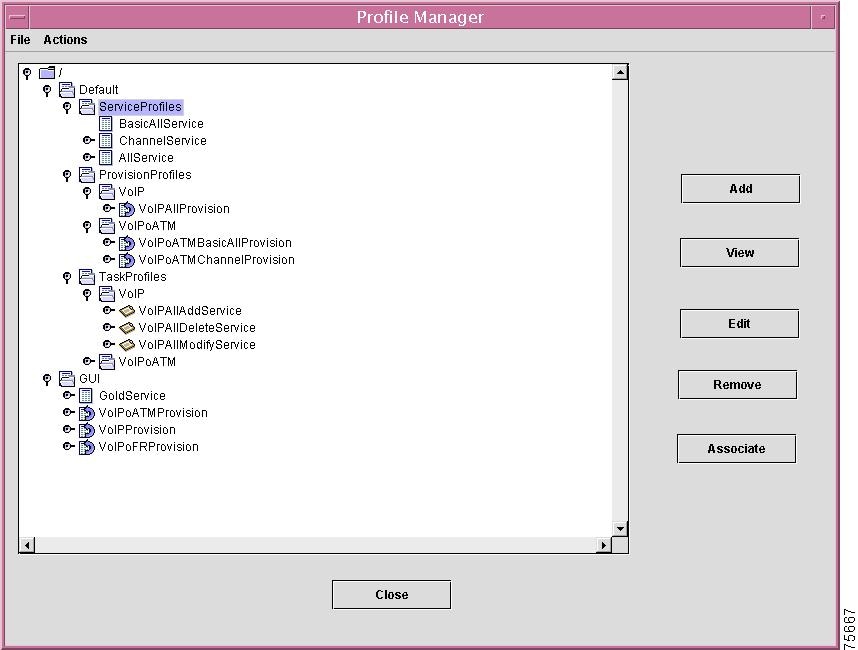
This is the default group profile that is provided with the CCNSC Subscriber Provisioning product. It contains three subgroups (ServiceProfiles, ProvisionProfiles, and TaskProfiles). It is within these subgroups that default service, provision, and task profiles reside, as shown in Figure 7-2.
Figure 7-2 Default Provision Profiles
Step 3 Click on the Default -> ProvisionProfiles subgroup entry.
A list of default provision profiles are displayed. You can view the contents of a profile by selecting a particular profile and then clicking View.
Step 4 Click on the Default -> TaskProfiles subgroup entry.
A list of default task profiles are displayed. You view the contents of a profile by selecting a particular profile, then you click View.
Creating a Group
This section describes how to create a new group.
Note New groups can only be created under the "/" (root) folder. The Default and GUI folders are read only.
Step 1 Select the root folder.
Step 2 Choose the Create Group option from the Action menu.
Step 3 Enter the name of the group you want to create, under the root folder, in the window that is displayed, as shown in Figure 7-3, then click OK.
Figure 7-3 Create Group Window
The new group is created under the root folder. You are now able to create new profiles under this new group, as described in the "Adding a Profile" section.
Adding a Profile
This section describes how to create new service, provision, and task profiles. You can create the profile's content in one of two ways:
•by specifying the contents directly through the Add Profile window
•by importing the contents from an existing profile. Refer to "Importing a Profile" section.
Note New profiles can only be created in an existing group within the root folder.
Step 1 In the Profile Manager window, select the desired group folder you want to create the new profile under, then click Add.
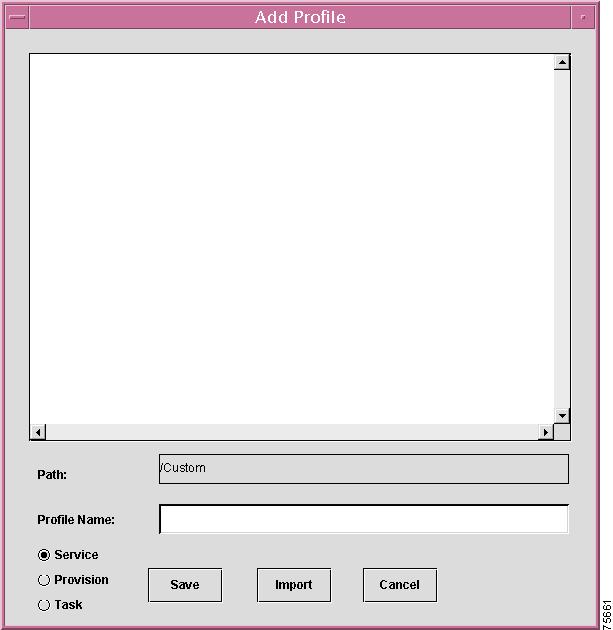
The Add Profile window is displayed, as shown in Figure 7-4. In this example, a group named Custom was previously created under the root folder, as indicated by /Custom being displayed in the Path field in the Add Profile window.
Figure 7-4 Add Profile Window
Step 2 Specify the full path name of the new profile in the Profile Name field. The profile name must be unique within a group.
Step 3 Select the profile type (Service, Provision, or Task).
Step 4 Click Save.
The new profile, of the specified profile type, is created.
Note A profile's content is in XML format. For information about the XML schema, see the $INSTALL_HOME_DIR/profiles/schema/Serviceprofile.dtd file. Figure 7-5 is an example of a profile's contents in XML format.
Figure 7-5 XML Format of a Sample Profile File
Importing a Profile
This section describes how to import the contents of an existing profile into a new profile.
Step 1 Click the Import button in the Add Profile window.
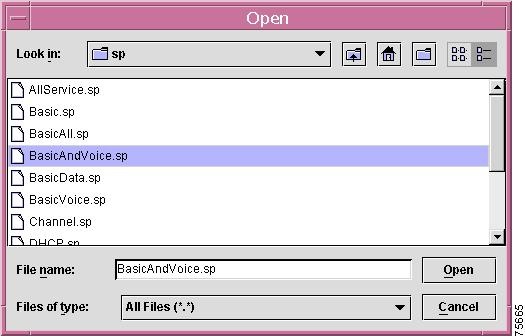
The Open window is displayed, as shown in Figure 7-6.
Step 2 Either specify the full path to the file you want to import in the File Name field, or click in the Look In field to filter out the directory where the profile resides, then select the profile you want to import.
Figure 7-6 Import Profile Open Window
Step 3 Click Open.
The contents of the selected profile are displayed.
Step 4 In the Add Profile window, specify a unique profile name, then select the desired profile type (Service, Provision, or Task).
Step 5 Click Save in the Add Profile window.
The contents of the selected profile are added to the newly created profile.
Viewing a Profile
This section describes how to view an existing profile.
Step 1 In the Profile Manager window, select a profile from the list of existing profiles, then click View.
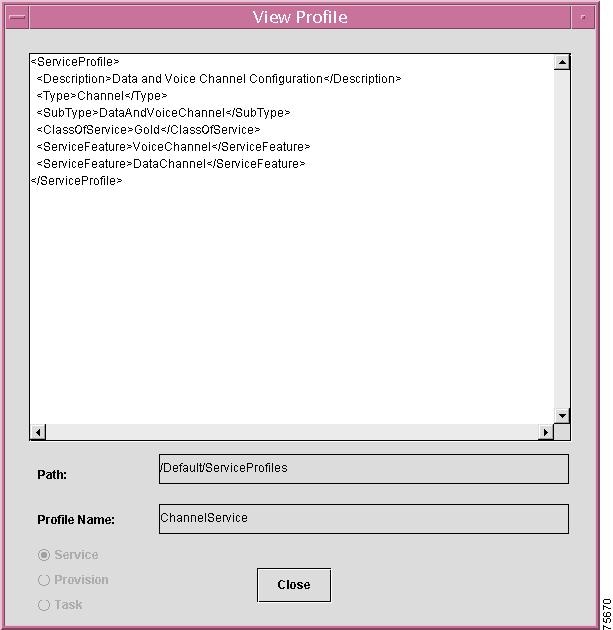
The contents of the selected profile are displayed in the View Profile window, as shown in Figure 7-7.
Note You cannot change the name of the profile nor edit the contents of the profile through the View Profile window.
Figure 7-7 View Profile Window
Step 2 Click Close when you are through viewing the contents of the displayed profile.
Editing a Profile
This section describes how to edit an existing profile.
Step 1 In the Profile Manager window, select a profile from the list of existing profiles, then click Edit.
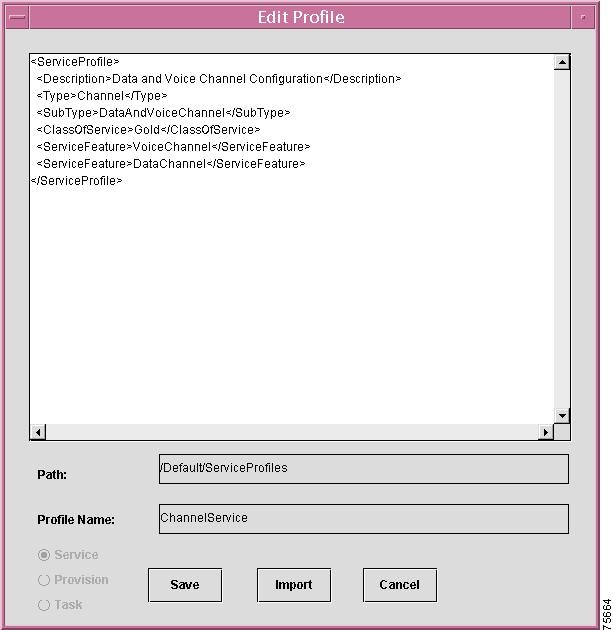
The contents of the selected profile (in XML format), the name of the profile, and the full path of the profile you want to edit are displayed in the Edit Profile window, as shown in Figure 7-8.
Note Only the contents of the profile can be edited. You cannot change the name of the profile nor can you alter the full path from the Edit Profile window.
Figure 7-8 Edit Profile Window
Step 2 When you are through modifying the contents of the profile, click Save in the Edit Profile window to save the modifications or click Cancel to discard the changes.
Note You can also edit a profile by using the Import feature provided in the Edit Profile window. The contents of the existing profile are completely overwritten when you use the Import feature.
Note Only a profile of the same type can overwrite another profile. For example, a service profile can overwrite an existing service profile, however, a provision profile cannot overwrite a service profile, nor can a task profile overwrite a provision profile.
Associating Profiles
This section describes how to associate a service profile to an existing provision profile.
Note Only a service profile can be associated with a provision profile. No other associations are allowed (that is, a service profile cannot be associated with a task profile, a task profile cannot be associated with a provision file, and so on).
Step 1 You must select the service profile you wish to associate with an existing provision profile, by clicking on a specific service profile that is displayed in the Service Profiles tree in the Profile Manager window.
Step 2 Click Associate in the Profile Manager window.
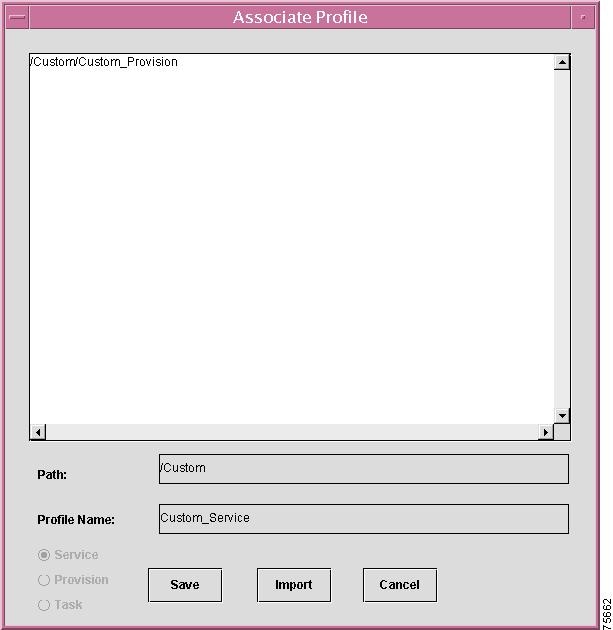
The Associate Profile window is displayed. In this example, the Default -> ServiceProfiles -> BasicAllService profile was selected in the Profile Manager window, prior to the Associate button being clicked. The full path (/Default/ServiceProfiles), service profile name (BasicAllService), and all associations already created for this service profile (/Default/ProvisionProfiles/VoIPoATM/VoIPoATMBasicAllProvision) are now displayed in the Associate Profile window, as shown in Figure 7-9.
Note When the service profile you select does not have any associations created to any provision profiles, the Associate Profile window is empty.
Step 3 You must now select or specify the provision profile that you want to associate with the previously selected service profile. You can do this in one of the following ways:
a. Either select the desired provision profile in the Profile Manager window and then drag it into the Associate Profile window, or specify the full path of the desired provision profile in the Associate Profile window.
b. Create a text file with the associations created in it. From the Associate Profile window, click Import, and import the contents of the text file, as described in "Importing a Profile" section.
Figure 7-9 Associate Profile Window
Step 4 Click Save to have the association between the service and provision profiles take effect or click Cancel to discard this operation.
Note Only a service profile can be associated with existing provision profiles (that is, the provision profile must already exist prior to attempting an association).
Disassociating a Profile
This section describes how to disassociate a service profile from a provision profile.
Step 1 In the Service Profiles pane in the Profile Manager window, select the service profile you wish to disassociate from a provision profile.
Step 2 Click Associate in the Profile Manager window.
The Associate Profile window is displayed, as shown in Figure 7-9.
Step 3 Delete the full path of the provision profile that is displayed in the Associate Profile window.
Step 4 Click Save to have the disassociation of the service and provision profiles take effect or click Cancel to discard this operation.