Maintaining the Air Filter in the Cisco cBR Chassis
Removing the Air Filter on a Card
 Note |
Attach an ESD-preventive wrist strap to your wrist and connect its end to the grounding lug that is connected to the chassis. |
Before you begin
Required Tools and Equipment
-
ESD-preventive Wrist Strap
-
3/16” Flat-blade Torque Screwdriver
Procedure
| Step 1 |
Check whether the captive screws on the card are secure and tightened to a torque of 10 to 12 lb-in. The red band on the captive screw should not be visible. If the screws are not secure, traffic may get interrupted. |
| Step 2 |
To remove the air filter from the card, use your finger to pinch the handle at the middle of the air filter and pull the air filter until it separates from the card.  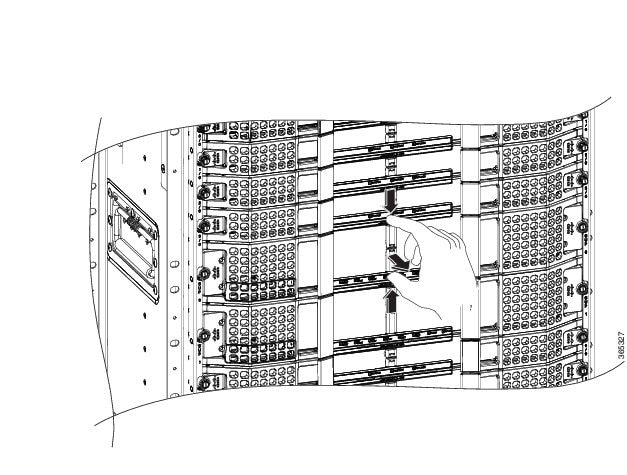 |
What to do next
Dispose the air filter according to local safety and compliance guidelines.
Installing the Air Filter on a Card
Note |
Attach an ESD-preventive wrist strap to your wrist and connect its end to the grounding lug that is connected to the chassis. |
Before you begin
Required Tools and Equipment
-
Air filter for the RF line card (PID—CBR-LC-FILTER and CBR-LC-FILTER=)
-
Air filter for the Supervisor card (PID—CBR-SUP-FILTER and CBR-SUP-FILTER=)
-
ESD-preventive Wrist Strap
Procedure
| Step 1 |
Hold the air filter with the orientation as shown below during installation.   |
| Step 2 |
Insert one end of the air filter at an angle under the ejector handle and slide it under the bezel filter guide rail on the card faceplate.  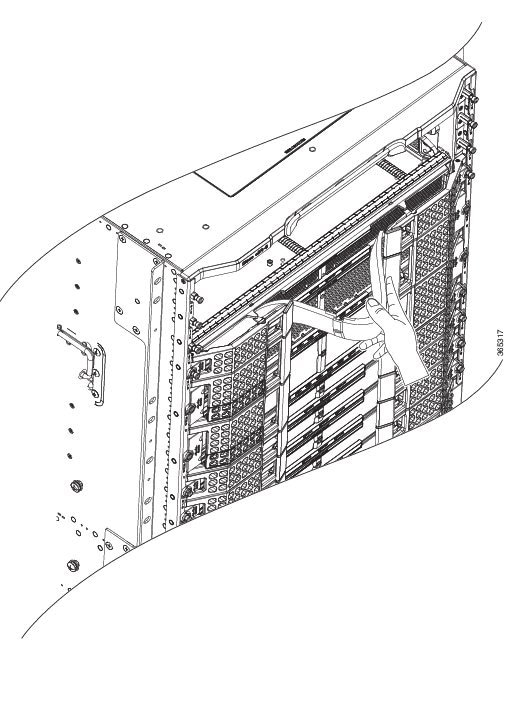 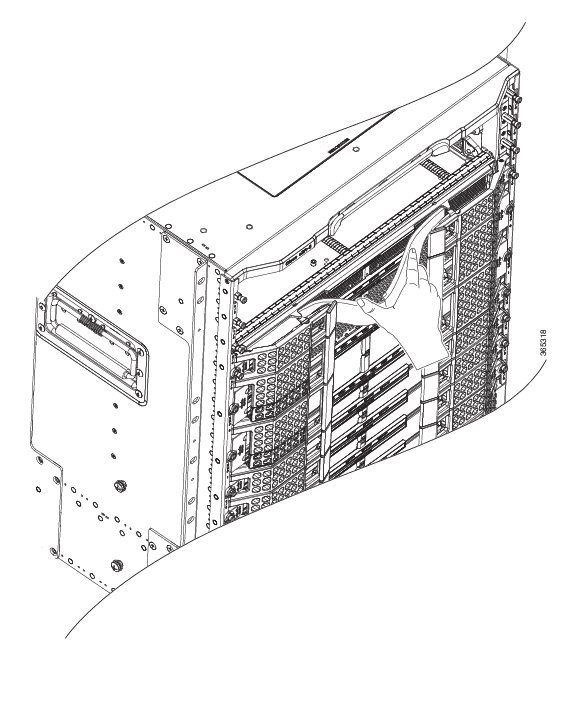 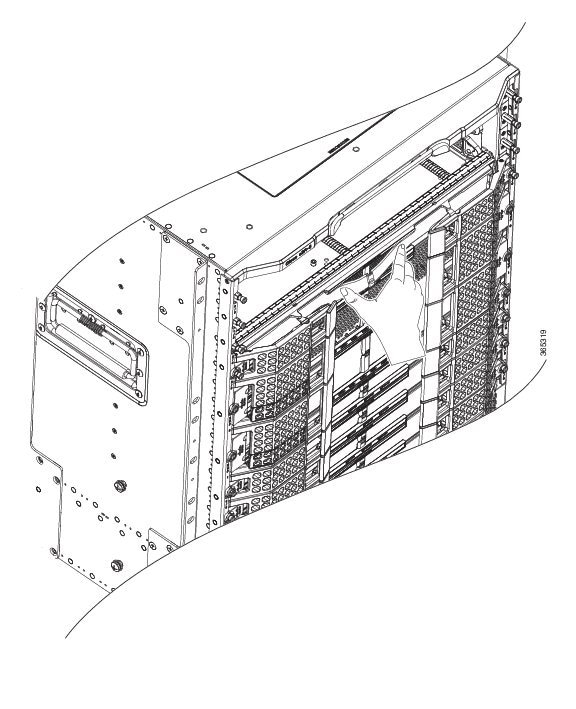 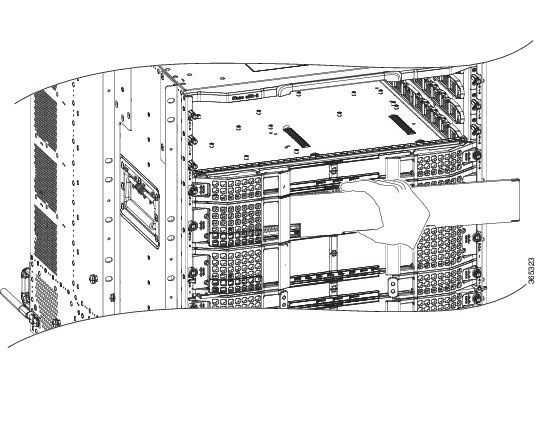   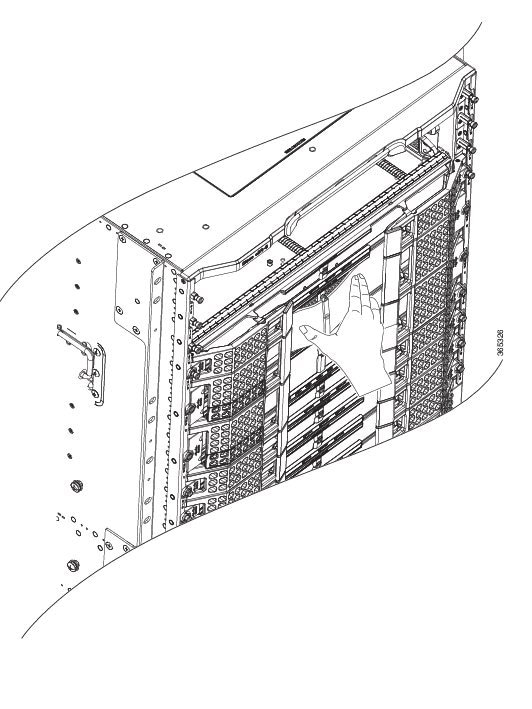 Repeat this for the other end of the air filter. |
| Step 3 |
Using your finger, pinch the handle at the middle of the air filter to insert the bottom and top edges of the air filter into the card faceplate rail. 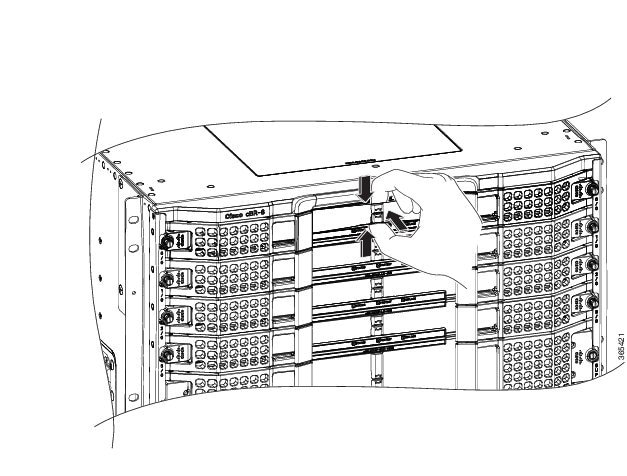 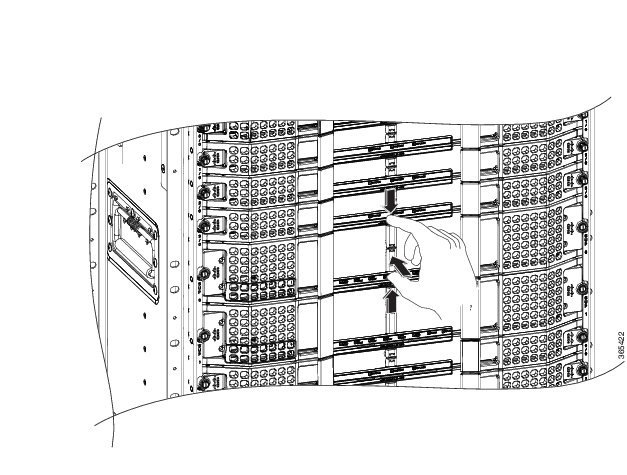 |
| Step 4 |
Tuck the air filter behind the LED panel. Visually check whether the air filter is seated behind the bezel guide rails. |
| Step 5 |
Press the handle on the air filter flat to seat it correctly. |
What to do next
-
One or both ejectors may snap past their retention stops during the procedure, snap the ejectors past the stops to restore them to their original positions.
-
After installing the Supervisor air filter, check whether the front console ports behind the ejector levers are accessible. If the air filter is installed upside down, the ports would be covered.
 Feedback