Introduction
This document describes how to collect Packet Captures (PCAPs) Over the Air (OTA) with the native tool Wireless Diagnostics and third-party applications such as Airtool and Wireshark on a MacBook in order to troubleshoot and analyze wireless behaviors.
Prerequisites
Requirements
Cisco recommends that you have knowledge of these topics:
Components Used
The information in this document is based on these software and hardware versions:
- Apple MacBook with macOS version 10.14.X or higher
- Apple Wireless Diagnostics tool
- Airtool 1.9 or higher
- Wireshark 3.X or higher
- Cisco Access Point (AP) 2802
The information in this document was created from the devices in a specific lab environment. All of the devices used in this document started with a cleared (default) configuration. If your network is live, ensure that you understand the potential impact of any command.
Background Information
Things to consider:
- It is recommended to have the Macbook acting as a Wireless Sniffer close to the AP and target device.
- Ensure you know which 802.11 Channel and Width, the client device, and the AP use.
- The Channel and Width can be found on:
- Cisco IOS®-XE Web Graphical User Interface (GUI) under Configuration > Wireless > 5GHz or 2.4GHz > Select an AP > Channel and Width
- AireOS Web GUI under Wireless > Access Points > 802.11a/n/ac (5GHz) or 802.11 b/g/n (2.4GHz) > Select an AP > Channel and Width
Configure
Option A. Configure PCAP with Wireless Diagnostics
Step 1. Launch the Wireless Diagnostics Tool.
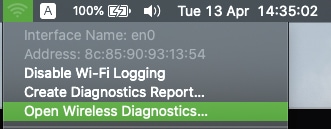
Press and hold the ALT/Option Key from the keyboard and click on the top-right Wi-Fi icon, as shown in the image.
Step 2. Open the Sniffer Tool.
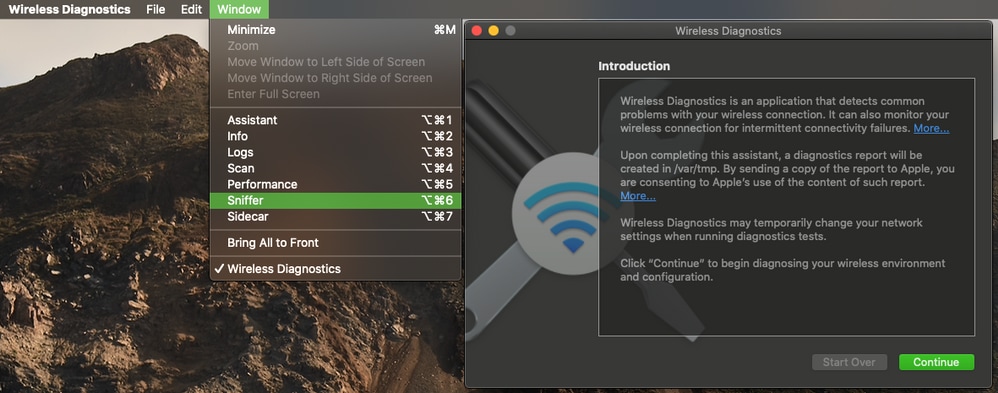
Select the Window menu from the Wireless Diagnostic Tool on the menu bar and select Sniffer or use the keyboard shortcut, press at the same time ALT + Command + 6 Keys, as shown in the image.
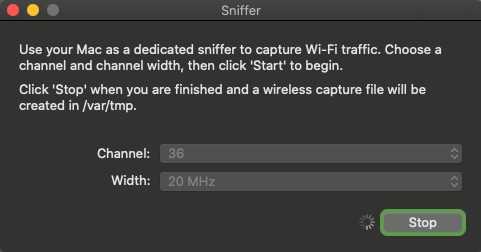
Step 3. Choose the Channel and Width that the target device and AP use, as shown in the image.

Step 4. Click Start.
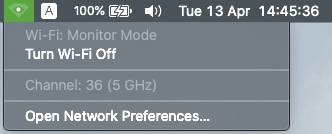
This action places the Wireless adapter in Monitor Mode and it cannot be used to connect the device to a Wireless LAN (WLAN), as shown in the image.
Step 5. Wait for some time to collect the information required and click Stop.
Tip: If the WLAN uses encryption such as Pre-shared Key (PSK), ensure the capture catches the four-way handshake between the AP and the desired client. This can be done if the OTA PCAP starts before the device is associated with the WLAN or if the client is deauthenticated and reauthenticated while the capture runs.
Step 6. The file is located in the Desktop folder or at the path /var/tmp/ (It may vary on the macOS version the MacBook runs).
1. Launch the Finder application on the MacBook, as shown in the image.
2. Select the Go Menu from Finder.
3. Choose Desktop Folder or Go to Folder and type the destination path.
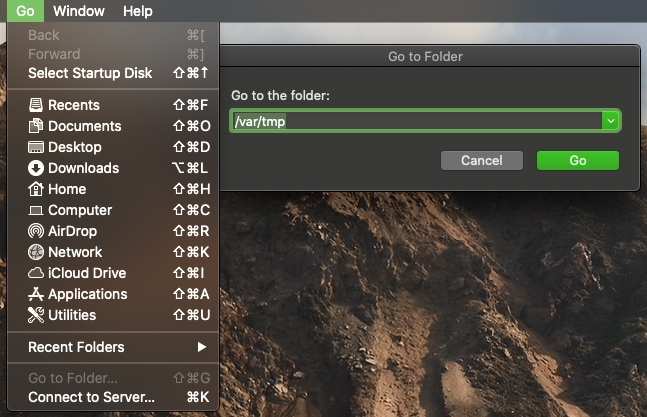
The destination folder is displayed.

Option B. Configure PCAP with Airtool
Step 1. Install the third-party Airtool application.
Step 2. Launch the tool.
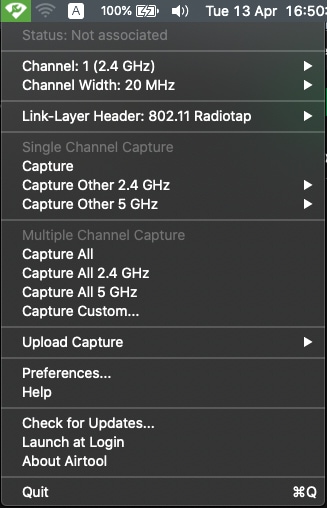
Once launched, the Airtool can be located at the top-right from the macOS menu bar, as shown in the image.
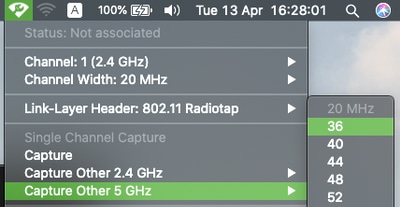
Step 3. Select the Channel and Width that the target device and AP use (this action starts the PCAP), as shown in the image.
Step 4. Wait some time to collect the information required and click Stop, as shown in the image.

Tip: If the WLAN uses encryption such as Pre-shared Key (PSK), ensure the capture catches the four-way handshake between the AP and the desired client. This can be done if the OTA PCAP starts before the device is associated with the WLAN or if the client is deauthenticated and reauthenticated while the capture runs.
Step 5. The file is located in the Desktop folder.
Option C. Configure PCAP with Wireshark
Step 1. Install Wireshark.
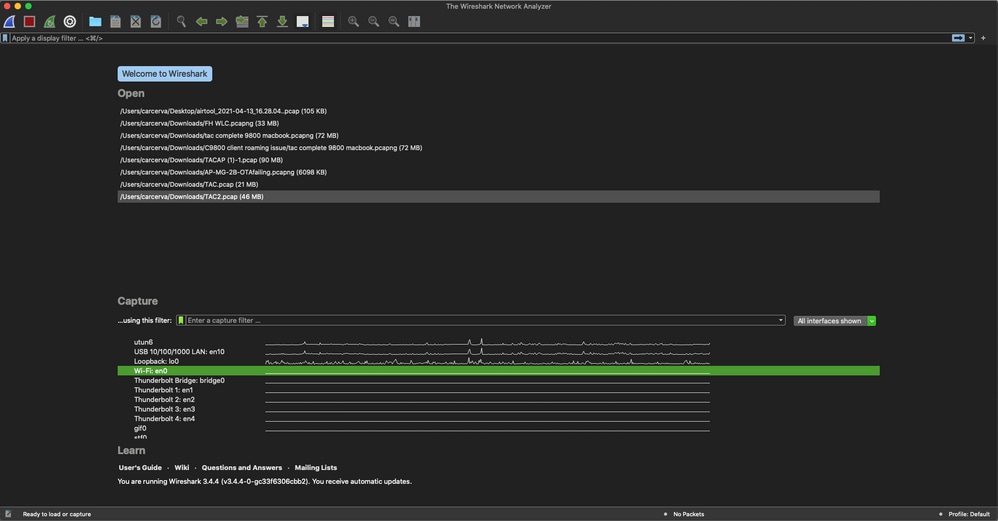
Step 2. Launch the application, as shown in the image.
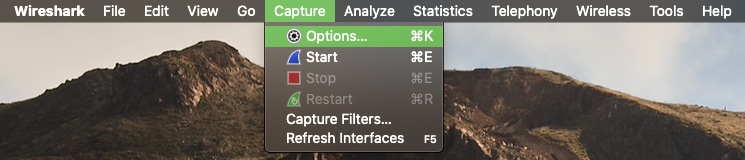
Step 3. Select the Capture menu from the menu bar and select Options, as shown in the image.
This action opens a pop-up window, as shown in the image.
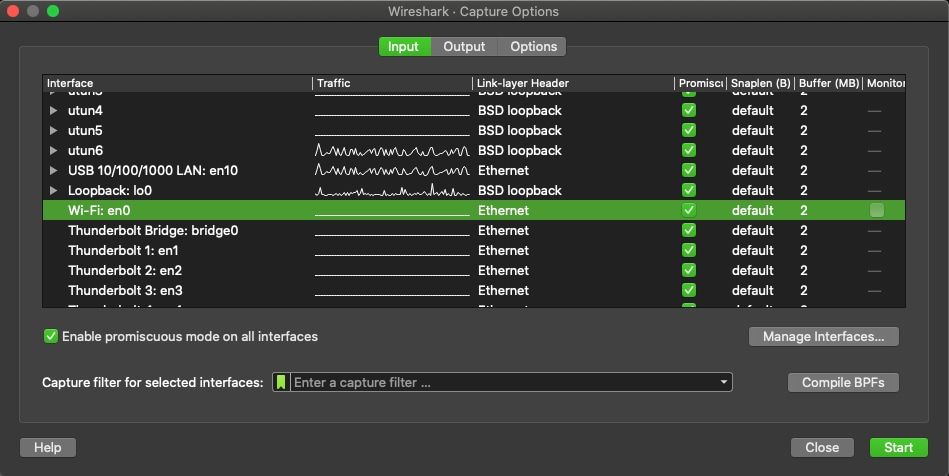
Step 4. Select the Wi-Fi: en0 (Wireless adapter) and tick the Monitor option that is to the right of the interface as shown in the image.
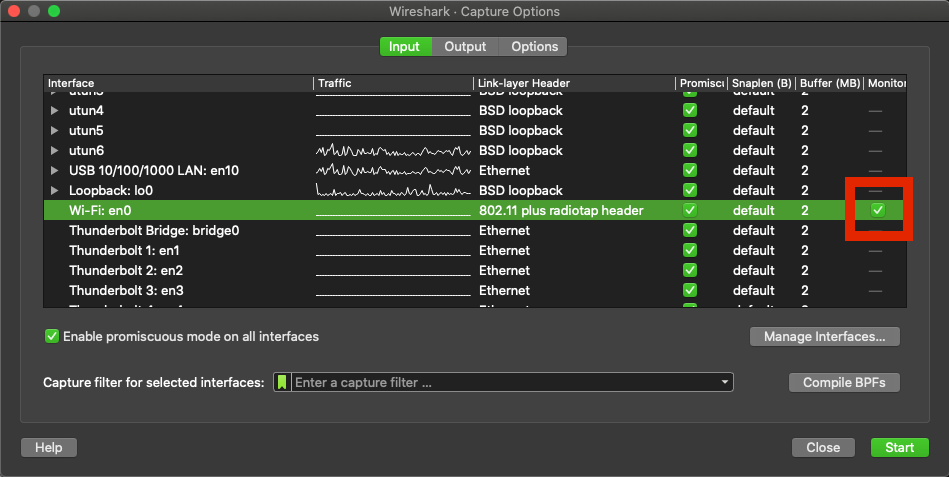
Note: In this method, Wireshark is unable to select the desired Channel and Width to scan. The Channel and Width are assigned with the Sniffer tool explained in this document. Refer to Option A. Step 3 in order to change them.
Step 5. Select Start.
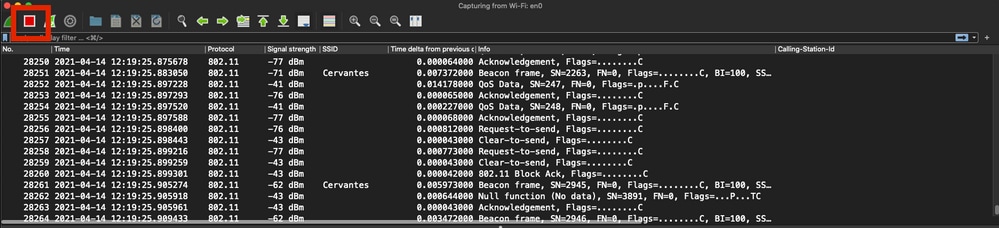
Step 6. Wait for some time to collect the information required and select the Stop button from Wireshark, as shown in the image.
Tip: If the WLAN uses encryption such as Pre-shared Key (PSK), ensure the capture catches the four-way handshake between the AP and the desired client. This can be done if the OTA PCAP starts before the device is associated with the WLAN or if the client is deauthenticated and reauthenticated while the capture runs.
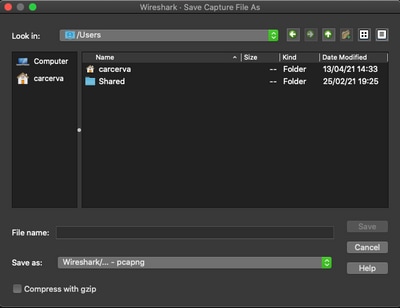
Step 7. Save the PCAP file. Click on the Save button from Wireshark, as shown in the image.

Select the destination folder, as shown in the image.
Verify
Use this section in order to confirm that your configuration works properly.
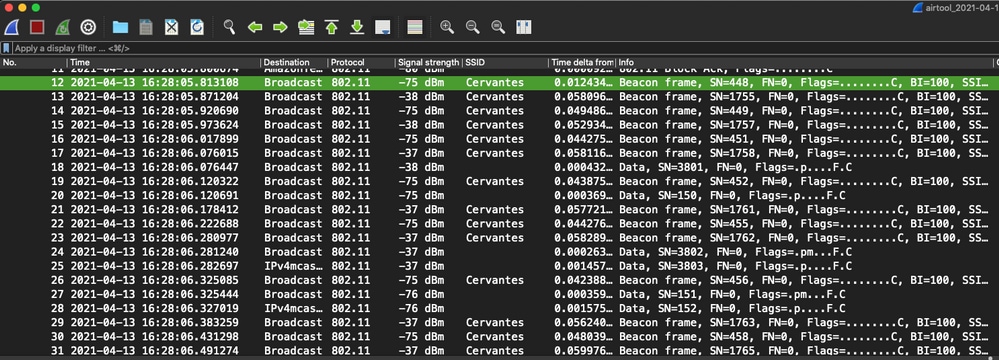
Open the capture with Wireshark and verify that 802.11 frames are visible, as shown in the image.
Troubleshoot
There is currently no specific troubleshooting information available for this configuration.
Related Information
 Feedback