Configure Third-Party Authentication on WAP571 or WAP571E
Available Languages
Objective
This article will guide you through configuration of third-party authentication on a WAP571 or WAP71E access point.
Introduction
Network users often connect to a wireless access point (WAP) to receive faster internet speeds compared to their mobile device’s carrier service. A smooth login process and easy navigation can ensure a positive experience for these users. You can configure your WAP571 or WAP571E to have some easy options for user login while still keeping your network secure.
Third-party authentication through Google or Facebook is an available feature with this latest update. When utilized, the third-party account of the user acts as a type of ‘passport’, granting the user access to your wireless network. Whether you run a coffee shop or a real estate office, it will ensure visitors have easy access to your network and have a great visitor experience.
Applicable Devices
-
WAP571
-
WAP571E
Software Version
-
1.1.03
Requirements
-
Internet access, so you can connect with Google and/or Facebook authentication servers.
-
Users must have an existing account with either Google and/or Facebook.
Configure Third-Party Authentication
Step 1. Log in to the web configuration utility of the WAP by entering the username, and password. The default username and password is cisco/cisco. If you have configured a new username or password, enter those credentials instead. Click Login.

Note: In this article, the WAP571E is used to demonstrate the configuration of third-party guest authentication. Menu options may slightly vary depending on the model of your device.
Step 2. Choose Access Control > Guest Access.

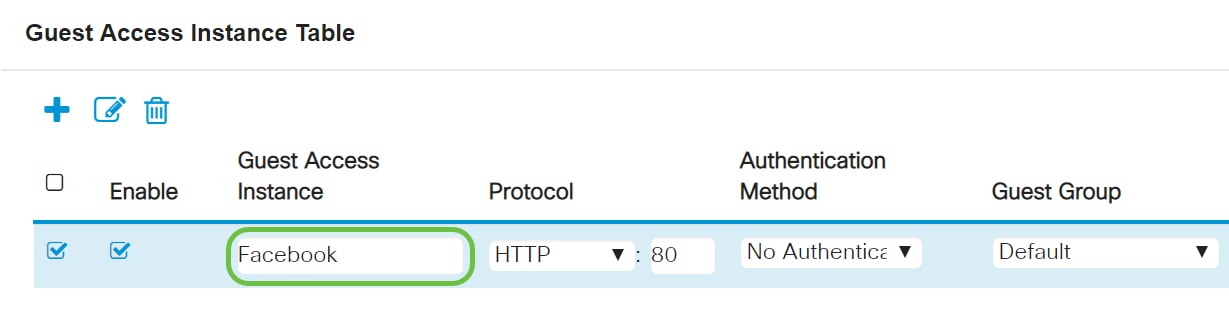
Step 3. In the Guest Access Instance Table, you can either add a new Guest Access Instance or edit an existing one.
In this example, a new Guest Access instance is added by clicking on the plus icon.

Step 4. Name the Guest Access Instance. In this example, it has been named Facebook.
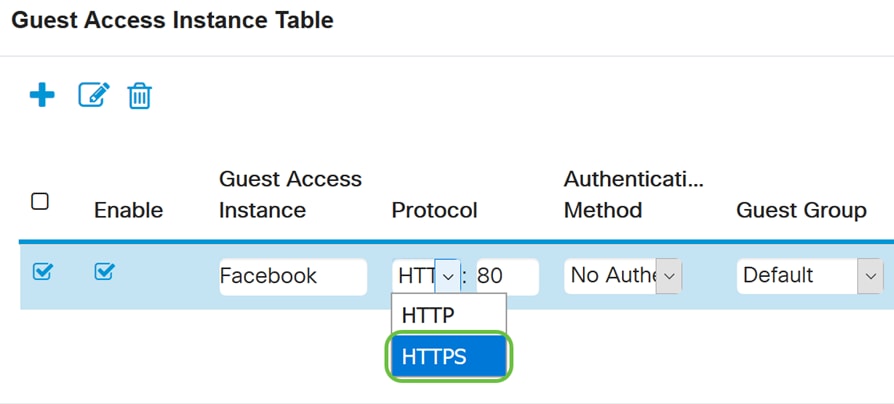
Step 5. Choose the Protocol to use during the verification process from the drop-down menu.
-
HTTP - Does not use encryption during verification.
-
HTTPS - Uses the Secure Sockets Layer (SSL), which requires a certificate to provide encryption. The certificate is presented to the user at connection time.
Note: It is very important that a client should configure the captive portal page to use HTTPS and not HTTP as the former is more secure. If a client chooses HTTP, they can inadvertently expose usernames and passwords by transmitting them in unencrypted clear text. It is best practice to use a HTTPS captive portal page.
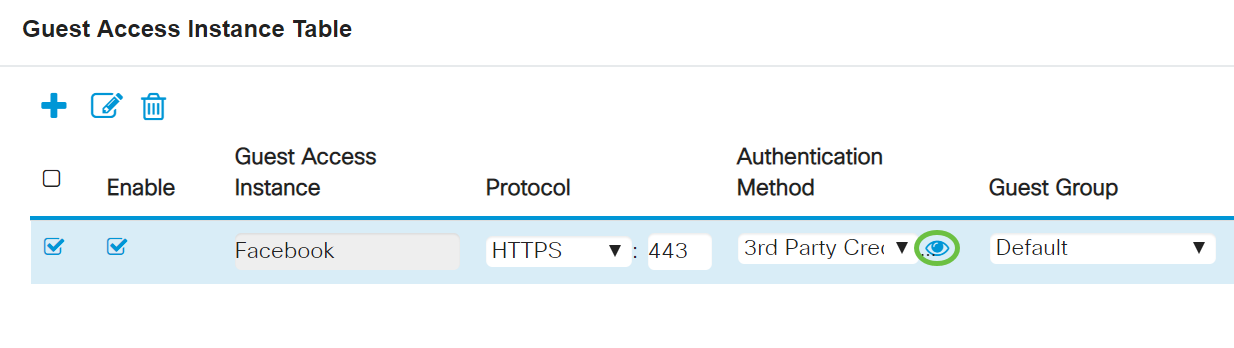
Step 6. Choose the Authentication Method as 3rd Party Credentials.

Note: The WAP device uses the credentials on the social media account to authenticate the users.
Step 7. Click the blue eye icon next to 3rd Party Credentials in the Authentication Method column.
Step 8. Configure the following 3rd Party Credentials authentication setting.
-
Accepted credentials - Select Facebook, Google, or both.
-
Walled Garden - The relevant default configuration will be set automatically while Accepted credentials are selected.
In this example, both Facebook and Google are selected. Click OK.

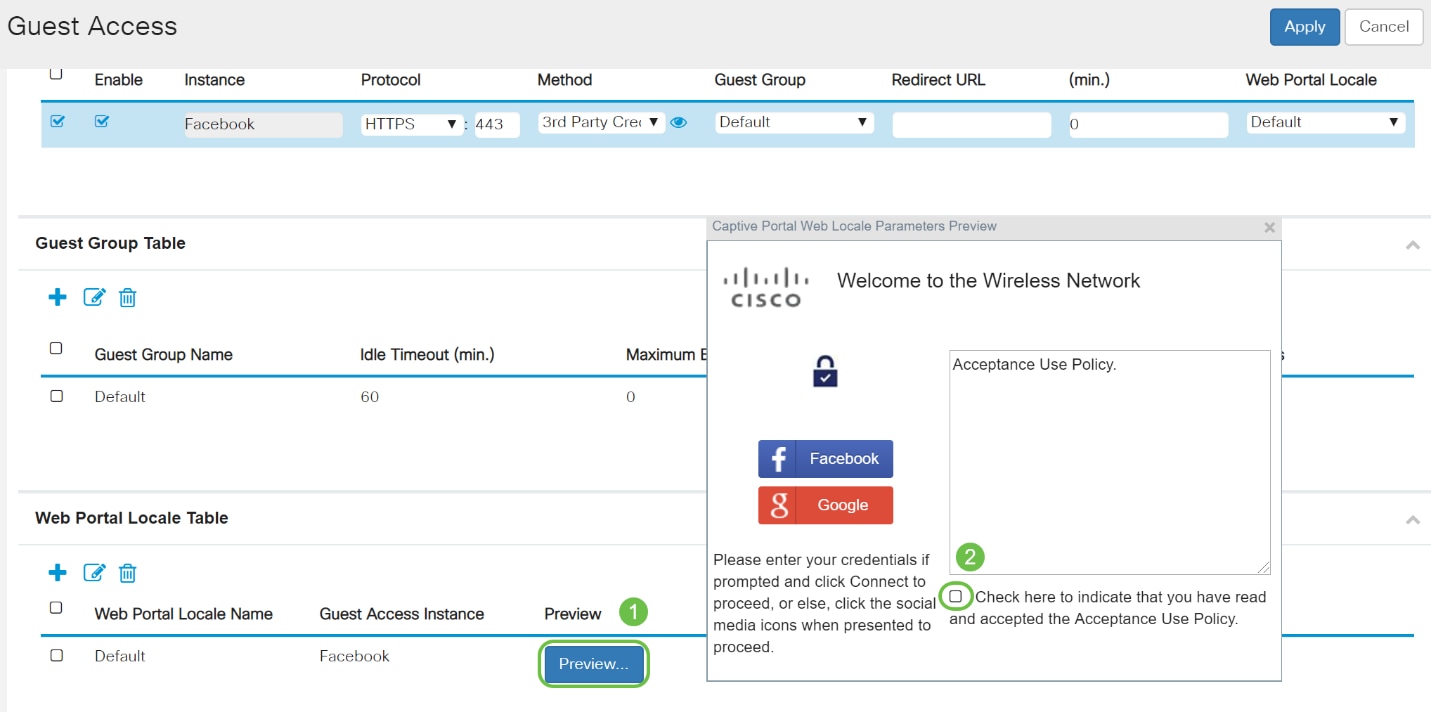
Step 9. (Optional) To preview the Captive Portal page, click the Preview button under Web Portal Locale Table. A new window will display the preview page where the users will be prompted to enter their Facebook or Google credentials. The users will also have to check the box for Acceptance Use Policy.
Step 10. Go to the menu and choose Wireless > Networks.

Step 11. Choose the network and specify that it will choose Facebook as the Guest Access Instance for authentication. In this example, the network is WAP571-Guest.
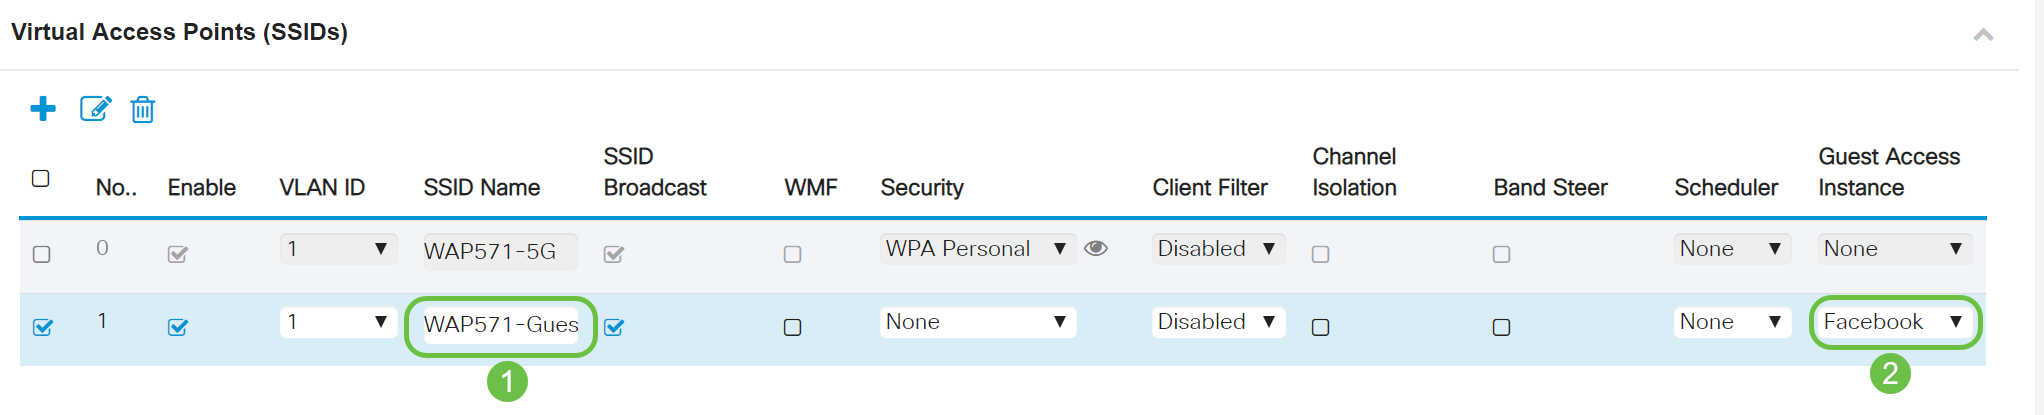
Step 12. Click Apply.

Conclusion
You have successfully configured third-party authentication through Google, Facebook, or both on a WAP571 or WAP571E.
 Feedback