Configure Web Filtering on the RV13x and RV32x Series Routers
Available Languages
Objective
Web filtering is a feature on your router that can enhance an already secured network and promote productivity in the workplace by screening websites according to a score on a Web Reputation Index, adding keywords or domain names to a block list, and by server IP address.
An administrator or a company may have existing guidelines that discuss general network security, the Internet of things, and rules they want to implement on a network yet find an exception to the rules when it comes to a particular department. The administrator can create scheduled rules and bind them to exception lists granting access to specific websites during a certain time of the day or granting access to all websites to a specific user or users while the rest of the users on the network have denied access.
This article aims to show you how to configure web filtering on the RV Series Routers. This configuration will also emphasize the importance of the features.
Applicable Devices
- RV130
- RV130W
- RV325
- RV320
Software Version
- 1.0.3.14 – RV130, RV130W
- 1.3.1.12 – RV320, RV325
Configure Web Filtering
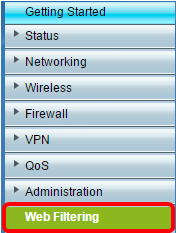
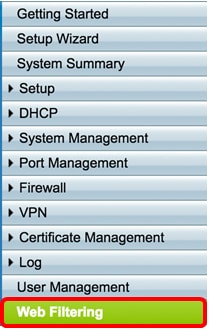
Step 1. Log in to the web-based utility and choose Web Filtering.
|
RV130, RV130W
|
RV320, RV325 |
|---|---|
 |
 |
Step 2. Choose a radio button in the Web Filtering area. By default, Web Filtering is set to Always Off. The options are:
- Always On — Web filtering is always enabled.
- Scheduled — Set a schedule to implement web filtering.
- Always Off — Disables web filtering.
Note: For this example, a scheduled web filter will be created.

Step 3. The End User License Agreement will appear as soon as web filtering is enabled by choosing either Always On or Scheduled. Go over the agreement and click Agree to continue with the setup.

Step 4. Click Save.

Step 5. Check the Web Reputation check box to enable filtering based on a web reputation index.
Note: Content will be filtered according to the notoriety of a website or URL based on a web reputation index. If the score falls below 40, the website will be blocked. To read more about web reputation, click here.

Step 6. Click Categories to manage and apply filters. You will be taken to the Category page.

Step 7. Click a radio button to quickly define the filtering extent that would best fit the network policies. The options are High, Medium, Low, and Custom.
- Low — Adult/Mature Content and Security are enabled with this option. Check the appropriate sub check boxes to further fine tune your filter.
- Medium — Adult/Mature Content, Illegal/Questionable, and Security are enabled with this option. Check the appropriate sub check boxes to further fine tune your filter.
- High — Adult/Mature Content, Business/Investment, Entertainment, Illegal/Questionable, IT Resources, Lifestyle/Culture, and Security are enabled with this option. Check the appropriate sub check boxes to further fine tune your filter.
- Custom — No defaults to allow custom admin-created filters.
Note: For this example, a medium category is chosen.

Step 8. Click Save and Back to return to the Filter page to continue the setup.

Step 9. Check the Enable HTTPS filtering check box to filter content based on the web server's IP address instead of the URL. Websites with secured HTTP or HTTPS will be accessible. If you want to block websites regardless of a secured URL, leave the check box unchecked.
Note: Since the URL is encrypted, often multiple websites will use the same web server IP address. If that is the case, the router will not block that page if there are multiple website categories associated with that IP address. However, the router will block the page if there is only one category associated with that page, if adult content hosts are associated, or if the IP address is known to host or distribute malware.

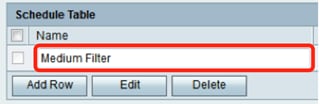
Step 10. Under Schedule Table, click Add Row to create a scheduled rule or policy to be implemented.

Step 11. Create a user-defined name in the Name Field to make identifying rules easier.
Note: In the example below, Medium Filter is used.
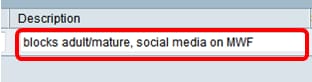
Step 12. Enter a description for this rule in the Description field to make identifying rules and policies easier.
Note: In the example below, blocks adult/mature, social media on MWF is used.
Step 13. Check the check box for the day of the week you would like this rule to take effect.
Note: For this example, Monday, Wednesday, and Friday have been selected.

Step 14. Using military time, enter the time of the day you would like for the rule to take effect. This allows you to switch rules and policies through out the day.
Note: For this example, 08:00 to 17:00 is used.
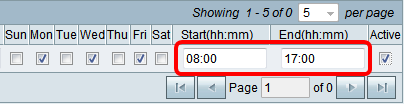
Step 15. Check the Active check box to enable the scheduled rule.

Note: There is no limit to the number of rules to be implemented.
Step 16. Click Save.
Note: It is important to save your configuration after enabling/disabling. Otherwise, you will lose your settings after moving through the different steps of the setup.

Step 17 (Optional). Click Exceptions. You will be taken to the exceptions list page.


Step 18 (Optional). Create a list to either allow, deny, or exclude in the filtering process. Choose the type of list you want to create. The options are:
- Allow List — If the incoming URL is included in the Allow List, the URL is allowed. If not, check the web category.
- Block List — If the incoming URL is included in the Block list, the URL is not allowed.
- Exclusion List — If the incoming URL is in the Exclusion List and its Web Reputation index value is not lower than 40, the URL is safe and allowed and vice versa. If the incoming URL is not in the Exclusion List, check if it is in the Block List. If it is in the Block List, the URL is blocked. If it is not in the Block List, check if it is in the Allow List.
See glossary for additional information.
Note:If the reputation index value of a URL is not lower than 40, then it is safe and will be allowed access.
Step 19. To create an entry, click Add Row.
Note: For this example, a Block List is created.

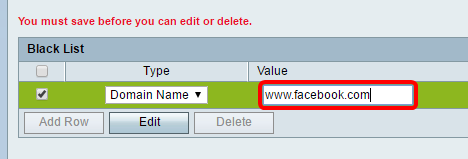
Step 20. From the Type drop-down list, select whether you want data to be blocked according to a keyword, or through a domain name.
Note: For this example, Domain Name is chosen.

Step 21. In the Value field, enter the domain name.
Note: For this example, www.facebook.com is used. If HTTPS filtering is enabled, any incoming URL using HTTPS will not be blocked.
Step 22. Click Save.

Step 23 (Optional). To verify that a website or URL has been filtered or blocked, go to a web browser and enter the domain name you have just blocklisted.
Note: In this example, it would be www.facebook.com.

You should now have successfully configured web filtering on your router.
For all Cisco Business articles, documentation, and firmware upgrades, check out the following product pages:
Revision History
| Revision | Publish Date | Comments |
|---|---|---|
1.0 |
13-Dec-2018 |
Initial Release |
 Feedback