Configuring IPSec Profiles (Auto Keying Mode) on the RV160 and RV260
Available Languages
Objective
This document will demonstrate how to create a new Internet Protocol Security (IPsec) profile using auto keying mode on RV160 and RV260 series routers.
Introduction
IPsec ensures that you have secure private communication over the Internet. It gives two or more hosts privacy, integrity, and authenticity for transmitting sensitive information over the Internet. IPsec is commonly used in Virtual Private Network (VPN) and is implemented at the IP layer and its use can assist many applications that lack security. A VPN is used to provide a secure communication mechanism for sensitive data and IP information that is transmitted through an unsecure network such as the Internet. It provides a flexible solution for remote users and the organization to protect any sensitive information from other parties on the same network.
In order for the two ends of a VPN tunnel to be successfully encrypted and established, they both need to agree on the methods of encryption, decryption, and authentication. IPsec profile is the central configuration in IPsec that defines the algorithms such as encryption, authentication, and Diffie-Hellman (DH) group for Phase I and II negotiation in auto mode as well as manual keying mode. Phase 1 establishes the pre-shared keys to create a secure authenticated communication. Phase 2 is where the traffic gets encrypted. You can configure most of the IPsec parameters such as protocol, mode, algorithm, Perfect Forward Secrecy (PFS), Security Association (SA) lifetime, and key management protocol.
Note that when you are configuring Site-to-Site VPN, the remote router would need to have the same profile settings as your local router.
Additional information about Cisco IPsec technology can be found in this link: Introduction to Cisco IPSec Technology.
To configure IPsec profile and Site-to-Site VPN using the VPN Setup Wizard, please click the link: Configuring VPN Setup Wizard on the RV160 and RV260.
To configure Site-to-Site VPN, please see the document: Configuring Site-to-Site VPN on the RV160 and RV260.
Applicable Devices
· RV160
· RV260
Software Version
· 1.0.00.13
Configuring IPsec Profiles
Step 1. Log into the web configuration page on your router.
Step 2. Navigate to VPN > IPSec VPN > IPSec Profiles.
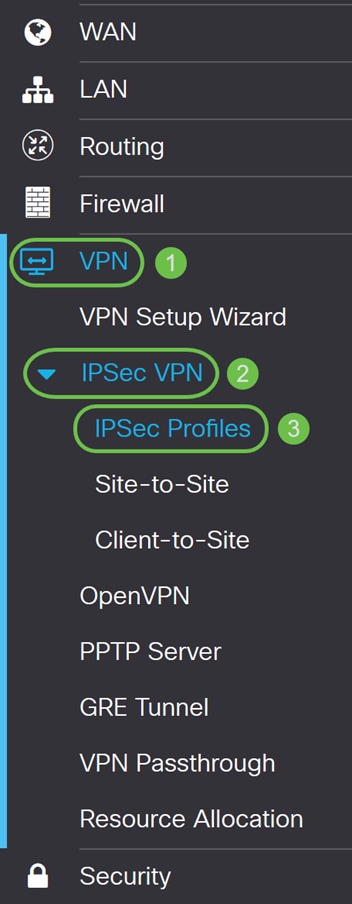
Step 3. In the IPSec Profiles table, click Add to create a new IPsec profile. There’s also choices to edit, delete, or clone a profile.

Step 4. Enter a profile name and select the keying mode (Auto or Manual).
HomeOffice is entered as the Profile Name.
Auto is selected for Keying Mode.

Step 5. Choose Internet Key Exchange Version 1 (IKEv1) or Internet Key Exchange Version 2 (IKEv2) as your IKE Version. IKE is a hybrid protocol that implements the Oakley key exchange and the Skeme key exchange inside the Internet Security Association and Key Management Protocol (ISAKMP) framework. Oakley and Skeme both defines how to derive authenticated keying material but Skeme also includes rapid key refreshment. IKE provides authentication of the IPsec peers, negotiates IPsec keys, and negotiates IPsec security associations. IKEv2 is more efficient because it takes less packet to do the key exchange, supports more authentication options while IKEv1 only does shared key and certificate based authentication. In this example, IKEv1 was selected as our IKE version.
Note: If your device supports IKEv2 then it is recommended to use IKEv2. If your devices doesn’t support IKEv2 then use IKEv1.
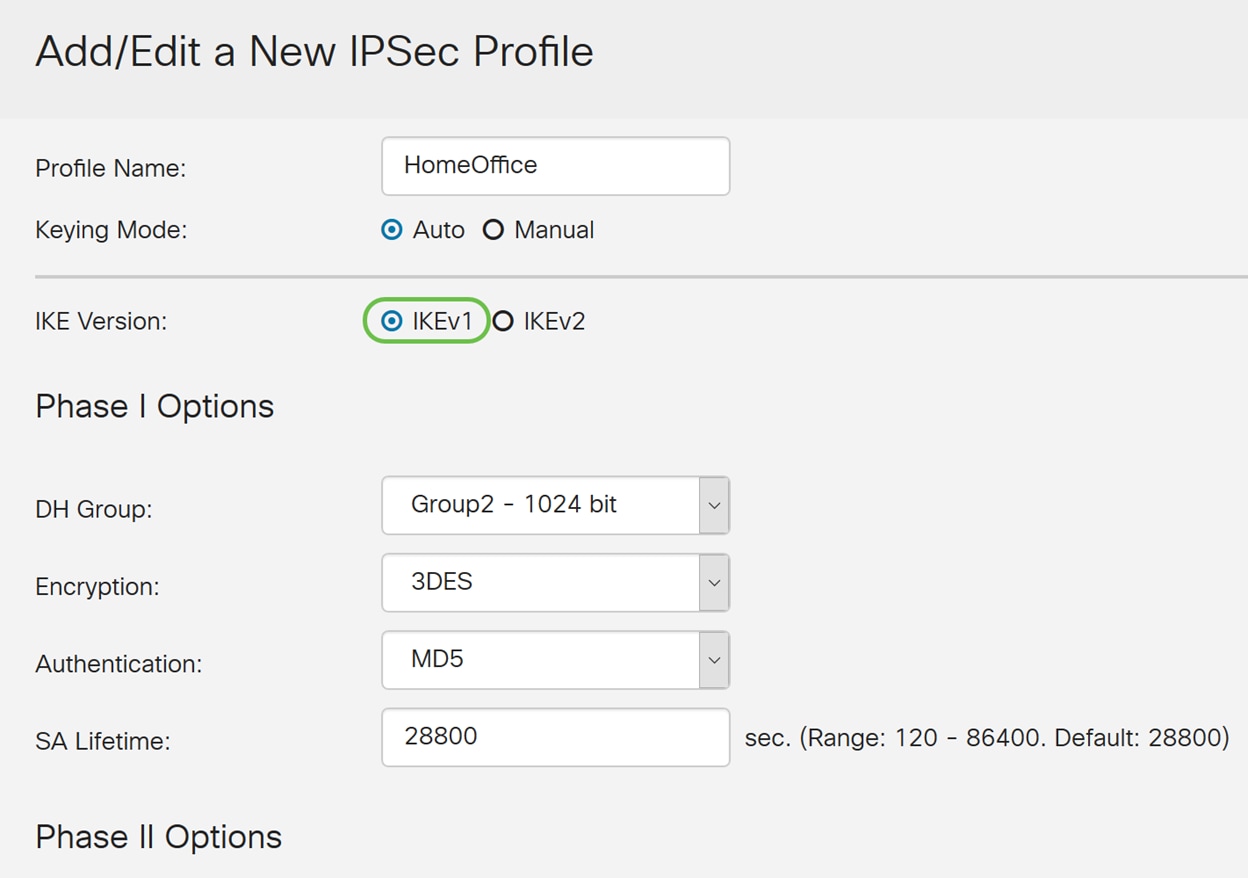
Step 6. Phase I sets up and exchanges the keys you will be using to encrypt data in phase II. In the Phase I section, select a Diffie-Hellman (DH) Group. DH is a key exchange protocol, with two groups of different prime key lengths, Group 2 - 1024 bit and Group 5 - 1536 bit. We selected Group 2 – 1024 bit for this demonstration.
Note: For faster speed and lower security, choose Group 2. For slower speed and higher security, choose Group 5. Group 2 is selected as default.

Step 7. Select an encryption option (3DES, AES-128, AES-192, or AES-256) from the drop-down list. This method determines the algorithm used to encrypt and decrypt ESP/ISAKMP packets. Triple Data Encryption Standard (3DES) uses DES encryption three times but is now a legacy algorithm. This means that it should only be used when there’s no better alternatives since it still provides a marginal but acceptable security level. Users should only use it if it’s required for backwards compatibility as it’s vulnerable to some “block collision” attacks. It is not recommended to use 3DES as it is not considered secure. Advanced Encryption Standard (AES) is a cryptographic algorithm that is designed to be more secure than DES. AES uses a larger key size which ensures that the only known approach to decrypt a message is for an intruder to try every possible key. It is recommended to use AES if your device can support it. In this example, we selected AES-128 as our encryption option.
Note: Here are some additional resources that may help: Configuring Security for VPNs with IPsec and Next Generation Encryption.
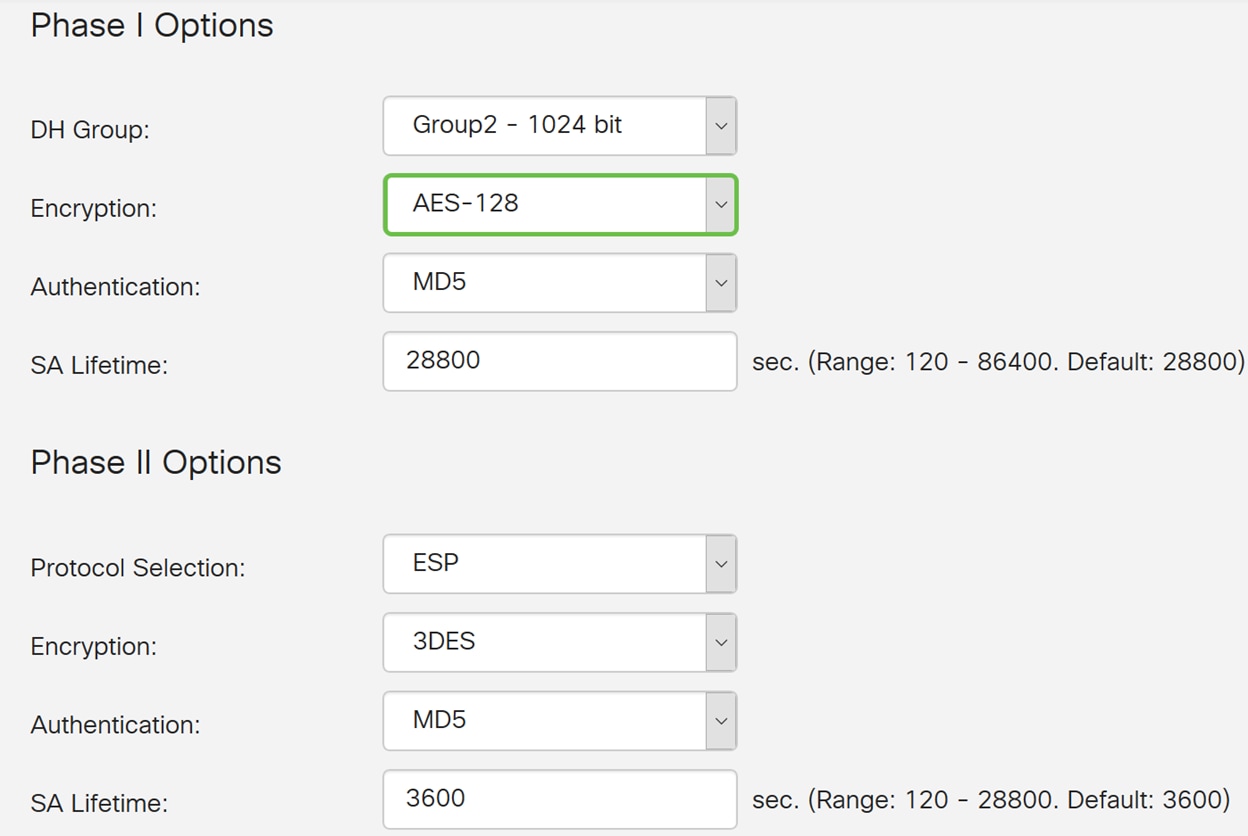
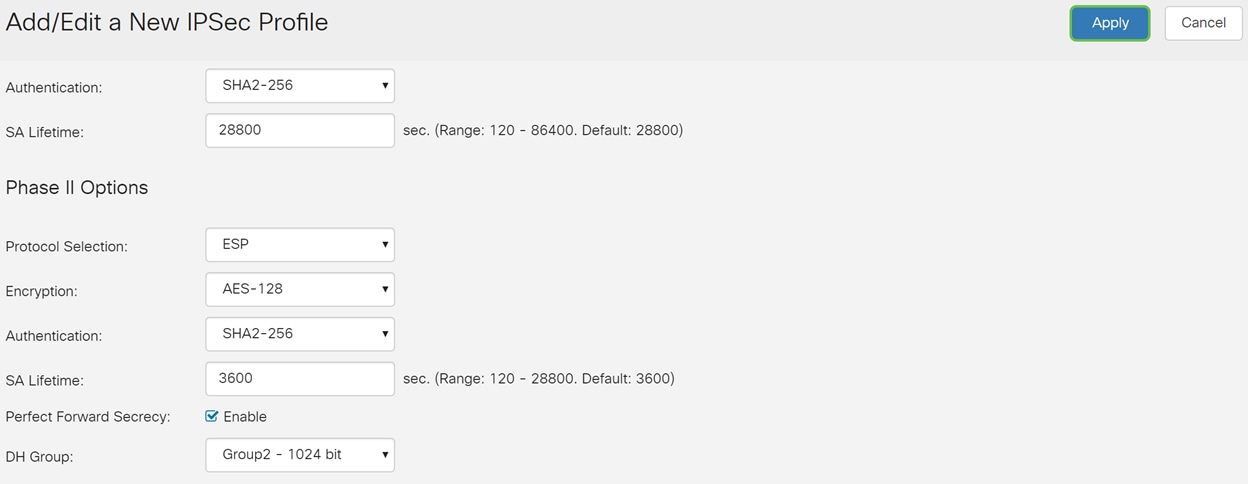
Step 8. The authentication method determines how the ESP header packets are validated. This is the hashing algorithm used in the authentication to validate that side A and side B really are who they say they are. The MD5 is a one-way hashing algorithm that produces a 128-bit digest and is faster than SHA1. The SHA1 is a one-way hashing algorithm that produces a 160-bit digest while SHA2-256 produces a 256-bit digest. SHA2-256 is recommended because it is more secure. Make sure that both ends of the VPN tunnel use the same authentication method. Select an authentication (MD5, SHA1, or SHA2-256).
SHA2-256 was selected for this example.
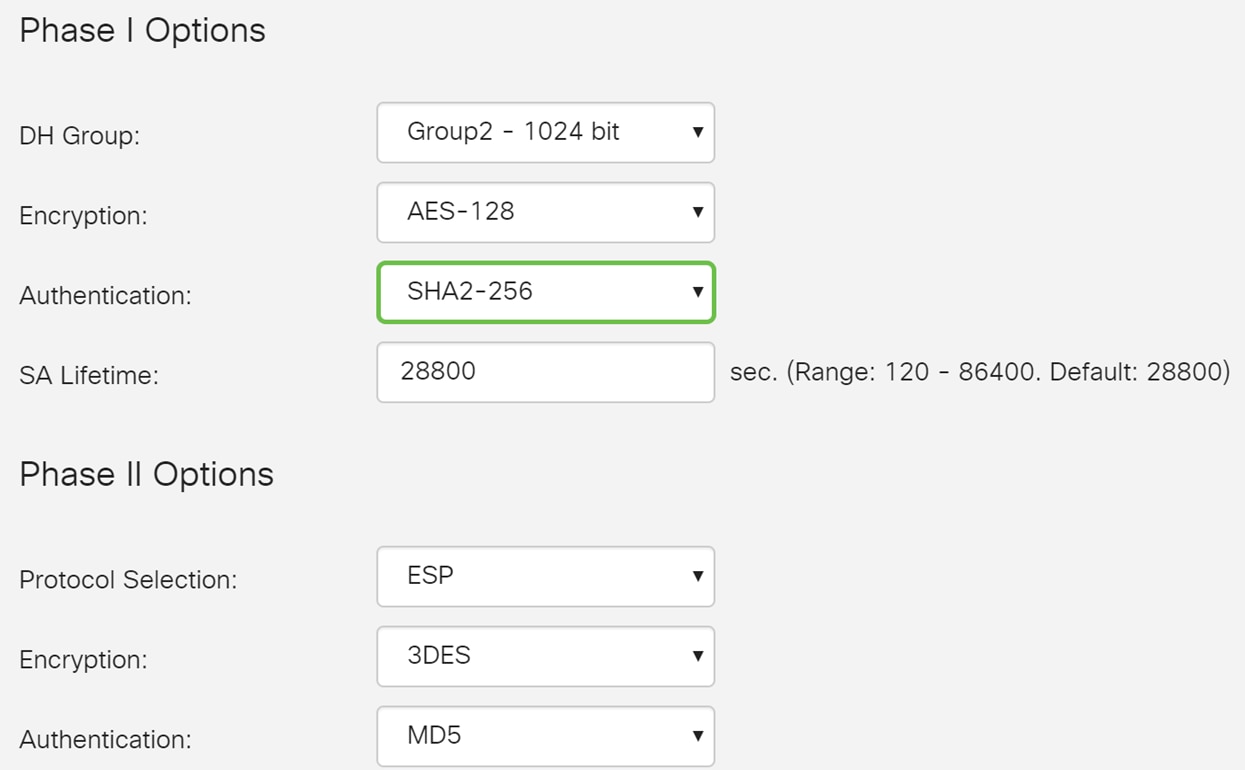
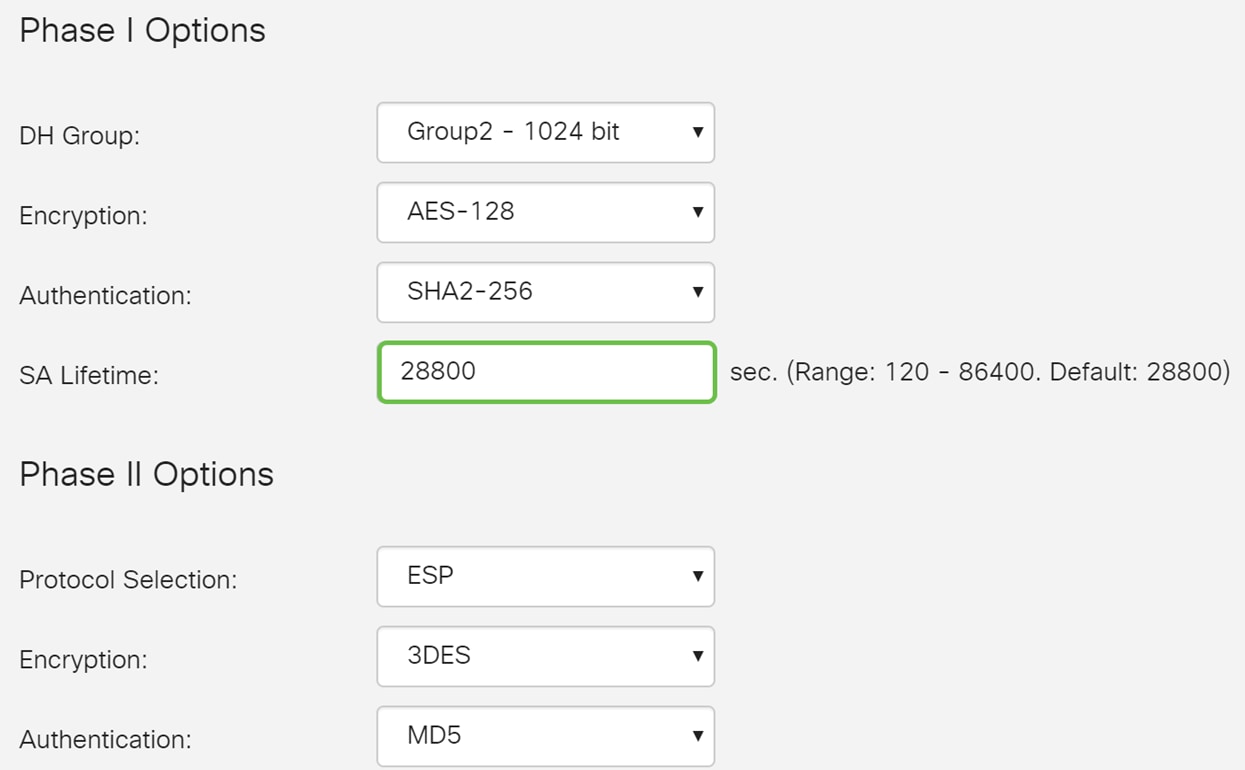
Step 9. The SA Lifetime (Sec) tells you the amount of time an IKE SA is active in this phase. When the SA expires after the respective lifetime, a new negotiation begins for a new one. The range is from 120 to 86400 and the default is 28800.
We will be using the default value of 28800 seconds as our SA Lifetime for Phase I.
Note: It is recommended that your SA Lifetime in Phase I is longer than your Phase II SA Lifetime. If you make your Phase I shorter than Phase II, then you will be having to renegotiate the tunnel back and forth frequently as opposed to the data tunnel. Data tunnel is what needs more security so it is better to have the lifetime in Phase II to be shorter than Phase I.
Step 10. Phase II is where you would be encrypting the data that is being passed back and forth. In the Phase 2 Options, Select a protocol from the drop-down list, the options are:
· Encapsulating Security Payload (ESP) – Select ESP for data encryption and enter the encryption.
· Authentication Header (AH) – Select this for data integrity in situations where data is not secret, in other words, it is not encrypted but must be authenticated. It is only used to validate the source and destination of the traffic.
In this example, we will be using ESP as our Protocol Selection.

Step 11. Select an encryption option (3DES, AES-128, AES-192, or AES-256) from the drop-down list. This method determines the algorithm used to encrypt and decrypt ESP/ISAKMP packets.
In this example, we will use AES-128 as our encryption option.
Note: Here are some additional resources that may help: Configuring Security for VPNs with IPsec and Next Generation Encryption.
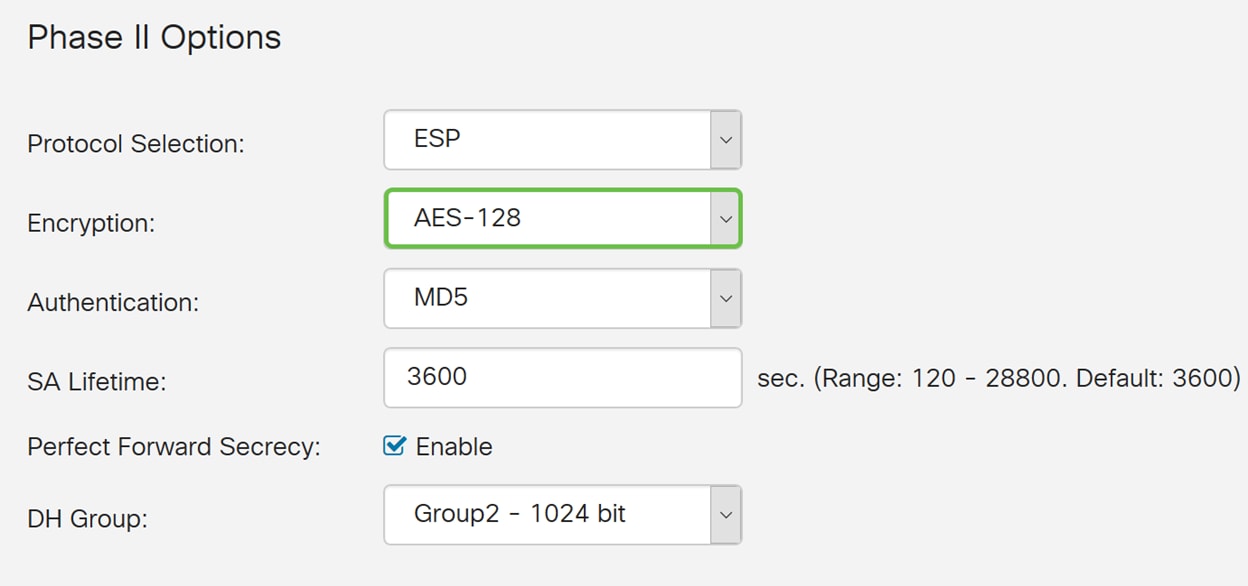
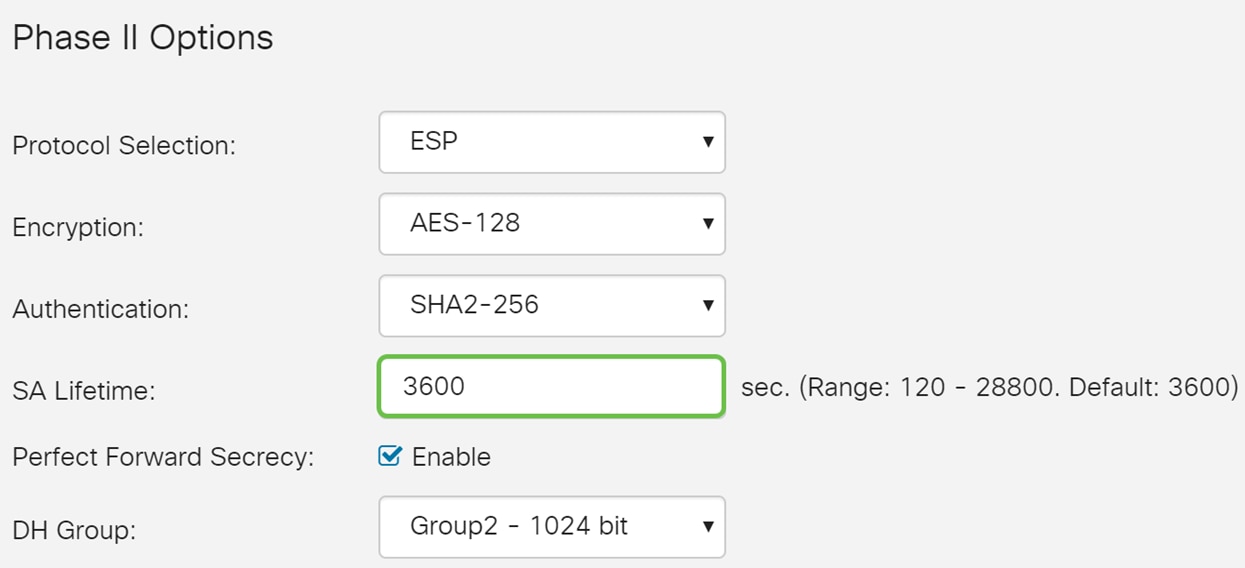
Step 12. The authentication method determines how the Encapsulating Security Payload Protocol (ESP) header packets are validated. Select an authentication (MD5, SHA1, or SHA2-256).
SHA2-256 was selected for this example.

Step 13. Enter the amount of time a VPN tunnel (IPsec SA) is active in this phase. The default value for Phase 2 is 3600 seconds. We will be using the default value for this demonstration.
Step 14. Check Enable to enable the perfect forward secrecy. When Perfect Forward Secrecy (PFS) is enabled, IKE Phase 2 negotiation generates new key material for IPsec traffic encryption and authentication. PFS is used to improve the security of communications transmitted across the Internet using public key cryptography. This is recommended if your device supports it.
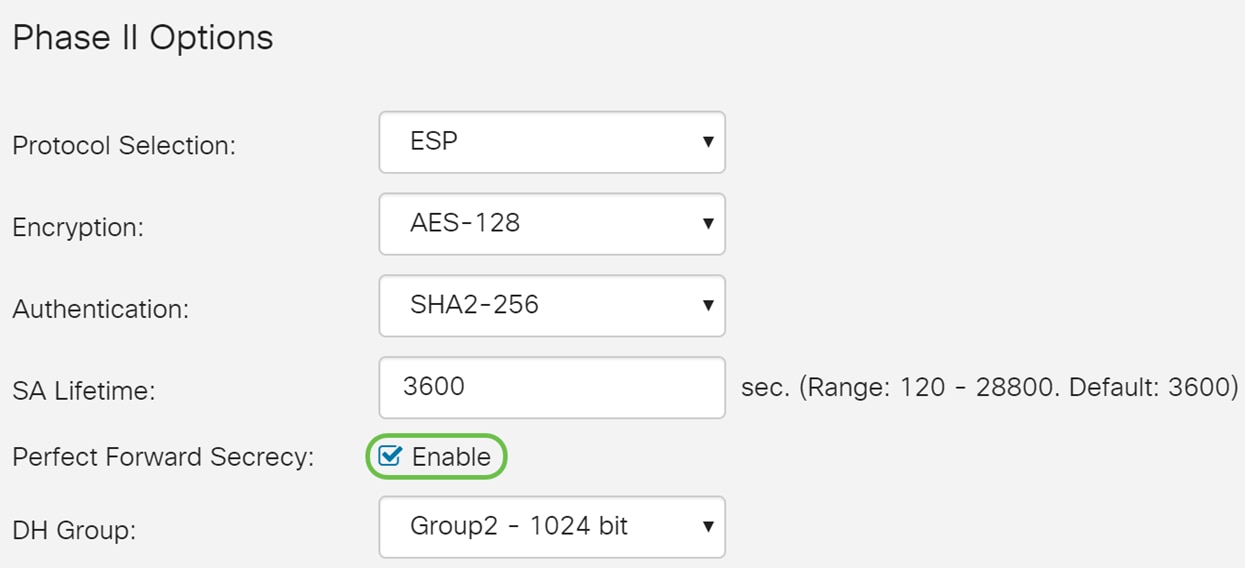
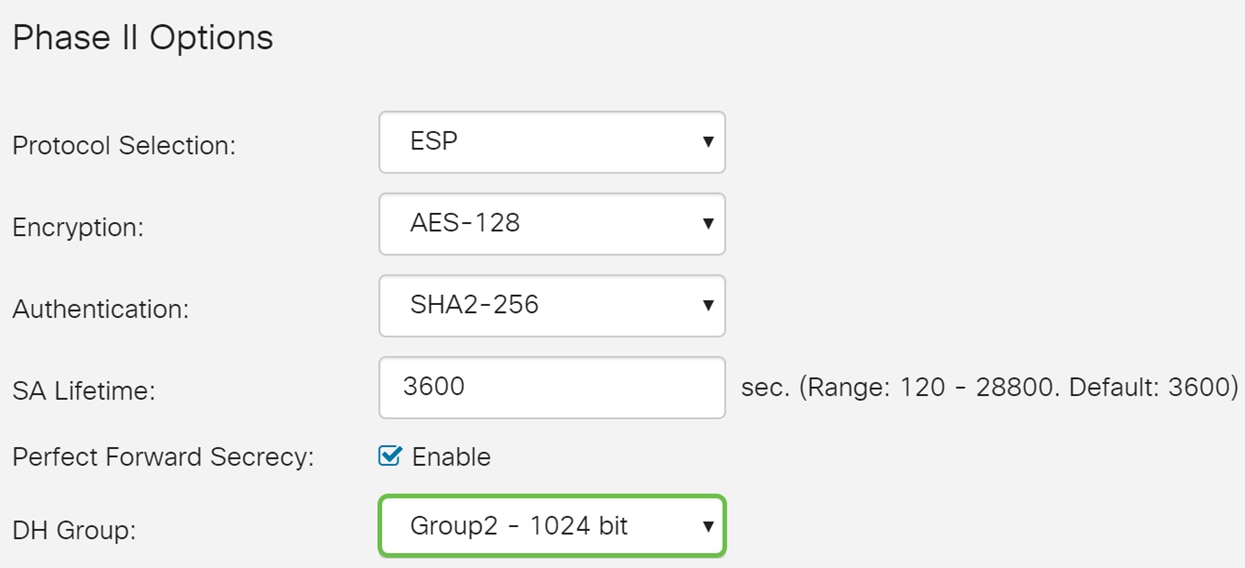
Step 15. Select a Diffie-Hellman (DH) Group. DH is a key exchange protocol, with two groups of different prime key lengths, Group 2 - 1024 bit and Group 5 - 1536 bit. We selected Group 2 – 1024 bit for this demonstration.
Note: For faster speed and lower security, choose Group 2. For slower speed and higher security, choose Group 5. Group 2 is selected by default.
Step 16. Click Apply to add a new IPsec profile.
Conclusion
You should now have successfully created a new IPsec profile. Please continue below to verify that your IPsec profile is added. You can also follow the steps to copy your Running Configuration File to the Startup Configuration File so all of your configuration is retained between reboots.
Step 1. After clicking Apply, your new IPsec profile should be added.

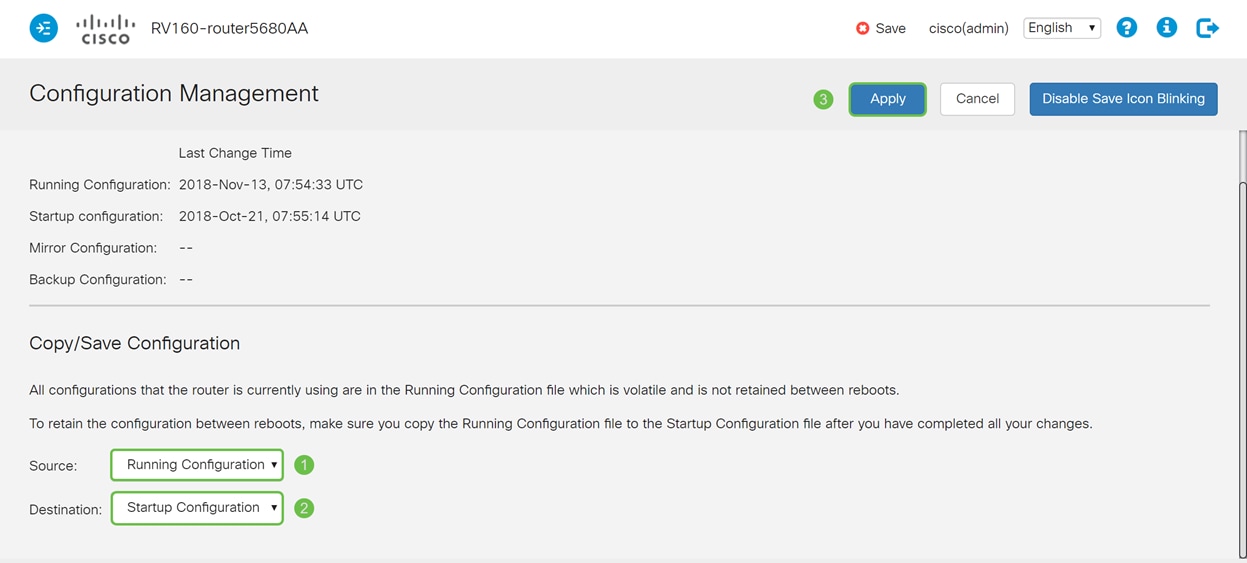
Step 2. At the top of the page, click the Save button to navigate to the Configuration Management to save your running configuration to the startup configuration. This is to retain the configuration between reboots.

Step 3. In the Configuration Management, make sure the Source is Running Configuration and the Destination is Startup Configuration. Then press Apply to save your running configuration to the startup configuration. All configuration that the router is currently using are in the Running Configuration file which is volatile and is not retained between reboots. Copying the Running Configuration file to the Startup Configuration file will retain all the configuration between reboots.
 Feedback