Certificate (Import/Export/Generate CSR) on the RV160 and RV260 Series Router
Available Languages
Objective
The objective of this document is to show you how to generate a Certificate Signing Request (CSR) as well as importing and exporting certificates on the RV160 and RV260 Series Routers.
Introduction
Digital Certificates are important in the communication process. It provides digital identification for authentication. A digital certificate includes information that identifies a device or user, such as the name, serial number, company, department, or IP address.
Certificate Authorities (CA) are trusted authorities that “sign” certificates to verify their authenticity, which guarantees the identity of the device or user. It ensures that the certificate holder is really who they claim to be. Without a trusted signed certificate, data may be encrypted, but the party you are communicating with may not be the one whom you think. CA uses Public Key Infrastructure (PKI) when issuing digital certificates, which uses public key or private key encryption to ensure security. CAs are responsible for managing certificate requests and issuing digital certificates. Some examples of CA are: IdenTrust, Comodo, GoDaddy, GlobalSign, GeoTrust, Verisign and many more.
Certificates are used for Secure Socket Layer (SSL), Transport Layer Security (TLS), Datagram TLS (DTLS) connections, such as Hypertext Transfer Protocol (HTTPS) and Secure Lightweight Directory Access Protocol (LDAPS).
Applicable Devices
· RV160
· RV260
Software Version
· 1.0.00.15
Table of Contents
Through this article, you will:
5. Conclusion
Generate CSR/Certificate
Step 1. Log in to the web configuration page.
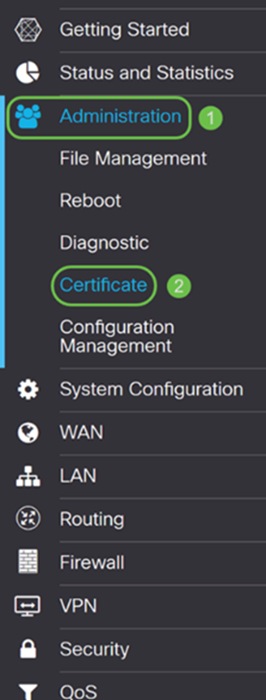
Step 2. Navigate to Administration > Certificate.

Step 3. In the Certificate page, click on Generate CSR/Certificate… button.

Step 4. Select the type of certificate to generate from one of the following options in the drop-down list.
· Self-Signed Certificate – This is a Secure Socket Layer (SSL) certificate which is signed by its own creator. This certificate is less trusted, as it cannot be cancelled if the private key is compromised somehow by an attacker. You must provide the valid duration in days.
· CA Certificate – Select this certificate type to make your router act like an internal certificate authority and issue certificates. In a security standpoint, it is similar to a self-signed certificate. This can be used for OpenVPN.
· Certificate Signing Request – This is a Public Key Infrastructure (PKI) which is sent to the certificate authority to apply for a digital identity certificate. It is more secure than self-signed as the private key is kept secret. This option is recommended.
· Certificate Signed by CA Certificate – Select this certificate type and provide relevant details to get the certificate signed by your internal certificate authority.
In this example, we will be selecting Certificate Signing Request.

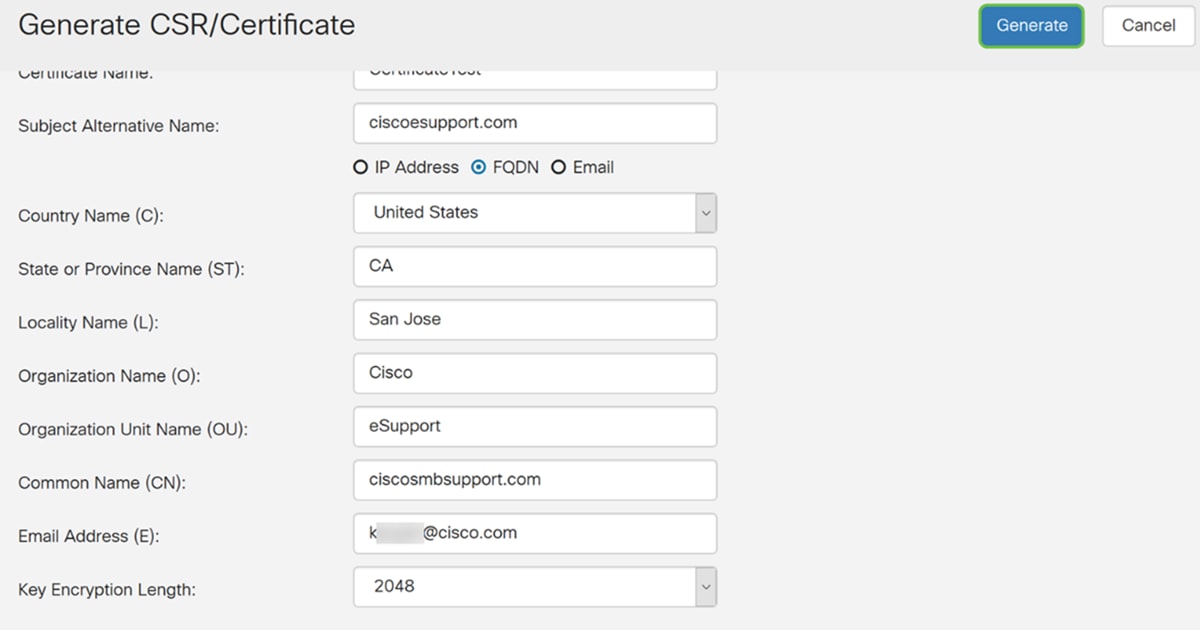
Step 5. Enter the Certificate Name. In this example, we will be entering CertificateTest.
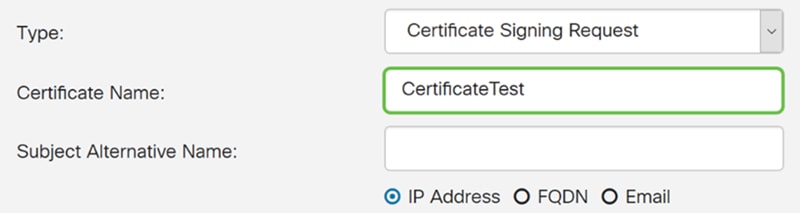
Step 6. In the Subject Alternative Name field, select one of the following: IP Address, FQDN (Fully Qualified Domain Name), or Email and then enter the appropriate name from what you have selected. This field allows you to specify additional host names.
In this example, we will be selecting FQDN and entering ciscoesupport.com.

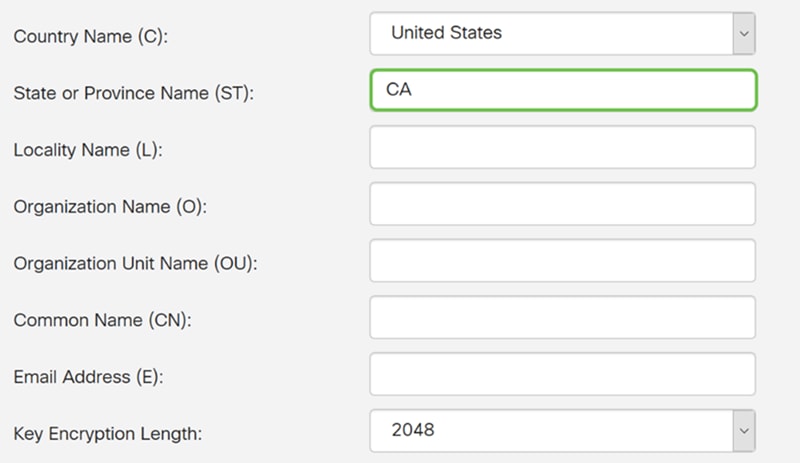
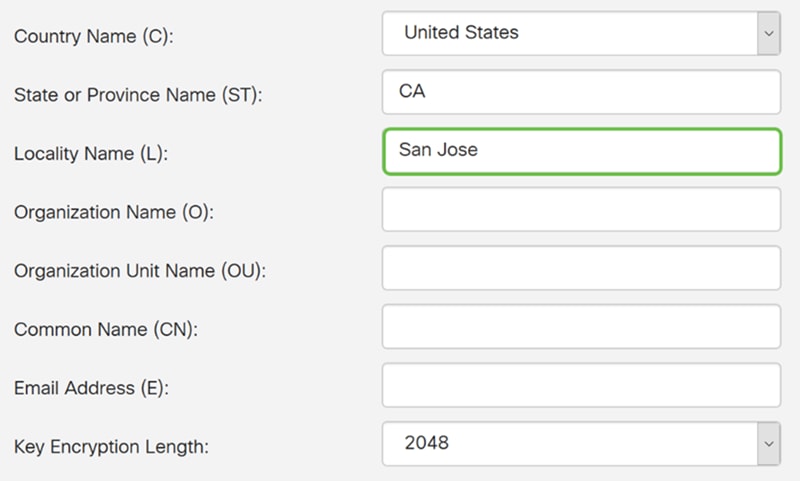
Step 7. Select a country from the Country Name (C) drop-down list.
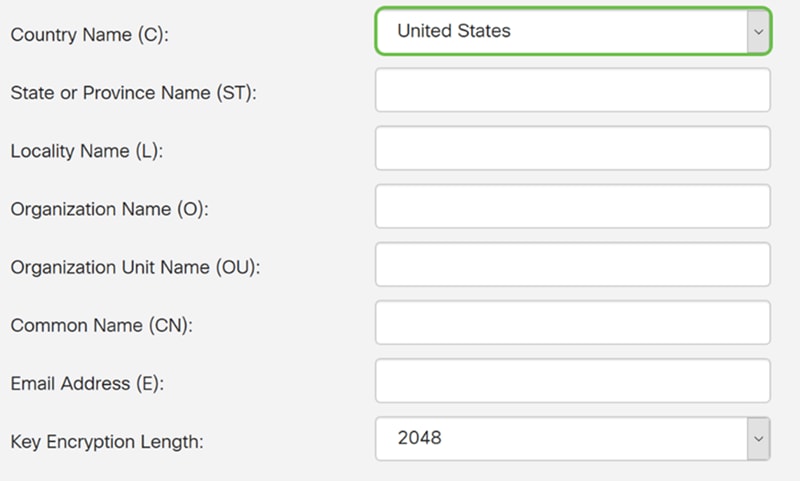
Step 8. Enter a state or province name in the State or Province Name field.
Step 9. In the Locality Name, enter a city name.
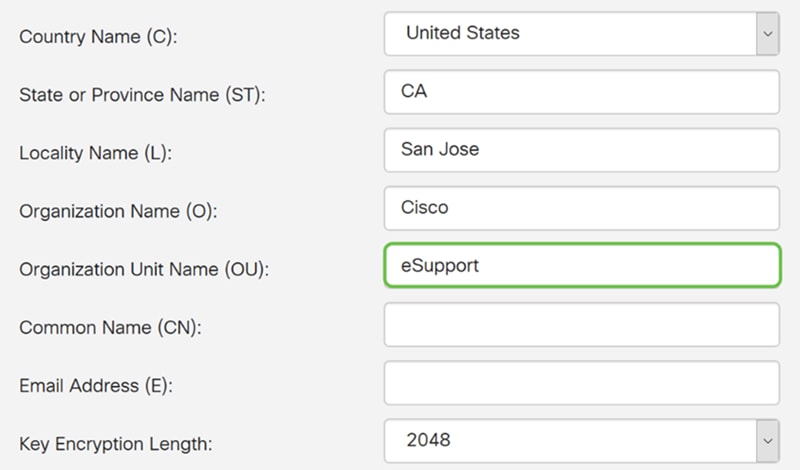
Step 10. Enter the name of the organization in the Organization Name field.

Step 11. Enter the name of the organization unit (i.e Training, Support, etc.).
In this example, we will be entering eSupport as our organization unit name.
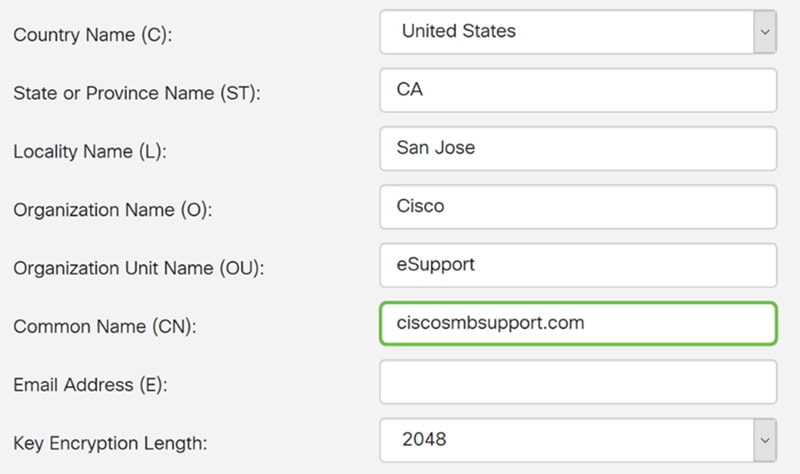
Step 12. Enter a common name. It is the FQDN of the web server that will be receiving this certificate.
In this example, ciscosmbsupport.com was used as the common name.
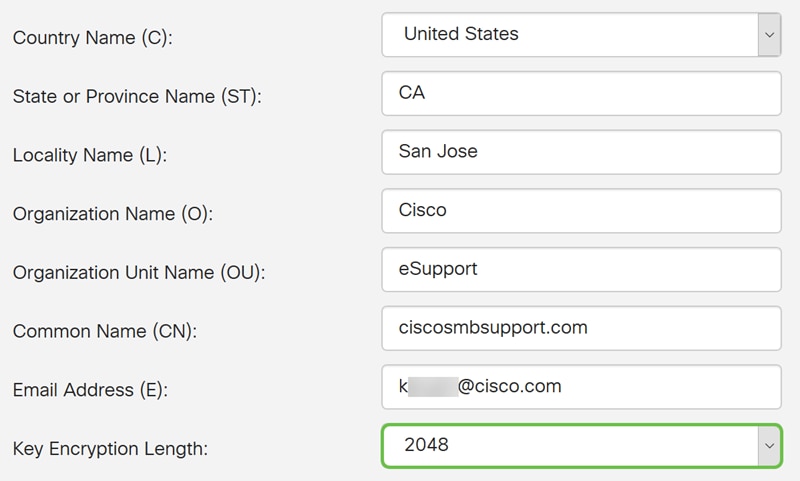
Step 13. Enter an email address.

Step 14. Select the Key Encryption Length from the drop-down menu. The options are: 512, 1024, or 2048. The larger the key size, the more secure the certificate. The larger the key size, the greater the processing time.
Best Practice: It is recommended to choose the highest key encryption length – enabling tougher encryption.
Step 15. Click Generate.
Step 16. An Information popup will appear with a “Generate certificate successfully!” message. Click OK to continue.

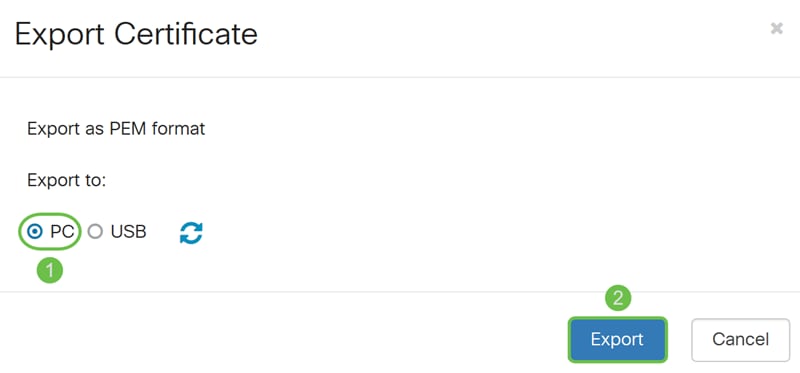
Step 17. Export the CSR from the Certificate Table.

Step 18. An Export Certificate window appears. Select PC for the Export to and then click Export.
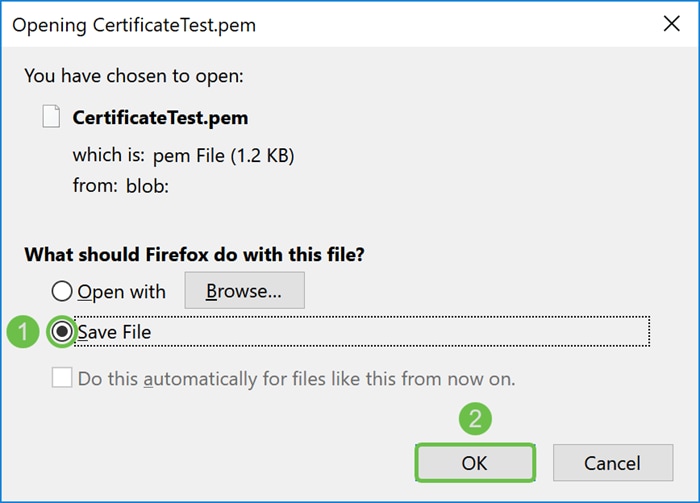
Step 19. Another window should appear asking whether to open or save the file.
In this example, we will be selecting Save File and then click OK.
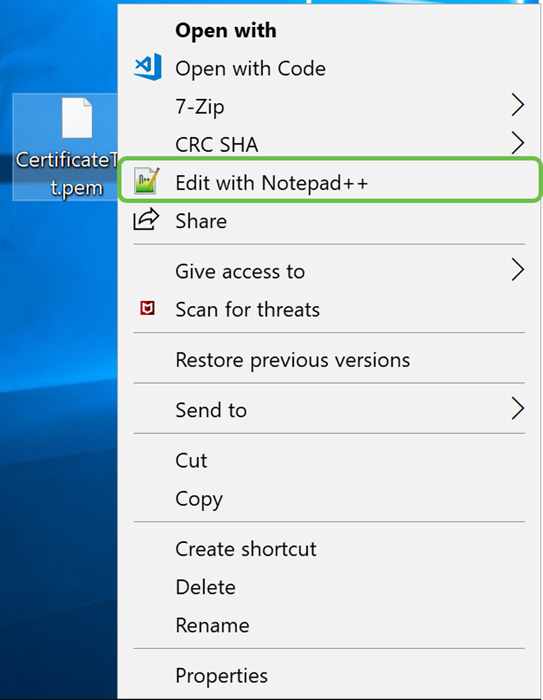
Step 20. Find the location of where the .pem file was saved. Right-click the .pem file and open it with your favorite text editor.
In this example, we will be opening the .pem file with Notepad++.
Note: Feel free to open it with Notepad.
Step 21. Ensure that the -----BEGIN CERTIFICATE REQUEST----- and -----END CERTIFICATE REQUEST----- is on its own line.
Note: Some parts of the certificate were blurred out.

Step 22. When you have your CSR, you would need to go to your hosting services or a certificate authority site (I.e. GoDaddy, Verisign, etc.) and request a certificate. Once you have submitted a request, it will communicate with the certificate server to make sure there isn’t any reason not to issue the certificate.
Note: Contact the CA or hosting site support if you don’t know where the certificate request is on their site.
Step 23. Download the certificate once it is completed. It should be either a .cer or .crt file. In this example, we were provided with both files.

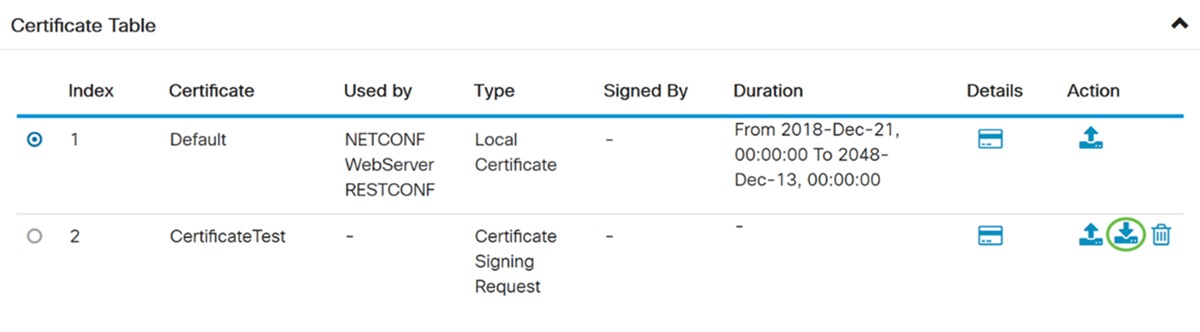
Step 24. Go back to the Certificate page in your router and import the certificate file by clicking the arrow pointing to the device icon.
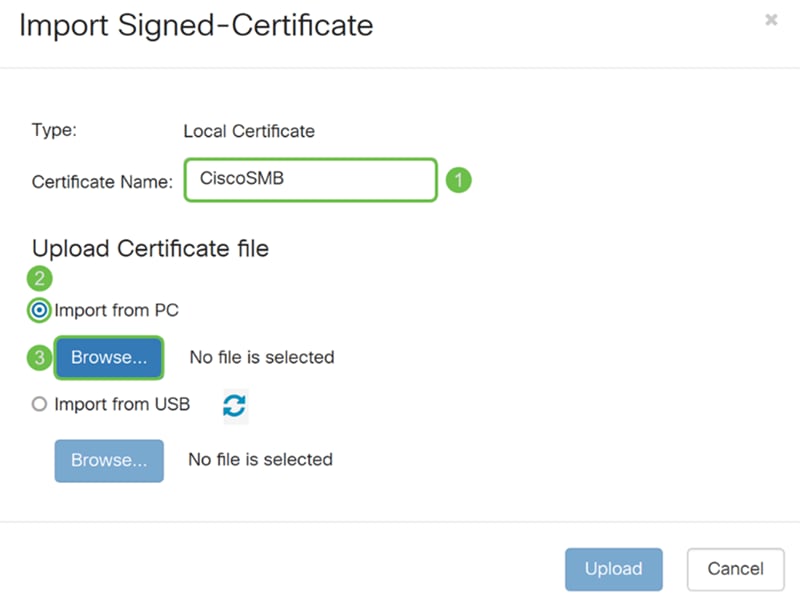
Step 25. In the Certificate Name field, enter the certificate name. It can’t be the same name as the certificate signing request. In the Upload Certificate file section, select import from PC and click Browse… to upload your certificate file.
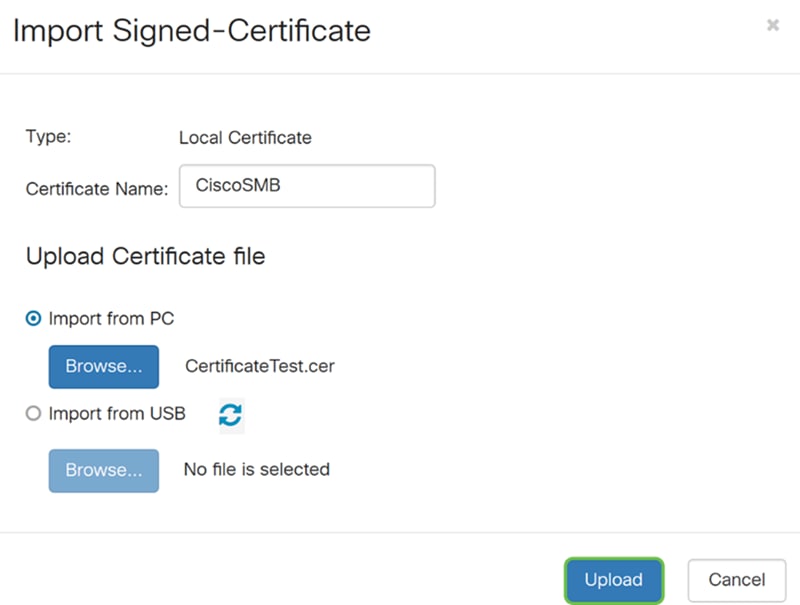
Step 26. A File Upload window appears. Navigate to the location of where your certificate file is. Select the certificate file that you want to upload and click Open. In this example, CertificateTest.cer was selected.

Step 27. Click the Upload button to start uploading your certificate to the router.
Note: If you get an error where you can’t upload your .cer file, it might be because your router requires the certificate to be in a pem encoding. You would need to convert your der encoding (.cer file extension), to a pem encoding (.crt file extension).
Step 28. If the import was successful, an information window should appear letting you know that it was successful. Click OK to continue.

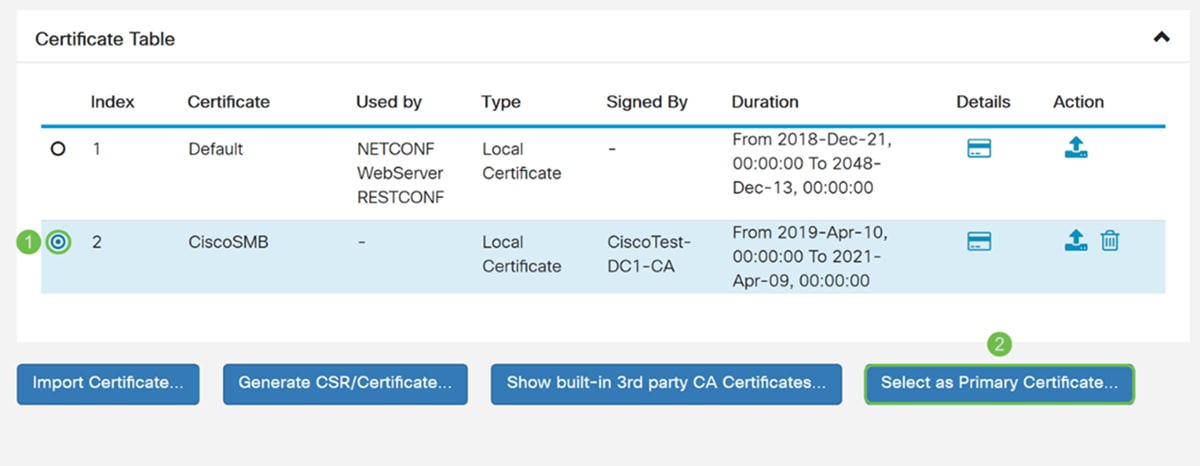
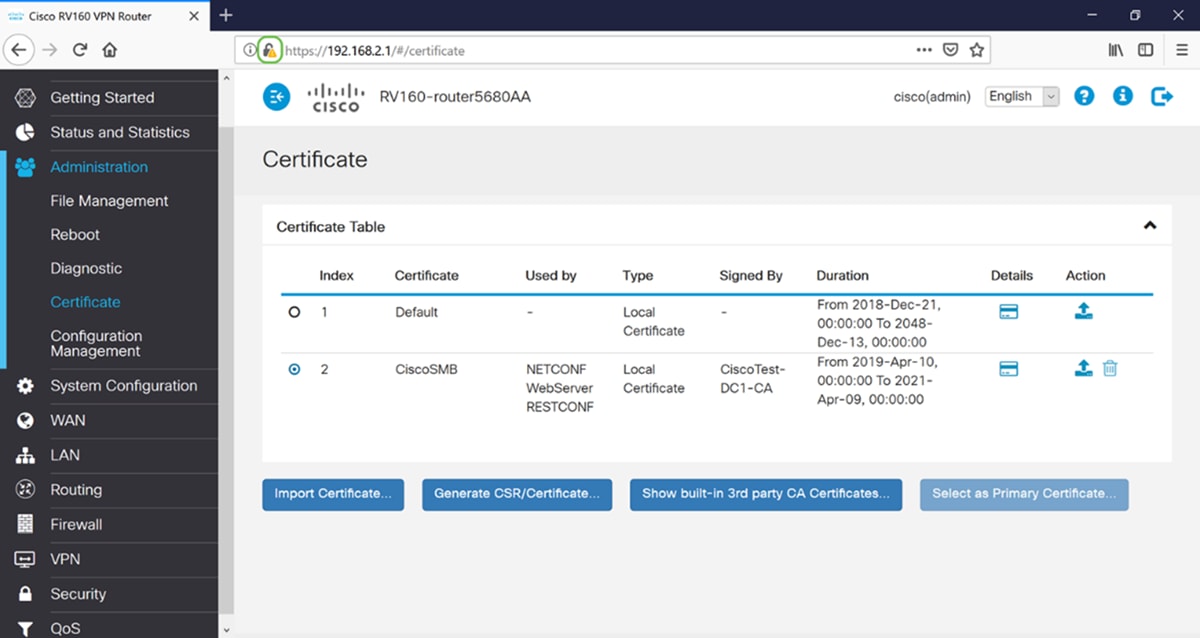
Step 29. Your certificate should be successfully updated. You should be able to see who your certificate was signed by. In this example, we can see that our certificate was signed by CiscoTest-DC1-CA. To make the certificate as our primary certificate, select the certificate by using the radio button on the left side and click Select as Primary Certificate… button.
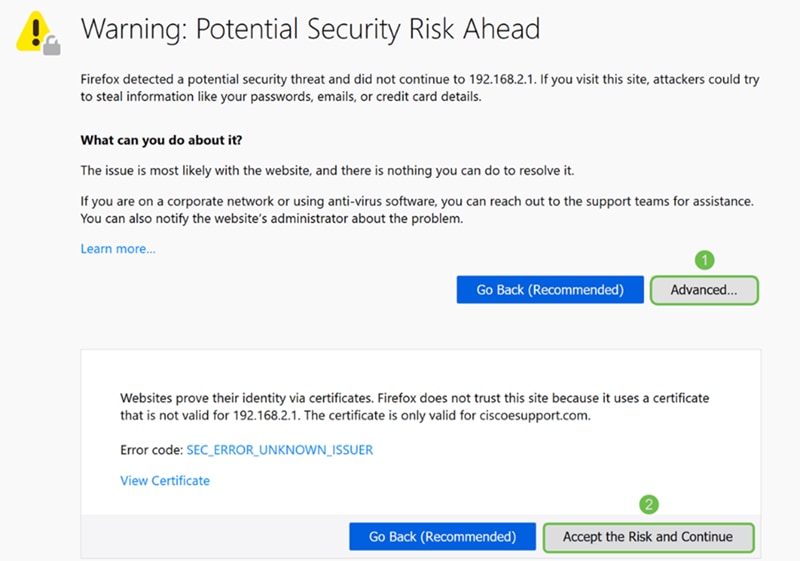
Note: Changing the primary certificate might bring you back to a warning page. If you are using Firefox and it comes up as a gray blank page, you would need to adjust some configuration on your Firefox. This document on Mozilla wiki gives some explanation about it: CA/AddRootToFirefox. To be able to see the warning page again, follow these steps that was found in Mozilla community support page.
Step 30. In the Firefox warning page, click Advanced… and then Accept the Risk and Continue to proceed back into the router.
Note: These warnings screen vary browser to browser but perform the same functions.
Step 31. In the Certificate Table, you should see that the NETCONF, WebServer, and RESTCONF has swapped to your new certificate instead of using the Default certificate.

You should now have successfully installed a certificate onto your router.
Viewing Certificate
Step 1. If you have navigated away from the Certificate page, navigate to Administration > Certificate.
Step 2. In the Certificate Table, click the Details icon located under the Details section.

Step 3. The Certificate Detail page appears. You should be able to see all the information about your certificate.

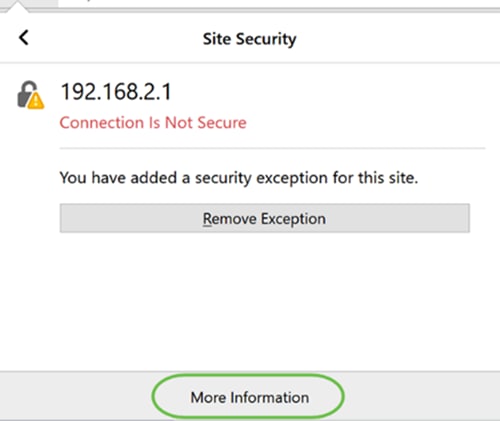
Step 4. Click the lock icon located on the left side of the Uniform Resource Locator (URL) bar.
Note: The following steps are used in a Firefox browser.
Step 5. A drop-down list of choices appears. Click the Arrow icon next to the Connection field.

Step 6. Click More Information.
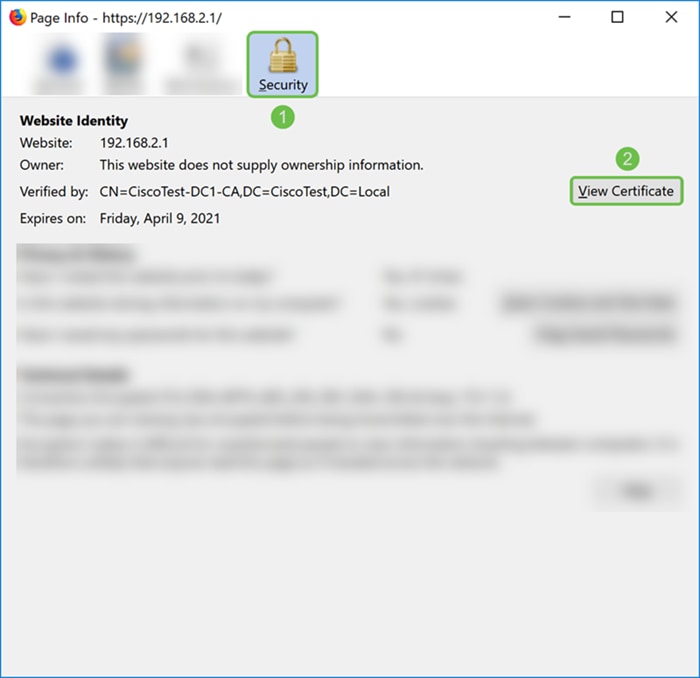
Step 7. In the Page Info window, you should be able to see a brief information about your certificate under the Website identity section. Ensure that you are in the Security tab and then click View Certificate to see more information about your certificate.
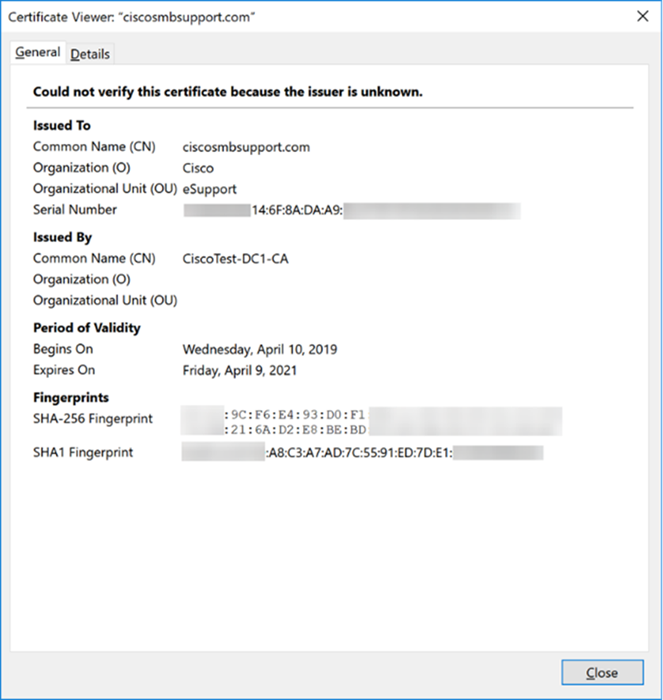
Step 8. The Certificate Viewer page should appear. You should be able to see all the information about your certificate, period of validity, fingerprints, and who it was issued by.
Note: Since this certificate was issued by our test certificate server, the issuer is unknown.
Exporting Certificate
To download your certificate to import it on another router, follow the steps below.
Step 1. In the Certificate page, click the export icon next to the certificate that you want to export.

Step 2. An Export Certificate appears. Select a format to export the certificate. The options are:
· PKCS#12 – Public Key Cryptography Standards (PKCS) #12 is an exported certificate that comes in a .p12 extension. A password will be required in order to encrypt the file to protect it as it is exported, imported, and deleted.
· PEM – Privacy Enhanced Mail (PEM) is often used for web servers for their ability to be easily translated into readable data by using a simple text editor such as notepad.
Select Export as PKCS#12 format and enter a password and confirm password. Then select PC as the Export to: field. Click Export to start exporting the certificate to your computer.
Note: Remember this password because you will be using it when importing it to a router.

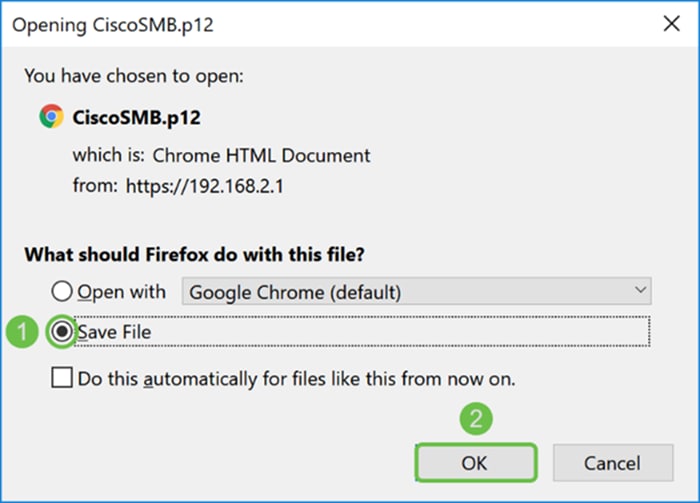
Step 3. A window will appear asking what you should do with this file. In this example, we will be selecting Save File and then click OK.
Step 4. The file should save to your default save location.
In our example, the file was saved to our Downloads folder on our computer.

Importing Certificate
Step 1. In the Certificate page, click the Import Certificate… button.

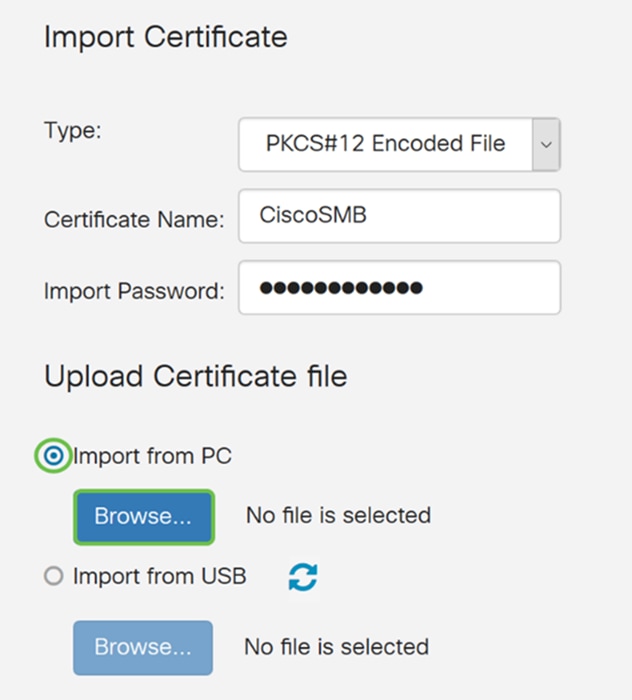
Step 2. Select the type of certificate to import from the Type drop-down list under Import Certificate section. The options are defined as:
· CA Certificate – A certificate that is certified by a trusted third-party authority that has confirmed that the information contained in the certificate is accurate.
· Local Device Certificate – A certificate generated on the router.
· PKCS#12 Encoded File – Public Key Cryptography Standards (PKCS) #12 is an exported certificate that comes in a .p12 extension.
In this example, PKCS#12 Encoded File was selected as the type. Enter a name for the certificate and then enter the password that was used.
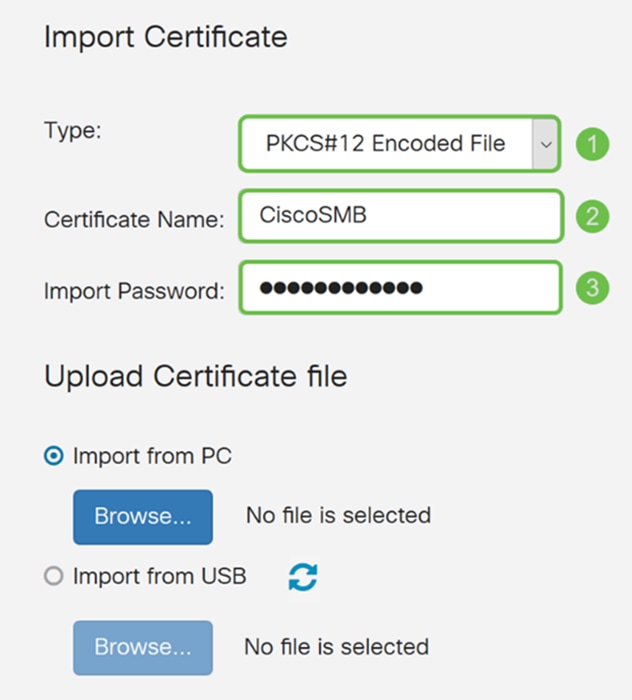
Step 3. Under the Upload Certificate file section, select either Import from PC or Import from USB. In this example, Import from PC was selected. Click Browse… to choose a file to upload.
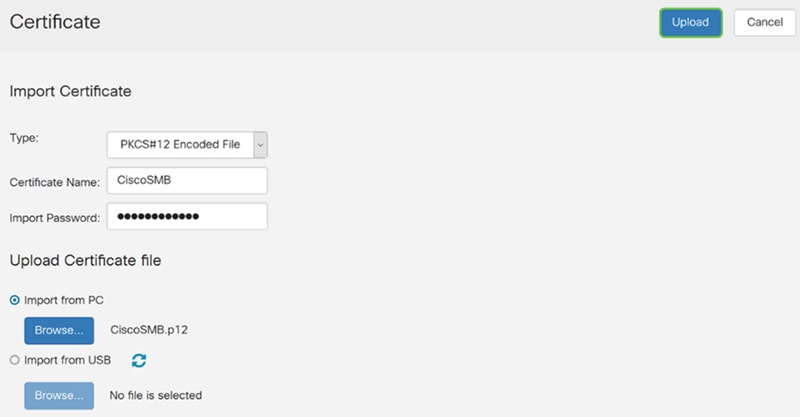
Step 4. In the File Upload window, navigate to the location of where the PKCS#12 Encoded File (.p12 file extension) is located. Select the .p12 file and then click Open.

Step 5. Click Upload to start uploading the certificate.
Step 6. An Information window will appear letting you know that your certificate was imported successfully. Click OK to continue.

Step 7. You should see that your certificate was uploaded.

Conclusion
You should have successfully learned how to generate a CSR, import, and download a certificate on the RV160 and RV260 series router.
 Feedback