Introduction
This document describes how to setup an External Media Storage with Telepresence Content Server(TCS). Cisco recommends using a Network Attached Storage (NAS) device that is built on the Windows Storage server and that is also Windows Hardware Quality Lab certified.
Contributed by Amrinder Singh, Cisco TAC Engineer.
Background Information
The default storage location for Content Server media files is the E: drive. You also have the option to store files on a Network Attached Storage (NAS) device so that recording capacity is not limited by Content Server disk space. If you set up a NAS device, the Content Server stores recording media to a temporary directory on the Content Server and then automatically stores the media on the NAS. The Content Server streams the media from the NAS. The file sharing protocol that is used by the Content Server to the NAS is Microsoft SMB.
Prerequisites
- Ensure TCS, TCS user and the External Storage Server is a part of a Domain
- An Add user that has Site Manager Access to the TCS
- Login to the TCS web interface –Server Overview and verify media storage location is set to Local Content Server
- Space available on the External Storage should be larger than the total size of the media files
Components Used
This document is not restricted to specific software and hardware versions.
The information in this document was created from the devices in a specific lab environment. All of the devices used in this document started with a cleared (default) configuration. If your network is live, Ensure that you understand the potential impact of any command.
Requirements
- TCS
- External Media Server (Windows)
- Domain User with TCS Site Manger Access

Configurations
Step 1. Back up the Content Server
Step 2. Add the Content Server to the same domain as the NAS.
Step 3. Choose or create an account in the domain that IIS on the Content Server uses to access the share on the NAS. This domain account needs to have both administrative rights on the Content Server and permissions over the NAS share.
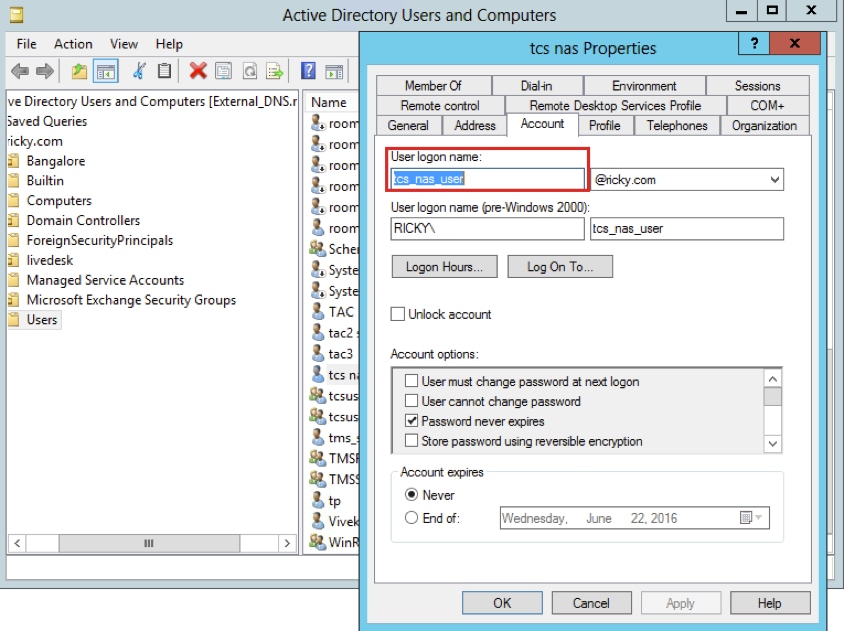
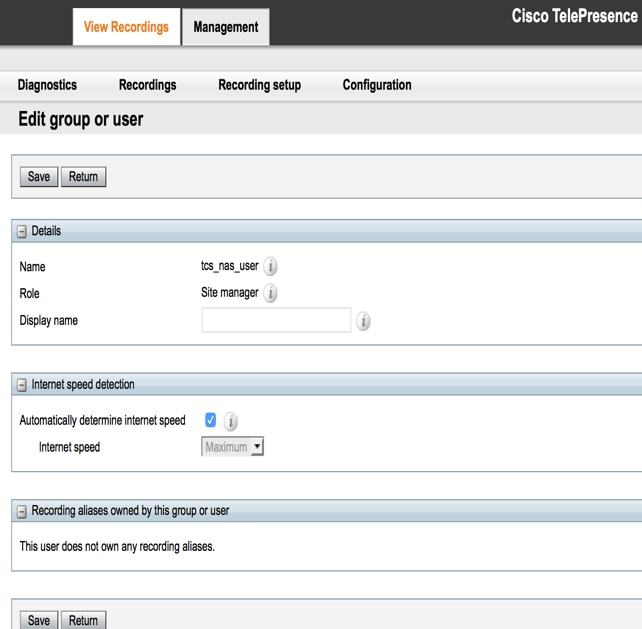
Step 4. Create a User on the domain(eg: ricky\tcs_nas_user), and make that user a site Manager of the TCS.
User Created on the AD and made that user a SIte Manager
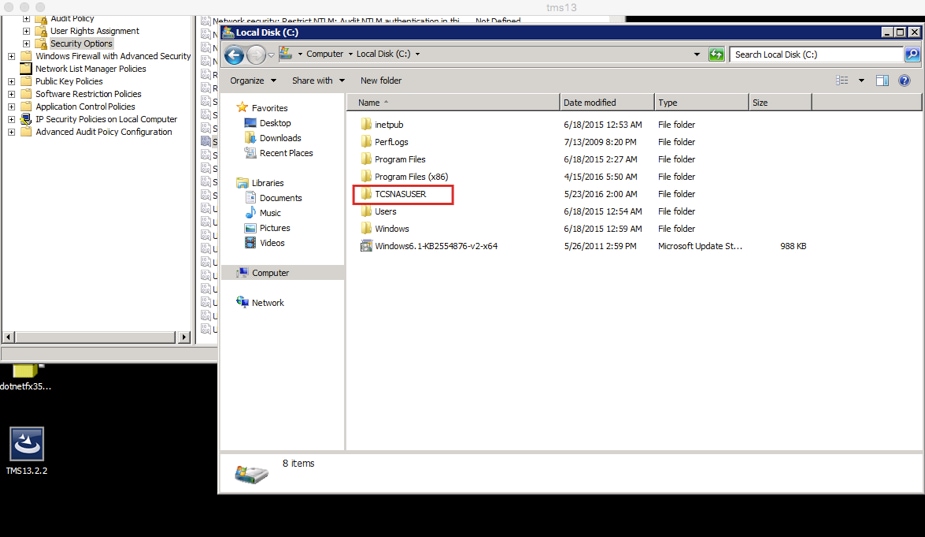
Step 5. Create a Folder on the External Storage location (TCSNASUSER)
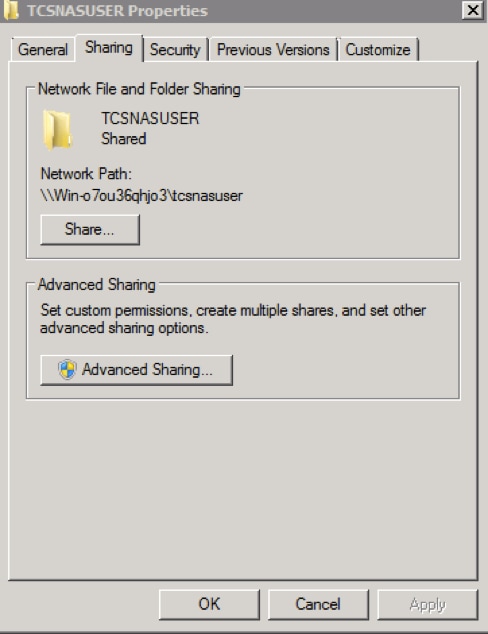
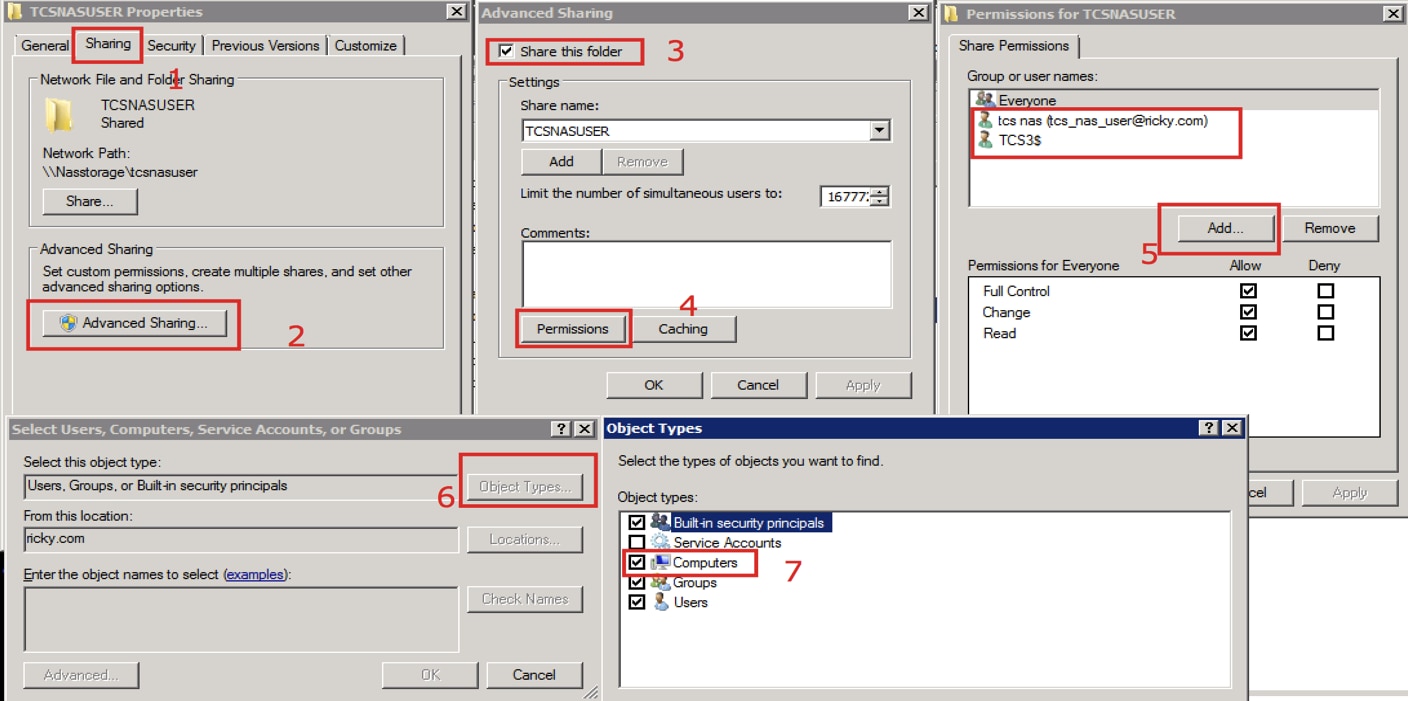
Step 6. Add sharing Permissions to the shared folder
- Set permissions on the share to allow the Content Server and the shared account (ricky\tcs_nas_user in this example) to have full control over the share. Right-click on the share and click Sharing and Security. Then click Permissions. Click Add.Click Object Types. Select Computers. Click OK.
- Click Sharing tab – Advanced Sharing – Select - Share this Folder - Click Permission – Add Click object types and Select Computer. Add one of the TCS Site Manager(Domain user = tcs_nas_user )
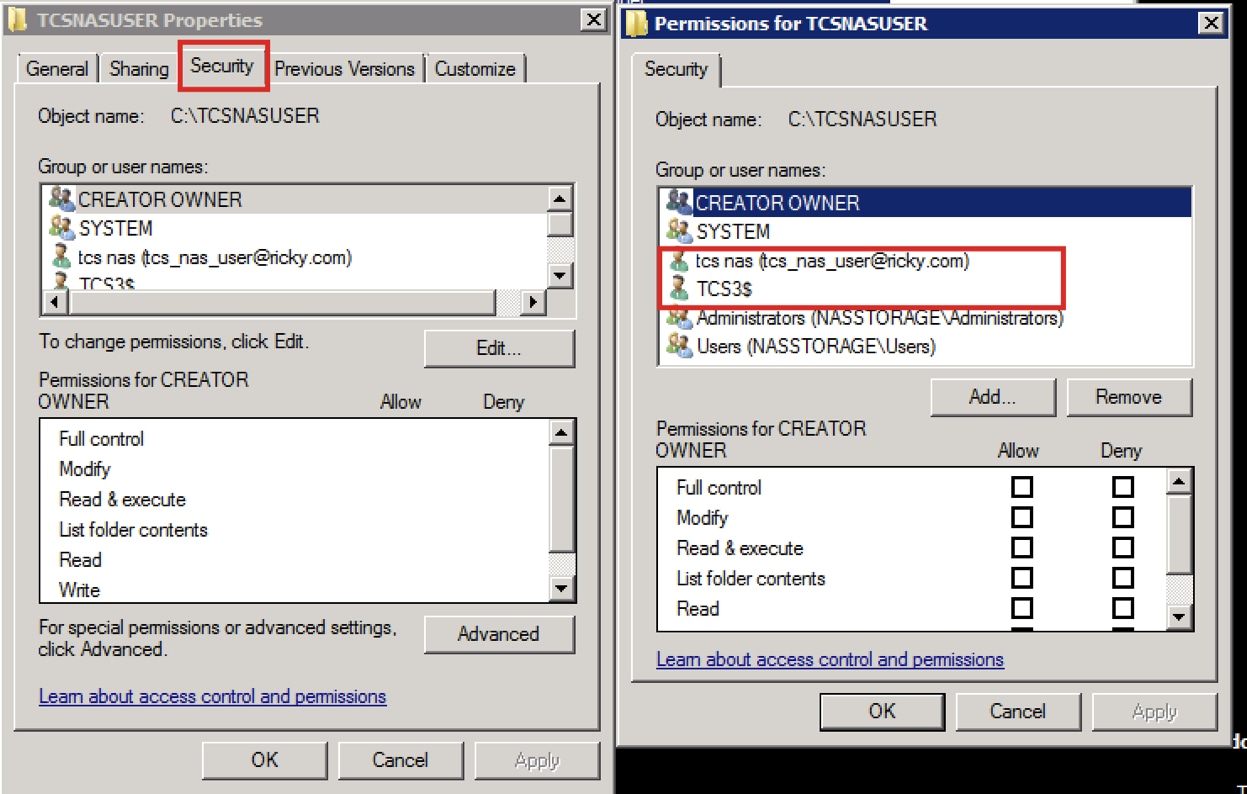
Step 7. Add Security permission to the Share Folder
Click the Security tab. Click Add. Repeat steps that you performed under permission tab and give the Content Server and ricky\tcs_nas_user full control of the NAS share.
TCS Wizard
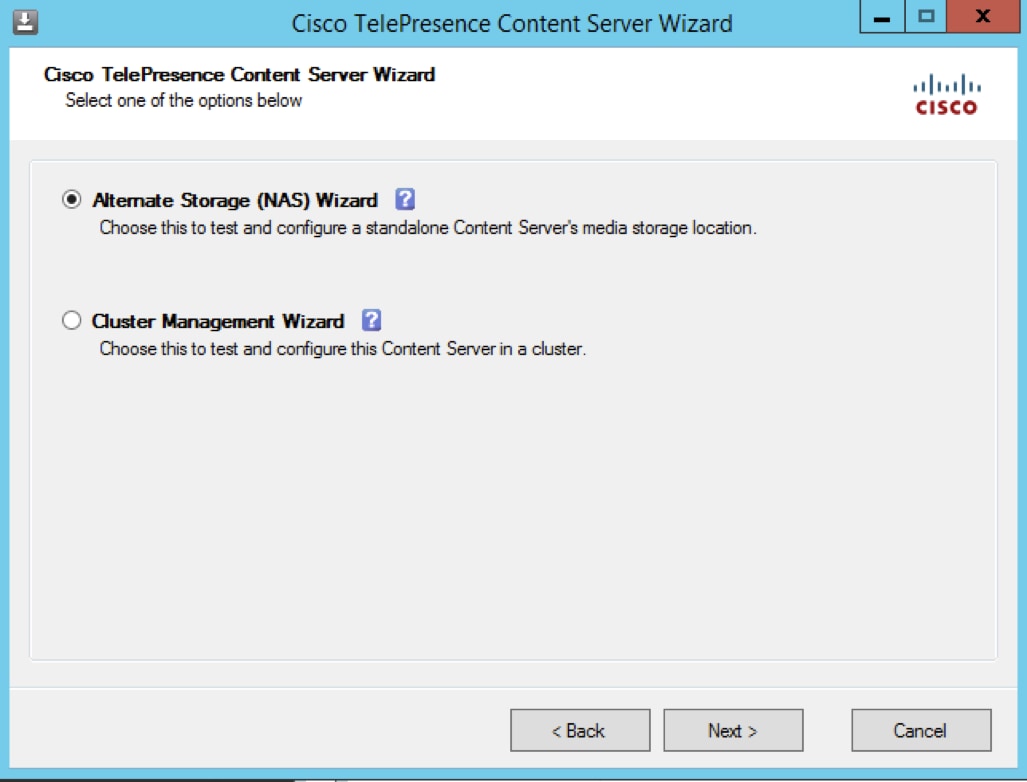
RDP to the TCS Server, On the Desktop, Click TCS Wizard

If there are live calls, the wizard prompts you to end all calls. It also puts the Content Server in idle mode so that no new calls or transcoding jobs are accepted while the wizard is running. The wizard must complete (or be cancelled) in order to return the Content Server to normal operation (online mode).
Click Alternate Storage (NAS) Wizard
Fill the Domain shared account credentials
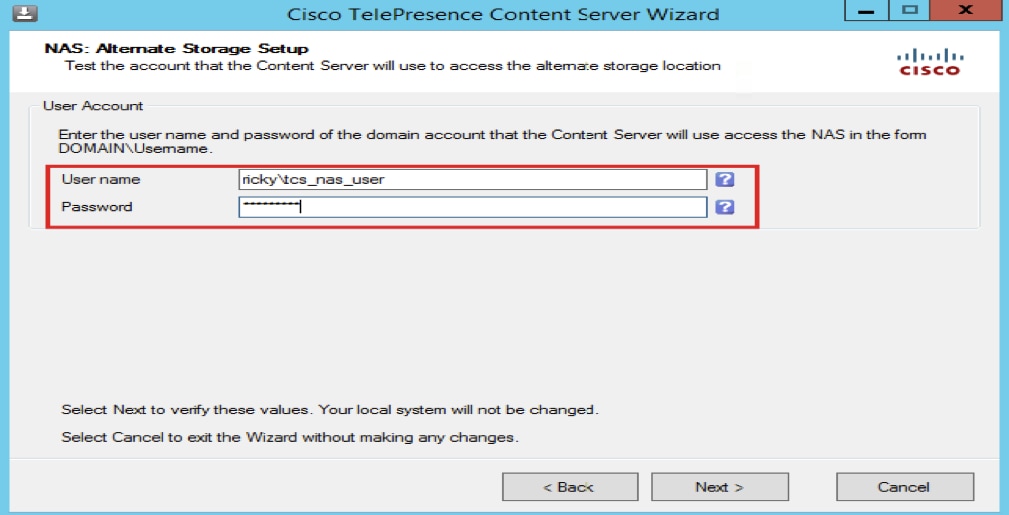

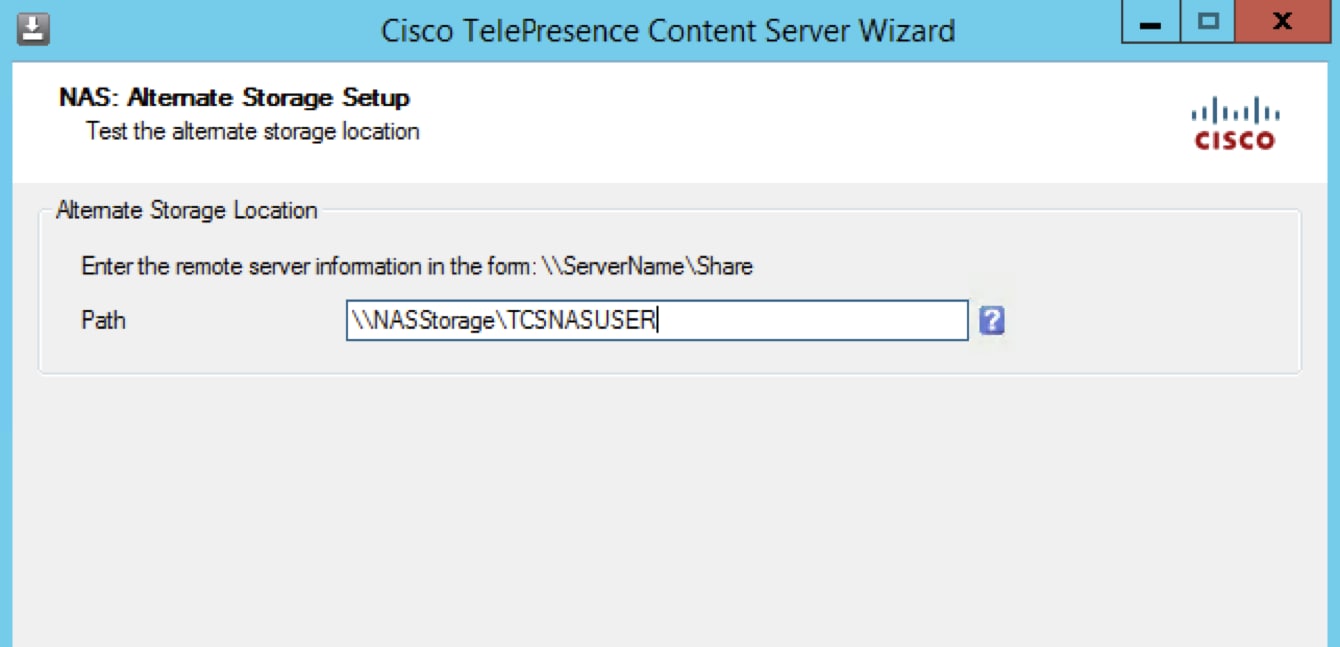
Fill the remote server information for the new NAS location in this format: \\server_name\share_name\. The server name must be entered as the DNS name, not as an IP address.
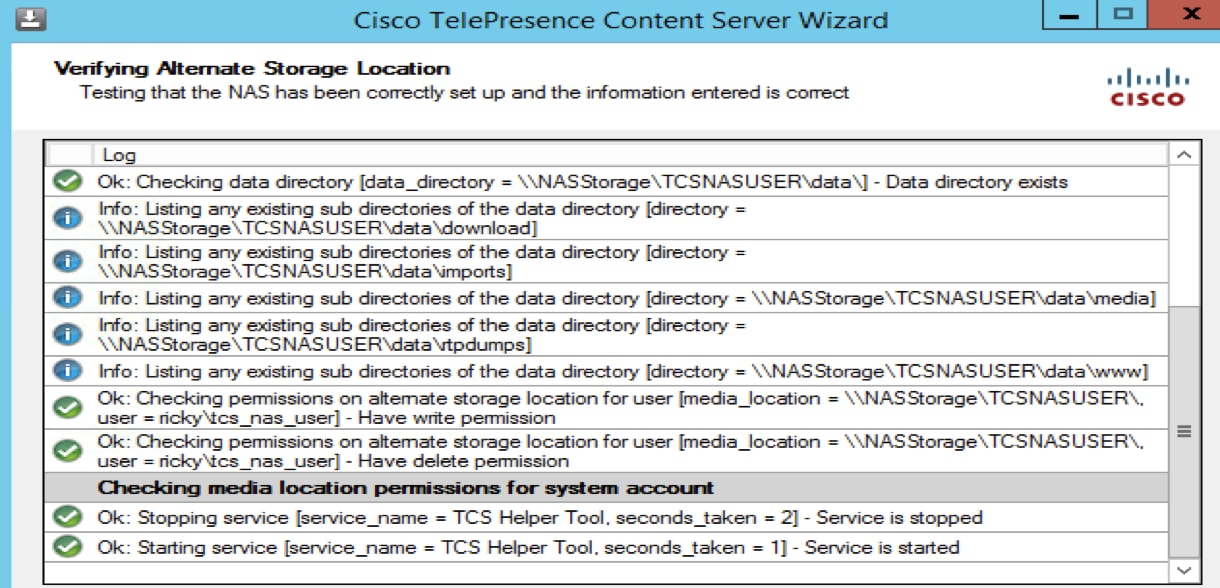
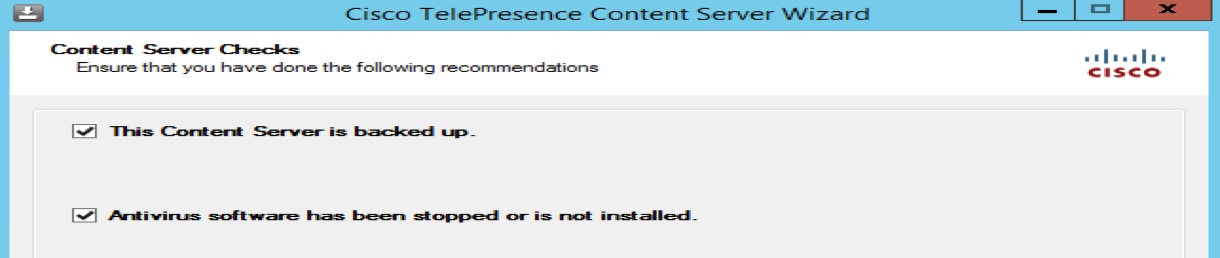
The installer verifies the permission level for the shared user account and the space available on the External Storage. At the Content Server Checks step, confirm that the Content Server is backed up and that anti-virus software has been stopped. If you have not backed up or stopped the anti-virus software, cancel the wizard and complete those actions. Then run the wizard again. If you click Cancel, your system doesnt change.
You can also click Finish to exit the wizard without making any changes. If any tests failed, you cannot continue. Check the external NAS configuration and the information that you entered and try again. Step 9 When the process is complete, click Finish. No server restart is necessary. TCS Wizard logs are available in E:\logs\SetupUtility. To check your new media location, navigate to Management Settings > Server Overview

 Feedback